I Tested And Reviewed 10 Best Garage Door Bottom Seal For Uneven Concrete (2023)
Installing an effective garage door bottom seal is crucial for insulating your garage and preventing dirt, leaves, pests, and moisture from entering under the door. However, finding the right seal can be tricky if your garage floor is uneven concrete. Before choosing a garage door bottom seal, there are several key factors you must consider.
First, determine the amount of unevenness or gap between your concrete floor and door. Measure at several spots to find the largest gap. Knowing the maximum gap size will ensure you select a bottom seal that can fully cover and seal it. Next, consider the door's weight and operation – does it roll up or swing open? Heavier, rolling doors require a more rugged seal.
You'll also want to think about the seal's durability and ability to compress and expand as needed. The material should form a tight barrier on uneven concrete, without losing shape or flattening out over time. Weatherstripping is useless if it doesn't maintain contact with the floor. Finally, make sure the seal you choose has a simple, quick installation and is easy to cut to size.
Choosing the best garage door bottom seal for uneven concrete takes a bit of thought. But once installed properly, will it stop drafts, block dirt and debris, deter pests, and help moderate garage temperatures? How much money could a high-quality bottom seal save in energy costs over time? Could a durable seal protect items stored in the garage from moisture damage? Read on to discover top-rated garage door seals that form an exceptional barrier on uneven concrete.
10 Best Garage Door Bottom Seal For Uneven Concrete
| # | Product Image | Product Name | Product Notes | Check Price |
|---|---|---|---|---|
|
1
|
 |
The product is ideal for sealing and protecting the bottom of garage doors from weather, water, and pests.
|
|
|
|
2
|
 |
The product is ideal for sealing and preventing water and debris from entering the garage through the bottom of the door.
|
|
|
|
3
|
 |
The product is ideal for sealing and weatherproofing garage doors to prevent drafts and debris from entering.
|
|
|
|
4
|
 |
The product is ideal for sealing the bottom of garage doors, preventing drafts, dust, and pests from entering.
|
|
|
|
5
|
 |
The product is ideal for providing a weatherproof seal on garage doors, for DIY weather stripping replacement.
|
|
|
|
6
|
 |
The product is ideal for providing a weatherproof seal at the bottom of garage doors to prevent drafts and pests.
|
|
|
|
7
|
 |
The product is ideal for The BOWSEN Garage Door Bottom Seals are ideal for providing weatherproof sealing and buffering for garage doors.
|
|
|
|
8
|
 |
The product is ideal for keeping out drafts, dirt, and pests from the bottom of your garage door.
|
|
|
|
9
|
 |
The product is ideal for sealing garage doors and preventing drafts, debris, and pests from entering.
|
|
|
|
10
|
 |
The product is ideal for sealing the bottom of a garage door to keep out drafts, dust, and pests.
|
|
1. Jin&bao Rubber Garage Door Weather Seal – 20 Ft


I recently purchased the 20' roll of this product and overall, I am quite satisfied with its performance. However, there were a few minor issues during the installation process that I encountered.
Firstly, upon unrolling the product, I noticed that one end of the roll did not lay flat. To resolve this, I had to cut about a foot off that end and dispose of it. Although this was a slight inconvenience, it did not significantly impact the overall functionality of the product.
As for the installation itself, it was relatively straightforward once I figured out the correct placement. I noticed that some people had mentioned water leakage issues, but in my experience, this was likely due to incorrect installation. To avoid this, I followed a specific method.
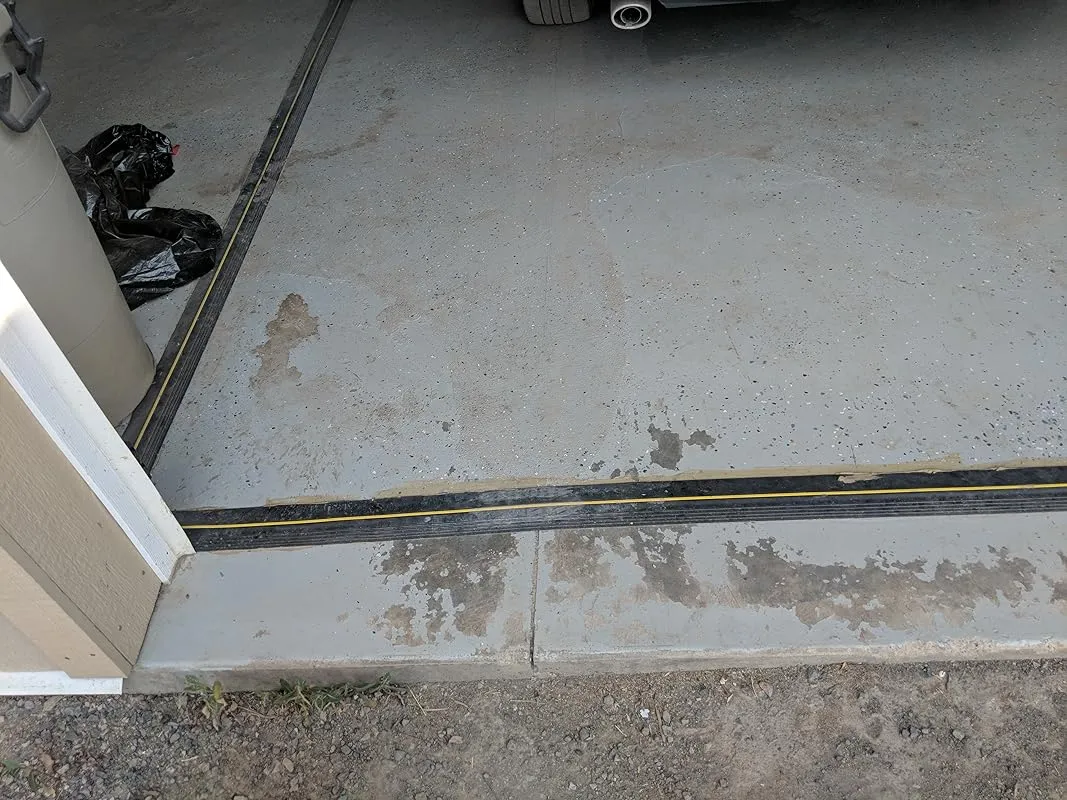
I began by bringing the roll-up door almost all the way down, leaving a small gap of about 1/4" from the floor. This allowed me to see light passing through the other side, indicating proper alignment. I then placed a 1' weather strip in the middle of the door, ensuring that the longer side went under the door. The key here is to ensure that the big yellow line on the weather strip aligns with the garage door seal on the inside portion of the door, as shown in the provided pictures.
To determine the correct placement for the Threshold Seal Strip, I used a sharpie to mark the spot. I repeated this process every foot until I had a clear line from one end to the other. It's important to note that the 1' cut from earlier is no longer needed and can be discarded.
When it came to cutting the length of the strip, I measured it according to my marked lines and proceeded to secure it using a high-quality adhesive. I opted for a premium glue that is specifically designed for use on concrete and rubber, ensuring its effectiveness even in underwater applications. While this may be slightly more expensive, it is crucial not to compromise on the quality of the adhesive.
Since the installation, I have experienced a major storm, and I am pleased to report that not a single drop of water made it under the door. Previously, my shop would tend to flood during heavy rainfall, so this product has definitely made a significant improvement.
To summarize, while there were a few minor issues during installation, the overall performance of this product has been excellent. By following the correct installation method and using a high-quality adhesive, I was able to achieve a watertight seal that effectively prevents any water from entering my garage. I highly recommend this product to anyone in need of a reliable solution for keeping their garage dry.
2. Jin&bao Garage Door Seal – Perfect Weatherproof Replacement


I recently purchased and installed a 20' strip of weatherstripping for my 18' garage door opening. Overall, I am satisfied with the product, but there were a few things that I found worth mentioning.
Firstly, the first 6 inches of the strip were slightly damaged because they were on the inside of the coiled product in the box. While this wasn't a major issue for me since I didn't need every inch of the strip, it is something to be aware of. I would suggest considering this when measuring and planning for installation.
To ensure that the strip was flat and pliable, I laid it out for a week in my garage during the summer. It did flatten out reasonably well, except for one end which remained slightly curled. It was important for me to determine which side was the outward-facing side and which was the inward-facing side before installation. I positioned the strip in a way that allowed my garage door to roll down on the relatively flat edge, leaving the larger hump on the inside. This was necessary to avoid tripping the door sensor and having the door immediately open. However, this positioning caused most of the strip to be hidden behind the closed door from the outside. Keep in mind that the positioning may vary depending on your specific garage door setup.
One challenge I encountered during installation was scribing a straight line across the floor to ensure the strip was applied evenly. The strip tends to curl up in the box and remains slightly wiggly even after flattening. To overcome this, I used a long straight edge to mark a straight line across the width of the garage door. This helped me to position the strip accurately.
Applying the adhesive was the next step, and I found that it was quite thick. I initially struggled with getting the adhesive out of the tube because I didn't open the seal wide enough. This required a lot of pressure to squeeze the adhesive out. Additionally, I had to be cautious not to have the adhesive squirt everywhere. On the second tube, I cut off more of the nozzle to make it easier to control the flow. It is difficult to gauge the amount of adhesive needed until you have used one tube, so be prepared for some trial and error.
I followed the instructions and applied a continuous line of adhesive just inside the width of the strip, as well as along the other edge. I then filled the space between these lines with a continuous curved line of adhesive. It is important to be thorough and not skip any areas when applying the adhesive.
Having a helper to hold the lightly rolled strip while I pushed one end into the adhesive was beneficial. This prevented the strip from accidentally smearing the adhesive on the floor. While it wasn't as effortless as the videos made it seem, it wasn't overly difficult either. I made sure to seal each end of the strip tightly into the garage opening to prevent water from getting around it.
Although we have only experienced a few moderate rains since the installation, the weatherstripping has worked effectively so far. It remains to be seen how it will perform during heavier rains, but I have no reason to doubt its effectiveness.
One thing to note is that despite having a helper, I managed to get some of the black adhesive on the yellow stripe of my garage floor. However, after allowing it to sit for a week, I was able to remove it by gently pushing it with my finger or a rag. The blemish is now gone, and I am pleased with the final result.
3. Universal Garage Threshold Seal Strip: Ultimate Weatherproof Solution


I recently purchased this weather strip for my garage door and I must say that I am extremely satisfied with my purchase. As someone who doesn't usually buy products online, I was pleasantly surprised by the quality and effectiveness of this weather strip.
Installation was a breeze, and the product lived up to its description. The quality of the strip was exactly what I expected, and it was pliable and flexible, making it easy to cut to fit my garage door opening. I simply used a pair of scissors and it fit perfectly.
The silicone adhesive that came with the weather strip was also of great quality. I used 1 3/4 tubes on my 16' opening and it provided a tight seal on the bottom of my garage door. I particularly liked the gray color, as it blended well with the overall aesthetic of my garage.
Not only did this weather strip work well for my garage door, but it also proved to be effective for other doors in my house. It worked perfectly for various sized gaps at the bottom of my doors, and I was impressed by its ability to keep out unwanted pests. I even witnessed a baby mouse attempting to squeeze under my door, only to be thwarted by the weather strip. It definitely gives me peace of mind, especially living in a rural area.
Additionally, this weather strip has replaced another one that was allowing water to seep in during heavy rains. So far, it has done an excellent job in sealing my doors and preventing any water leakage. I no longer need to constantly wipe up water after each rainstorm, which is a huge relief.
I also used this weather strip for my bilco basement door to prevent water leaks, and it worked like a charm. It saved me from having to undergo an expensive repair or replacement, and I couldn't be happier with the results. It was easy to use and sealed beautifully.
4. Dgsl Universal Garage Door Weather Stripping Kit


I recently purchased the door seal product for my garage doors and wanted to share my experience with installation and product quality. After reading some negative reviews, I was initially hesitant, but I found that my experience was quite different.
Firstly, I would like to mention that the product I received was exactly as advertised and pictured. The rubber material is heavy-duty, supple, and feels durable for long-term use. Contrary to some reviews, I found it difficult to tear even with significant force. I believe this quality will ensure its longevity, even in extreme temperature conditions like those we experience here in Wisconsin.
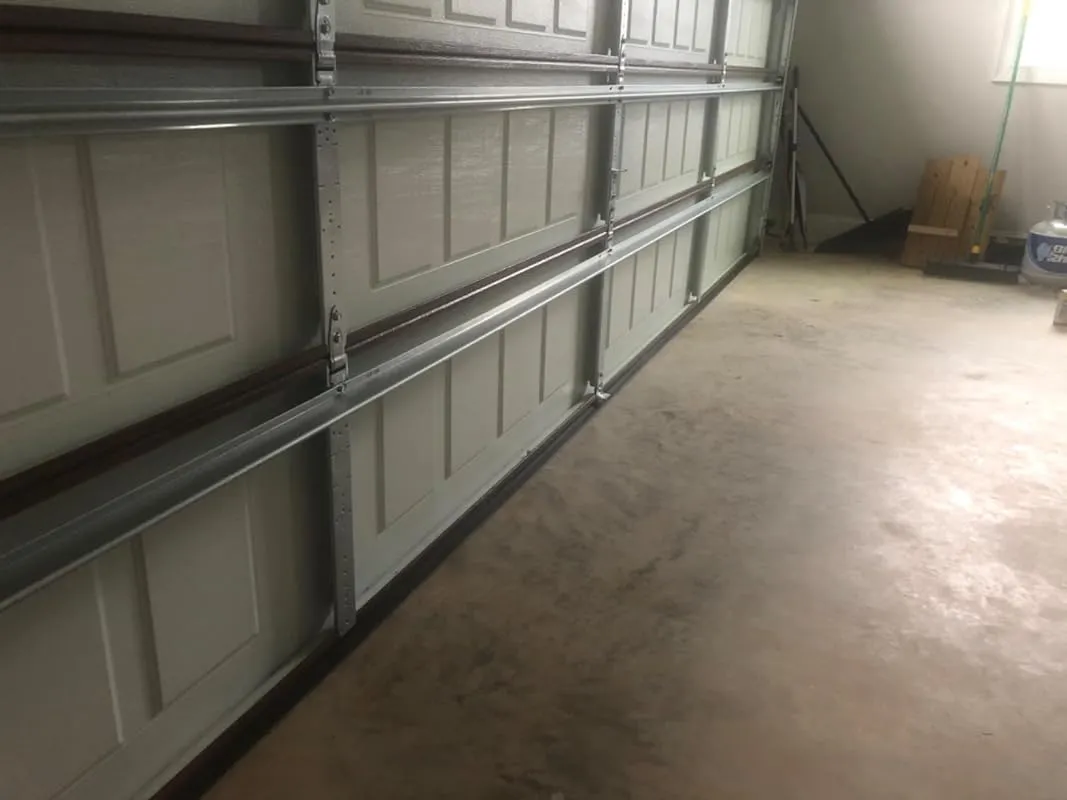
Addressing the concerns about installation, I must say that I did not encounter any major difficulties. I ordered a 20-foot piece of the product to fit my 9-foot-wide garage doors. I started by removing the old, worn-out door seals, which were in terrible shape. After cleaning the bottom of the doors, I lubricated the T-slots using a product called Fluid Film spray, which made the installation smoother.
To install the new seal, I formed it into a cup shape and fed it into the door seal mounting slots using one hand. With the other hand, I pushed it along the bottom of the door until it reached the other side. This process took less than five minutes per door, and I completed the entire installation in about 30 minutes by myself. Cutting the seal to the proper length was easily done with a good pair of shop scissors.
Considering the negative reviews mentioning installation difficulties and frustration, I was pleasantly surprised by how smoothly the process went for me. I attribute this to the clear instructions provided and the manageable nature of the installation. Despite the concerns about the heat, I had no issues completing the installation on a hot day.
I am very satisfied with the product and the difference it has made in the appearance and functionality of my garage doors. The new seals provide a better seal, reducing the amount of light that enters the garage and keeping out the cold weather. I will keep an eye on the product's wear and update this review if necessary, but so far, I am a happy customer.
5. Ultimate Weatherproof Garage Door Threshold Strip – Diy, 10ft/3m


I recently purchased this garage door threshold strip to address the issue of water entering my garage during heavy rains. Despite having a French drain installed, the corners of my garage would still get wet due to the uneven concrete. Following the instructions provided, I allowed the strip to flatten for at least 8 hours before installation. While the strip does not come with adhesive, I used Dap 230 ultra sealant, which worked perfectly for securing it in place.
It is important to note that any claims of water still getting in after installation may be attributed to inadequate surface preparation. Properly prepping the surface is crucial for a tight fit and optimal performance. Additionally, replacing the garage door seal on the bottom of the door ensures a seamless match when closed, preventing debris and cold air from entering. I have noticed a significant improvement in temperature control and a reduction in debris since installing this threshold.
While there is a slight hump created by the strip, it does not pose a significant tripping hazard. However, caution should be exercised, especially when maneuvering objects like motorcycles. The adhesive used to secure the strip is reliable, but it is essential to ensure a clean surface free of dust and dirt. I found that using brake cleaner during the cleaning process and using gorilla tape to hold the strip in place overnight resulted in a successful installation.
It is worth mentioning that allowing the rolled-up material to relax and flatten before installation is crucial. I achieved this by leaving it in the sun. Additionally, to cover the entire width of the garage, two tubes of 100% silicone adhesive were required, ensuring a secure and watertight seal.
6. Secureseal – Garage Door Weather Stripping & Threshold


I recently purchased this garage door seal and I am extremely satisfied with its quality and performance. Unlike many other sellers who offer products directly from China, this seller is based in the USA, which gives me peace of mind knowing that I am getting a reliable product.
The material used for this seal is 100% silicone, and it is perfect for adhering to concrete. I applied it to my garage door and it provided a solid seal. The very next morning after installation, I noticed that insects and beetles were unable to enter my garage anymore, thanks to the effective cushion on the base of the door. This product has effectively kept bugs out of my garage, and I would highly recommend it to anyone in need of a reliable garage door seal.
I appreciate that this seller is transparent about their product's origin and proudly advertises themselves as a USA company. This is in contrast to the growing trend of Chinese-made products being sold directly from China, which often cuts out American sellers. I commend this seller for providing a high-quality product and supporting local businesses.
In terms of performance, this garage door seal worked exactly as expected. It effectively keeps water out of the garage, which is a common issue for many homeowners. I did need to purchase adhesive separately, but the roll of seal provided was sufficient to cover both bays of my garage. I plan to also add a bottom garage door seal to ensure a tight seal, as my garage doors and floor are not completely square or flat. So far, it has been successful in keeping water and leaves out of my garage.
Initially, I purchased a slightly longer seal than I needed, as I had heard from someone that theirs had shrunk over time. However, after a month of use, I have not experienced any shrinkage. I was able to easily cut the seal to fit perfectly, and it has stayed in place without the need for adhesive. It effectively keeps bugs and leaves out, which is exactly what I was looking for.
In terms of installation, I did face some challenges with finding the right adhesive. I initially used Liquid Nails Extreme Duty LN-907, but it did not cure within the specified 24-hour time frame. As a result, the seal would lift up. However, after switching to Gorilla Glue Heavy Duty construction adhesive, I was able to securely fasten the seal, and it has been working well. I have yet to experience any rain, but I am confident that this seal will do its job effectively. In fact, I am planning to order another one for my detached garage.
7. Bowsen Weatherproof Garage Door Seals – 16ft Long!


I recently purchased this garage door seal from Amazon after having a frustrating experience with a seal I bought from a local store. The seal I bought locally was the wrong size, and I struggled to install it properly. However, this seal from Amazon was a game-changer.
Firstly, I want to mention that if you have a 2-car wide garage door like mine, you will need two people to install this seal. Trying to do it alone will only lead to frustration and difficulty. With that said, the installation process was fairly straightforward with the help of my neighbor.
I followed the recommended method of using soapy water to lubricate the channels for easier installation. However, I found that the soap dried quickly and became tacky, making it less effective. Instead, I used synthetic grease applied with a Q-tip in each channel and coated the T-ribbing with a light layer of grease before inserting the weather stripping.
My neighbor and I worked together, with them pulling while I fed the seal into the channels. We repeated this process, greasing each section before moving on. One thing to note is that if you pull too quickly, the seal may come out of the track. So, it's important to keep an eye on that and readjust if needed. Additionally, halfway through the installation, the weather stripping may start to stretch, making it harder to continue. In this case, gentle tugs along the already installed portion can help alleviate the stretching.
Once the installation was complete, I trimmed the excess seal and used the provided plugs to secure the ends. It's worth mentioning that there were two sets of plugs included, which I assume is for those with two one-car garage doors.
8. Universal Weather Stripping Seal For Garage Doors – 20ft


I recently purchased two thresholds for my garage after experiencing severe flooding due to heavy rain. As a petite 67-year-old female, I struggled to remove the water for hours. However, after installing these thresholds, my garage has remained completely dry during subsequent storms. The price of the product is reasonable, and the peace of mind it provides is priceless.
I also had a problem with water intrusion along the bottom of my overhead door due to wind-driven rain. I initially used the threshold as a test without gluing it down, and it successfully prevented water from seeping into the garage. It even stays in place when I drive my truck over it. I am considering not gluing it down so that I can remove it during winter when I need to clear snowmelt from the garage. Overall, I am satisfied with its performance.
I can't express how grateful I am to have found this product. After experiencing frequent basement flooding due to a small gap under my garage, I spent a significant amount of money trying various solutions. Nothing seemed to work until I came across this threshold. I only wish I had found it sooner and saved myself thousands of dollars. My husband was skeptical, but we followed the instructions and used liquid glue to secure it under the garage. Since then, we have had no more flooding issues. I can now finally stop worrying every time it rains. Thank you to the creators of this amazing product.
9. Bowsen Universal Garage Door Bottom Seals Retainer Kit


I recently installed this garage door seal and I have to say, I am pleasantly surprised with the results. As someone who considers themselves relatively handy but not knowledgeable about garage doors, I was initially hesitant to purchase this product due to the difficulty mentioned in previous reviews. However, I decided to give it a try and I'm glad I did.
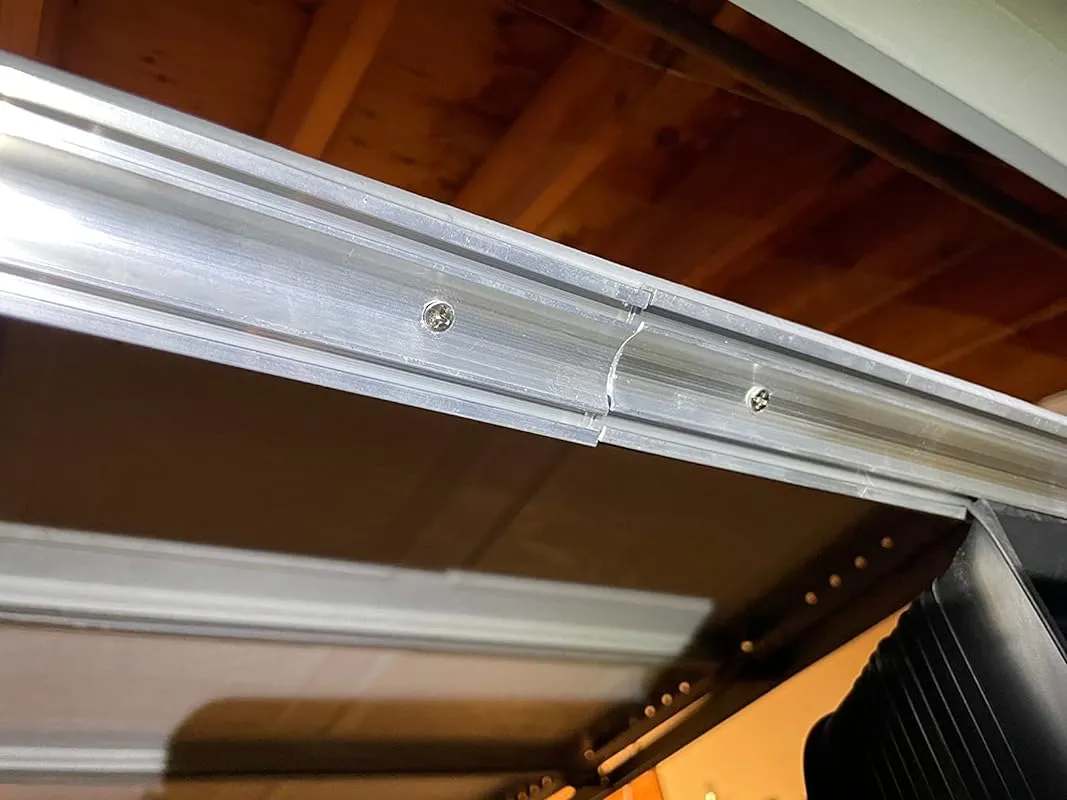
The instructions clearly state that it's easier to install with two people, but being unable to find someone to assist me, I tackled the installation solo. My garage door is a 16ft metal/aluminum door with a metal track attached at the bottom and a single line where the previous seal was inserted.
To begin, I had to remove the old, crusty seal using a knife. Unfortunately, I couldn't figure out how to remove the metal bottom plate that was part of the garage door. I opened the door partially to a comfortable working height and proceeded with the installation.
Now, I must admit that I took a shortcut and didn't cut power to the door as recommended. This was probably not the safest approach, but I wanted to save time. I taped up the track to the bottom of the door using painter's tape, as I had seen in some images from other reviews. For the final piece, I used an oscillating saw with the appropriate blade to cut through the track effortlessly.
Drilling pilot holes is a must, especially when dealing with metal or aluminum doors. It was a bit challenging to keep the drill bit centered due to the metal-on-metal contact, but with some patience and adjustment, I managed to drill the pilot holes. To prevent the track from moving during drilling, I used some quick grip bar clamps to secure it in place. This approach worked well as I focused on one track at a time.
The next step was inserting the rubber seal, which many people mentioned as being difficult. However, following the instructions and using silicone garage door lubricant, I found it surprisingly easy. I applied the lubricant along the entire track, one section at a time, and used a screwdriver to pop the seal into place. The process was a breeze and really made a difference. I used a ladder to hold the seal in place as I moved from one end to the other, simulating having a second person assisting me.
After completing one side, I repeated the process for the other track. Once the seal was in place, I encountered a small issue when closing the door. The door detected the new seal and assumed it was an obstruction, preventing it from closing. I had to adjust the down and up force on the garage door, which required some guidance from YouTube since I'm not familiar with garage door mechanics.
Additionally, I noticed that the chain was hanging lower than before, so I had to refer to YouTube again to learn how to adjust it properly. It involved using wrenches to adjust a pin, and eventually, I was able to resolve the issue.
10. Universal Weatherproof Garage Door Strip – Diy Rubber Seal


I recently had an issue with water seeping into my garage during heavy rains due to an incline in my garage drive. After doing some research, I decided to replace the garage door seal to solve the problem. Here's my experience and review of the process.
First, I had to prepare the surface where the seal would be installed. Since my garage is 25 years old, there was some scum buildup in the area where the garage doors close. I used a scraper and a wire wheel on a grinder to clean the surface thoroughly. This step is crucial as it ensures a clean surface for the adhesive to adhere to.
Next, I measured and cut the seal to the appropriate length for my door, which was 109 1/2". I laid the seal in place and closed the door until it was just slightly touching the seal. This allowed me to position the seal accurately. I then marked the seal with a pencil on each side to indicate its placement.
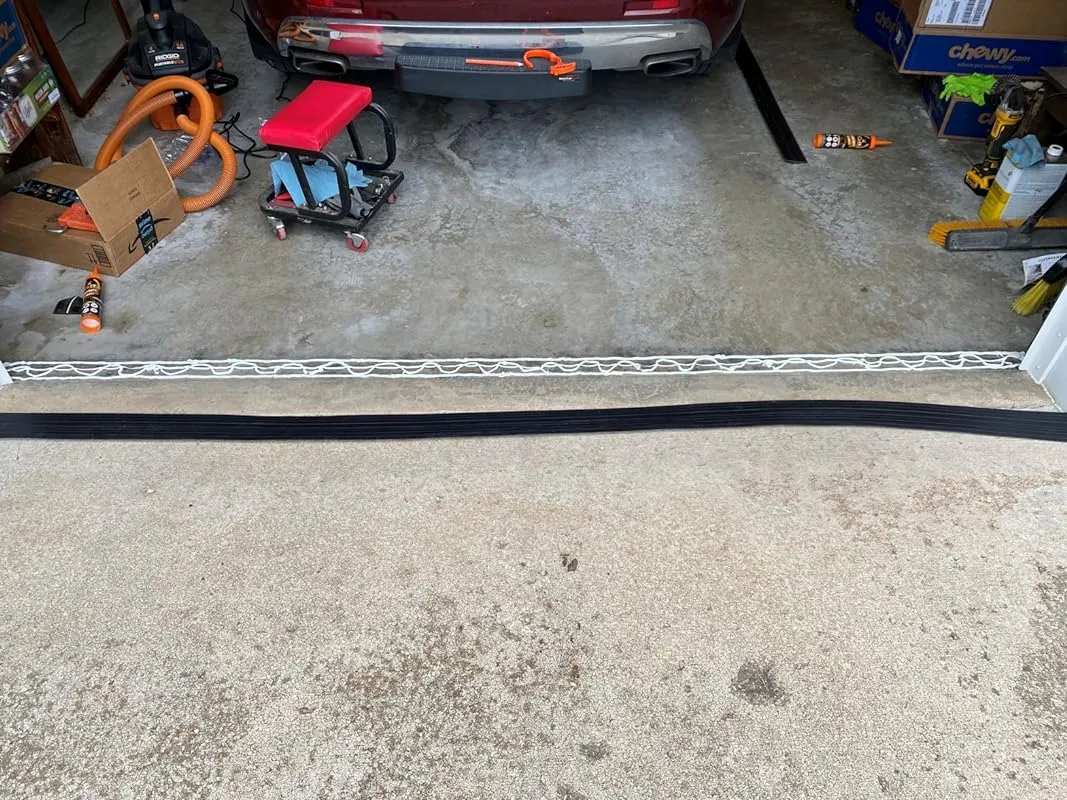
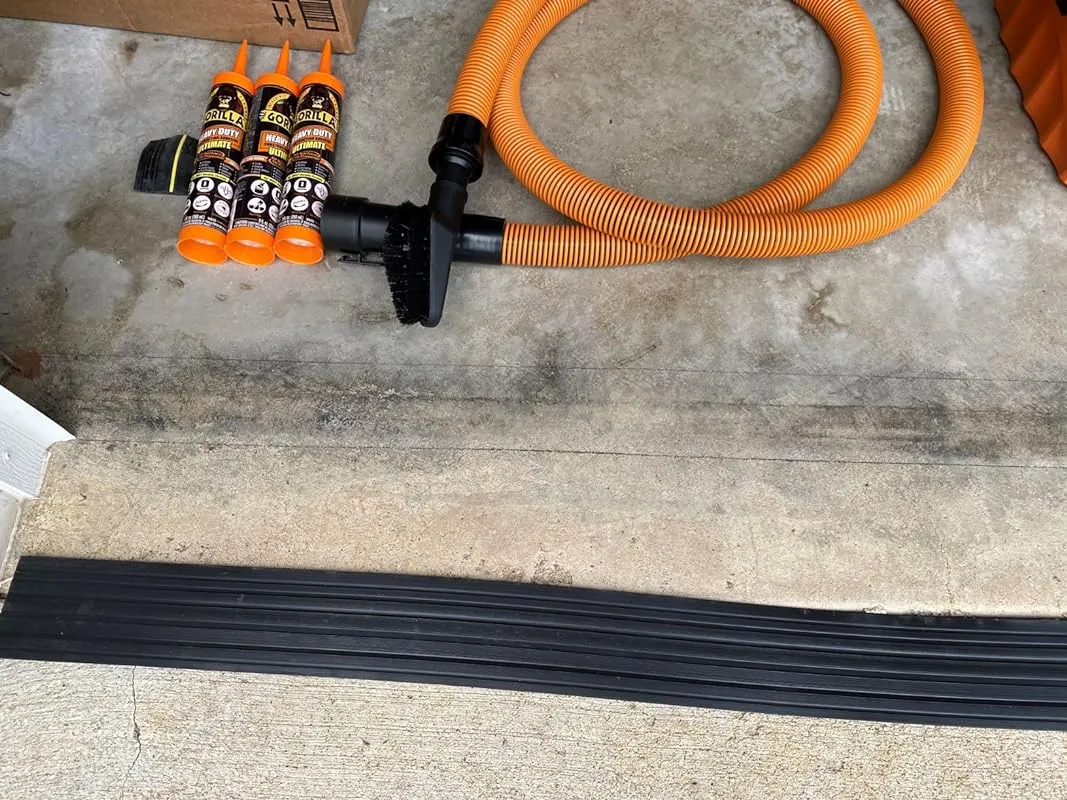
After marking the seal, I rolled it back into the garage upside down next to the inner scribed line. This allowed me to apply the adhesive easily. I used Gorilla 8008002 Ultimate Construction Adhesive White for this step, using one tube per seal. The seal has recessed grooves on the back, so it's important to use enough adhesive to flow up into these grooves.
Once the adhesive was applied, I rolled the seal back onto it, making sure to apply pressure along the entire length of the seal. This step helps the adhesive flatten and forces any air out. I also made sure the seal was aligned with the pencil marks by using my fingers or a 1" flat roller to apply pressure from the center to the outside edge of the seal. This ensured there were no voids for water to seep in under the seal.
After allowing the adhesive to cure for 24 hours, I used a utility knife to score the excess glue along the door seal and removed the excess with a scraper. This step helped give a clean and finished look to the installation.
FAQs
Are there any additional accessories or tools required for installing a garage door bottom seal on uneven concrete?
When installing a garage door bottom seal on uneven concrete, there are a few additional accessories or tools that can help ensure a proper installation. Here are some suggestions:
1. Concrete anchors: If the uneven concrete surface is causing the seal to not sit flat, you may need concrete anchors to secure the seal in place. These anchors can help prevent the seal from shifting or moving over time.
2. Leveling compound: If the unevenness of the concrete is significant, you might consider using a leveling compound to create a smoother surface. This compound can be applied to the uneven areas to even them out and provide a stable base for the seal.
3. Silicone adhesive: To ensure a tight and secure seal, you may want to use a silicone adhesive. Apply the adhesive to the bottom of the seal before installing it, as this can help create a stronger bond between the seal and the concrete.
It is important to note that the specific accessories or tools required may vary depending on the specific situation and the type of garage door bottom seal being used. It is always recommended to consult the manufacturer's instructions or seek professional advice for the most suitable accessories or tools for your particular installation.
Are there any special considerations or modifications needed when installing a garage door bottom seal on uneven concrete?
When installing a garage door bottom seal on uneven concrete, there are a few special considerations and modifications that can be made to ensure a proper installation.
Firstly, it is important to assess the level of unevenness in the concrete. If the unevenness is minimal, a standard bottom seal may still work effectively. However, if the unevenness is significant, it may be necessary to make modifications.
One option is to use an adjustable bottom seal. These seals have adjustable components that can be altered to accommodate uneven surfaces. They often come with screws or clips that can be adjusted to fit the contours of the concrete.
Alternatively, if the unevenness is localized to specific areas, you can consider using a threshold seal. These seals are placed directly on the concrete, creating a barrier between the floor and the bottom of the garage door. They are particularly useful for keeping out water, insects, and debris.
If the unevenness is extreme, it may be necessary to level the concrete before installing the bottom seal. This can be done using self-leveling compounds or by hiring a professional to fix the uneven surface.
In conclusion, when installing a garage door bottom seal on uneven concrete, it is important to assess the level of unevenness and choose an appropriate solution. Adjustable bottom seals and threshold seals are options to consider, while leveling the concrete may be necessary in extreme cases.
Are there specific garage door bottom seals designed for uneven concrete surfaces?
Yes, there are specific garage door bottom seals designed for uneven concrete surfaces. These seals are typically made of flexible materials like rubber or vinyl, which can conform to the irregularities of the concrete.
They are often equipped with adjustable features such as height or width adjustments, allowing them to be customized to fit uneven surfaces.
One popular type of seal for uneven concrete surfaces is the "threshold seal." These seals are installed directly on the garage floor at the bottom of the door, creating a barrier against drafts, pests, and debris.
Threshold seals are usually made of durable materials that can withstand heavy foot traffic and vehicle movement.
Another option for uneven surfaces is a "brush seal." These seals consist of bristles or brushes that can adapt to the contours of the concrete. Brush seals effectively block out dust, insects, and drafts while allowing for smooth operation of the garage door.
It is recommended to consult with a professional garage door installer or supplier to determine the most suitable seal for your specific uneven concrete surface. They can assess the condition of your garage floor and provide expert advice on the appropriate seal for your needs.
Can a garage door bottom seal help prevent water infiltration on uneven concrete?
Yes, a garage door bottom seal can help prevent water infiltration on uneven concrete. Uneven concrete surfaces can create gaps and spaces where water can seep through and enter the garage. A bottom seal acts as a barrier, sealing off these gaps and preventing water from entering.
By installing a bottom seal, you can create a tight seal between the garage door and the floor, minimizing the chances of water infiltration. The seal is typically made of a flexible material, such as rubber or vinyl, which can conform to the uneven surface of the concrete.
However, it is important to note that the effectiveness of the bottom seal may depend on the severity of the unevenness in the concrete. If the unevenness is significant, it may be necessary to address the underlying issue by leveling or repairing the concrete before installing the seal.
Overall, a garage door bottom seal can be a valuable addition to prevent water infiltration on uneven concrete, but it is important to ensure that the underlying concrete surface is in good condition for optimal effectiveness.
Can a garage door bottom seal improve energy efficiency on uneven concrete surfaces?
Yes, a garage door bottom seal can help improve energy efficiency on uneven concrete surfaces. The bottom seal acts as a barrier between the garage and the outside, preventing air drafts, dust, insects, and moisture from entering the garage.
When the concrete surface is uneven, gaps and spaces can be created under the garage door, allowing air to flow in and out freely. This can lead to energy loss as the heated or cooled air inside the garage escapes and outside air enters.
By installing a bottom seal, it helps to fill in these gaps and spaces, creating a tight seal between the garage door and the uneven concrete surface. This reduces air leakage, improving energy efficiency by minimizing heat or cool air loss.
It can also help to keep out dust, insects, and moisture, providing a more comfortable and cleaner environment inside the garage.
It is important to choose a bottom seal that is flexible and adjustable to accommodate the uneven surface. Additionally, ensuring proper installation is crucial to maximize the effectiveness of the seal.
How can I install a garage door bottom seal on uneven concrete?
Installing a garage door bottom seal on uneven concrete can be a bit challenging, but with the right approach, it can be done effectively. Here's a suggestion on how to tackle this task.
1. Measure the length: Start by measuring the length of your garage door to determine the correct size of the bottom seal you need to purchase. Ensure you have a seal that is slightly longer than the door.
2. Clean the area: Thoroughly clean the bottom of the garage door and the concrete surface where the seal will be installed. Remove any debris, dirt, or old seal remnants to ensure a clean and smooth surface.
3. Choose the right seal: Look for a bottom seal that is flexible and can adapt to uneven surfaces. Some seals come with adjustable features or built-in leveling mechanisms that can help accommodate uneven concrete.
4. Position the seal: Begin by placing the seal at one end of the garage door and align it with the concrete surface. Start with the highest point of the uneven concrete and gradually work your way down.
5. Secure the seal: Use appropriate screws, nails, or adhesive recommended by the manufacturer to secure the seal in place. Make sure it is tightly attached to both the garage door and the concrete.
6. Trim if necessary: Once the seal is securely fastened, trim off any excess length if needed. Use a utility knife or scissors to achieve a neat and precise fit.
7. Test the seal: Open and close the garage door a few times to ensure that the seal is properly aligned and provides a tight seal against the uneven concrete.
Remember, it's always a good idea to consult the manufacturer's instructions or seek professional assistance if you're unsure about any step of the installation process.
How can I measure and determine the correct size of a garage door bottom seal for uneven concrete?
To measure and determine the correct size of a garage door bottom seal for uneven concrete, you will need a measuring tape, a straight edge, and a level.
1. Start by closing the garage door and examining the area where the seal will be installed. Take note of any uneven spots or gaps in the concrete.
2. Next, measure the width of the garage door opening. Use the measuring tape to measure from one side of the opening to the other. Make sure to measure both at the top and bottom of the opening, as uneven concrete can cause variations in size.
3. Once you have the width measurements, use the straight edge to determine the highest point of the uneven concrete. Place the straight edge across the opening, parallel to the ground, and adjust it until it is level. Use the level to confirm that the straight edge is indeed level.
4. Measure the distance between the bottom of the straight edge and the floor at the highest point of the uneven concrete. This measurement will help you determine the thickness of the bottom seal needed.
5. Finally, take the width and thickness measurements and find a garage door bottom seal that matches these dimensions. It's always a good idea to purchase a slightly larger seal to allow for flexibility and adjustments during installation.
If you're uncertain about the measurements or find it challenging to determine the correct size, consider consulting a professional garage door installer who can provide expert advice and assistance.
What are some common challenges or issues that may arise when installing a garage door bottom seal on uneven concrete, and how can they be overcome?
When installing a garage door bottom seal on uneven concrete, there are a few common challenges or issues that may arise. One challenge is ensuring proper alignment of the seal along the entire length of the garage door.
Uneven concrete can cause gaps or misalignment, which can compromise the effectiveness of the seal.
To overcome this, it is important to carefully measure the width of the garage door opening and choose a bottom seal that is slightly longer to accommodate any unevenness. Additionally, using a flexible seal material can help conform to the contours of the concrete surface, ensuring a better seal.
Another challenge is securing the seal firmly to the concrete. Uneven surfaces can make it difficult to achieve a secure attachment. One solution is to use adhesive or sealant specifically designed for concrete surfaces to ensure a strong bond.
It is important to thoroughly clean the concrete surface before applying any adhesive to ensure proper adhesion.
Lastly, if the unevenness of the concrete is significant, it may be necessary to level the surface before installing the bottom seal. This can be done using concrete leveling compounds or by hiring a professional to resurface the area.
Overall, by carefully choosing the right seal, using proper adhesion techniques, and addressing any significant unevenness, the challenges of installing a garage door bottom seal on uneven concrete can be overcome effectively.
What are the benefits of using a garage door bottom seal on uneven concrete?
Using a garage door bottom seal on uneven concrete offers several benefits. Firstly, it helps to create a tight seal between the garage door and the ground, preventing drafts, dust, and pests from entering the garage. This is particularly important on uneven surfaces where gaps may be present.
Secondly, a bottom seal helps to improve energy efficiency by reducing air leakage. It prevents cold air from seeping into the garage during winter months and hot air from entering during summer, thereby reducing the need for excessive heating or cooling.
Additionally, a garage door bottom seal can help to minimize noise transmission. Uneven concrete surfaces may create gaps that allow sound to travel in and out of the garage, causing disturbances. A seal helps to dampen the noise and create a quieter environment.
Lastly, a bottom seal can provide protection against water intrusion. If your garage is situated in an area prone to flooding or heavy rain, a seal will help prevent water from seeping in and damaging the interior or any stored items.
In summary, using a garage door bottom seal on uneven concrete provides benefits such as improved insulation, reduced noise, enhanced protection against pests and water, and overall increased comfort and efficiency.
What are the different types of garage door bottom seals suitable for uneven concrete?
There are several types of garage door bottom seals that are suitable for uneven concrete surfaces. Here are a few options:
1. Threshold seal: This type of seal is designed to create a barrier between the bottom of the garage door and the floor. It is typically made of durable rubber or vinyl material and can be easily installed on uneven concrete surfaces. The threshold seal helps to keep out dirt, pests, and drafts.
2. Retainer and brush seal: This type of seal consists of a retainer strip that is installed along the bottom of the garage door and a brush seal that is attached to the retainer. The brush seal conforms to uneven surfaces and helps to create a tight seal when the door is closed.
3. Rubber bulb seal: This seal is made of flexible rubber material and is designed to attach to the bottom of the garage door. It can be adjusted to fit uneven concrete surfaces and provides a good barrier against drafts, dust, and pests.
4. Vinyl flap seal: This type of seal is made of vinyl material and is attached to the bottom of the garage door. The flexible vinyl flap conforms to uneven surfaces and helps to block out drafts and debris.
When choosing a garage door bottom seal for uneven concrete, it is important to consider the specific needs of your garage and the level of unevenness of the floor.