I Tested And Reviewed 10 Best Heat Transfer Vinyl For Cricut (2023)
When looking to buy heat transfer vinyl for a Cricut machine, it's important to consider a few key factors to ensure you get the right product. The type of vinyl you choose can affect the quality and durability of your projects, so investing some time upfront to pick the right one will pay off in the end. Some elements to think about are vinyl cutability, application method, and durability.
Cutability refers to how easily the Cricut machine can cut through the material. Some vinyls are thicker or have a sticky backing that makes them harder to cut cleanly. You want to select one that cuts smoothly without leaving residue behind on the mat. The application method is also key – some vinyls require a heat press to fuse properly to the fabric while others can simply be ironed on. Consider which option best suits your needs and equipment.
Durability comes down to how well the material holds up over time and through washing. Typically, polyurethane or PVC vinyls are quite durable and can handle multiple washes without cracking or peeling. The longer a vinyl graphic lasts, the better return you'll get on your investment.
When searching for the best heat transfer vinyl for Cricut projects, taking the time to understand these factors will ensure you choose an option that cuts cleanly, applies easily, and produces professional long-lasting results. Ready to unlock your Cricut's potential for making custom shirts, bags, and more? Keep reading to explore your vinyl possibilities!
10 Best Heat Transfer Vinyl For Cricut
| # | Product Image | Product Name | Product Notes | Check Price |
|---|---|---|---|---|
|
1
|
 |
The product is ideal for creating custom designs on white t-shirts and other fabric items using a heat press machine.
|
|
|
|
2
|
 |
The product is ideal for creating custom designs and transferring them onto shirts and other fabrics.
|
|
|
|
3
|
 |
The product is ideal for creating colorful and durable designs on T-shirts and other fabrics.
|
|
|
|
4
|
 |
The product is ideal for creating custom designs on t-shirts, hats, and clothes using heat transfer vinyl.
|
|
|
|
5
|
 |
The product is ideal for creating custom designs on shirts, bags, and other fabrics using a heat press or iron.
|
|
|
|
6
|
 |
The product is ideal for creating custom designs and graphics on clothing and fabrics.
|
|
|
|
7
|
 |
The product is ideal for creating custom, long-lasting designs on t-shirts using Cricut Explore Air 2/Maker.
|
|
|
|
8
|
 |
The product is ideal for DIY projects, customizing clothes, and creating iron-on designs with vibrant colors.
|
|
|
|
9
|
 |
The product is ideal for creating custom designs and graphics on shirts using heat transfer vinyl.
|
|
|
|
10
|
 |
The product is ideal for creating heat transfer designs on various fabrics using cutting machines like Cricut and Cameo.
|
|
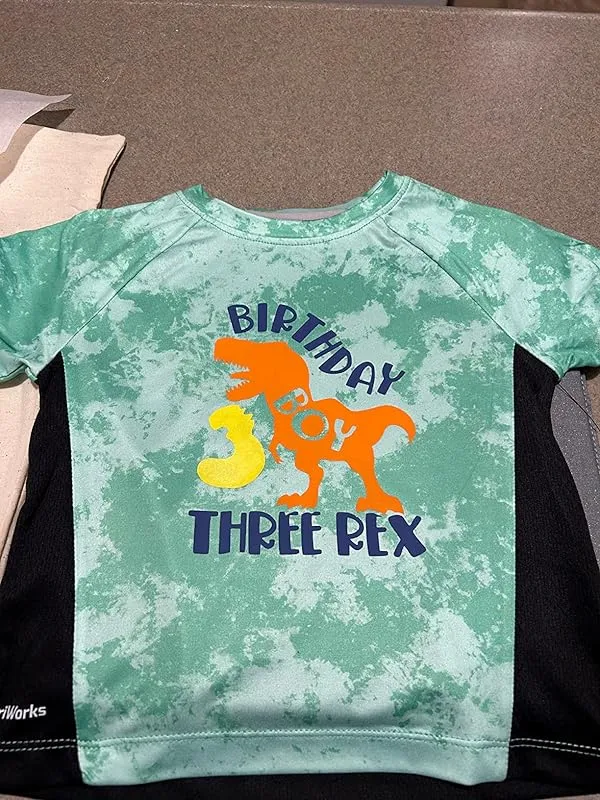
1. White Htv Vinyl Bundle: T-Shirt Perfect White Pack


I recently purchased the value pack of HTV with the intention of using it for Christmas gifts. However, due to various reasons, I didn't get a chance to use it until February. Despite my late start, I was pleasantly surprised by the quality of the vinyl. As a beginner, I expected some difficulties, but this vinyl cut perfectly at the default settings and was incredibly easy to weed. It adhered well to upholstery leather and the design came out clear with a clean matte finish. I have been using it for coasters and haven't experienced any issues with moisture so far. While I haven't tested it on items that will be worn or bent often, I can confidently say that this vinyl is great for small projects and offers excellent value for its quality.
As someone who is new to vinyl and HTV, I was immediately impressed with this product. It cut flawlessly on my Cricut Explore Air 2 and was incredibly easy to weed. Even as a beginner, I was able to achieve intricate details with this HTV. The only minor complaint I have is that the black vinyl with the dark backing was slightly more difficult to cut and weed compared to the color sheets with the white backing. However, after adjusting the pressure, it cut much better. It's possible that the issue was with my blade, as I am still new to this. Despite this minor inconvenience, my project turned out awesome! I also appreciate that the product came with a teflon sheet, saving me the hassle of having to order it separately.
I have been using this vinyl for years and have always been extremely satisfied with its quality. However, I recently received a batch of vinyl that was completely different from what I had previously used. I had three urgent orders to complete, and I confidently placed my order here, expecting the same high-quality vinyl. Unfortunately, the vinyl I received was not up to par. It was difficult to cut and weed, and I ended up using all but two sheets with unsatisfactory results. I am now left with no vinyl and unfinished work. I am incredibly frustrated and unsure of how to proceed. I would appreciate a refund, but it seems unreasonable to ask me to return a box of unusable vinyl.
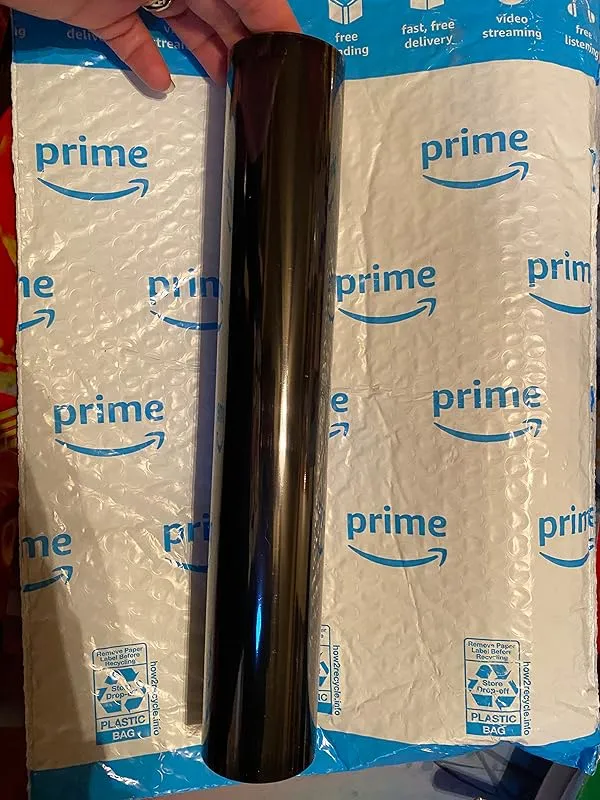
2. Neon Pink Htv Vinyl Rolls: Easy-Cut Iron-On For Crafts


After trying out this brand of HTV vinyl, I must say that I am quite disappointed with my purchase. Firstly, the color I received was not what I had expected. I was hoping for a gold gold shade, but instead, it turned out to be more of a yellow gold. This was not what I wanted and it did not meet my expectations.
Furthermore, the quality of the vinyl was not up to par. I noticed that the vinyl was peeling off the clear carrier sheet even before I had a chance to use it. This was very frustrating and it made the whole process of using the vinyl much more difficult. Additionally, I was surprised to find that the vinyl had a strong fish odor. I'm not sure why this is the case, but it definitely made me question the overall quality of the product.
As a result of these issues, I will most likely be looking for a new brand of gold glitter vinyl. However, I must say that the black and white HTV vinyl that I ordered seemed to be fine and did not have any odor.
On a more positive note, I have purchased other products from this brand in the past and have been quite satisfied with the quality. The HTV vinyl, in particular, is affordable and of good quality. I have not experienced any issues with weeding and the rolls even come with a weeding tool, which is a nice bonus. The colors are also vibrant and have not shown any signs of bubbling or peeling after multiple washes. Overall, I have had a positive experience with this brand in the past.
I have also tried other brands of HTV vinyl and have had some difficulties with weeding and getting the vinyl to hold well. However, this brand has been a game-changer for me. Weeding the designs is incredibly easy and the finished result looks fantastic on shirts. The only minor issue I had was that I had to hold my iron on for a bit longer than the recommended time in the instructions, but aside from that, it worked great. The amount of product you get on the huge roll is also a great value for the price.
3. Htvront Vinyl Bundle: 36 Pack + Cutting Mat + Tweezer


The variety pack of heat transfer vinyl offered in this store is a great option for anyone who wants to save money and receive some extra tools. The pack includes 36 sheets of 12" x 10" iron-on vinyl in 25 different colors, along with a teflon sheet, a weeding tool, and a cutting mat.
The vinyl sheets are of high quality, with a smooth surface and consistent color. They weed reasonably easily and adhere well to various surfaces. While the variety of colors included may vary according to personal preference, it does provide a good range for experimentation and creative projects. For longer runs, users may eventually want to purchase continuous rolls of the same color to standardize their work.
The cutting mat included in the pack has a medium stickiness, which is sufficient to securely hold the vinyl in place. Unlike some mats that can be too sticky, this one works well without causing any issues during the peeling process. The weeding tool provided feels comfortable to use and effectively removes excess vinyl.
One of the highlights of this pack is the inclusion of a Teflon sheet, which proves to be very useful. Additionally, the pack also includes a standard grip 12×12 cutting mat and an adhesive weeding tool, both of which are valuable tools for working with vinyl.
Using the materials in this pack is straightforward. The cutting mat has a clear film that can be peeled away to reveal a sticky side. Users can either cut the vinyl to size or place the entire sheet, glossy side down, into the top left corner of the mat. The stickiness of the mat will lightly hold the vinyl in place during the cutting process. Once cut, the weeding tool comes in handy for peeling away the excess vinyl, leaving only the desired design on a clear sticky film. This film can then be applied, sticky side down, onto any object or fabric, and heat can be applied to securely attach the vinyl.
4. Ink Splash Htv: Vibrant Watercolor Heat Transfer Vinyl


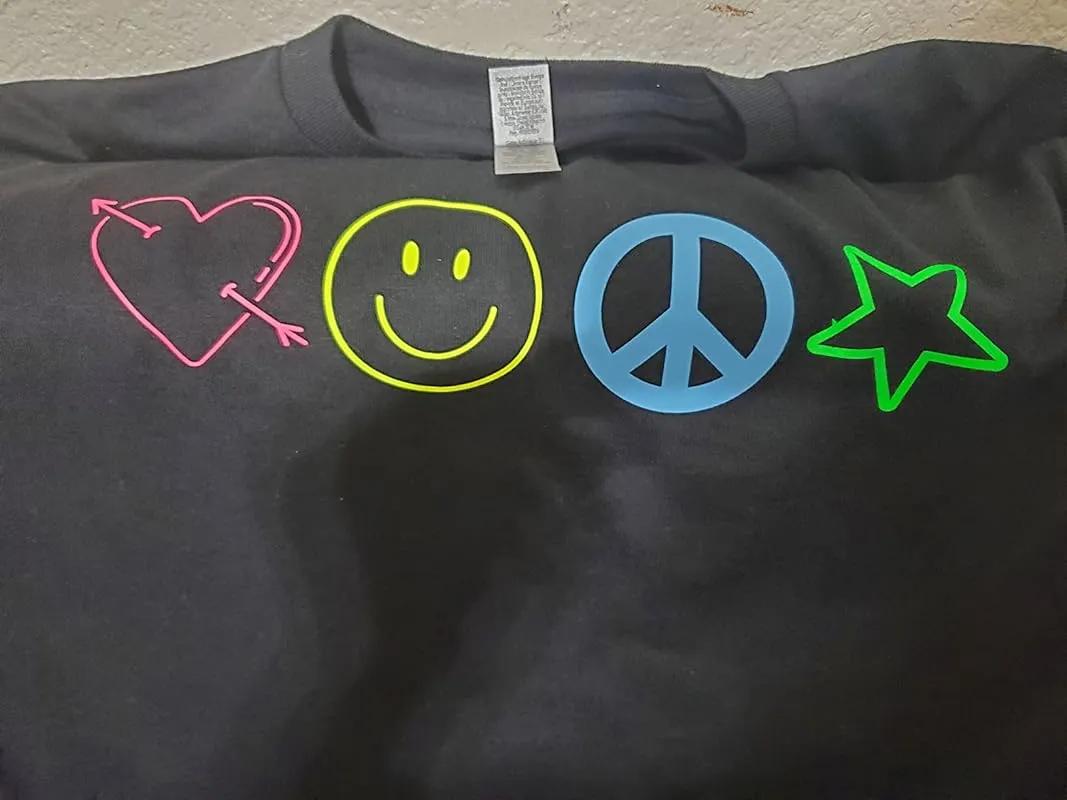


The color variety of this vinyl set is absolutely delightful! The fact that there are two sheets of each color, instead of just one, was a pleasant surprise. It made me even more excited about my purchase. However, I did find it a bit challenging to see while weeding. I would recommend using the MORE setting for Cricut to ensure better visibility.
The iron-on process went smoothly, and the vinyl adhered perfectly. I appreciated that the package included a sheet with recommended heat settings, which made the application process even easier.
Weeding was a breeze, and the final result was super cute! I was so satisfied with my experience that I have already placed another order for more vinyl.
I used this vinyl to make shirts for my entire teaching team, and I absolutely love how they turned out. The cutting, weeding, and transfer processes all went seamlessly, resulting in professional-looking shirts. I will definitely be purchasing more designs from this brand in the future.
The quality of this vinyl is excellent. It was very easy to weed and apply, and I used it on drawstring bags. However, I would caution others to watch the temperature on the press to avoid "burning" the vinyl.
5. Colorful Vinyl Pack For Cricut & Silhouette: Jandjpackaging


I recently purchased and tried out this "off branded" HTV and I must say, I was pleasantly surprised. Despite my initial worries, the product exceeded my expectations in terms of quality and performance.
Firstly, the packaging was impressive with a neat and professional appearance. The heavy-weight feel of the packaging gave it a premium touch. Additionally, the product came with detailed printed instructions and a teflon sheet, which was a great bonus. I had been using typing paper as a cover sheet with other "name-brand" HTV, so having a proper teflon sheet was a game-changer.
The HTV itself was easy to work with. It cut smoothly and applied effortlessly to cotton t-shirts. I didn't have to use excessive heat, which was a relief. The backing sheet had just the right weight, making it easier to weed compared to some other brands I've used before. However, one thing to note is that the backing sheet is slightly less sticky, so you need to be careful not to lose any tiny bits while weeding. I found a couple and had to place them by hand without the carrier.
I was particularly impressed with the level of detail the HTV could handle. Even with a fairly small and intricate design, measuring 8" wide, it worked well and looked great. The texture of the HTV after application on a normal cotton t-shirt fabric was impressive. It melded seamlessly with the fabric, giving me confidence that it will stay in place.
The colors of the HTV were brilliant and beautiful, adding a vibrant touch to my designs. This was my first time using this particular brand, and I am very pleased with the results. I will definitely be repurchasing in the future. It's definitely a "best buy"!
I have also used this HTV with my UScutter vinyl cutter/plotter, and I must say I'm impressed. I had to make a few adjustments to the settings, slowing down the cut speed and adjusting the blade depth, but once I found the right settings, the cutting process was smooth. The HTV is a bit thicker and rubbery compared to the vinyl I'm used to cutting, but it was easy to work with. The backing is a heavy plastic sheeting with a tacky feel, making it incredibly easy to weed even with detailed designs.
I have used this HTV on different types of t-shirts and it has worked great. I did encounter a small issue with a large design not sticking well, but I believe it was due to the material and the fact that I was using a hand-held iron instead of a press. Despite that, I have received numerous compliments on my designs. The t-shirts almost look professionally made!
The only downside is the color selection that comes with the pack. While I was aware of this before purchasing, it would be great if the company offered solid colors in 10' rolls. It can be a bit tricky to line up the sheets on the plotter when cutting with individual sheets.
6. Vinyl Crafters Delight: Htvront Bundle – 14 Pack


I recently purchased this vinyl in a stunning color and I must say, it exceeded my expectations. Not only is it visually appealing, but it is also incredibly easy to work with. The weeding process was a breeze and the end result was truly beautiful. In fact, the picture I uploaded does not do justice to the vibrant and eye-catching color of this vinyl.
Out of all the heat transfer vinyls I have used in the past, this one takes the crown as the best. It has quickly become my number one choice for all my projects. The cutting process was flawless, resulting in clean and precise designs. When it came time to iron it onto my fabric, it adhered smoothly without any hassle or complications. This vinyl made the entire process seamless and enjoyable. I have no doubt that it will remain my top choice moving forward.
Not only is this vinyl of exceptional quality, but it is also incredibly user-friendly. It is easy to work with, making it suitable for both beginners and experienced crafters. The end result exceeded my expectations, with the shirts turning out great. The vinyl stuck onto the fabric with ease, leaving no room for any issues or complications.
7. Strongbond Black Iron-On For Cricut: Outlasts 50+ Washes!

I recently tried this vinyl and I must say, it was perfect! The only minor concern I had was that there was no label indicating that it was CRICUT branded on the actual vinyl roll. However, the yellow Manila folder it came in did mention it was from CRICUT. Overall, the quality of the vinyl was great.
Out of all the vinyls I have ordered, I particularly liked the HTV/Ont brand. I've had trouble in the past with transfer tape not picking up my whole design, but with this vinyl, that was not an issue. The vinyl is placed on the mat with the shiny side down, and I adjusted the blade pressure to about 22. Once the design is finished, I make a light straight line cut just under the design and start weeding. Weeding is a breeze, as the sticky transfer paper built into the vinyl securely holds the design or letters. No more worrying about incomplete pickups!
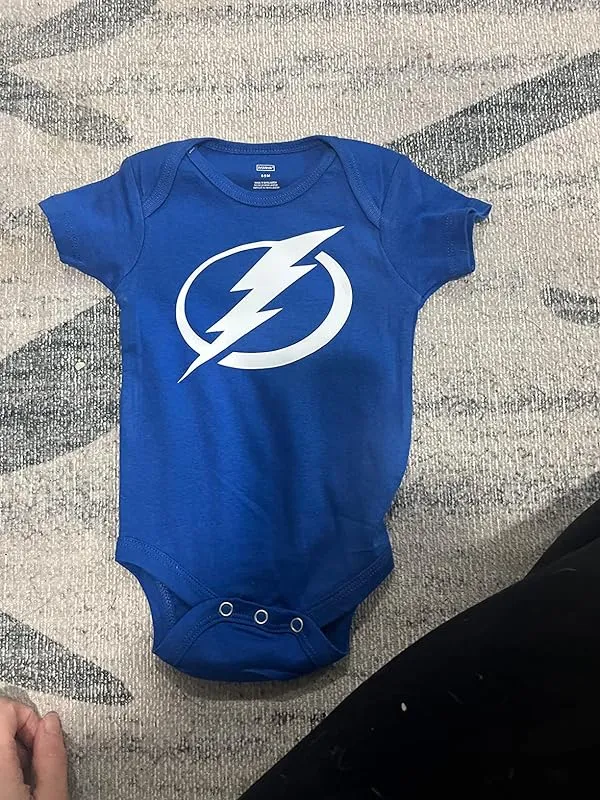
I had trouble finding onesies online that supported our team for our trip to Tampa to watch a game. So, I decided to make my own using this vinyl. It's important to peel the vinyl once it's cool to the touch, as it is not a hot peel. This vinyl was the only one that worked for us, unlike those bulk cheap 50-foot rolls. It's worth investing in quality vinyl because it's the only thing that works effectively.
I found this vinyl to be incredibly easy to weed and I love how it looks on shirts! I will definitely be purchasing it again in the future.
En resumen, este vinilo es fácil de utilizar y me gustó mucho. Lo volvería a comprar sin dudarlo. Cuando se adhiere a la ropa, no se sienten relieves ni nada por el estilo. Es un excelente producto.
8. Colorful Heat Transfer Vinyl Bundle – Easy Iron-On


I recently received my order from HTVRONT and I must say, the packaging was excellent. Each color was tightly wrapped and protected, ensuring that the product arrived in perfect condition. Although I haven't used them yet, I can tell that the colors are of good quality.
Speaking from past experiences, I have to say that I love everything about HTVRONT vinyl. It cuts great, making it easy to weed. The colors also layer beautifully, allowing for stunning finished projects. What's even better is that the vinyl holds up well after washing, lasting a long time and maintaining its softness. It has become my favorite vinyl brand and I highly recommend it to others.
I recently purchased the HTVRONT bundle for a last-minute appreciation gift for my daughter's teacher. I was pleased to find that it included all the colors I needed and it did not disappoint. The vinyl worked great for my project and I was able to complete it easily using my Cricut machine. I am so satisfied with the quality of this product that I plan on purchasing the glitter ones next. The cost is also very reasonable, which makes me even happier.
One of the things I love about HTVRONT vinyl is its excellent quality. I have made multiple shirts using this vinyl and they have lasted through several washes, both with hot and cold water. Even after multiple washes, the vinyl has not cracked, faded, or peeled. The durability of this product is truly impressive.
9. Htvront Easycut White Heat Transfer Vinyl For Shirts


I am absolutely thrilled with the HTVRONT HTV Vinyl Rolls Heat Transfer Vinyl in White! This vinyl has quickly become my go-to choice for adding personalized and creative designs to various fabric items.
The ease of use of this heat transfer vinyl is unparalleled. Cutting and weeding designs has never been smoother, saving me valuable time and ensuring that my projects come out just right. The sensitivity to temperature and pressure allows for effortless heat transfer onto any fabric, resulting in professional-looking designs on every t-shirt or fabric piece.
One of the standout features of this vinyl is its exceptional stickiness. Once applied, it adheres seamlessly to the fabric and maintains its integrity even after repeated washes. I've been pleasantly surprised by how well it has held up, with no fading, peeling, or cracking. The designs I've created using this white heat transfer vinyl remain vibrant and durable, making my creations truly long-lasting.
The versatility of this vinyl is impressive. From shirts and tote bags to sportswear, aprons, hats, and even pillows, the possibilities are endless. The compatibility with various fabric types, including athletic mesh fabrics, cotton, polyester blends, and more, makes it a versatile choice for a wide range of projects.
The size of the HTVRONT HTV Vinyl Rolls is convenient for a variety of cutting mats, making it easy to create different sizes of art designs, logos, or letters. Whether I'm working with a 12×12" or 12×24" cutting mat, this vinyl performs flawlessly and consistently.
Furthermore, this vinyl is not only user-friendly but also eco-friendly. The SGS certification ensures its safety for wear, giving me peace of mind when using it on clothing and accessories.
The personalization possibilities with this vinyl are endless, making it an excellent choice for creating unique gifts for special occasions. Whether it's Christmas, Halloween, anniversaries, or just a thoughtful gesture, custom-made items using this heat transfer vinyl add a personal touch that everyone will appreciate.
In the rare event that any issues arise, I appreciate the willingness of HTVRONT to address concerns promptly and effectively.
10. Craftmate Htv Heat Transfer Vinyl Bundle – Easy Cut, Iron On – 12 Pack


I recently decided to give these vinyls a try because of the great deal they offered. Normally, I would purchase a roll for around $12, but those are only 12*24 inch, whereas these vinyls are 12inch * 5 feet. Let me tell you, I was not disappointed with my purchase! When I opened the box, I was pleasantly surprised by the vibrant colors. The set includes the basic colors, as well as some fun ones.
I had no issues with cutting the vinyls using my Cricut Air, and weeding was a breeze. I even managed to include tiny fonts in my project and they were easy to weed, except for a few letters that got messed up due to an occasional alignment issue with my Cricut. The box suggests using 300F and 15 seconds for pressing, but I found that I needed a bit more time. I used my Easy Press 2 set at 300F for 30-35 seconds, and the results were perfect.
I absolutely love the look and feel of this vinyl. It cuts effortlessly, adheres well, and the end result looks fantastic. I bought it during an Amazon sale, but I would be willing to pay full price for it. I give it a perfect 10 out of 10.
This vinyl from HTVRont is definitely value for money. It is one of my favorites to use as it cuts easily on my machine and is a breeze to weed.
I purchased this HTV for Halloween treat bags and to have a variety of colors at a great price. I was initially skeptical due to some negative reviews, but this stuff turned out to be amazing. It is incredibly easy to cut, weed, and press. I used my Cricut Maker on the everyday iron-on setting and it cut out beautifully. When I followed the recommended time, temperature, and medium pressure for pressing, the vinyl adhered nicely to the base material. I also made a T-shirt using this HTV, but I will have to see how it holds up after washing.
FAQs
Are there any special considerations or precautions when using heat transfer vinyl with a Cricut machine?
When using heat transfer vinyl (HTV) with a Cricut machine, there are a few special considerations and precautions to keep in mind. Firstly, it is important to ensure that your Cricut machine is compatible with HTV.
Most Cricut machines are suitable for working with HTV, but it's always a good idea to double-check the user manual or consult the manufacturer's website to be sure.
Secondly, it is crucial to adjust the settings on your Cricut machine to match the specific type of HTV you are using. Each HTV brand may have different recommended settings for blade depth, pressure, and speed.
It is advisable to do a test cut on a small piece of HTV before proceeding with your actual project to ensure the settings are correct.
Another important consideration is the proper placement of the HTV on the cutting mat. The shiny side of the HTV should be facing down on the mat, with the dull side facing up. This ensures that the design is cut in reverse, allowing for correct application when transferred onto the fabric.
Lastly, it is crucial to follow the manufacturer's instructions for heat application when using HTV. Different HTV brands may have different temperature and time recommendations for ironing or heat pressing.
Adhering to these instructions will ensure a proper and long-lasting bond between the HTV and the fabric.
By taking these considerations and precautions into account, you can successfully use heat transfer vinyl with your Cricut machine and achieve professional-looking results.
Are there any specific blade settings for cutting heat transfer vinyl with a Cricut?
Yes, there are specific blade settings for cutting heat transfer vinyl (HTV) with a Cricut machine. The recommended blade setting for cutting HTV depends on the type and thickness of the vinyl being used.
As a general guideline, a fine-point blade with a depth setting of 1 is commonly used for standard HTV. However, if you are working with thicker or specialty HTV, you may need to adjust the blade depth accordingly.
It is important to note that different Cricut models may have slight variations in blade settings. Therefore, it is always a good idea to consult your machine's user manual or the manufacturer's website for specific recommendations.
Additionally, conducting a test cut on a small piece of HTV before starting your project can help ensure the blade is set correctly and the vinyl will be cut cleanly.
If you are unsure about the blade settings for a particular type of HTV, reaching out to the manufacturer or seeking advice from online crafting communities can be helpful.
Can heat transfer vinyl be used on different types of fabrics with a Cricut machine?
Yes, heat transfer vinyl can be used on different types of fabrics with a Cricut machine. Heat transfer vinyl, also known as HTV, is a type of vinyl that can be applied to fabrics using heat and pressure.
The Cricut machine is a popular cutting machine that can precisely cut designs and shapes out of various materials, including heat transfer vinyl.
When using heat transfer vinyl with a Cricut machine, it is important to select the appropriate settings for the type of fabric you are working with. Different fabrics may require different temperature and pressure settings to ensure proper adhesion of the vinyl.
It is recommended to consult the manufacturer's instructions for both the heat transfer vinyl and the fabric to determine the optimal settings.
Before applying the heat transfer vinyl to the fabric, make sure to pre-wash and dry the fabric to remove any residues or sizing. Then, use the Cricut machine to cut the desired design out of the heat transfer vinyl.
Once the design is cut, carefully weed out the excess vinyl, leaving only the desired design on the carrier sheet.
Next, preheat the fabric using an iron or a heat press. Place the heat transfer vinyl design on the fabric with the carrier sheet facing up. Apply heat and pressure according to the manufacturer's instructions for the specific heat transfer vinyl being used.
This will typically involve using an iron or a heat press set to the recommended temperature and pressing down firmly for a certain amount of time.
Once the vinyl has been applied, allow it to cool before removing the carrier sheet. Some heat transfer vinyls may require a warm or cold peel, so be sure to follow the instructions provided by the manufacturer.
In summary, heat transfer vinyl can be successfully used on different types of fabrics with a Cricut machine. Proper settings, pre-washing, and correct application techniques are crucial for achieving durable and professional-looking results.
Can you layer heat transfer vinyl with a Cricut machine?
Yes, you can definitely layer heat transfer vinyl (HTV) with a Cricut machine. The process of layering HTV involves cutting multiple pieces of vinyl and then applying them one on top of the other. To achieve this with a Cricut machine, you would need to follow a few steps.
First, design your image or text in your preferred design software and then upload it to Cricut Design Space. Arrange the different layers according to your design.
Next, load the HTV onto a cutting mat with the shiny side down and feed it into the Cricut machine. Ensure that you select the appropriate material setting for the type of HTV you are using.
After cutting the first layer, remove the excess vinyl and weed out the negative space. Then, position the first layer onto your garment or fabric and use a heat press or iron to apply it according to the HTV manufacturer's instructions.
Repeat the cutting and weeding process for the subsequent layers, ensuring that the design aligns correctly. Apply each layer one by one, using a heat press or iron to adhere them to the fabric.
Finally, follow the recommended instructions for washing and caring for the HTV to ensure durability.
Overall, layering HTV with a Cricut machine is a great way to create intricate and multi-colored designs on your garments or fabric projects.
How do you weed heat transfer vinyl for Cricut projects?
To weed heat transfer vinyl for Cricut projects, follow these steps:
1. Prepare your design: Create or import your design into Cricut Design Space. Make sure to mirror the image horizontally, especially if you're working with text or any design with a specific orientation.
2. Cut the vinyl: Place the heat transfer vinyl (HTV) shiny side down on the cutting mat and load it into your Cricut machine. Adjust the settings according to the type of vinyl you're using (consult the vinyl manufacturer's instructions for recommended settings).
3. Weed the excess vinyl: Once the machine completes cutting, remove the mat and carefully peel off the excess vinyl around your design. Use a weeding tool (a sharp, pointed tool) to lift and remove the unwanted pieces. Take your time to be precise and avoid accidentally removing parts of your design.
4. Transfer the design: Preheat your heat press or iron according to the recommended temperature for the specific HTV you are using. Place your weeded design on the desired fabric or material, with the shiny side up. Apply heat and pressure following the HTV manufacturer's instructions.
5. Peel off the carrier sheet: After heat pressing, allow the HTV to cool down for a few seconds. Then, gently peel off the carrier sheet while it's still warm. Be cautious not to peel off any parts of the design. If any areas didn't adhere properly, reapply heat and pressure.
By following these steps, you should be able to successfully weed heat transfer vinyl for your Cricut projects. Happy crafting!
How does heat transfer vinyl work with a Cricut machine?
Heat transfer vinyl, also known as HTV, is a material used to create designs on various fabrics using a heat source. When it comes to using heat transfer vinyl with a Cricut machine, the process is relatively straightforward.
First, you need to design your desired image or text using Cricut Design Space or any other compatible design software. Once your design is ready, you load the heat transfer vinyl onto a cutting mat, ensuring the shiny side is facing down.
Next, you feed the cutting mat into the Cricut machine and follow the prompts on the software to cut your design. The machine precisely cuts through the vinyl but not the backing material.
After the cutting is complete, you remove the excess vinyl around your design, leaving only the desired image or text on the backing material. This process is called weeding.
Now, preheat your heat press or iron to the recommended temperature for the specific heat transfer vinyl you're using. Place the weeded design onto your fabric, ensuring it is positioned correctly.
Apply heat and pressure using the heat press or iron, following the manufacturer's instructions for the vinyl. The heat and pressure will activate the adhesive on the vinyl, causing it to bond with the fabric.
Once the recommended pressing time has elapsed, remove the heat source and allow the vinyl to cool. Finally, peel off the backing material, leaving your design permanently adhered to the fabric.
It's essential to note that specific instructions may vary depending on the type and brand of heat transfer vinyl you're using, so be sure to read and follow the manufacturer's guidelines for the best results.
What are the best practices for applying heat transfer vinyl to garments using a Cricut?
When applying heat transfer vinyl (HTV) to garments using a Cricut, there are several best practices to ensure a successful and professional-looking result.
1. Prepare the garment: Start by washing and drying the garment to remove any dirt, oils, or chemicals that may affect the adhesion of the HTV. Avoid using fabric softeners as they can create a barrier.
2. Design and cut the HTV: Create or select your design using Cricut Design Space and cut the HTV using a Cricut machine. Be sure to mirror the design before cutting, especially if using text or a logo.
3. Weed the design: Carefully remove the excess vinyl from the design using a weeding tool, leaving only the desired design on the carrier sheet.
4. Preheat the garment: Use a heat press or an iron to preheat the garment for a few seconds. This helps remove any moisture and wrinkles, creating a smooth surface for the HTV.
5. Position and apply the HTV: Place the HTV on the garment with the carrier sheet facing up. Use heat-resistant tape to secure it in place if needed. Apply firm pressure with the heat press or iron, following the recommended temperature and time settings for the specific HTV material.
6. Peel the carrier sheet: Allow the HTV to cool down before carefully peeling off the carrier sheet. If any part of the design lifts, apply more heat and pressure or use a heat-resistant transfer sheet to protect the design while reheating.
7. Post-application: Once the HTV is applied, avoid washing the garment for at least 24 hours to ensure a strong bond. When washing, follow the care instructions for the garment and turn it inside out to protect the design.
By following these best practices, you can achieve professional results when applying HTV to garments using a Cricut.
What temperature and time settings should be used for heat transfer vinyl on a Cricut machine?
When using heat transfer vinyl (HTV) on a Cricut machine, it is important to follow the manufacturer's instructions for the specific type of HTV you are using. However, as a general guideline, most HTV materials require a temperature setting of around 305°F (150°C) and a pressing time of approximately 15-20 seconds.
To achieve these settings, preheat your Cricut machine to the recommended temperature. Place your HTV design on the desired material with the shiny side facing up and the carrier sheet down. Apply firm, even pressure using a heat press or an iron set to the recommended temperature.
It's important to note that different types of materials or brands of HTV may require slight variations in temperature and time settings. Therefore, it is always best to consult the instructions provided by the HTV manufacturer to ensure optimal results.
If you are unsure about the specific settings for your HTV, I recommend reaching out to the manufacturer directly for further guidance.
What types of heat transfer vinyl are compatible with Cricut?
Cricut machines are compatible with a wide range of heat transfer vinyl (HTV) options. The most common type is the traditional iron-on HTV, which typically requires a heat press or an iron to apply. Cricut also offers its own brand of iron-on vinyl, which is specifically designed to work seamlessly with their machines.
In addition to the traditional iron-on HTV, there are other types that are compatible with Cricut. One popular option is the glitter HTV, which adds sparkle and shine to your designs. Another option is the stretch HTV, which is ideal for fabrics that require a bit more flexibility, such as athletic wear or stretchy materials.
Furthermore, Cricut machines can work with patterned HTV, holographic HTV, metallic HTV, and even specialty options like glow-in-the-dark HTV. It's important to note that Cricut machines have different temperature and pressure settings, so it's recommended to follow the specific instructions provided by the HTV manufacturer to achieve the best results.
Overall, Cricut machines offer great versatility when it comes to heat transfer vinyl, allowing you to explore various options to create unique and personalized designs.
Where can I find tutorials or resources for using heat transfer vinyl with a Cricut?
There are several places where you can find tutorials and resources for using heat transfer vinyl with a Cricut machine. One of the best places to start is the official Cricut website. They have a dedicated section for tutorials and projects, which includes step-by-step instructions for working with heat transfer vinyl.
You can find videos, blog posts, and downloadable project files that will guide you through the process.
Another great resource is YouTube. There are many talented crafters and Cricut enthusiasts who create video tutorials specifically for using heat transfer vinyl with a Cricut. Simply search for "Cricut heat transfer vinyl tutorial" and you'll find a wide range of videos to choose from.
Additionally, there are numerous blogs and websites dedicated to Cricut crafting. These sites often have detailed tutorials, tips, and tricks for using heat transfer vinyl. Some popular ones include Hey, Let's Make Stuff, The Crafted Sparrow, and Jennifer Maker.
Lastly, consider joining online crafting communities and forums, such as Facebook groups or Reddit communities. These platforms are filled with experienced crafters who are always willing to share their knowledge and provide guidance.