I Tested And Reviewed 10 Best Paint For Furniture Without Sanding (2023)
Looking to give your furniture a fresh new look but don't want the hassle of sanding? With the right paint, you can skip the sanding and get beautiful results. When choosing a paint for furniture makeovers without sanding, here are some key factors to consider:
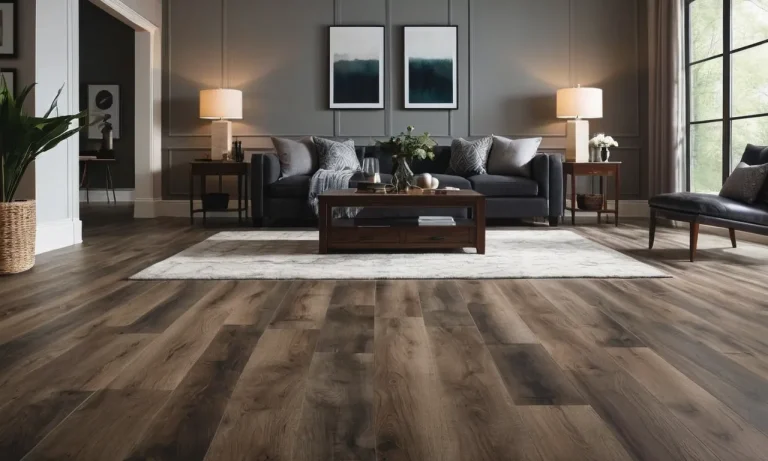
Type of paint – Look for paints specifically formulated for furniture and cabinets, as they will adhere better to laminates and wood without sanding. Latex and acrylic paints are good options. Stay away from lower quality craft paints.
Prep work – Proper prep is still needed for good adhesion. Clean surfaces thoroughly, fill any imperfections with wood filler, remove hardware and use liquid deglosser. Light scuffing can help, but avoid heavy sanding.
Primer – Using a bonding primer will help paint stick to surfaces without sanding. Primers made for plastic, laminate or metal are ideal for those furniture materials.
Topcoat – A clear polyurethane coating will protect your painted furniture from scratches and scuffs. Apply 2-3 thin coats for best durability.
Ready to transform your furniture with paint but want to skip the messy sanding? With the right products and techniques, you can give furniture a fresh new look without hours of prep work. Do your research to find the best no-sanding paint for your project. The results will be stunning!
10 Best Paint For Furniture Without Sanding
| # | Product Image | Product Name | Product Notes | Check Price |
|---|---|---|---|---|
|
1
|
 |
The product is ideal for painting furniture and cabinets on various surfaces without the need for stripping, sanding, or priming.
|
|
|
|
2
|
 |
The product is ideal for refinishing furniture and other DIY home decor projects, without the need for sanding or priming.
|
|
|
|
3
|
 |
The product is ideal for refinishing and updating furniture, cabinets, floors, walls, and home decor items with a deep brown finish.
|
|
|
|
4
|
 |
The product is ideal for refinishing furniture, cabinets, floors, walls, home decor, and accessories with a matte finish.
|
|
|
|
5
|
 |
The product is ideal for painting furniture, crafts, cabinets, and countertops with a semi-gloss finish.
|
|
|
|
6
|
 |
The product is ideal for renovating wood surfaces with a semi-gloss finish.
|
|
|
|
7
|
 |
The product is ideal for refreshing and giving a distressed look to furniture and home decor.
|
|
|
|
8
|
 |
The product is ideal for DIY furniture painting projects, providing a matte creamy brown finish.
|
|
|
|
9
|
 |
The product is ideal for painting and refreshing various furniture, doors, cabinets, and wooden tables.
|
|
|
|
10
|
 |
The product is ideal for painting furniture, home decor, and crafts without the need for wax.
|
|
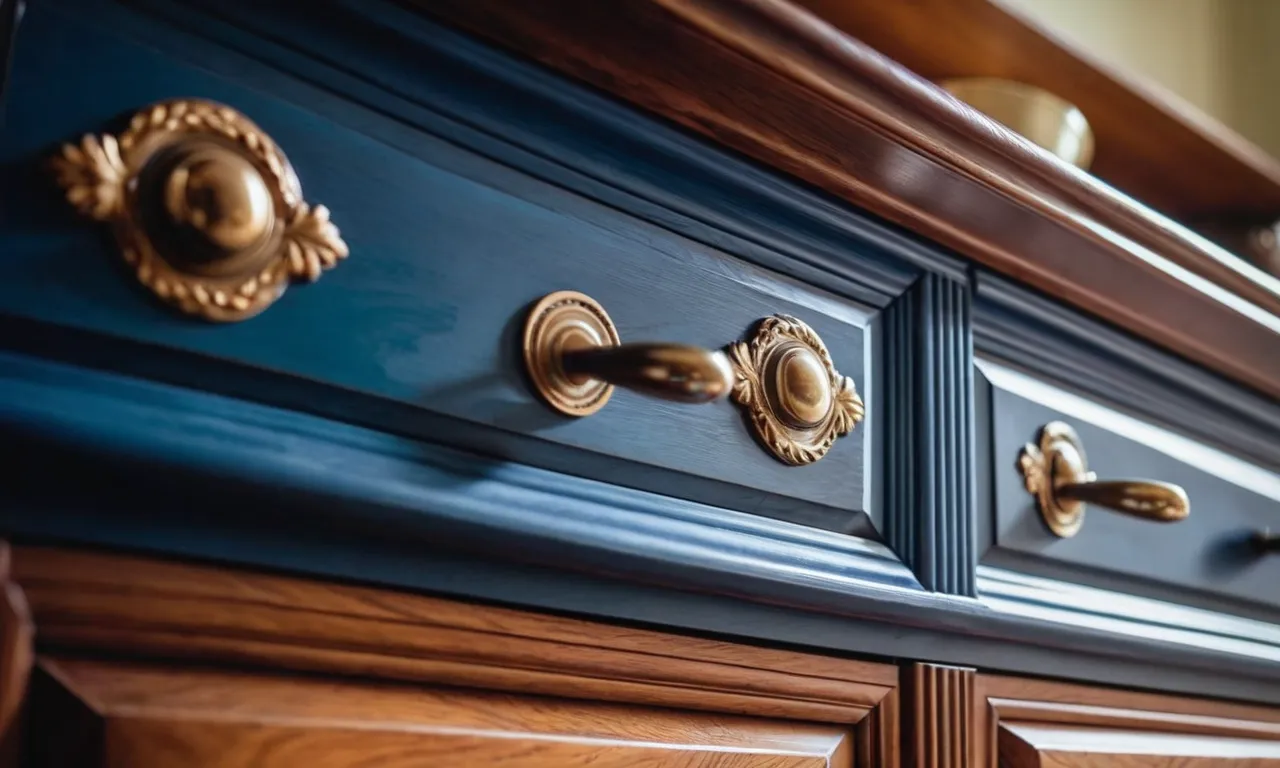
1. Bauhaus Buff: Ultra-Easy Eco-Friendly Chalk Furniture Paint


I have used numerous chalk paints in the past for my furniture and kitchen cabinets, but I must say that this one is by far the best! Recently, I decided to paint the ceramic tile around my fireplace as I wasn't satisfied with the existing beige color. Given the various patterns and colors in my living room, replacing the tile was proving to be a challenge. However, this paint came to the rescue and I couldn't be happier with the outcome! I applied two coats, and the paint dried quickly and provided excellent coverage. I opted for the Cartouche Green color in the 32 oz size, and I still have a significant amount of paint left even after completing the project. The pictures may make it appear gray, but it is actually a lovely sage green shade, which was exactly what I was aiming for. I plan to add a wood floating mantle, which I believe will complement this paint color beautifully. Trust me, you won't be disappointed with this paint!
In addition to its impressive performance on the tile, I also used this paint on the top and inner part of a hutch. With just two coats on the top and one coat on the inner part, I barely made a dent in the 32 oz can. The paint dried quickly, allowing me to finish one section while the other was already dry and ready for the second coat. I would definitely purchase this brand again, and it's always a bonus to support a small business!
Although I had never refinished furniture before, this paint made the process incredibly easy for me. I didn't even have to sand the dresser beforehand – I simply dove right in with the paint, and the end result was adorable. I did have a bit of a learning curve to prevent build-up, but I attribute that to my lack of experience rather than any fault of the paint. The low odor and smooth application of this paint were impressive, and I finished off the project with a clear wax for added protection. I couldn't be happier with the outcome, and I have attached before and after pictures for reference.
When I first heard about "game changer" paints that are all-in-one, I assumed they would come with a hefty price tag and involve a tedious search online or a trip to a chic boutique. However, after conducting some research, I took a chance on this particular all-in-one paint, and I am beyond thrilled with the results. Dean, the seller, was incredibly helpful with my "tester" piece, and the entire process was seamless. After washing and drying the piece, I applied two coats of paint without any brush marks, and I ended up with a perfectly painted treasure for my home.
Next, I plan to tackle two identical living room tables that have previously been chalk painted, and I will update with pictures once they are completed. From now on, this paint will be my go-to choice for all my painting projects. The color selection is perfect, and the fact that it can be conveniently shipped through Amazon is an added bonus.
2. Antique White Chalk Paint Set: No Sanding, No Priming


I recently had the opportunity to try out a paint for my Ikea Billy shelf, as I wanted to change the color to match my new decor. In the past, I had tried using chalk paint on a different piece of furniture with water stains, but it didn't provide the coverage I was looking for. So, this time, I decided to visit a paint store and seek their recommendations. Surprisingly, they did not suggest chalk paint and instead recommended a synthetic paint.
After several coats, I was still not achieving the desired finish. There were roller marks and it was overall a messy job, despite trying different types of rollers. I was almost ready to give up and throw the shelf away, considering the amount of money I had already spent on paint, rollers, sandpaper, and other supplies, which was almost the same as the cost of the shelf itself.
That's when I came across this paint on Amazon. Although it wasn't the most expensive option, I decided to give it a try and give my shelf one last chance. And boy, am I glad I did!
The finish is absolutely amazing, exactly what I had envisioned from the beginning. The paint provides sufficient coverage with just one coat, which was a pleasant surprise. I highly recommend it.
I was a bit disappointed with the brush that came with the paint, as it absorbed a lot of paint with each stroke. So, I opted to use a roller instead, and the results were fantastic (even though they were still drying at the time of writing this review).
I want to note that this was my first time painting furniture, and I didn't sand it beforehand. However, I noticed that while the paint covered well, it would sometimes come off with small scratches, revealing the original color. To address this issue, I purchased furniture varnish and applied two coats. This solution has made the new color more resistant to scratches, and I'm pleased with the outcome.
3. Jolie Espresso Matte Paint – Transform Furniture & Decor!


I recently had the opportunity to try out this chalk paint and I must say, I was thoroughly impressed. Having previously used the Annie Sloan line, I was curious to see how this brand would compare. The coverage of this paint is excellent, and although I ended up doing three coats to achieve the rich color I desired, I could have easily gotten away with just two if I had been more careful during my first pass.
One aspect that stood out to me was how quickly this paint dried. Within just a few hours, I was able to apply another coat, saving me time and allowing me to complete my project in a timely manner. To ensure durability, I followed up with two coats of the same brand's clear wax top, with each coat being allowed to cure for 24 hours. While it's too early to determine its long-term durability, I am confident that this coffee table, which will undoubtedly be put to the test, will hold up well.
The only slight disappointment I had was that the color did not turn out as dark as I had expected based on the description. However, I do love the color it ended up being, and I found that additional coats did not darken the color further, but rather made it richer.
In terms of ease of use, this paint is a dream. It has good coverage and is easy to work with. I recently used the Jolie slate gray paint and black wax to refinish my mom's childhood desk, which is approximately 75 years old. With minimal prep work, including a thorough vacuum, wipe down, and light sanding due to the age of the piece, I was extremely pleased with the results.
Another impressive aspect of this paint is its longevity. I had a table that was previously black, and after applying just two coats of this paint, it looks absolutely stunning. The amount of paint goes a long way, and I still have some left for touch-ups or future projects. I am definitely planning on purchasing more colors in the future.
4. Jolie Matte Paint: Misty Cove – Non-Toxic 4oz Sample
I recently purchased this paint and found it to be perfect for the purpose I needed it for. The consistency of the paint is excellent, allowing for smooth and even application. However, I must note that the color appears darker than expected. The lightest grey shade is more of a medium grey, which was slightly disappointing as I was hoping for a lighter hue. This discrepancy in color made it a bit challenging for me to do touch-ups as I had originally intended. Nonetheless, the quality of the paint is undeniable, and if you are looking for a medium grey shade, this product would be an excellent choice.
5. Nadamoo Chalked Furniture Paint Kit: Black, 35 Oz


I rarely write reviews, but I had to make an exception for this paint. I have been using chalk paint from well-known brands for years, so I was initially skeptical about trying this lesser-known brand. However, after reading the reviews and considering the price, I decided to give it a shot. And I am so glad I did!
Firstly, a little goes a long way with this paint. With just one dip of my brush, I was able to cover the entire top surface of my wide dresser, which is 5ft long. The paint container also comes with a plastic seal top, which is a great feature for quick closure when your hands are busy.
The kit includes a chip-like paint brush that is smooth and works perfectly, although I did experience some minor bristle detachment. There is also a small foam roller that provides great coverage, and multiple sheets of sandpaper, although I didn't need to use them. It would have been better if the sandpaper had been an assortment of different grits, in case I needed to use it. Additionally, the kit includes plastic sheeting to cover surrounding areas while painting. All of this is available for just $35!
I was able to paint two large dressers with two coats each and still have more than half of the container left. The paint has a perfect consistency, provides amazing coverage, and dries quickly, just like chalk paint should. It dries to a matte finish and works well with any wax sealer. Overall, I highly recommend this paint and will continue using this brand as long as I can. My only wish is that there were more color options, but hopefully, they will introduce more in the future.
Now, I understand that not everyone may fully understand what chalk paint is and what it is not. Chalk paint has gained popularity because it can give a rustic, washed-out look to old or worn furniture. It is usually thicker and adheres better than regular paint. One of the advantages of chalk paint is that it eliminates the need for prep work such as sanding or adding primer. However, like any other paint or finish, it is recommended to use a clear top coat to protect it from scratches.
I have had great success with chalk paints in the past, so I decided to try this NADAMOO paint to finish a polished plywood countertop in my kitchen. After just two coats, I achieved complete coverage. I have been using the countertop for washing and preparing dishes without adding the sealer yet, and it has held up well. There was only a minor water ring after leaving a warm cooker of heated water on it for a couple of days. Overall, I am very pleased with the performance of this paint.
Normally, chalk paint can be quite expensive considering that you don't need any primer or sanding. However, this paint is a bargain at its current price, even without any coupons. So far, it has exceeded my expectations and I am extremely satisfied with the results.
6. Eco-Friendly Wood Surface Renovation Paint – Grey Blue


I recently used this paint on my console and I must say, I am extremely satisfied with the results. The application process was a breeze as the paint went on smoothly and effortlessly. It only took two coats to achieve the desired look, and there were no visible brush strokes. The end result is absolutely stunning, and I am in love with the look and feel of the paint. Overall, I am very happy with my purchase.
I purchased the 32oz. blue gray kit and I couldn't be happier. I lightly sanded my chairs and table to prepare the surface, and then proceeded to apply the paint. The brush and roller provided in the kit were of great quality, and the paint went on incredibly smoothly. A little goes a long way with this paint, and I still have a quarter of the paint left after completing my 6 chairs and table. The coverage was excellent, although I ended up using the brush for better coverage on some areas. The paint dried to the touch in just 30 minutes, and there was no strong smell or fumes. I am now considering what else I can paint with the leftover paint. Overall, I am extremely impressed with this paint.
I was initially skeptical about the size of the paint container, as it seemed small when I received it. However, I was pleasantly surprised to find that it was more than enough for my wood dresser, headboard, and jewelry armoire. I had to apply multiple coats, but the paint dried quickly and there was no strong smell. The end result was amazing, and I still have paint left over for future projects. I highly recommend this paint to anyone in need of a high-quality, durable paint that delivers excellent results.
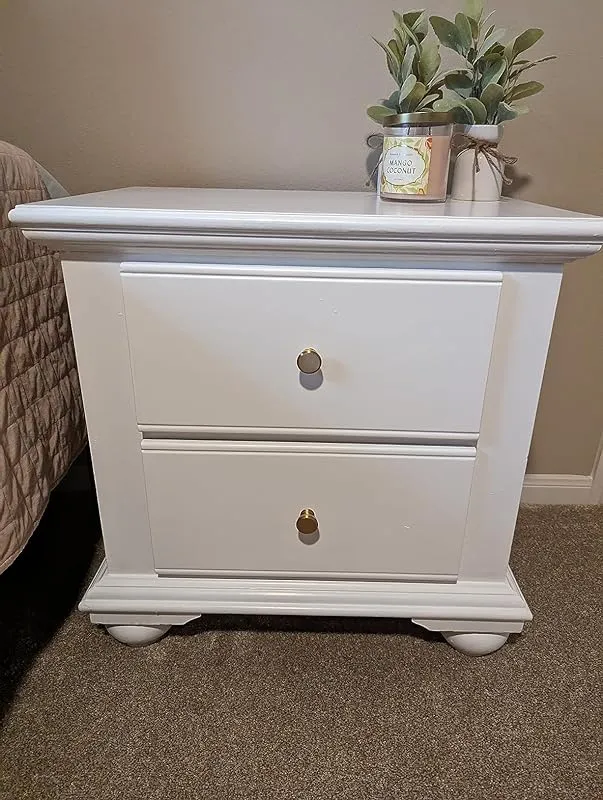
I used this paint to transform my nightstands and it was a simple and easy process. The paint provided a smooth finish, and I was able to complete the project inside my house without making a mess. Although I forgot to take a before photo, the drawers in the photo speak for themselves. Overall, I am very pleased with this paint and would highly recommend it to others.
7. Rust-Oleum 1 Qt Brands 285140 Linen White Chalked Ultra Matte Paint


I recently purchased the Rustoleum chalked paint and I must say, it exceeded my expectations. I was initially hesitant due to mixed reviews regarding the number of coats required, but I needed a paint that could effectively cover a heavily chipped piece of furniture. To my surprise, just one coat of this paint was enough to bring a significant improvement to the piece. However, I decided to apply three coats to achieve a darker grey color, and I was impressed by how smoothly the paint rolled on and how quickly it dried.
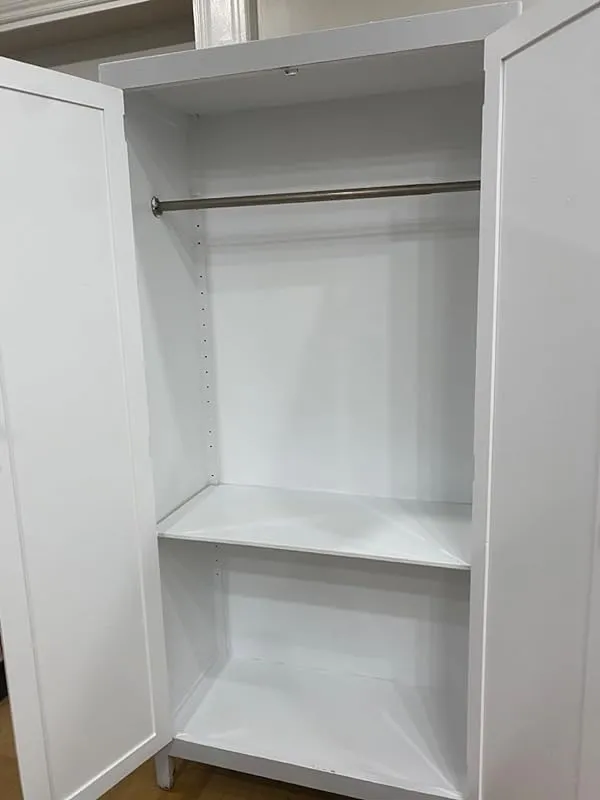
For my project, I used the chalked gray paint for the exterior of a wardrobe, the glossy white paint for the interior, and the black spray paint for the handles. Despite my concerns about the quantity, the 30ml can proved to be more than sufficient for a nearly 6ft wardrobe. In fact, I purchased two cans and still had more than half of the second one left. Overall, I highly recommend this paint for its excellent coverage, ease of application, and impressive results.
Another product from Rustoleum that has left me amazed is their Rustoleum Chalked Paint. I was initially skeptical due to negative reviews of similar products, but the positive feedback for Rustoleum convinced me to give it a try, despite the higher price tag. I am so glad I did! This paint is absolutely amazing.
I have been using it to update the interior of my 12-year-old RV, specifically covering up the unsightly vinyl wall coverings. With just one coat, the paint provided excellent coverage and adhered exceptionally well to the surfaces, even those that regular Kilz paint struggled to stick to. Additionally, the paint is easy to clean and touch up, making it incredibly user-friendly.
I have previously used Rustoleum kitchen cabinet kits with fantastic results, and the Rustoleum Chalked Paint has once again impressed me. In cases where the available colors don't suit my needs, I use the chalked paint as a primer and then apply the regular Rustoleum matte latex paint to achieve the desired outcome. This combination consistently delivers the desired result.
In my years of experience with chalk painting, I have primarily used Annie Sloan or Renaissance Chalk paint. However, when it came to painting my kitchen plank wood counters, I was concerned about the durability of these paints for high-traffic surfaces. Given my positive experiences with other Rustoleum products, I decided to try their Chalked Paint, particularly because it was described as a "true white," which can be challenging to find in the world of chalk paints.
After reading through reviews that consistently mentioned the paint's true white color, I felt confident in my choice. I applied the paint directly in my kitchen, as I am experienced in chalk painting and knew I wouldn't make a mess. However, upon starting to apply the paint, I noticed that it had a noticeable hint of blue, almost like it was tinted. Worried, I switched brushes, but the blue hue was still present. In a panic, I resorted to using a flat white paint I had on hand for one counter, fearing the blue tint.
To my surprise, the Rustoleum Chalked Paint dried completely white and it was an amazing true white shade. I was stunned by how accurate and beautiful the white color turned out to be. I will be using this paint on the other counter as well, as it truly dries white. I was surprised that I didn't come across any reviews mentioning this initial bluish hue, as I can't imagine I was the only one to notice it. Nevertheless, I am extremely pleased with the outcome of my kitchen counters.
8. Dixie Belle Chocolate Chalk Furniture Paint: Create Chic Diy!


I recently tried a DIY furniture painting project using spray water and Mr. Clean spray to help the paint adhere to the faux furniture. I mixed 1/2 water and 1/2 paint and applied it to the furniture, allowing it to dry. Then, I used a fine-grain sandpaper to smooth it down until it was touchably smooth. I repeated these steps two more times, ensuring to use 303 protectant spray after each step to create a protective barrier.
On the final step, I painted the furniture without adding any water. I used a thick mineral paint specifically designed for painting materials like sofas or faux leather chairs. It required painting with good coverage, similar to painting a wall. After letting it dry, I sanded it down again to ensure a smooth finish and sprayed it with 303 protectant spray.
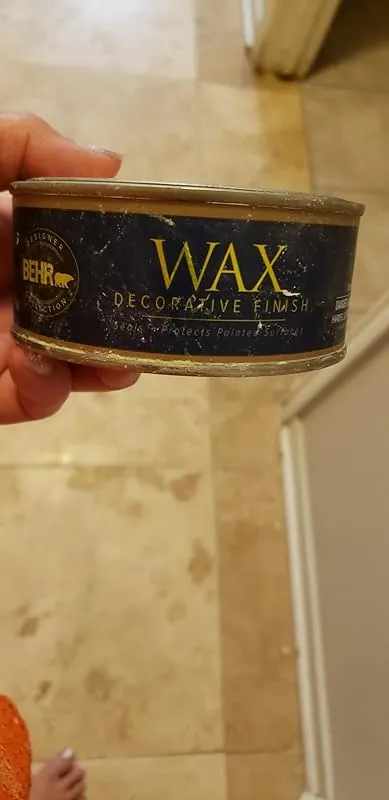
For the cabinets and kitchen furniture, I used Behr chalkboard paint, which I found to be thinner and more affordable. I lightly wiped down the cabinets with Mr. Clean Clean Freak spray to remove grime and grease before applying the paint. I also used Behr wax on the kitchen cabinets, but no wax was required for the faux sofa or chair.
I purchased regular chalkboard paint from Home Depot, where they can mix any color you desire. It is a cheaper option and ideal for kitchen cabinets or furniture. I used it as regular paint without diluting it with water. One can of Behr paint was sufficient for all my cabinets, both inside and out.
I thoroughly enjoyed this painting project, and it was particularly satisfying to see the transformation of the cabinets. The total cost for the cabinets was $25, including the wax, while the chalkboard mineral paint cost $40, along with the 303 protectant spray. No wax was needed for the faux sofa or chair.
9. Furniwood Paint: Ultimate All-In-One Furniture Kit


I recently purchased this paint kit for a cabinet in my upstairs bathroom and I must say, I am extremely pleased with the results. The kit came with all the necessary materials and step-by-step instructions, making the painting process a breeze. The paint itself has a low odor and provided excellent coverage in just one coat. The final result looked near professional and I couldn't be happier. In fact, I am now planning to use this kit for my downstairs bathroom as well.
Additionally, I used this paint to transform a dresser nightstand and the outcome was equally impressive. I added a small amount of flotrol to the paint and used mini foam rollers to apply it. The combination of the additive and the paint eliminated streaking and provided a smooth, store-bought finish. Even after drying for more than a day, the paint proved to be durable and long-lasting.
One of the standout features of this kit is its convenience. Everything is pre-assembled and ready to use, saving you from multiple trips to the store. The 32 oz of water-based paint provided in the kit is of high quality and can be easily washed up when you're finished. I particularly appreciate that I chose the white color, as any leftover paint can be used for future projects.
Not only is this kit perfect for painting furniture, but it is also ideal for crafting. Many of the items in the kit, such as the paint roller, are reusable, adding to its value and convenience. Overall, I am extremely satisfied with this paint kit. The coverage, finish, and ease of use make it a great choice for both small and large painting projects. Whether you're a professional or a DIY enthusiast, I highly recommend giving this kit a try.
10. Eco-Friendly Furniture Paint: All-In-One Chalk Style, No Wax


I recently had the opportunity to try Country Chic Chalk Paint and I must say, it exceeded my expectations. As someone who dislikes painting, I was pleasantly surprised by how easy and forgiving this paint was to work with. Despite my lack of painting skills, the paint went on flawlessly using both a brush and a foam roller. The finish was nice and even, and I couldn't even tell the difference between the areas I painted with a brush and those I painted with a roller.
I chose the driftwood color for my project and I was pleased to see that it matched the advertised color perfectly. However, I did find that it appeared slightly greener in person compared to how it appeared on my phone. The paint dried quickly, allowing me to apply multiple coats. The only drawback I noticed was that the finish was quite chalky, which bothered me personally. I plan on using wax or another product to seal the top in the future.
In terms of durability, I haven't had the chance to clean the painted surface yet, so I can't speak to that aspect. However, based on the easy application and the overall quality of the paint, I am optimistic about its longevity.
Additionally, I purchased the driftwood color specifically and although I didn't take a photo of it before I started scuffing, you can still get a good sense of what the color looks like. The paint has a thick consistency, which worked well for me when I used a roller. I found that scuffing the paint was easy, and depending on the driftwood look you are going for, this paint serves as the perfect base color. In my case, I had a black table and after sanding, painting, and scuffing the surface, I used a black paint I already had at home and added a stain that closely resembled aged oak. The end result was a beautiful driftwood look.
FAQs
Are there any special techniques or tools required for painting furniture without sanding?
Yes, there are special techniques and tools that can be used to paint furniture without sanding. One technique is to use a deglosser or liquid sandpaper. These products help to remove the glossy finish from the furniture's surface, allowing the paint to adhere better.
You can apply the deglosser or liquid sandpaper using a brush or a rag, following the manufacturer's instructions.
Another technique is to use a bonding primer. This type of primer is specifically designed to stick to glossy and smooth surfaces, providing a good base for the paint to adhere to. Apply the bonding primer with a brush or a roller, making sure to cover the entire surface of the furniture.
In terms of tools, you will need a good quality brush or roller to apply the paint. It is also important to have clean, lint-free rags for applying the deglosser or liquid sandpaper and for wiping away any excess primer or paint.
Additionally, using high-quality paint is crucial for achieving a smooth and durable finish. Look for paint specifically formulated for furniture, as it will provide better coverage and durability.
While these techniques and tools can help you paint furniture without sanding, it is important to note that sanding can still be beneficial in certain cases, especially if the furniture has deep scratches or imperfections that need to be smoothed out.
Are there any specific primers or sealers recommended for painting furniture without sanding?
Yes, there are specific primers and sealers that can be used for painting furniture without sanding. One popular option is a bonding primer, which is designed to adhere to various surfaces, including glossy or smooth ones, without the need for sanding.
Bonding primers create a strong bond between the paint and the furniture, ensuring better adhesion and durability.
Another option is a shellac-based primer, like Zinsser BIN, which is known for its excellent adhesion and stain-blocking properties. Shellac primers work well on most surfaces and can be applied without sanding, as they have the ability to grip onto glossy surfaces.
For sealing the painted furniture, you can use a clear topcoat or polyurethane. Water-based polyurethane is a popular choice as it provides a durable and clear protective finish. It is important to choose a product that is specifically formulated for furniture to ensure good adhesion and longevity.
When using these primers and sealers, it is still advisable to clean the furniture thoroughly and remove any loose or peeling paint before applying the primer. Additionally, following the manufacturer's instructions and allowing proper drying time is essential for achieving the best results.
Can I achieve a smooth finish without sanding furniture?
While sanding is often recommended to achieve a smooth finish on furniture, it is possible to achieve a smooth finish without sanding, depending on the condition of the furniture and the desired outcome. Here are a few alternatives to consider:
1. Chemical Stripping: You can use a chemical stripper to remove the old finish or paint from the furniture. This method requires caution and following the instructions carefully. Once the old finish is removed, you can apply a new finish for a smooth look.
2. Paint or Varnish Remover: Similar to chemical stripping, paint or varnish removers can help remove the existing finish without the need for sanding. Again, be sure to follow the instructions and safety precautions.
3. Liquid Sandpaper: Liquid sandpaper is a deglosser that can help remove the gloss from the surface of the furniture, providing better adhesion for a new finish. It can be an alternative to traditional sanding, but it won't remove deep scratches or imperfections.
4. Use a High-Quality Primer: Applying a high-quality primer can help create a smooth surface for the new finish, minimizing the need for sanding. It fills in minor imperfections and creates a uniform base for the final coat.
While these alternatives can help achieve a smooth finish without sanding, keep in mind that sanding may still be necessary for certain situations or to achieve the best results. It's always recommended to assess the condition of the furniture and consult with professionals or experts in the field for specific recommendations.
Can I paint furniture without sanding it first?
Yes, it is possible to paint furniture without sanding it first, but it is generally recommended to sand the surface before painting for better adhesion and a smoother finish. Sanding helps remove any existing finish, roughens up the surface, and creates a better bonding surface for the paint.
However, if you are short on time or the furniture is in good condition with no glossy finish or rough patches, you can use alternative methods to avoid sanding. One option is to use a primer that is specifically designed for adhesion to glossy or difficult surfaces.
This can help the paint adhere better without the need for sanding. Another option is to use a deglossing liquid or a liquid sander, which can dull the surface and create a better bonding surface for paint.
Keep in mind that skipping the sanding process may result in less durable and less professional-looking results. It is always best to follow proper preparation techniques to ensure the longevity and quality of the painted furniture.
Can I paint over glossy or shiny surfaces without sanding?
While it is generally recommended to sand glossy or shiny surfaces before painting, it is possible to paint over them without sanding under certain circumstances. However, there are a few important factors to consider.
Firstly, the type of paint you plan to use is crucial. Using a high-quality bonding primer specifically designed for glossy surfaces can help the new paint adhere properly without sanding. This primer creates a rough surface for the paint to grip onto, ensuring better adhesion.
Secondly, the condition of the existing glossy surface is important. If it is in good condition without any peeling, cracking, or flaking, you may have a better chance of success without sanding. However, if the surface is damaged or in poor condition, sanding becomes more necessary to create a smooth and even base.
Lastly, the type of material you are painting on also matters. Different materials, such as wood, metal, or plastic, may require different approaches. Some surfaces may require sanding to remove any imperfections or to create a better surface for the new paint to adhere to.
In conclusion, while it is possible to paint over glossy surfaces without sanding, it is generally recommended to sand them for better results. Use a bonding primer and assess the condition of the surface to determine the best course of action.
How do I properly prepare furniture for painting without sanding?
While sanding is typically recommended for preparing furniture before painting, there are alternative methods you can try if you want to avoid this step. One option is to use a deglosser or liquid sandpaper, which can effectively remove the glossy finish from the furniture surface without the need for sanding.
This product is applied with a cloth or brush and works by chemically etching the surface, creating a suitable base for paint adhesion. Another technique you can consider is using a bonding primer designed specifically for smooth and glossy surfaces.
This primer helps create a strong bond between the furniture and the paint, eliminating the need for sanding. However, it's important to note that these alternatives may not be as effective as sanding in terms of ensuring long-lasting paint adhesion.
Sanding provides a better surface for the paint to cling to, so if possible, it's generally recommended to include this step in your furniture preparation process.
How long does the paint job last on furniture painted without sanding?
The longevity of a paint job on furniture that is painted without sanding can vary depending on several factors. While sanding is typically recommended to create a smooth surface for better paint adhesion, there are alternative methods that can be used to achieve satisfactory results without sanding.
When painting furniture without sanding, it is crucial to properly clean the surface and use a primer specifically designed for adhering to glossy or non-porous surfaces. This will help the paint bond effectively to the furniture.
However, it's important to note that skipping the sanding step can potentially reduce the durability of the paint job. Without the roughened surface that sanding provides, the paint may be more prone to chipping or peeling over time, especially in high-contact areas.
To enhance the longevity of the paint job, it is advisable to use high-quality paint and apply multiple thin coats, allowing sufficient drying time between each layer. Additionally, using a clear protective topcoat can provide an extra layer of durability and help safeguard the painted furniture against wear and tear.
While it is difficult to provide an exact timeframe for how long the paint job will last without sanding, following these tips can help maximize its longevity.
What are some alternatives to sanding furniture before painting?
There are a few alternatives to sanding furniture before painting, depending on the condition of the piece and the desired outcome. One option is to use a liquid deglosser or chemical stripper to remove the existing finish.
These products can effectively remove varnish, paint, or other coatings, allowing you to paint directly over the surface. Another alternative is to use a bonding primer specifically designed to adhere to glossy or smooth surfaces.
This type of primer helps create a better bond between the paint and the furniture, even without sanding. Additionally, you could consider using a chalk paint or milk paint, which are popular for their ability to adhere well to various surfaces, including lightly sanded or unsanded furniture.
However, it's important to note that while these alternatives may save you time and effort, proper surface preparation, including sanding, often yields the best results.
What are the advantages and disadvantages of painting furniture without sanding?
Painting furniture without sanding can have both advantages and disadvantages.
Advantages:
1. Time-saving: Skipping the sanding step can save a significant amount of time, especially if you have multiple pieces of furniture to paint.
2. Convenience: Sanding can be messy and requires additional tools. By avoiding sanding, you eliminate the need for sandpaper, sanding blocks, and other equipment.
3. Smooth finish: Some types of paint, such as chalk paint, adhere well to surfaces without the need for sanding. This can result in a smooth finish without the hassle of sanding away imperfections.
Disadvantages:
1. Lack of adhesion: Without sanding, the paint may not adhere as well to the furniture surface. This can lead to chipping, peeling, or uneven coverage over time.
2. Surface imperfections: Sanding helps to smooth out any imperfections on the furniture, such as scratches or dents. Without sanding, these flaws may still be visible even after painting.
3. Limited paint options: Certain types of paint may require a sanded surface to properly adhere. By skipping the sanding step, you may limit your choice of paint types and finishes.
If you choose to paint furniture without sanding, consider using a primer specifically designed for adhesion to improve paint durability and finish. Additionally, thoroughly clean the furniture surface to remove any dirt or grease before painting.
What types of paint are suitable for painting furniture without sanding?
When it comes to painting furniture without sanding, there are a few types of paint that can be suitable for this task. One option is chalk paint, which is known for its ability to adhere well to various surfaces without the need for extensive sanding.
Chalk paint typically has a matte finish and can give furniture a vintage or shabby chic look. Another option is milk paint, which is also known for its adhesive properties and can create a distressed or aged appearance.
Additionally, there are some latex paints that are designed specifically for use on furniture and do not require sanding. These paints often have a self-priming formula that allows them to adhere well to surfaces without the need for sanding beforehand.
It's important to follow the manufacturer's instructions and recommendations when using any paint, including those that claim to require no sanding.