I Tested And Reviewed 10 Best Paint For Kitchen Cabinets Without Sanding (2023)
Choosing the best paint for kitchen cabinets without sanding can seem like a daunting task. With so many options on the market, how do you know which one is right for your needs? When making this important decision, there are a few key factors to consider.
First, examine the condition of your existing cabinet surfaces. Are they glossy or do they have a lot of grime built up? The amount of preparation needed will help determine the type of paint that will adhere best. If surfaces are dirty or greasy, a bonding primer may be required so the paint can grab on evenly.
Next, think about the look you're hoping to achieve. Are you going for a smooth, factory-like finish or more of a distressed, worn-in style? The amount of sheen you want will guide you towards paints labeled satin, semi-gloss, or high gloss. A more matte paint can create a timeworn look.
It's also important to consider the color. Do you want something bold and dramatic or a more subtle, neutral shade? Have samples mixed so you can visualize test swatches on the cabinets. This allows you to see how the tone interacts with your existing kitchen décor.
Finally, don't forget about durability. Kitchens can be a tough environment for painted finishes. Look for acrylic latex paints that offer maximum adhesion, are scrubbable, and resist moisture, grease, and stains. The more resilient the coating, the better it will hold up over time.
Doing the prep work will help you select a top-quality paint that transforms your cabinets without the need for backbreaking sanding. With a little time and thought, you'll achieve a fresh new look that makes your kitchen shine.
10 Best Paint For Kitchen Cabinets Without Sanding
| # | Product Image | Product Name | Product Notes | Check Price |
|---|---|---|---|---|
|
1
|
 |
The product is ideal for refinishing cabinets, doors, tables, and dressers with its water-based, non-toxic, and odorless qualities.
|
|
|
|
2
|
 |
The product is ideal for painting cabinets, furniture, and other surfaces with a durable finish, eliminating the need for sanding.
|
|
|
|
3
|
 |
The product is ideal for renovating and painting various wooden surfaces such as furniture, cabinets, countertops, doors, and tables.
|
|
|
|
4
|
 |
The product is ideal for painting furniture, cabinets, front doors, walls, bathrooms, kitchens, and crafts on both interior and exterior surfaces.
|
|
|
|
5
|
 |
The product is ideal for providing a protective and durable finish on cabinets or other painted surfaces.
|
|
|
|
6
|
 |
The product is ideal for painting cabinets with a durable and semi-gloss finish.
|
|
|
|
7
|
 |
The product is ideal for transforming small cabinets to a pure white finish.
|
|
|
|
8
|
 |
The product is ideal for transforming and updating cabinets with a fresh new look.
|
|
|
|
9
|
 |
The product is ideal for refinishing cabinets, countertops, furniture, and doors with a matte finish without sanding.
|
|
|
|
10
|
 |
The product is ideal for transforming furniture or other surfaces with a smooth and durable milk paint finish.
|
|
1. Revivepro Furniture Paint: Easy Diy Refinishing – Anthracite Gray


I am extremely satisfied with this paint kit. It provided everything I needed to complete my project, and the additional sand paper I purchased ensured that I could properly prepare my dresser. The final result exceeded my expectations, and I was so pleased with the outcome that I purchased more of this paint for future projects.
Upon purchasing this kit, I was pleasantly surprised to find that it included sand paper, a roller, touch up brush, drop cloth, and gloves, in addition to the paint itself. This comprehensive kit made the process of repainting my thrift store nightstand seamless and hassle-free. The paint itself is of excellent quality, drying quickly and evenly. This product has exceeded my expectations to such an extent that I felt compelled to write this review, despite not usually being one to do so. I highly recommend this paint kit and would definitely purchase it again in the future.
I was delighted with this kit as it contained everything I needed to complete my project, and I even had some paint left over. It was my very first DIY project, and I found this paint incredibly easy to use. The utensils provided in the kit were sufficient, with the exception of a floor covering, which I had to purchase separately. Despite initially thinking that I would use up all the paint, I only required two coats, which used up a little more than a quarter of the can. As a result, I now have enough paint for another project. I absolutely love the finished look!
I decided to use this paint on our dull, white cabinet in the laundry room, and I am thrilled with the results. The cabinet now perfectly complements the aesthetic of our house. In fact, I am so impressed with this paint that I intend to purchase more to redo the cabinets over the washer and dryer. The value and quality of this paint are truly exceptional.
2. Thistle Gray Purple Paint: Revitalize Furniture Effortlessly!


I recently tried the Abbey Chalk Paint from Heritage and I must say, I am thoroughly impressed. As someone who is not the best painter, I was pleasantly surprised by the results I achieved with this product.
My husband, who is a builder, is usually critical of my painting skills, but even he had to admit that this was the best paint job I have ever done. The chalk paint gave a smooth and almost sprayed-on finish, making my vanity look brand new. The Abbey color, a dark greige, perfectly complemented our master bathroom decor.
One thing to note is that my vanity had a non-porous surface, which made it a bit challenging to cover. I needed about four coats to achieve the desired result. However, I also painted a small wooden item with the same paint, and it looked great with just one coat. So, the number of coats required might depend on the surface material.
Clean-up was a breeze, even for someone like me who was not exactly careful with the painting process. The paint easily wiped off the white tile and walls without leaving any stains. It also dried quickly, which allowed me to continue with my project without any delays.
The only downside I experienced was that the paint was prone to chipping in spots, but I attribute this to the non-porous surface of my vanity rather than the quality of the paint itself. To protect the finish, I applied three coats of General Finishes flat top coat, which is highly recommended for chalk paint. This extra step ensured that my paint job stayed intact and looked as good as new.
My builder husband, who usually prefers higher-end products, was so impressed with the results that he has decided to use chalk paint on our sleigh bed and bureaus. He believes that his skills will take the finish to the next level. While I still plan to buy a new set eventually, at least our old furniture will match our newly remodeled master bedroom until then.
If you're considering trying chalk paint, I highly recommend Heritage's Abbey Chalk Paint. It provided excellent coverage and a smooth finish. Compared to other brands, I found it to be more user-friendly with fewer steps involved. Additionally, Heritage offers a wide range of examples and inspiration on their website, making it easier to get started on your projects.
3. Renewx Wood Furniture Paint: All-In-One, 33 Oz, Tools Included


The paint in this set is absolutely beautiful, and the inclusion of a paint brush is a great bonus. The hardener additive really takes this paint to the next level, making it much better than your average paint. I am definitely planning on ordering more for my future projects.
The application of this paint was incredibly smooth, just like butter. Personally, I found the color to be a bit too bright for my taste, but I was able to improvise by mixing it with black to create a darker shade, which turned out pretty good. I was pleasantly surprised to find that the set included all the necessary tools for painting, although I had already purchased them separately. Despite that, I still think it was a good price considering all that was included. The application process was easy and I didn't have to do multiple layers like I initially expected.
I used this paint set to revive an old wooden dresser for my daughter. After cleaning the dresser with a degreaser and allowing it to dry for 15 minutes, I applied the paint. I was delighted with the result and realized that there was no need to throw away old furniture when you have a product like this. To add a touch of sparkle, I used pink spray glitter for the knobs and a clear glitter spray for the final coat. Although I believe I could have done a better job with more time, I was able to complete this project in the morning as my daughter had friends coming over the next day.
This paint set is incredibly easy to use and is great for fixing up damaged surfaces. It has made my life so much easier, and I appreciate the high quality of the product considering its reasonable price.
I used this paint to transform an old cherrywood fireplace into a white one. Two coats of this paint were all it took to cover the cherrywood stain, which tends to rise to the surface. In other areas of my house where I have the same cherrywood, it usually takes three or four coats to achieve the desired coverage. While sanding can prevent this issue, I didn't have the time for it.
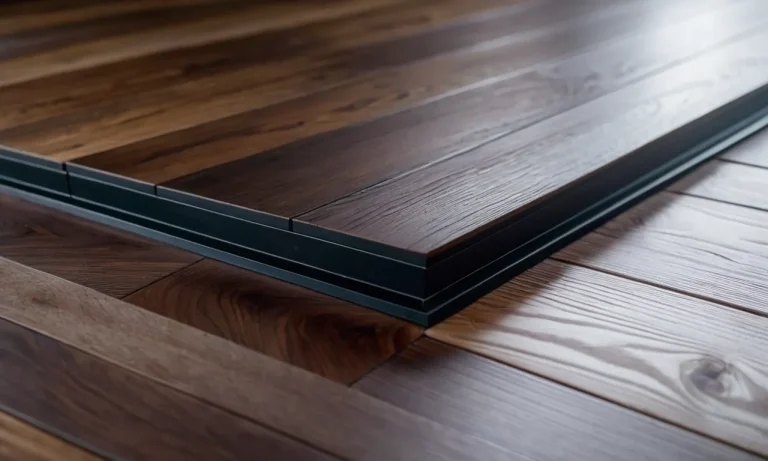
4. Durable All-In-One Paint For Furniture, Cabinets, Doors, Walls


I recently used this paint in the black satin finish to transform an old wardrobe, and I must say, I am absolutely thrilled with the results. The paint provided excellent coverage, and even though I opted for the larger can, I was able to complete multiple furniture pieces with plenty of paint left over. A little really goes a long way!
Before applying the paint, I made sure to thoroughly clean and degrease the surface using a baking soda spray cleaner. Since the wardrobe had a highly varnished surface, I lightly sanded it with a soft sanding block before wiping it down and allowing it to dry overnight. This ensured that the paint adhered properly.
I found that using brushes and mini/skinny rollers worked best for me, as the brush strokes dried out nicely. There was no need to dilute the paint, and there was no unpleasant smell either. The consistency of the paint is thick, and it dries quickly. It's important to work fast and avoid going back over spots that may appear thin, as this can cause the paint to pull up. If touch-ups are necessary, wait until the paint is completely dry before applying additional coats.
The drying time is impressively fast, but I erred on the side of caution and let all the pieces sit overnight before reinstalling the hardware. This ensured that the paint was fully cured and ready for use.
I am so pleased with the outcome of my project that I will definitely be purchasing this paint again in different colors for future furniture makeovers. The quality is fantastic, and the ease of use makes it a joy to work with. I highly recommend this paint to anyone looking to transform their furniture with minimal effort and stunning results.
5. Nuvo Cabinet Acrylic Paint Topcoat, 31 Fl Oz (Pack Of 1), Quart


I recently used the Nuvo Cabinet paints to transform my entire kitchen, and I must say, I am extremely satisfied with the results. I opted for the Oxford Blue shade for the base cabinets and Titanium Infusion for the wall cabinets. The online video instructions provided by Nuvo were incredibly helpful, and I was able to complete the entire project in just four days, including the application of the clear coat.
Speaking of the clear coat, while it is not necessary, I highly recommend applying it as it adds a lovely sheen to the cabinets, making them easier to clean. The application process was a breeze, and although I had to apply three coats of paint to achieve the desired finish, the end result looks incredibly professional. Additionally, I decided to add a top coat for extra shine and protection, and I am pleased with how it turned out.
Midway through my cabinet painting project, I realized that some of the paint on the first half of my cabinets was wearing down due to high use. After extensive research, I came across this protectant from Nuvo. I was initially concerned about it yellowing over time since I painted my cabinets white, but I discovered that this product was a great option. Some reviews mentioned a milky tint that could slightly alter the colors underneath, but since I was painting white, it didn't pose a problem. I immediately applied the protectant to the second half of my cabinets, and so far, they look fantastic and appear to be well protected.
The application process for the protectant was incredibly easy, just like the paint. I also applied a clear coat after two coats of paint, and the final outcome was truly impressive. The wood finish was transformed, and I couldn't be happier with the end result. I wish I had taken before pictures to showcase the dramatic change.
As for the application method, I decided to spray the paint onto the cabinets, and I am thrilled with how they turned out. The final finish looks professional and has completely rejuvenated the space. I would definitely purchase Nuvo Cabinet paints again. I used two gallons to complete all the cabinets in my RV, and the outcome was well worth it.
6. Cabinet Coat: Semi-Gloss Enamel White Paint Quart


I recently used Insul-X Cabinet Coat paint to repaint my mother-in-law's door, and I must say, it exceeded my expectations. Previously, her walker was scraping paint off the door, but after sanding it down and applying this cabinet paint, we haven't experienced any more scraping or peeling. The paint sticks like glue and has provided a durable finish. It has been weeks since we painted, and the door still looks great. Overall, it's a good product that I would highly recommend.
I also used Insul-X Cabinet Coat for a different project – remaking my buffet into a bathroom vanity. The process involved sanding, applying two coats of restore primer, and then two coats of Insul-X with a foam roller. I absolutely love this coating! It's incredibly easy to use, goes on smoothly, self-levels, and dries fairly quickly. I had previously used it on all the wood trim in my house, so I already knew how durable it is. Now that my vanity is finished, I plan on using it on my wood doors and kitchen cabinets as well. I can't recommend this coating enough!
For my window sills and existing trim, I decided to give Insul-X Cabinet Coat a try, and I was thoroughly impressed with the coverage it provided. It's even better than oil-based paint because it cleans up easily and has no odor. This has become my go-to interior trim paint, and I'll be using it to repaint my closet doors next.
When I needed to touch up my kitchen cabinets, I turned to Insul-X Cabinet Coat. I painted the drawer fronts and areas around the handles, lightly sanding before applying the paint. I was initially worried about the shade of white matching, but it matched perfectly. However, this might vary depending on the color you're working with. I opted for three coats to ensure a durable finish, but two coats would have likely been enough.
In another project, I used Insul-X Cabinet Coat without using deglosser or liquid sandpaper beforehand. I applied 3-4 coats, and the paint dried quickly to a strong, durable finish.
7. Rust-Oleum 263232 Cabinet Transformations, Small Kit, Pure White


I recently had the pleasure of using this amazing product and I must say, it truly is a miracle. Not only did it save me a significant amount of money, but it was also incredibly easy to use.
For those of you who have yellow oak cabinets like I did, here are a few tips that I found helpful during the process. Firstly, when using the deglosser, it's important to not overdo it. Applying too much strength can open up the pores of the wood too much, making it difficult to fill them with paint. Just a little bit of deglosser is sufficient.
Secondly, I highly recommend not skipping the glaze step, even if you're using a dark color like espresso. The glaze really enhances the wood grain and makes the cabinets look even better. I personally used a foam brush for this step instead of rags, as the rags were leaving residues on my doors.
Lastly, I strongly advise against skipping the protective coat. It's surprising to see tips suggesting otherwise. Without a protective coat, the cabinets become difficult to wipe clean as everything sticks to the "raw" paint. I found that using a semi-wet foam brush to retouch any white areas with water made the process easier.
I must say, this product truly transformed my builder oak cabinets into something more modern and pleasing. The kit comes with two quart cans of color coat, but I only used one full can and a small portion of the other, so there's plenty left over for future projects.
A couple of tips I have for using the product is to invest in high-end brushes to avoid any visible brush strokes. I personally used a brand new medium soft Purdy brush for each color coat. Additionally, I would advise against using the supplied Rustoleum top coat as it tends to dry too quickly and can gum up your work and brushes. Instead, I opted for the Minwax polycrylic semi-gloss and applied it with a soft Wooster brush, resulting in a flawless finish without any brush strokes.
8. Nuvo Titanium Infusion All-In-One Cabinet Makeover Kit, 5 Piece Set


I recently used the Nuvo Hearthstone cabinet paint for my kitchen renovation, and I have to say, I am extremely pleased with the results. The color perfectly complements the bright and calm paint I have on my walls, creating a cohesive and elegant look in my kitchen.
Considering its price point, this paint exceeded my expectations in terms of coverage and quality. I used it for both my upper and lower cabinets, and it covered them completely with just one can. However, I did notice that the cabinets I sanded beforehand had a better grip on the paint and were easier to work with during the application process. In hindsight, I would recommend sanding all cabinets before painting to achieve the best results.
To ensure a smooth and efficient painting process, I followed a few helpful tips. First, I unscrewed the bottom cabinet door sets and painted one side of them, allowing for about an hour of drying time. Then, I unscrewed the top cabinet sets and painted the first side, while the bottom set was drying. This alternating process allowed me to work continuously without having to wait for dry time. Additionally, I highly recommend sanding or using TSP to prepare the cabinets, as it ensures better adhesion of the paint. I found that the vinegar/water mix worked well for cleaning the cabinets, but it didn't adhere as well as the sanded ones when it came to making contact with the paint.
When it comes to application tools, the roller that comes with the Nuvo kit works decently. However, it's important not to overload it with paint, especially at the beginning, to avoid bubbles and a "water spot" look once the paint dries. I personally found that using a foam roller designed for cabinets and smooth surfaces worked even better, especially for the top coat. For corners, a brush works fine, but I found that black foam brushes were easier to work with.
In addition to my kitchen cabinets, I also used the Nuvo paint to update a rolling island and an old cabinet I purchased online. The paint adhered well to both surfaces, and now they seamlessly match the rest of my kitchen.
9. Beymatte: Revolutionary All-In-One Paint For Cabinets & More


I am thoroughly impressed with the ease and durability of this paint. Initially, I was a bit skeptical, but it exceeded my expectations by far. Following the instructions, I ensured that the surfaces were properly cleaned and degreased before applying the paint. The thickness of the paint allowed for excellent coverage.
In my home, I used both the White and Pewter colors. The White required 3-4 coats, whereas the Pewter only needed 1-2 coats. Surprisingly, I used significantly less Pewter paint compared to the White. One of the standout features of this paint is its self-leveling properties. The finish is mostly matte with a subtle sheen, as can be seen in the photos.
I took on the ambitious project of painting every cabinet in my house, including the entry built-in, kitchen, bathrooms, and built-in office. I also added hardware to enhance the overall look. Although it was a budget-friendly project, it did require significant effort. However, the end result was absolutely beautiful, and I wouldn't hesitate to do it again, perhaps using a different brand for the White paint, which proved to be a bit more challenging. This could be attributed to the fact that I was covering dark wood.
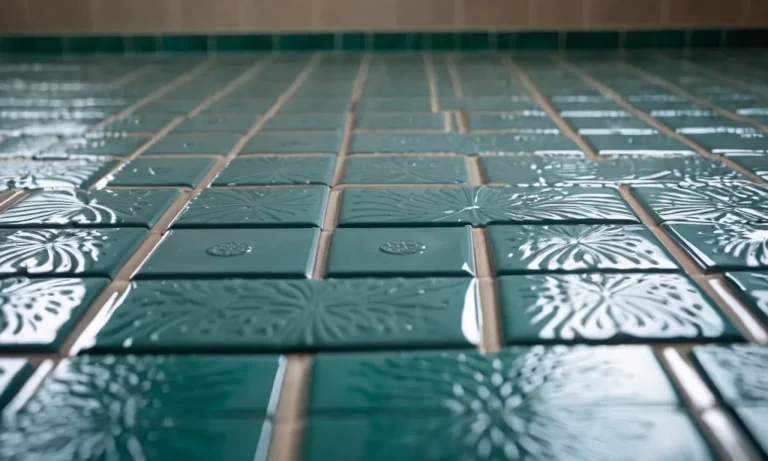
I had seen numerous YouTube videos showcasing the application of Beyond Paint on furniture, cabinets, cupboards, and even tile floors. Encouraged by these videos, I decided to try it on my almond-colored tub surround in the shower. Following the proper application instructions, I used the White color option.
Since this is the only bathroom in my home, I was really hoping that this product would deliver. I used a small brush for the corners and beveled areas and a small foam roller for the larger sections. I applied 2 coats, allowing 24 hours between each application. It is important to apply the paint reasonably lightly. I found the YouTube videos to be immensely helpful in guiding me through the process.
I am delighted with the results. Looking at the before and after photos, you would never guess that the tub surround was painted; it looks brand new. The finish is flawless, without any brush or roller marks. Although it is not a high-gloss finish, it still looks beautiful without the need for a sealant. While a sealant may be considered in the future, it is not necessary at the moment.
I highly recommend this product, despite the slightly higher cost. It saves a tremendous amount of effort by eliminating the need for sanding the entire area. As someone who is no longer able to engage in extensive physical work, the cost was well worth it for me. The product has minimal odor, and clean-up is a breeze with just water.
If you have been contemplating whether or not to try Beyond Paint, I encourage you to give it a go. Chances are, you will fall in love with it, just like I did.
10. Rust-Oleum 331052 Milk Paint Finish, Quart, Eclipse 32 Fl Oz (Pack Of 1)


I recently had the opportunity to use this milk paint for a refinishing project on my old piano and mirror. Initially, I had planned to use chalk paint, but I couldn't find a navy blue shade that matched my preferences. So, I decided to give this milk paint a try, and I'm thrilled with the results.
First and foremost, I found this milk paint very easy to work with. It came in a thin consistency, which is similar to what I usually achieve by adding a few sprays of water to my chalk paint. Although it was thinner, I did need to apply three coats of milk paint to achieve the same opacity as two coats of chalk paint. However, I didn't mind this extra effort because the paint was forgiving. If I noticed any pooling or paint globs, I could easily sand them off before applying the next coat. This was particularly helpful when dealing with the piano's intricate crevasses.
I am extremely pleased with how both the piano and mirror turned out. For the piano, I used five coats of paint, but I could have stopped at three if I wanted to. Since the piano receives heavy use, I wanted to ensure maximum durability. On the other hand, I only needed three coats for the mirror. Surprisingly, I still have a fifth of the can left, which means I have enough paint to refinish a small piece of furniture.
Here are a few tips based on my experience:
1. Don't be alarmed when you open the can and see the bright blue paint. It dries to a deep, gorgeous navy color.
2. If your piece has a shiny surface, sand it lightly with medium-grit sandpaper before painting to create a better grip for the paint.
3. I highly recommend using synthetic brushes for better coverage and ease of application.
4. You can choose to use polycrylic as a top coat, but I personally used Jolie furniture wax (also available on Amazon). It not only provided excellent protection but also enhanced the color and texture, giving the piano and mirror an even richer look. The wax has held up well, and guests are often drawn to touch the piano because of its stunning appearance.
5. If you are painting a piano, please avoid painting the back/soundboard as it may compromise the sound quality.
6. Most importantly, have fun! This milk paint is forgiving and easy to use, allowing you to enjoy the process.
I want to mention that the can of paint was securely shipped without any issues, unlike some experiences others have had. Additionally, I have posted multiple photos to showcase the paint in different lighting conditions, both artificial and natural.
FAQs
Are there any specific preparations required before painting kitchen cabinets without sanding?
Yes, there are some specific preparations required before painting kitchen cabinets without sanding. While sanding is typically recommended to remove the existing finish and create a smooth surface for better paint adhesion, there are alternative methods available.
First, it is essential to clean the cabinets thoroughly. Use a mild detergent or a degreaser to remove any grease, dirt, or grime that might have accumulated on the cabinets over time. This step is crucial as it ensures that the paint adheres properly and provides a long-lasting finish.
Next, it is recommended to use a liquid deglosser or a liquid sanding product. These products can help to roughen up the surface slightly and remove any glossy finish, allowing the paint to adhere better. Follow the manufacturer's instructions carefully when using these products.
After deglossing, it is essential to prime the cabinets. A good quality primer will help the paint to adhere better and provide a smooth, even finish. Choose a primer that is suitable for your cabinet material, such as wood or laminate.
Apply the primer evenly, following the manufacturer's instructions.
Finally, you can proceed with painting the cabinets. Use a high-quality paint suitable for kitchen cabinets, preferably one that is durable and easy to clean. Apply the paint in thin, even coats, allowing each coat to dry completely before applying the next one.
While painting kitchen cabinets without sanding is possible, it is important to note that the results may not be as long-lasting or durable as sanding and priming. Sanding helps in creating a better surface for the paint to adhere to, so if possible, it is still recommended to sand the cabinets before painting for optimal results.
Are there specific types of paint that work better for kitchen cabinets without sanding?
While sanding is typically recommended for preparing kitchen cabinets before painting, there are alternatives that can help achieve good results without sanding. One option is to use a liquid deglosser or a chemical paint stripper.
These products can effectively remove the glossy finish from cabinets, allowing the new paint to adhere properly. It is important to carefully follow the instructions provided by the manufacturer and take necessary safety precautions when using these products.
Another option is to use a bonding primer specifically designed for slick surfaces, such as cabinets. This type of primer helps create a strong bond between the paint and the cabinet surface, even without sanding.
Look for a high-quality bonding primer that is suitable for kitchen cabinets and follow the application instructions closely.
In terms of paint, it is advisable to choose a high-quality, durable paint that is specifically formulated for cabinets or trim. Acrylic latex paints are often recommended for kitchen cabinets due to their durability, easy cleanability, and resistance to moisture and stains.
Semi-gloss or satin finishes are popular choices as they provide a smooth and washable surface.
Remember that proper surface preparation and using the right products are crucial for achieving long-lasting and professional-looking results.
Can I achieve a smooth finish when painting kitchen cabinets without sanding?
While it is generally recommended to sand kitchen cabinets before painting for the best results, there are alternative methods that can help achieve a smooth finish without sanding. One option is to use a deglosser or liquid sander, which can help roughen the surface and allow the paint to adhere better.
These products work by breaking down the existing finish, creating a suitable surface for painting. Another option is to use a high-quality bonding primer, specifically designed to adhere to glossy surfaces. This primer can help create a smooth base for paint application.
Additionally, using a paint sprayer instead of a brush or roller can help achieve a smoother finish. It is important to thoroughly clean the cabinets before applying any products or paint to ensure the best results.
Can I still achieve a professional-looking result when painting kitchen cabinets without sanding?
Yes, it is possible to achieve a professional-looking result when painting kitchen cabinets without sanding, although it may require some additional steps and alternative techniques. Sanding is typically done to remove the existing finish, smooth out any imperfections, and create a surface that promotes adhesion for the new paint.
However, if you choose not to sand, there are alternative methods to ensure a good outcome.
First, thoroughly clean the cabinets to remove any grease, dirt, or grime. Use a degreaser or a mild detergent solution and a sponge or cloth to scrub the surfaces. Rinse with clean water and allow the cabinets to dry completely.
Next, use a high-quality primer specifically designed for adhesion to glossy or smooth surfaces. Apply the primer evenly with a brush or roller, following the manufacturer's instructions. Allow the primer to dry completely.
Once the primer is dry, apply a high-quality paint suitable for cabinets. Use a brush or roller to apply the paint evenly, following the grain of the wood. Apply multiple thin coats for better coverage and durability.
Allow each coat to dry according to the manufacturer's instructions before applying the next one.
To further enhance the durability and professional finish, consider applying a clear topcoat or sealant specifically formulated for cabinets. This will help protect the painted surface from daily wear and tear.
Remember, while it is possible to skip sanding, it is still important to thoroughly clean and prime the cabinets for optimal adhesion and longevity.
How long will the paint job last on kitchen cabinets without sanding?
The longevity of a paint job on kitchen cabinets without sanding can vary depending on several factors. While sanding is typically recommended to create a smooth surface for better paint adhesion, there are alternative methods that can be used to improve the durability of the paint job.
One option is to thoroughly clean and degrease the cabinets before painting. This helps remove any dirt, grease, or residue that may hinder the paint's ability to adhere properly. Additionally, using a high-quality primer specifically designed for slick surfaces can further enhance the paint's durability.
However, it's important to note that even with these measures, the paint job may not last as long as it would with proper sanding. Without sanding, the paint may be more prone to chipping, peeling, or wearing off over time, especially in high-traffic areas like the kitchen.
To ensure the longest-lasting paint job, it is generally recommended to sand the cabinets before painting. This helps create a smoother surface and allows the paint to adhere more effectively, resulting in better durability and longevity.
Is it possible to paint kitchen cabinets without sanding?
Yes, it is possible to paint kitchen cabinets without sanding, although it is generally recommended to sand them before painting for better adhesion and durability. However, if you are looking for a quicker and easier alternative, there are a few steps you can follow.
First, clean the cabinets thoroughly to remove any grease or grime using a mild detergent or a degreaser. Next, lightly scuff the surface with a fine-grit sanding sponge or sandpaper to create a rougher texture for the paint to adhere to.
After that, apply a good quality primer designed for use on cabinets, as it will help the paint bond better. Finally, paint the cabinets with a high-quality paint specifically formulated for kitchen cabinets.
Keep in mind that skipping the sanding step may result in a less durable finish and may require more frequent touch-ups in the long run. Additionally, the success of this method may depend on the condition of the cabinets and the type of paint used.
It is always a good idea to consult with a professional or test a small, inconspicuous area before proceeding with the entire project.
What are some alternative methods to sanding when painting kitchen cabinets?
There are a few alternative methods to sanding when painting kitchen cabinets. One option is to use a liquid deglosser, which helps remove the glossy finish of the cabinets without the need for sanding.
This product is applied with a cloth or sponge and then wiped off, leaving a dull surface that is ready for painting.
Another method is to use a chemical paint stripper. This involves applying the stripper to the cabinets, allowing it to sit for the recommended time, and then scraping off the old paint. While this method does require some manual labor, it can be a more efficient alternative to sanding.
Additionally, you can consider using a bonding primer. This type of primer is specifically designed to adhere to glossy surfaces, allowing the paint to stick without the need for sanding. It creates a strong bond between the cabinet surface and the paint, ensuring a durable finish.
It's important to note that while these alternatives can be effective, they may not work in all situations. It's always a good idea to test the method on a small area of the cabinets before committing to the entire project.
What are some common mistakes to avoid when painting kitchen cabinets without sanding?
When painting kitchen cabinets without sanding, there are a few common mistakes to avoid to ensure a successful outcome:
1. Skipping the cleaning process: It is crucial to thoroughly clean the cabinets before painting. Grease, dirt, and grime can prevent paint from adhering properly. Use a degreaser and a sponge or cloth to clean the surfaces thoroughly.
2. Not using a primer: Using a primer is essential to create a smooth and durable finish. It helps the paint adhere better and prevents stains and discoloration. Choose a primer specifically formulated for kitchen cabinets.
3. Using low-quality paint: Investing in high-quality paint is crucial for achieving a professional-looking finish. Cheap paints may not provide adequate coverage or durability. Look for paints specifically designed for cabinets or trim, which are more resistant to wear and tear.
4. Applying thick coats: It's better to apply multiple thin coats of paint rather than one thick coat. Thick coats can result in drips, uneven coverage, and longer drying times. Allow each coat to dry completely before applying the next.
5. Neglecting proper ventilation: Adequate ventilation is essential when painting kitchen cabinets. Open windows or use fans to ensure proper airflow and prevent strong paint fumes from accumulating.
If you are hesitant about skipping the sanding step, consider using a liquid deglosser or a bonding primer to help the paint adhere better to the surface.
What are the advantages and disadvantages of painting kitchen cabinets without sanding?
Painting kitchen cabinets without sanding has both advantages and disadvantages.
Advantages:
1. Time-saving: Skipping the sanding step can significantly reduce the overall time required to paint the cabinets, making it a quicker process.
2. Less mess: Sanding generates dust and debris, which can be messy and time-consuming to clean up. By avoiding sanding, you can minimize the mess in your kitchen.
3. Easier for beginners: Sanding requires some skill and experience to do correctly. By eliminating this step, novice DIYers may find it easier to paint their cabinets without compromising the quality of the finish.
Disadvantages:
1. Less durability: Sanding helps the paint adhere better to the surface, providing a stronger bond. Without sanding, the paint may not adhere as well and may be more prone to chipping or peeling over time.
2. Poor finish: Sanding helps to smooth out any imperfections on the surface, creating a smoother and more professional-looking finish. Without sanding, the cabinets may have a rougher texture, and any existing dents or scratches may be more noticeable.
3. Limited color options: Not sanding the cabinets may limit your choice of paint colors. Some types of paint require a sanded surface to adhere properly, so you may need to choose from a narrower range of options.
In conclusion, while skipping the sanding step may save time and effort, it can result in a less durable and potentially less appealing finish. It's important to weigh the advantages and disadvantages before deciding whether to paint kitchen cabinets without sanding.
Will the paint adhere properly to the cabinets without sanding?
While it is generally recommended to sand cabinets before painting them, there are alternative methods that can help achieve proper paint adhesion without sanding. One option is to use a deglossing or liquid sanding solution, which helps to remove the glossy finish from the cabinets and create a better surface for the paint to adhere to.
Another option is to use a primer specifically designed to promote adhesion on glossy or smooth surfaces. These primers are formulated to create a bonding layer between the paint and the cabinet surface, ensuring better adherence.
However, it is important to note that while these alternatives can improve paint adhesion, sanding is still considered the most effective method for achieving the best and most durable results.