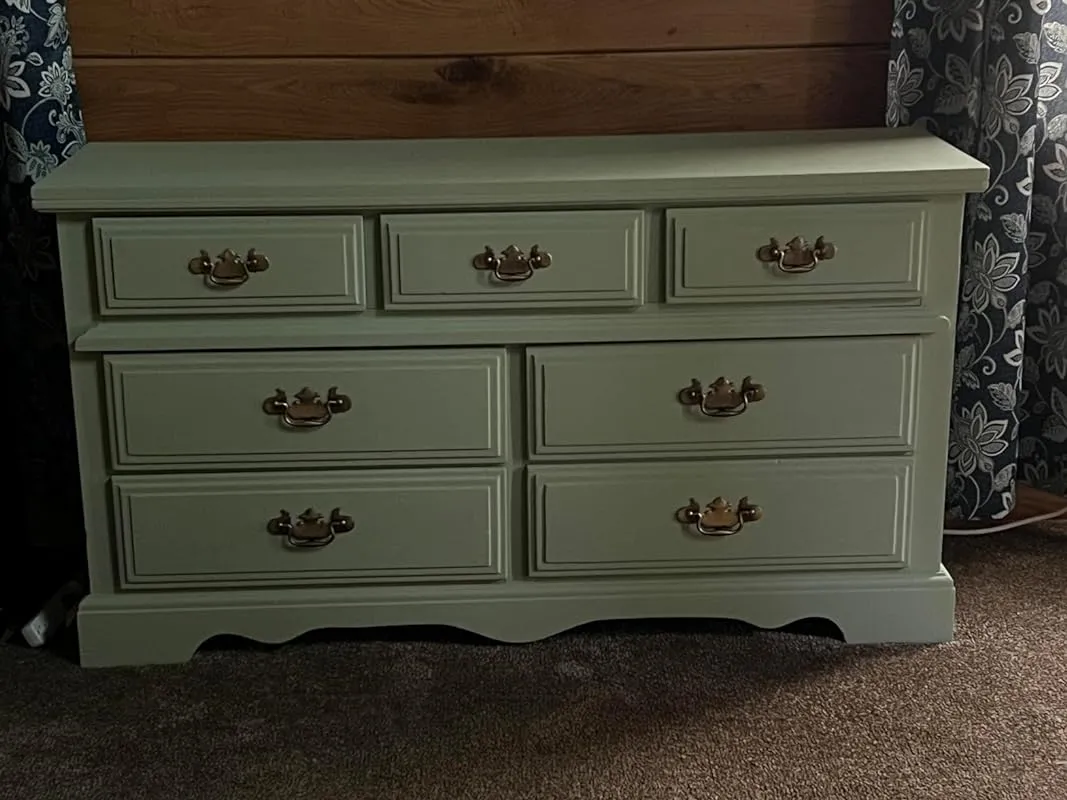
I Tested And Reviewed 10 Best Paint For Outdoor Wood Furniture (2023)
Painting or repainting outdoor wood furniture can seem like a daunting task. With so many factors to consider like weather conditions, types of wood, and paint finish, it's hard to know where to start. The most important step is choosing the right paint that will hold up against the elements and protect your furniture investment.
What should you think about before buying paint for outdoor wood? First, consider your climate. Is it mostly sunny and dry or humid with frequent rainfall? For hot and arid climates, look for paints specifically formulated for durability. In humid conditions, seek out paints that resist mildew. Second, identify the specific wood you'll be painting. Different woods have varying porosity and may require specialized primer and paint. Third, decide the finish you want–glossy, matte, or somewhere in between. Gloss paints tend to be harder and more resilient. Matte finishes obscure imperfections in the wood.
Does it seem overwhelming? Don't worry. With the right prep work, high quality exterior paint, and some elbow grease, you can give your outdoor furniture a fresh new look. Keep reading to learn more about choosing the best paint for your climate and wood furniture. We'll recommend top brands, compare prices and finishes, and make your painting project go smoothly from start to finish. Let's get started!
10 Best Paint For Outdoor Wood Furniture
| # | Product Image | Product Name | Product Notes | Check Price |
|---|---|---|---|---|
|
1
|
 |
The product is ideal for painting a variety of indoor and outdoor surfaces with a beautiful satin espresso brown finish.
|
|
|
|
2
|
 |
The product is ideal for providing a glossy black finish and acting as a primer for indoor and outdoor use.
|
|
|
|
3
|
 |
The product is ideal for painting furniture, home decor, and crafts with an eco-friendly chalk-style paint that does not require wax.
|
|
|
|
4
|
 |
The product is ideal for adding a lasting and protective finish to indoor and outdoor furniture.
|
|
|
|
5
|
 |
The product is ideal for providing a durable and smooth finish to various surfaces with its flat black spray paint.
|
|
|
|
6
|
 |
The product is ideal for painting outdoor furniture to give it a navy blue color.
|
|
|
|
7
|
 |
The product is ideal for painting cabinets and furniture, providing durability and eliminating the need for sanding.
|
|
|
|
8
|
 |
The product is ideal for painting and giving a wood-like finish to furniture, cabinets, doors (interior & exterior), and garage doors.
|
|
|
|
9
|
 |
The product is ideal for refinishing and repurposing furniture, cabinets, glass, metal, tile, wood, and more with a smooth satin finish.
|
|
|
|
10
|
 |
The product is ideal for painting furniture, cabinets, front doors, walls, bathrooms, kitchens, and quick-drying craft projects both inside and outside.
|
|
1. Krylon K02738007 Fusion All-In-One Spray Paint For Indoor/outdoor Use, Satin Espresso Brown


I have tried many different paints for my restoration projects, but I have finally found the perfect one – Krylon Fusion. I can confidently say that I will never buy any other paint again. The gloss finish of this paint is absolutely stunning, resembling actual lacquer. The reflection is so clear that you can even shave in it. The satin finish is equally amazing, adding a touch of elegance to any project. I usually fine sand before painting, so I can't speak for its performance on unsanded surfaces, but it works wonders on prepped surfaces.
The versatility of Krylon Fusion is truly impressive. It adheres beautifully to a wide range of surfaces, including wood, metal, plastic, and more. Whether you're working on indoor furniture, outdoor projects, or DIY crafts, this paint is a true all-in-one solution.
One of the standout features of Krylon Fusion is its long-lasting durability. Once dry, it forms a protective coating that can withstand the elements. It is resistant to chipping, fading, and peeling, ensuring that your projects remain in pristine condition for a long time.
Another great aspect of this spray paint is its quick drying formula. You don't have to wait around for ages for the paint to dry, allowing you to work efficiently. It also allows for multiple coats if needed, so you can achieve the desired finish in no time.
In terms of coverage, a little goes a long way with Krylon Fusion. The 12-ounce can provides ample coverage, making it cost-effective for both small and large projects.
I recently used this paint on my yellowed console, and I am extremely pleased with the results. While it may not be a 100% match, it is still a fantastic formula that adheres well to plastics. It has made a significant improvement in the appearance of my console, and it now looks great next to my other consoles.
2. Krylon Colormaxx Gloss Black Spray Paint & Primer


The Krylon gloss paint is truly a high-quality product that lives up to its promises. With no runs and no drips, it provides excellent coverage and a smooth finish. Unlike cheaper alternatives, this paint + primer combo goes a long way and offers superior coverage.
I recently used this paint to transform a lamp post, and the results were outstanding. The glossy black finish was achieved effortlessly, thanks to the exceptional performance of this paint. One key observation I made was that the thinner, cheaper paints available in the market dry quickly because of their thin consistency, but they lack coverage. In contrast, Krylon's paint is thicker, ensuring better coverage and a more professional look. However, it does take a bit longer to dry, so it's important to plan accordingly if multiple coats are required.
The can recommends waiting for 2 hours between coats, but I found that the paint was touch-dry in just 20 minutes. This quick drying time allows for efficient progress on your project. I highly recommend this Krylon gloss paint for its quality and performance.
On a separate note, when I initially purchased this paint from a local store, I faced difficulties finding it in stock. However, I was relieved to find it available on Amazon at the same price. Interestingly, buying individual cans turned out to be more cost-effective than purchasing a whole box. I appreciate the convenience of Amazon's fast and secure delivery.
3. Eco-Friendly Chalk Style Paint – Furniture/home Decor/crafts


I recently purchased the driftwood paint from Country Chic and I must say, I am highly impressed. The color is exactly what I was looking for and it provided a great base for achieving the driftwood look. The chalk paint is thick and applies smoothly, making it easy to work with. I opted to use a roller instead of a brush and it worked perfectly fine.
I started by scuffing the surface with a wet paper towel, although a sponge would have been a better option. The chalk paint made the scuffing process effortless. Depending on the driftwood look you're aiming for, this paint is the ideal choice. I had a black table that I sanded, painted with the driftwood color, scuffed, and then used a black paint and a stain to achieve the aged oak effect. I'm even considering adding white to the mix for another project!
I must admit, I'm not a fan of painting, but this product made the process much more enjoyable. I had a dresser with ripped decoupage that had been through a lot, and this paint worked wonders. It is thick, but it applies flawlessly and is very forgiving. I used a brush and a foam roller, and the finish turned out smooth and even. The color is exactly as advertised, although it appears slightly greener in person, which is perfect for my needs. It dries quickly, and I applied a couple of coats for optimal coverage.
The only downside is that the finish is quite chalky, which can be bothersome. I plan on getting some wax or a similar product to protect the top surface. However, I must say that this paint has exceeded my expectations so far. I haven't cleaned it yet, so I can't comment on its durability, but it's definitely a win in my book.
I have less-than-ideal cabinets in my kitchen, and I couldn't stand the brown color anymore. On a whim, I decided to paint them and after researching various options, I settled on Country Chic paint. The reviews, coverage, and cost were all factors that influenced my decision.
The application process was simple and surprisingly, I achieved full coverage with just one coat. However, I did apply 2 to 3 coats depending on the desired look. Although my kitchen is not yet complete, the before and after transformation is already remarkable. The color is perfect for my coastal theme and I couldn't be happier with the results.
4. Woodstain+seal: Fast-Dry Walnut Finish For Indoor/outdoor Furniture


I recently purchased the Rosewood stain from Furniture Clinic to restore my scratched-up industrial wood coffee table. The wood had a lighter oak tone, but I wanted to deepen and enrich the color. I found the application process to be incredibly simple and convenient. I just wiped the table down and applied the stain with a dry cloth. The outcome exceeded my expectations! The table now has a much richer and more vibrant color than it originally had. I was never a fan of the light shade, but the Rosewood stain truly transformed the table. I highly recommend this product for anyone looking to enhance the color of their furniture.
One of the things I loved about this stain is that it has minimal smell. Unlike the canned stains, this one is much more pleasant to work with. It's also very easy to use and dries quickly. I appreciate that it doesn't release any toxic fumes that can be hazardous to health or cause combustion. Overall, it's a forgiving stain that I highly recommend.
I had been on the hunt for the perfect water-based stain to recolor my golden oak cabinets. I didn't want a heavily saturated color; all I wanted was a sheer, subtle rosy hue to replace the yellow tint. Even after sanding off the orange stain, the cabinets still had a yellow hue that I despised. Thankfully, this stain came to the rescue! The left side of the cabinets, which had been sanded mostly off, shows the effect of the stain, while the right side showcases the bare wood. The stain is conveniently packaged in a bottle, making it easy to pour onto a rag and wipe onto the surface. It's forgiving and easy to work with, making the entire process a breeze.
The color of the stain is exactly what I was looking for. The pictures I've attached show the wood before and after just one coat of the stain. It dries incredibly quickly, and there's absolutely no odor. I'll definitely be using this brand again for my future projects.
I opted for the Walnut stain, and I'm absolutely thrilled with the result. One bottle was enough for two coats on two small side curios and the large one inside and out. I used sponge brushes to achieve a deeper color, applying two coats of the stain, and it turned out exactly how I wanted it to.
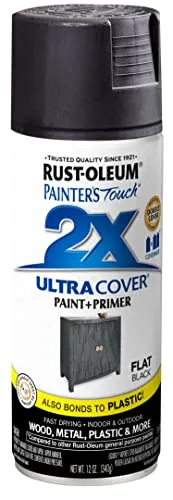
5. Rust-Oleum 249127 Painter's Touch 2x Ultra Cover Spray Paint, 12 Oz, Flat Black


If you're looking for a reliable and versatile spray paint for your DIY projects, look no further than the Rust-Oleum 249124 Painter's Touch 2X Ultra Cover Spray Paint in Gloss Apple Red. This spray paint is a game-changer when it comes to revamping furniture, accessories, or home decor.
One of the standout features of this spray paint is its impressive coverage. The 2X Ultra Cover formula allows for quick and efficient application, ensuring that you can achieve a solid and even coat in just a few passes. This means less time spent on multiple coats and more time enjoying the finished product.
The apple red color is bold and eye-catching, adding a pop of vibrancy to any project. Whether you're updating an old chair or adding a fresh coat of paint to a decorative piece, this spray paint will make a statement.
The ease of use is another advantage of this spray paint. The can's design provides a comfortable grip, allowing for precise control during application. The spray nozzle disperses the paint evenly, reducing the likelihood of drips or uneven coverage. Just make sure to shake the can thoroughly before use to ensure the paint mixes well and provides optimal results.
The gloss finish of this spray paint adds a sleek and polished look to the painted surface. It enhances the color intensity and provides a durable, smooth, and shiny appearance. Plus, the paint dries relatively quickly, allowing you to complete your project efficiently.
In terms of durability, the Painter's Touch 2X Ultra Cover holds up well over time. It provides a protective layer that resists chipping, fading, and peeling, making it suitable for both indoor and outdoor use. However, for surfaces that will be subject to heavy wear or constant exposure to the elements, additional protective measures may be necessary.
While this spray paint offers impressive coverage, it's worth noting that multiple coats may be required for certain surfaces or when covering darker colors. To ensure the best results, it's always recommended to test the paint on a small inconspicuous area before applying it to the entire surface.
6. Wolman 360349 Outdoor Furniture Paint, Quart, Navy Blue, 1 Quarts (Pack Of 1)


The paint was easy to work with, especially when mixed with a bit of water on the first coat. It provided a nice spread and made the application process simple. I only needed to apply one more coat for touch-ups and I was done.
I chose the navy blue color for my rocking chairs, but it turned out to be a lighter shade than expected. However, the color still looked great, as I shared a before-and-after picture of my brown chairs transformed into a pretty blue. The paint arrived undamaged, allowing me to start painting immediately.
This paint is definitely thicker than any other paint I've used before. It provided good coverage in just one coat, even when painting over another dark-colored paint. However, one thing I would change is the finish of the paint. It has a flat sheen, and I personally would have preferred a bit more gloss, like a satin finish. Additionally, I would have liked the blue to be a little darker. Despite these minor preferences, I am still satisfied with my purchase.
I was pleasantly surprised by how quickly I was able to paint a picnic table using this paint. With the help of a mini roller, I completed the task in just 15 minutes. Overall, this paint provided ease of use, good coverage, and quick results.
7. Ultimate Furniture Paint: Iron Gate Black, No Sanding, 32oz


I recently decided to try my hand at chalk painting, specifically using the Abbey color from Heritage Chalk Paint. As someone who is not the best painter, I was pleasantly surprised by the results. Even my builder husband, who is very particular about paint jobs, was impressed.
Firstly, I must mention that the surface I painted on was not ideal for chalk paint. It was a non-porous vanity with a wood look shiny paper surface. Despite this, after degreasing as recommended, it took me about four coats to achieve full coverage. In comparison, when I painted a small wooden item, it only required two coats for perfection. So, the number of coats required may vary depending on the surface.
One of the standout features of this chalk paint is its smooth and almost sprayed-on appearance. It gave my vanity a professional finish that I couldn't take credit for – it was all thanks to the product. The Abbey color, a dark greige, worked perfectly with my master bathroom's weather barnwood and transitional/loft style decor.
Clean up was also a breeze, even when I was being a bit careless with my painting. I didn't have to worry about protecting nearby surfaces as much as I would with latex paint. The paint dried quickly without drying out in the tin.
The only downside I experienced was that the paint was prone to chipping in spots. However, I attribute this more to the non-porous surface of my vanity rather than the paint itself. To rectify this, I applied three coats of General Finishes flat top coat, a highly recommended top coat for chalk paint. This extra step ensured the longevity of my paint job and gave it added protection.
Despite the need for a top coat in my situation, chalk paint typically does not require one. The decision to use a top coat or wax will depend on the surface being painted and personal preference.
Even as someone who works in the construction industry, my builder husband was impressed by the results and has now decided to chalk paint our sleigh bed and bureaus. He believes that he can achieve an even better result, and I'm looking forward to seeing the outcome. It's a great way to update our furniture until we can replace it with new pieces that match our master remodel.
I highly recommend Heritage Chalk Paint for anyone considering diving into chalk painting. The experience with this brand was smooth and enjoyable, with great results. I can't speak for other brands, but Heritage Chalk Paint seems to have a minimal learning curve and fewer steps involved. Their website provides plenty of inspiration with numerous examples to help you get started on your projects. I'm even considering trying their gel stain next, although I do wish they offered more color options in that range. Overall, I'm very pleased with this product and may even join their monthly club for access to new colors. Chalk painting has been a fun and rewarding experience, and I can't wait to tackle more projects with Heritage Chalk Paint.
8. Wood Like Paint Venier – Walnut Finish For Doors


I recently purchased this wood grain paint kit and I must say, I am quite impressed. Initially, I was skeptical about its ability to create a realistic wood grain effect, but after applying two base coats and two stain coats, I was pleasantly surprised. The paint perfectly matched the real cedar stain on my window, with the top of the window being faux wood and the bottom vertical grid being real cedar wood stained. The end result was a seamless match.
The application process was straightforward. I followed the manufacturer's instructions, applying two light coats of the base coat and allowing them to dry for a week. The adhesion on glass was impressive, as I couldn't chip the paint off with my fingernail. However, I would exercise caution and avoid running it through the dishwasher, as it may not come out flawlessly. I'm still amazed at how this paint is able to simulate wood grain, even though I can't quite understand the magic behind it.
I have plans to use this paint on my Adirondack chair, which was made by my son-in-law a couple of years ago. I believe it will give it a new lease on life. Unfortunately, I haven't been able to do so yet due to unfavorable weather conditions. Once I've had the chance to complete the project, I will update my review with any issues or impressive results I come across. In the meantime, I'm giving this product a 5-star rating for its generous container size and clear directions.
I haven't had the chance to use this product on my door yet, but I am looking forward to giving it a wood look. The availability of various colors and the generous amount of paint included in the kit is a plus. Instructions are also provided, ensuring a smooth application process. Once I have used it, I will update my review accordingly.
9. Majic Satin Enamel: Repurpose Furniture, Cabinets & More


I recently had the opportunity to revamp my wood and granite bathroom vanity using this paint, and I must say, I am extremely pleased with the results. The vanity was in terrible condition and replacing it would have been a hassle due to its weight. However, this paint allowed me to give it a new lease on life.
One of the things I loved about this paint is that a single can was more than enough to cover the vanity with four coats. In fact, I could have gotten away with just three coats, but since the bathroom is high traffic and steamy, I wanted to ensure the durability of the paint. The project took two days to complete, mainly due to the eight-hour drying time between coats. Despite this, the process was relatively easy as minimal prep work was required. I simply sanded the rough parts, cleaned the vanity with Windex, lightly sanded all over, and cleaned again with a tack cloth. Then, I proceeded to paint the four coats, starting with a light coat using foam brushes and followed by three coats with a brush and mini roller.
The paint dried well and after the final coat, I was able to use the vanity after eight hours of drying time. I did notice that the paint was fragile for about a week, but it eventually dried to a hard finish. After a month, the finish was fully cured and nearly impossible to dent with a fingernail.
I initially had concerns about using the ivory color to cover the dark wood, but I have no regrets. The paint did an excellent job of hiding the wood grain and filling in any uneven areas. I'm confident that the white color would have provided the same coverage. Additionally, the paint cleaned easily off my brushes and roller with just water and dish soap. The can was sealed with metal tabs, ensuring the freshness and quality of the paint. The paint had a typical latex paint smell, but it was not overwhelming when used indoors.
10. The One Black Matte Paint: Durable & Versatile Solution


I absolutely love this paint! I recently used the black satin shade on an old wardrobe and the results were stunning. I opted for the larger can and was pleasantly surprised by how far it went. In addition to the wardrobe, I was able to paint a vintage vanity table, tri mirror, chair, and still had half the can left. This paint truly goes a long way and provides excellent coverage in just one coat.
To prepare the surface, I cleaned and degreased it with a baking soda spray cleaner. Since the furniture was highly varnished, I lightly sanded it with a soft sanding block and wiped it down again before letting it dry overnight. I found that using brushes and mini/skinny rollers worked well, as the brush strokes dried out nicely. I didn't need to dilute the paint, and there was no unpleasant odor.
One thing to note is that this paint is thick and dries fast, so it's important to work quickly and avoid going back over a spot if it's thin, as it may pull up the paint. I recommend having extra brushes and rollers on hand, as they can become unusable once the paint dries. I allowed all the painted pieces to sit overnight before reattaching the hardware to ensure they were fully dry.
I will definitely be purchasing this paint again in different colors when I tackle more furniture projects. I highly recommend it for its quality, coverage, and ease of use. I absolutely love the end result!
When I received the 250ml tin of paint, I was initially disappointed by its size as I had intended to use it for painting my stairs, skirts, and door frames. However, I was pleasantly surprised by the quality and coverage of this paint. It went a long way and was effortless to apply. It also dried quickly, allowing me to finish the job in a timely manner. Even after touch-ups, I still had 1/3 of the tin left. I was impressed by how far it stretched and how lovely it looked. I highly recommend this paint and will definitely purchase it again in the future.
As someone with no prior painting experience, I was a bit nervous when I decided to paint my room all on my own. However, this paint made the process much easier. I bought two cans of black matt and was surprised by how much coverage I got. With just two cans, I was able to almost complete my entire room, and I only needed another half can to finish the job.
At first, I was concerned that the color looked like a dark navy blue when I opened the can, but it turned out to be a beautiful black once applied. I was able to paint two walls in less than an hour, and no second coat was necessary. The paint dried quickly and didn't have a strong odor like regular paints. I also appreciated that it was an all-in-one paint, saving me time on priming.
Considering I had never painted a wall before, I am proud of how well the project turned out. The paint was easy to work with, and I am pleased with the results. I still have to finish the ceiling, but I am confident it will look just as good. Overall, I highly recommend this paint for its ease of use, coverage, and quick drying time.
FAQs
Are there any special techniques or tools I should use when painting outdoor wood furniture?
When painting outdoor wood furniture, there are a few special techniques and tools that can help ensure a successful and long-lasting finish. Here are some recommendations:
1. Prep the surface: Start by cleaning the furniture thoroughly to remove any dirt, grime, or loose paint. Sand the surface lightly to create a smooth and even base for paint application.
2. Use a primer: Applying a primer specifically formulated for outdoor use is essential. It helps the paint adhere better to the wood, enhances durability, and provides additional protection against weather elements.
3. Choose the right paint: Opt for a high-quality exterior paint that is designed for outdoor applications. Look for paint labeled as weather-resistant, UV-resistant, and water-resistant. Acrylic or oil-based paints are commonly used for outdoor wood furniture.
4. Use a brush or sprayer: Depending on your preference and the size of the furniture, you can either use a brush or a paint sprayer. Brushes provide better control and precision, while sprayers are faster for larger surfaces. Ensure even coverage and smooth strokes while applying the paint.
5. Apply multiple coats: Apply multiple thin coats of paint, allowing each coat to dry completely before adding the next. This helps achieve a more even and durable finish.
6. Seal with a topcoat: To further protect the painted surface, consider applying a clear topcoat or varnish. This adds an extra layer of protection against UV rays, moisture, and general wear and tear.
Remember to work in a well-ventilated area, follow the manufacturer's instructions for drying times, and consider the weather conditions during the painting process.
Are there any specific weather conditions that are best for painting outdoor wood furniture?
Yes, there are specific weather conditions that are best for painting outdoor wood furniture. Ideally, the temperature should be between 50°F (10°C) and 85°F (29°C) for the best results. Avoid painting when it's too hot or too cold, as extreme temperatures can affect the drying process and the quality of the paint finish.
Additionally, it's important to choose a day with low humidity. High humidity can cause moisture to become trapped in the paint, leading to longer drying times and potentially affecting the durability of the finish. Aim for a day when the humidity level is below 70% for optimal results.
Furthermore, it's recommended to paint outdoor wood furniture on a dry day. Moisture or rain can interfere with the adhesion of the paint and cause it to peel or bubble. Therefore, it's best to wait for a day when there is no rain in the forecast and the wood is completely dry before painting.
In summary, the best weather conditions for painting outdoor wood furniture are mild temperatures, low humidity, and a dry day. Following these guidelines will help ensure a smooth and long-lasting paint finish.
Can I repaint outdoor wood furniture if I want to change the color later on?
Yes, you can definitely repaint outdoor wood furniture if you want to change the color later on. Repainting outdoor wood furniture is a great way to give it a fresh new look and extend its lifespan. However, there are a few steps you should follow to ensure a successful paint job.
First, you need to prepare the surface by cleaning the furniture thoroughly. Remove any dirt, dust, or previous paint flakes using a brush or sandpaper. Next, apply a primer to help the new paint adhere better and provide a smooth base.
Choose a primer suitable for outdoor use and follow the manufacturer's instructions.
Once the primer has dried, you can apply your desired color of paint. It's essential to use paint specifically designed for outdoor use to ensure durability and protection against the elements. Apply multiple thin coats of paint, allowing each coat to dry completely before applying the next one.
Finally, once the paint has dried, you may consider applying a clear sealant or varnish to protect the painted surface from fading and moisture damage.
Remember to choose high-quality paint and materials suitable for outdoor use to achieve the best results.
Can I use regular indoor paint on outdoor wood furniture?
Using regular indoor paint on outdoor wood furniture is not recommended. Outdoor furniture is exposed to various weather conditions such as rain, sunlight, and temperature fluctuations, which can cause the paint to deteriorate quickly.
Regular indoor paint is not designed to withstand these elements and may start peeling, fading, or cracking soon after application.
To ensure the longevity and durability of your outdoor wood furniture, it is advisable to use paint specifically formulated for outdoor use. Outdoor paint is designed to be more resistant to weather conditions, UV rays, and moisture.
It typically contains additives that protect against fading, cracking, and peeling. Furthermore, outdoor paint may also have additional features like mildew resistance, which is beneficial for furniture that is constantly exposed to moisture.
If you are unsure about which type of paint to use, it is always a good idea to consult with a professional or the manufacturer of the paint to get their expert advice. Additionally, proper surface preparation and priming are crucial for achieving a long-lasting finish on outdoor wood furniture.
How can I protect painted outdoor wood furniture from the elements?
To protect painted outdoor wood furniture from the elements, there are several steps you can take. Firstly, ensure that the wood is properly prepared before painting. This includes cleaning the surface, sanding any rough areas, and applying a primer suitable for outdoor use.
Once the paint is applied, it's essential to seal the wood with a clear, weather-resistant topcoat. This will provide an extra layer of protection against UV rays, moisture, and other outdoor elements.
Additionally, consider covering the furniture during periods of heavy rain or extreme weather conditions. Regular maintenance is also crucial. Inspect the furniture periodically for any signs of peeling or cracking paint, and touch up those areas promptly.
Finally, avoid placing the furniture in direct sunlight for extended periods, as this can cause the paint to fade. By following these steps, you can significantly prolong the lifespan of your painted outdoor wood furniture.
How do I properly prepare outdoor wood furniture before painting?
To properly prepare outdoor wood furniture before painting, there are a few steps you should follow:
1. Clean the surface: Start by removing any dirt, grime, or mildew from the furniture. You can use a mild detergent mixed with water and scrub the surface gently with a brush. Rinse thoroughly and allow it to dry completely.
2. Sand the wood: Next, use sandpaper to lightly sand the entire surface of the furniture. This helps to smooth out any rough areas and create a better adhesion for the paint. Be sure to sand along the grain of the wood for the best results.
3. Repair any damages: If there are any cracks, holes, or splinters on the furniture, now is the time to repair them. Use a wood filler to fill in the gaps and sand it down once it's dry.
4. Apply a primer: To ensure the paint adheres well and lasts longer, it's recommended to apply a coat of primer. Choose a primer specifically designed for outdoor use and apply it evenly over the entire surface. Follow the manufacturer's instructions for drying time.
5. Paint the furniture: Finally, you can apply the paint of your choice. Opt for a high-quality exterior paint that is suitable for wood and outdoor conditions. Use a paintbrush or a sprayer to apply the paint in thin, even coats, allowing each coat to dry before applying the next.
By following these steps, you can properly prepare your outdoor wood furniture for painting and ensure a long-lasting and beautiful finish.
How long does paint typically last on outdoor wood furniture?
The longevity of paint on outdoor wood furniture can vary depending on various factors such as the quality of the paint, the type of wood, the climate, and the level of maintenance. Generally, a well-applied paint job on outdoor wood furniture can last anywhere from 3 to 5 years.
However, it is important to note that exposure to harsh weather conditions, such as excessive sunlight, heavy rain, or extreme temperatures, can cause the paint to deteriorate more quickly. To extend the lifespan of the paint, it is recommended to regularly clean the furniture, apply a fresh coat of paint when signs of wear and tear appear, and consider using protective finishes such as sealants or varnishes.
Additionally, choosing high-quality paint specifically designed for outdoor use can also contribute to a longer-lasting finish.
Is it necessary to use a primer before painting outdoor wood furniture?
Using a primer before painting outdoor wood furniture is highly recommended. Primers serve multiple purposes and can greatly enhance the longevity and appearance of your paint job.
Firstly, a primer creates a strong bond between the wood surface and the paint, ensuring better adhesion. This helps prevent the paint from peeling or flaking over time, especially when exposed to outdoor elements such as sunlight, moisture, and temperature changes.
Secondly, primers provide a smooth and uniform surface for the paint to adhere to. They help to fill in any imperfections or porous areas in the wood, resulting in a more even and professional-looking finish.
Additionally, primers can act as a barrier, preventing tannins and other substances from bleeding through the paint. This is particularly important when working with certain types of wood that may release natural oils or stains.
In summary, while using a primer is not always mandatory, it is highly recommended for outdoor wood furniture painting projects. It can significantly improve the durability, appearance, and overall quality of the finished piece.
What are the most common mistakes people make when painting outdoor wood furniture?
When painting outdoor wood furniture, there are a few common mistakes that people often make. Firstly, one mistake is not properly preparing the surface before painting. It is important to clean the furniture thoroughly and remove any existing paint or varnish.
Failing to do so can result in poor adhesion and a shorter lifespan for the new paint job.
Another mistake is using the wrong type of paint. Outdoor wood furniture is exposed to various weather conditions, so it is crucial to choose a paint that is specifically designed for exterior use. Look for paints that are labeled as weatherproof or formulated for outdoor applications.
Additionally, not applying enough coats of paint is a common mistake. Outdoor furniture is subjected to a lot of wear and tear, so it is essential to apply multiple coats to ensure durability and protection against the elements.
Lastly, neglecting to seal the paint is a mistake that can lead to premature fading and peeling. Applying a clear sealant or varnish over the painted surface will provide an extra layer of protection and extend the lifespan of the paint job.
To avoid these mistakes, it is advisable to carefully follow the instructions provided by the paint manufacturer and take the time to properly prepare and protect the surface before painting.
What type of paint is best for outdoor wood furniture?
When it comes to painting outdoor wood furniture, it is essential to choose a paint that can withstand the elements and provide long-lasting protection. The best type of paint for outdoor wood furniture is an exterior-grade acrylic paint.
Acrylic paints are known for their durability, resistance to fading, and ability to adhere well to various surfaces, including wood.
Before applying the paint, it is crucial to properly prepare the wood surface by cleaning it thoroughly and sanding any rough or uneven areas. This will ensure better paint adhesion and a smoother finish.
Additionally, it is advisable to apply a primer specifically designed for outdoor use to further enhance the paint's durability and longevity.
When selecting the color, opt for lighter shades as they tend to reflect sunlight and prevent the furniture from heating up excessively. It's also recommended to choose a paint with UV protection to prevent fading caused by sun exposure.
Ultimately, using an exterior-grade acrylic paint, properly preparing the wood surface, and applying a primer will help ensure that your outdoor wood furniture remains protected and looking great for years to come.