I Tested And Reviewed 7 Best Paint For Walls And Ceilings (2023)
Choosing the best paint for your walls and ceilings can seem like a daunting task with so many options available. Before making a purchase, it's important to consider the finish, sheen, quality, color, and special features you need to match your goals and style. The right interior paint will refresh and update the look of any room while also withstanding the wear and tear of high traffic areas.
What is your main priority – touchups and coverage, durability, or aesthetics? Do you need stain blocking abilities or antimicrobial properties? Are you looking for vapor permeable paint that allows moisture to pass through? Does the space require easy clean up and washability? Answering questions like these will help narrow your selections.
Additionally, think about the different sheens available and which would work best for the walls versus ceilings in a given room. A matte or eggshell finish often works well for walls in main living spaces while a satin or semi-gloss may be preferred for kitchens, baths, and kids’ rooms. Ceilings typically look best with flat or matte paints to avoid any unsightly shiny spots drawing the eye.
Don't forget about coordinating trim, doors, and accent walls. Be sure to get color samples and test swatches before fully committing to a color palette. With some forethought and smart preparation, you'll end up with interior paints that check all your boxes for both form and function. Let the research begin!
7 Best Paint For Walls And Ceilings
| # | Product Image | Product Name | Product Notes | Check Price |
|---|---|---|---|---|
|
1
|
 |
The product is ideal for painting and brightening up ceilings with its color-changing acrylic formula.
|
|
|
|
2
|
 |
The product is ideal for repairing textured surfaces like drywall, walls, ceilings, and can be used for DIY painting.
|
|
|
|
3
|
 |
The product is ideal for DIY painting projects, specifically for patching and repairing drywall or adding texture to ceilings and walls.
|
|
|
|
4
|
 |
The product is ideal for extending the reach of paint brushes or rollers for painting high ceilings, walls, trim, and corners.
|
|
|
|
5
|
 |
The product is ideal for cleaning walls, ceilings, and baseboards easily and quickly using an extendable and washable tool.
|
|
|
|
6
|
 |
The product is ideal for creating textured finishes on walls and ceilings, such as orange peel and knockdown textures.
|
|
|
|
7
|
 |
The product is ideal for adding a sparkle effect to water-based emulsion paints on walls and ceilings.
|
|
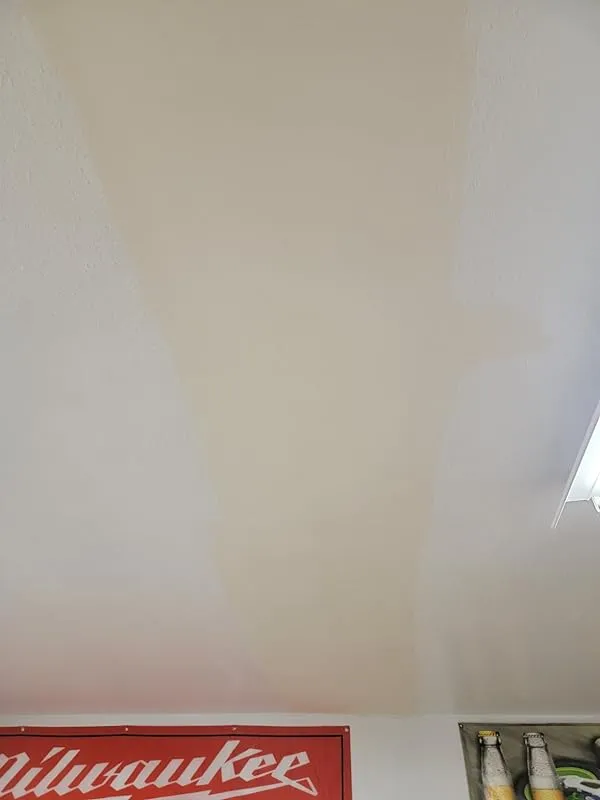
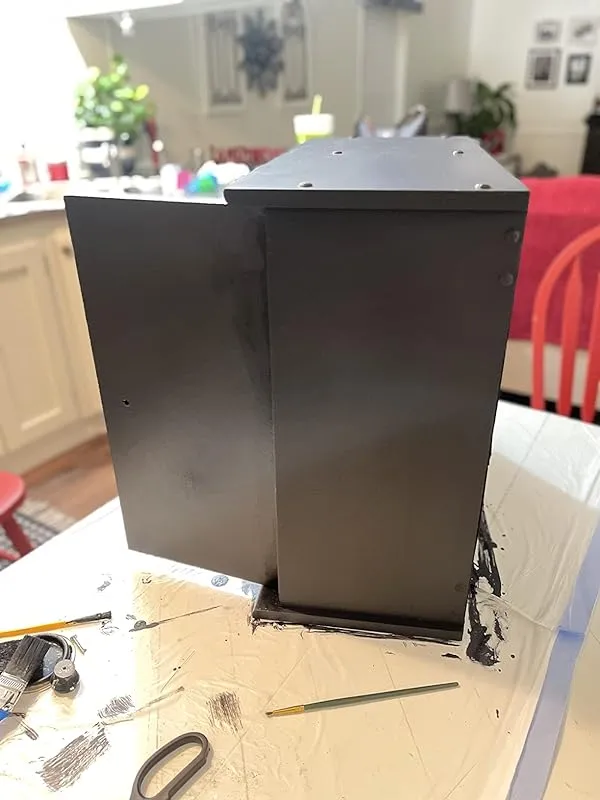
1. Insl-X Color-Changing Acrylic Ceiling Paint, White, 1 Gallon, 128 Fl Oz (Pack Of 1)

I recently had the opportunity to try out this paint and I must say, it exceeded my expectations. The color-changing feature made it incredibly easy to keep track of which areas I had already painted, eliminating any guesswork. The paint glided smoothly with the roller set I purchased, resulting in a flawless finish. The quality of this paint is exceptional, and I am truly impressed with the final result.
Not only was the paint itself top-notch, but the packaging was also outstanding. It arrived in perfect condition, and the thickness and color-changing properties were exactly as described. I couldn't be happier with my purchase and have nothing but positive things to say about it.
One of the main reasons I decided to try this paint was because I had previously painted my ceiling with a different product that left visible lines and yellow spots. However, this paint completely transformed my ceiling and made it look perfect. It delivered on all its promises, and I couldn't be more satisfied with the outcome.
I must mention that there were some issues with the delivery when ordering this paint online. On two separate occasions, the paint can arrived damaged, and it had to be discarded. This was due to mishandling by the shipping company. Therefore, if you decide to order this paint online, I would advise being cautious and ensuring proper packaging.
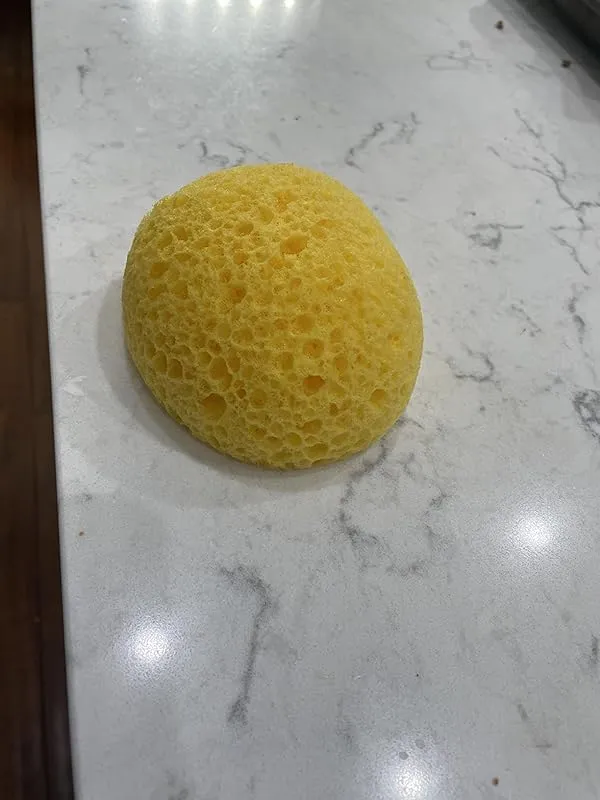
2. Texture Repair Sponge: Perfect Diy Home Decor Solution
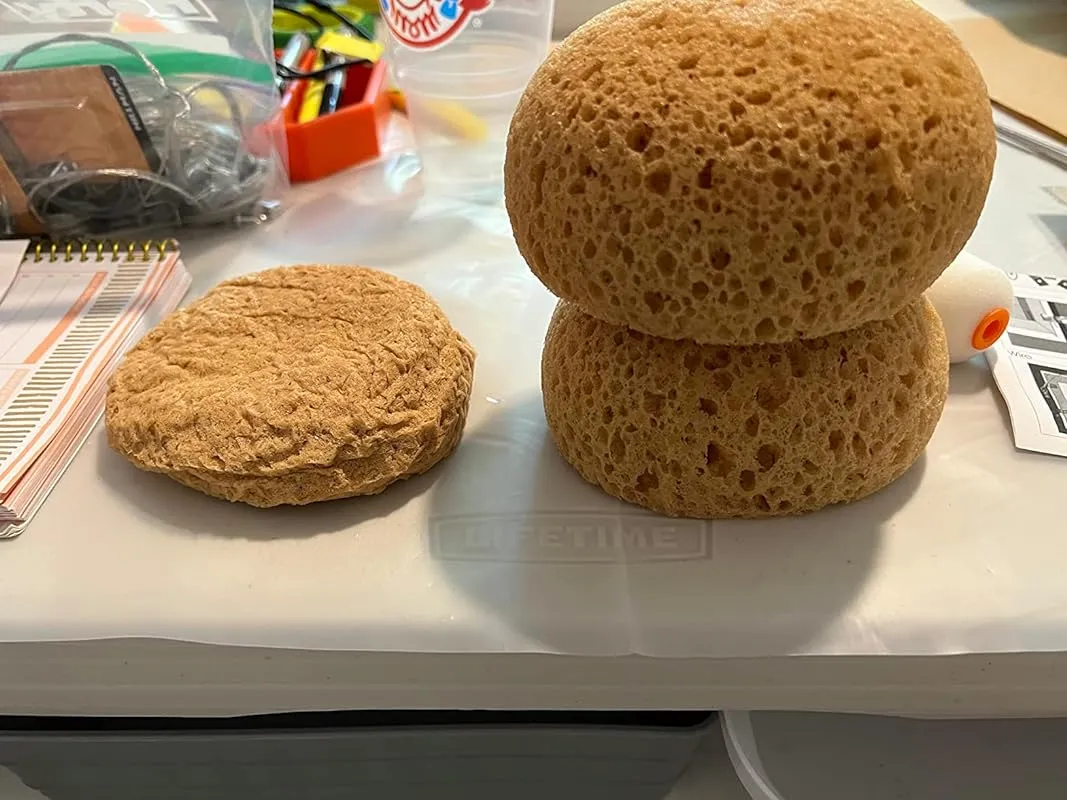


I recently used these paint texture sponges to repair cracked and damaged ceilings, and I must say they were quite effective. However, it's important to note that this process is not easy and requires some skill. Matching and blending the texture into an existing finish can be quite challenging.
To achieve good results, I had to scrape off the texture around the crack, fix the crack to prevent it from reappearing, and then apply the texture using these sponges. It definitely required a lot of work and additional tools such as screws, mud, a knock down knife, a bucket for water, sponges, and drop cloths.
The sponges arrived in a vacuum-sealed package, which was convenient. I learned from watching videos that it's important to practice first on scrap boards or drywall to determine the correct amount of paint drops before working on the actual ceiling. This saved me a trip to the hardware home improvement store.
The sponges need to be soaked in water and squeezed until they rehydrate. Once hydrated, they expand in size, as shown in the picture. They come in a pack of four, which is a nice bonus. The thickness and texture of the sponges are suitable for knockdown ceiling application.
Initially, I was almost going to return these sponges because they seemed ineffective. However, after reading some comments, I realized that they need to be wet before use. Once wet, they worked exactly as intended.
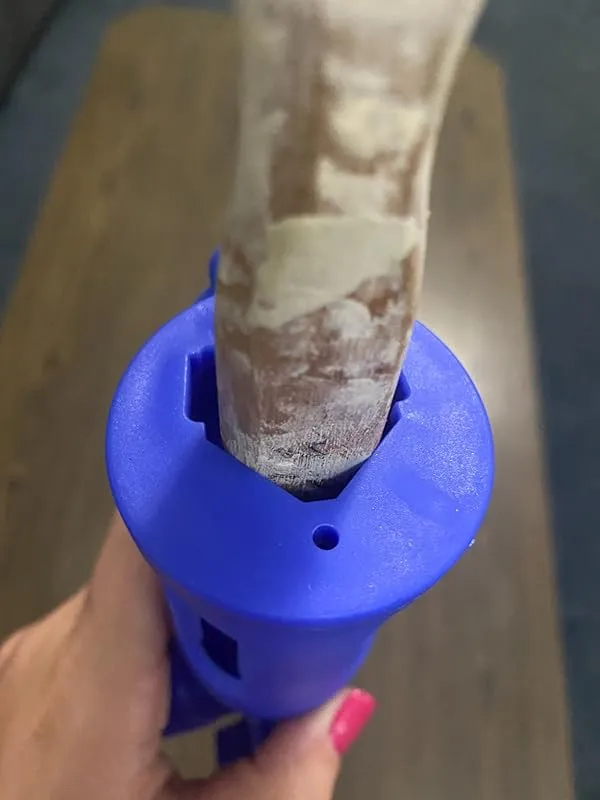
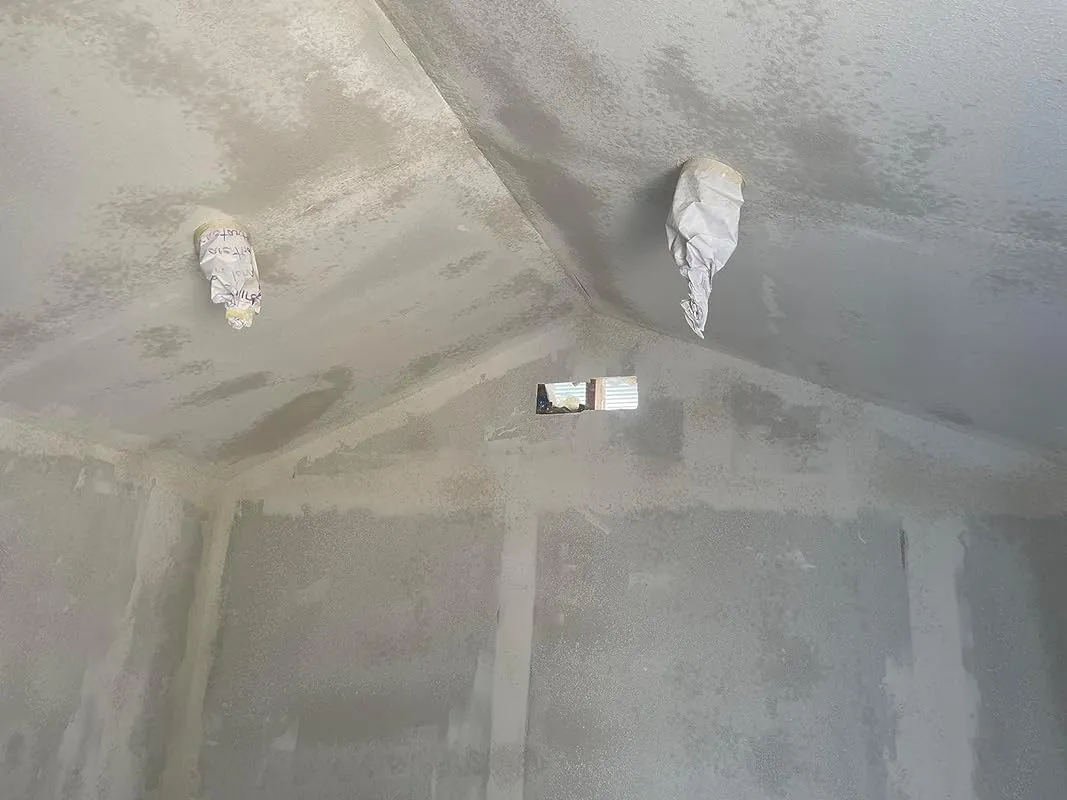
3. Diy Texture Patch Sponge – 2 Pcs
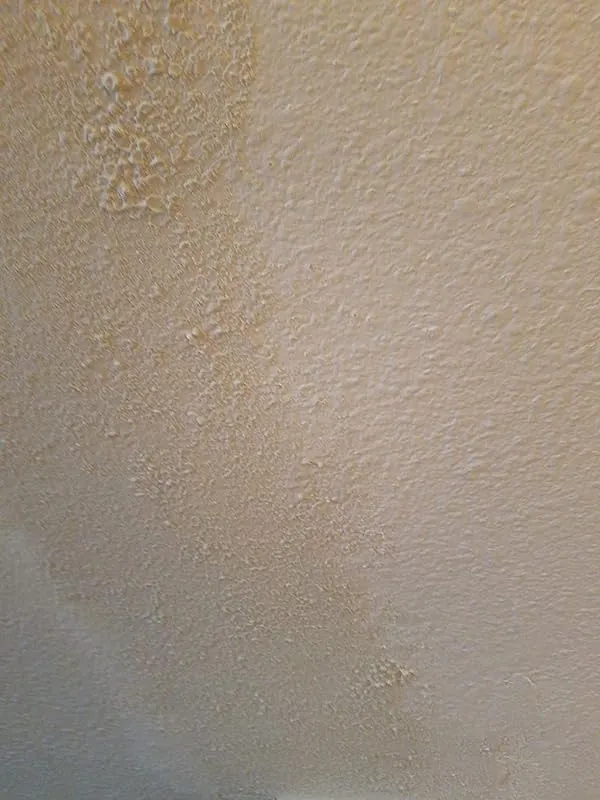


I recently had to repair some water damage in a room and needed to replace the drywall in certain areas. Since the room had a professionally done knock down texture, I wanted to make sure my repair work matched seamlessly. That's when I came across these amazing sponges.
The texture repair sponges were perfect for applying the mud and were incredibly easy to rinse out. They allowed me to achieve a professional repair job that blended in seamlessly with the existing texture. If you're unsure about how to do knock down texture, a quick search on YouTube will provide you with all the guidance you need.
When I received the sponge, it was quite compressed. However, running it under warm water while squeezing it repeatedly quickly restored it to its full size. It worked wonders for my small ceiling repair. I would recommend watching some tutorial videos, practicing on scrap or cardboard, and giving the texture time to set up before lightly scraping it.
One thing I appreciated about these sponges is that they allowed for some margin of error. Even if you make a few mistakes along the way, don't worry! Just keep going and continue working with the sponges. They are forgiving and will still give you great results.
While these sponges may have a variety of uses, they were particularly useful to me for my drywall repair after experiencing flood damage in my home. I had a significant amount of texture to match, specifically swirl knock down, and these sponges worked wonders in achieving the desired outcome.
4. Paintpro Extend: Multifunctional High Reach Paint Tool


The paint brush extender is a game-changer for anyone in need of painting hard-to-reach areas. Whether it's above kitchen cabinets, high ceilings, or stairwells, this tool makes the job much easier and safer.
One of the standout features of this extender is its secure fit. Both rollers and brushes can be easily attached to the adaptor, providing a stable and secure connection. This eliminates the need for ladders and ensures a smooth painting experience.
The adjustable angle feature is also highly praised by users. It allows for easy maneuverability while painting, giving you the flexibility to reach even the trickiest spots. The extender stays in place, providing stability and allowing for precise painting.
Many users have expressed their gratitude for this tool, stating that they wouldn't have been able to complete their painting projects without it. It saves time and effort, making it a highly recommended tool for any DIY enthusiast or professional painter.
Additionally, the paint brush extender is cost-effective. It can be easily attached to a broom stick pole or any other compatible pole you have at home, eliminating the need to purchase expensive equipment.
5. Chomp Wall Cleaner: Ultimate Extendable Cleaning Solution
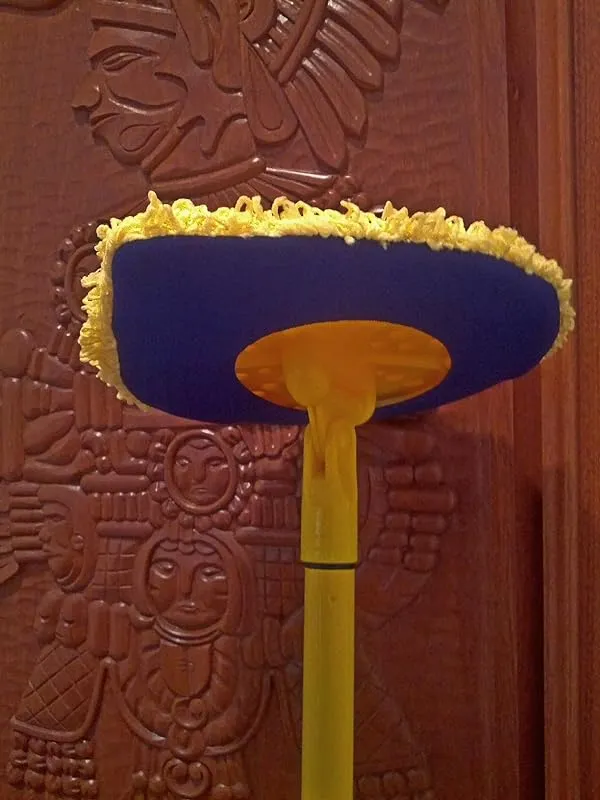

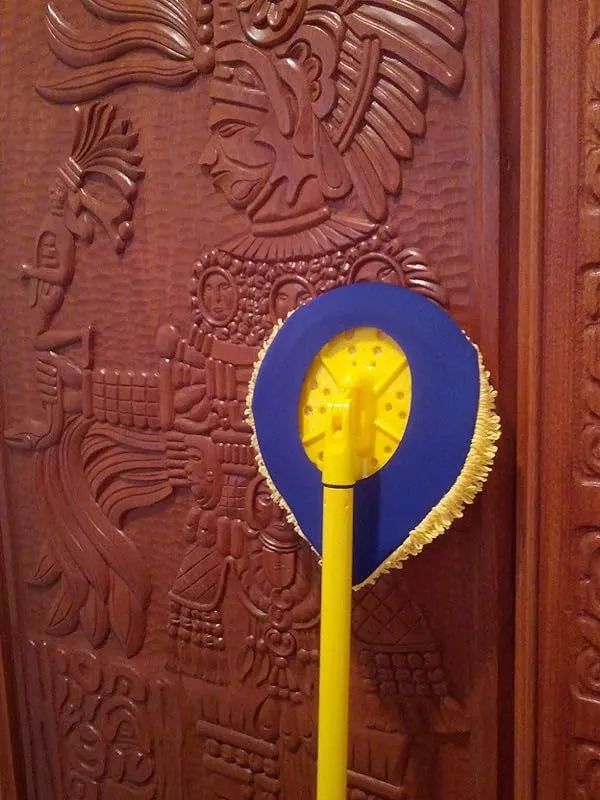

I recently purchased the Chomp CleanWalls Paint Prep Kit and I must say, it exceeded my expectations. This mop is specifically designed for wall cleaning, but I found it to be versatile and useful for multiple purposes.
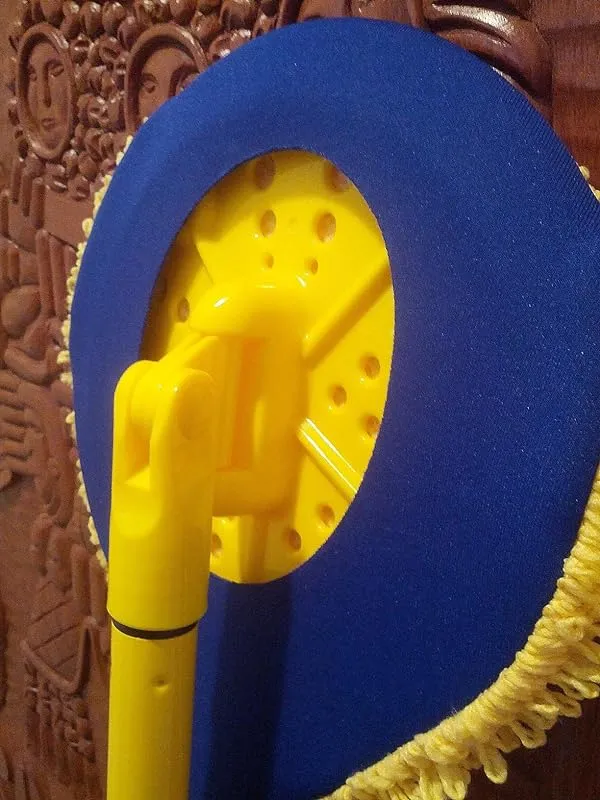
Firstly, the mop is perfect for removing fly swatter bug stains and other marks on the walls. I have tried various mops and methods in the past, but none have been as effective as this one. The microfiber and durable polyester mop mitt easily attaches to the mop head, allowing me to reach all the way up the walls, even in hard-to-reach corners.
What sets this mop apart is the inclusion of a squeezing tray. This tray can be placed on a 5-gallon bucket or the bottom of the sink, providing a surface to press the mop against and remove excess water before cleaning the walls. This feature is incredibly convenient, especially if you don't have a 5-gallon bucket.
The pole of the mop is sturdy and has a two-way swivel joint, allowing for easy mobility and maneuverability while in use. This makes cleaning the walls a breeze, even in stairwells or other tight spaces.
I also had a pleasant experience with the customer service at Chomp. When I reached out to inquire about replacement mop mitts, they were friendly and informed me that they would soon be available on Amazon. As a gesture of goodwill, they even offered to send me an extra set of mop mitts. This level of customer care speaks volumes about the company and its dedication to customer satisfaction.
In addition to the mop, Chomp also offers a liquid wall cleaner. While it is recommended to wash off the cleaner before painting, it can be left on for other purposes. This adds to the versatility of the Chomp CleanWalls Paint Prep Kit.
6. Homax 41072083607 Wall And Ceiling Dry Mix Texture 15 Lb, Orange Peel And Knockdown Texture


The Homax 41072083607 Wall and Ceiling Dry Mix Texture is a must-have for anyone looking to add texture and dimension to their walls and ceilings. This 15 lb bag of dry mix texture offers the versatility of both orange peel and knockdown textures, making it the perfect choice for various projects.
One of the standout features of this product is its ease of use. The dry mix texture can be easily mixed with water to create a thick paste that can be applied using a sprayer, roller, or trowel. The texture spreads smoothly and evenly, ensuring consistent results and minimizing the need for touch-ups.
The ability to achieve both orange peel and knockdown textures with this product is a major advantage. The orange peel texture adds a subtle and elegant look to walls and ceilings, while the knockdown texture offers a more dramatic and textured finish. This versatility allows for creative freedom in choosing the desired look for any space.
Another great aspect of this dry mix texture is its quick-drying formula. Once applied, it dries within a reasonable timeframe, allowing for efficient completion of projects. This is especially beneficial for those who are working on a tight schedule or have multiple areas to texture.
The 15 lb bag provides ample dry mix texture for larger projects, making it a cost-effective choice. The packaging is sturdy and ensures the product arrives in perfect condition, ready to be mixed and applied. The clear instructions on the package make the mixing and application process straightforward, even for beginners.
The Homax Wall and Ceiling Dry Mix Texture delivers professional-looking results. The texture hides minor imperfections on walls and ceilings, creating a smooth and flawless finish. The orange peel and knockdown textures add depth and character to any space, enhancing its overall aesthetic appeal.
Cleanup is relatively easy with this dry mix texture. Any spills or excess texture can be removed with water before it dries, minimizing the need for extensive cleanup after the project is completed.
I highly recommend the Homax Wall and Ceiling Dry Mix Texture for anyone looking to add texture and dimension to their walls and ceilings. It provides excellent results, hides imperfections, and offers the convenience of a single product with multiple texture options. Whether you're a seasoned DIYer or just starting out, this product is sure to meet your needs.
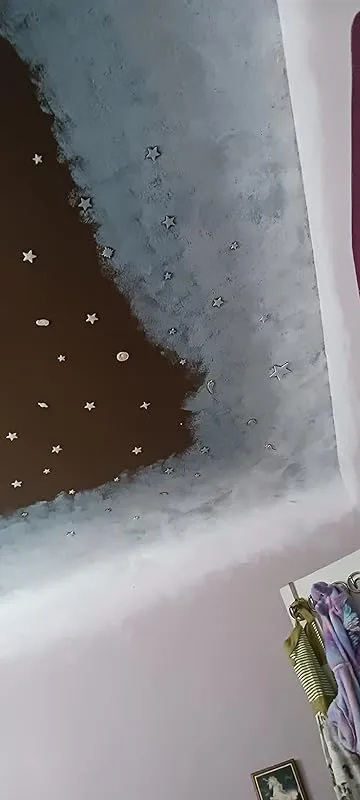
7. Hemway Silver Glitter Paint Additive – Creative Sparkle!

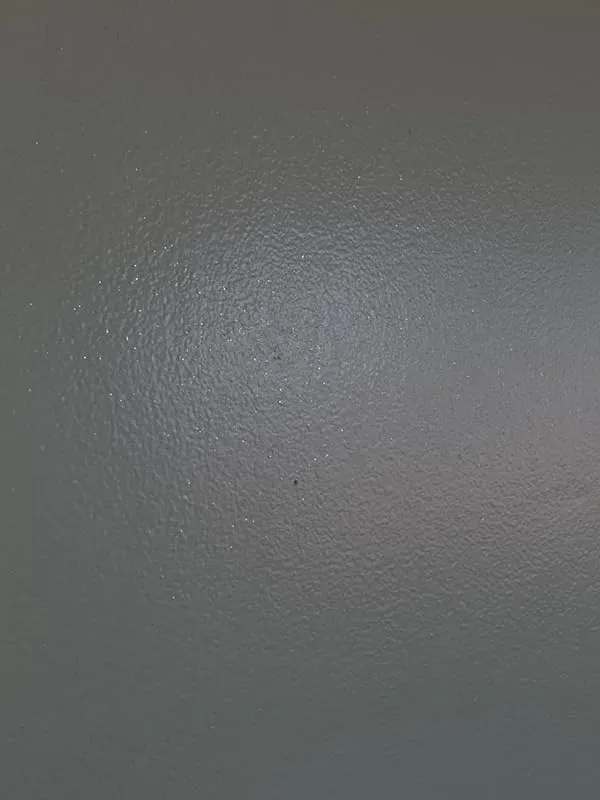

I absolutely love this product! I used it to create accent walls in both of my kids' rooms and the results were amazing. In one room, I used the mother of pearl in a sky blue color, and in the other room, I combined yellow, dark pink, light pink, and white with the mother of pearl. I only used the sample sizes in the second room and now I wish I had used more because it turned out so great! The pictures and videos really don't do justice to how beautiful and subtle this product is.
I was initially hesitant when my painter suggested using this product in my daughter's room, but I am so glad I took his advice. He added two packets of the glitter to a gallon of paint and the effect is incredibly classy. It's not overwhelming or in your face; it's more like a gentle dusting of frost or fairy dust. Once you see it, you can appreciate its beauty, but it doesn't scream "glittery walls." It's just perfect! We used black and white stripes on the bottom half of the walls and a light pink color on the upper half, and the glitter looks amazing with every color. However, I must say that the aqua color in her bathroom is the best.
We used one large and one small packet of glitter in a gallon of paint, and it was the perfect amount to add a subtle sparkle to the walls without looking gaudy. It's definitely not like a fairy threw up on the walls! We mixed it in gradually to avoid clumping, and the result was fantastic. The silver gold option would have also looked great, but my daughter wanted the gold with her pink. Overall, I highly recommend this product!
I initially ordered two 10g samples because I wasn't sure if I wanted a very sparkly effect. I added both packs (20g in total) to a little over half a gallon of paint and applied two coats. However, after it dried, the sparkle was barely noticeable, with only about 5 flecks of glitter per square inch. But then I decided to give it a bit more sparkle, so I got some paint buff pads, and let me tell you, it felt magical! With just one buff, sparkles started appearing everywhere, and I was getting an average of 20 flecks per square inch. If you can see the glitter right under the surface, you can easily buff it out. So, don't be discouraged if you don't see sparkles at first; this product really needs to be buffed to shine through.
FAQs
Are there any eco-friendly or low-VOC options for wall and ceiling paint?
Yes, there are several eco-friendly and low-VOC (volatile organic compounds) options available for wall and ceiling paint. These options are designed to minimize the release of harmful chemicals into the air, promoting better indoor air quality and reducing environmental impact.
One popular choice is water-based or latex paint, which typically has lower levels of VOCs compared to oil-based paints. Look for paints that are labeled as low-VOC or zero-VOC, as these products have undergone testing to ensure they meet certain standards.
Another option is to choose paints that are specifically marketed as eco-friendly or sustainable. These paints are often made with natural or organic ingredients and have reduced or zero VOC content. They may also be manufactured using environmentally friendly processes or come in packaging made from recycled materials.
Additionally, you can consider using natural alternatives such as milk paint or clay paint, which are made from natural ingredients and have minimal environmental impact.
It is always recommended to check the label or product specifications to ensure that the paint you choose meets your eco-friendly requirements. Consulting with a paint specialist or an eco-friendly home improvement store can also provide you with more options and guidance.
Are there any specific preparation steps required before painting walls and ceilings?
Yes, there are several preparation steps that are recommended before painting walls and ceilings.
1. Clean the surfaces: Start by cleaning the walls and ceilings to remove any dirt, dust, or grease. Use a mild detergent and water solution, and make sure to rinse and dry the surfaces thoroughly.
2. Repair any damages: Inspect the walls and ceilings for any cracks, holes, or imperfections. Fill them with spackling compound or putty, and sand the area smooth once it's dry. This will ensure a smooth and even surface for painting.
3. Remove old paint or wallpaper: If there are layers of old paint or wallpaper, it's usually best to remove them before painting. Use a scraper or steamer to remove the old material, and sand the surface lightly to create a smooth base.
4. Protect surrounding areas: Cover the floors, furniture, and any other items in the room with drop cloths or plastic sheets to protect them from paint splatters or spills.
5. Prime the surfaces: Applying a coat of primer before painting can help improve the adhesion and durability of the paint. It also helps to create a uniform surface and cover any stains or dark colors.
By following these preparation steps, you can ensure a professional-looking paint job and extend the longevity of your newly painted walls and ceilings.
Can the same paint be used for both walls and ceilings?
Yes, the same paint can be used for both walls and ceilings. However, it is important to consider the specific requirements of each surface before making a decision.
For walls, a variety of paints are available, such as matte, semi-gloss, or satin finishes. These paints are designed to provide durability, ease of cleaning, and a smooth appearance. It is advisable to choose a paint with good coverage and a finish that suits your preference and the overall aesthetics of the room.
When it comes to ceilings, it is generally recommended to use a flat or matte finish paint. This helps to minimize the appearance of imperfections and reduces glare. Flat paints have a non-reflective surface, making them suitable for hiding any unevenness or flaws on the ceiling.
Before painting, it is essential to prepare the surfaces properly by cleaning, repairing any damages, and applying a primer if needed. Additionally, consider using painter's tape to protect adjacent surfaces and achieve clean lines.
In summary, while the same paint can be used for both walls and ceilings, it is important to choose the appropriate finish for each surface to achieve the desired results.
How do I choose the right paint color for my walls and ceilings?
Choosing the right paint color for your walls and ceilings can greatly impact the overall look and feel of a room. Here are some steps to help you make the right decision:
1. Consider the room's purpose: Think about the function of the room. If it's a bedroom, you may want a calming and relaxing color. For a living room, you might opt for a more vibrant or warm tone.
2. Assess the lighting: Take into account the natural and artificial lighting in the room. Different colors can appear different under various lighting conditions. Test paint samples on the walls to see how they look during different times of the day.
3. Look for inspiration: Browse through interior design magazines, websites, or even visit showrooms to gain inspiration. Take note of colors that catch your eye and consider how they might work in your space.
4. Consider the size of the room: Light and neutral colors tend to make smaller rooms appear larger, while darker colors can create a cozy and intimate atmosphere in larger rooms.
5. Test paint samples: Purchase small paint samples of your top color choices and paint a small section of your wall or use a sample board. This will give you a better idea of how the color will look in your space before committing to it.
6. Coordinate with other elements: Consider existing furniture, flooring, and other elements in the room. Ensure that the paint color complements or contrasts well with these elements.
7. Seek professional advice: If you're unsure, consult with a professional interior designer or a paint specialist at a home improvement store. They can offer guidance and suggest color palettes that suit your preferences and the room's requirements.
Remember, choosing paint colors is a personal decision, so trust your instincts and go with a color that you love and that reflects your style and personality.
How long does it typically take for wall and ceiling paint to dry?
The drying time for wall and ceiling paint can vary depending on various factors such as the type of paint, humidity levels, temperature, and ventilation. In general, most latex or water-based paints will dry to the touch within 1-2 hours.
However, it is important to note that drying to the touch does not mean the paint is fully cured.
Complete curing of wall and ceiling paint can take up to 2-4 weeks, during which the paint will fully harden and reach its maximum durability. It is recommended to avoid touching or cleaning the painted surface during this curing period to allow the paint to fully set.
To speed up the drying process, ensure proper ventilation by opening windows or using fans. In colder or more humid conditions, it may take longer for the paint to dry. It is always advisable to refer to the specific instructions provided by the paint manufacturer for accurate drying times and recommendations.
How many coats of paint are usually needed for walls and ceilings?
The number of coats of paint needed for walls and ceilings can vary depending on several factors. In most cases, two coats of paint are sufficient for achieving a smooth and even finish. However, there are certain situations where additional coats may be required.
If the walls or ceilings are being painted for the first time or if they have not been painted in a long time, it is recommended to apply a primer coat before the actual paint. This helps to create a better surface for the paint to adhere to and can improve the overall coverage.
In such cases, three coats (primer coat + two paint coats) may be necessary.
Additionally, the color of the paint and the color of the surface being painted can also affect the number of coats required. Darker colors may require more coats to achieve full coverage, while lighter colors may need fewer coats.
It is advisable to check the paint manufacturer's instructions for specific recommendations on coverage and number of coats.
Ultimately, the goal is to achieve a smooth and evenly covered surface, so if the desired result is not achieved after two coats, it may be necessary to apply an additional coat.
What are some common mistakes to avoid when painting walls and ceilings?
When painting walls and ceilings, there are some common mistakes that you should avoid to achieve a professional and flawless finish.
Firstly, not properly preparing the surface is a common mistake. It is important to clean the walls and ceilings thoroughly to remove any dirt, grease, or old paint. Additionally, make sure to patch any holes or cracks and sand the surface to create a smooth base for the paint.
Another mistake is using low-quality paint or tools. Investing in high-quality paint and brushes or rollers will ensure better coverage and a more even application. Low-quality tools can leave streaks or brush marks, resulting in an unprofessional look.
Not using primer is also a mistake to avoid. Primer helps to seal the surface, provide better adhesion for the paint, and prevent stains or discoloration. Skipping this step can lead to uneven color and poor durability.
Lastly, rushing the process is a common mistake. Take your time when painting, allowing each coat to dry thoroughly before applying the next one. Rushing can result in drips, uneven coverage, and a less durable finish.
By avoiding these common mistakes and following proper techniques, you can achieve a smooth and professional-looking paint job on your walls and ceilings.
What are the best types of paint for walls and ceilings?
When it comes to choosing the best types of paint for walls and ceilings, there are a few factors to consider. Firstly, it's important to opt for a paint that is specifically designed for interior use, as exterior paints may not provide the desired finish or durability.
For walls, latex or acrylic-based paints are popular choices due to their ease of application, quick drying time, and durability. These types of paints also tend to have low levels of volatile organic compounds (VOCs), making them more environmentally friendly.
Satin or eggshell finishes are often preferred for walls, as they offer a subtle sheen and are easier to clean than flat finishes.
For ceilings, flat or matte finishes are commonly used to minimize glare and hide imperfections. Ceiling paints are typically formulated to have a thicker consistency, allowing for easier application overhead.
Water-based paints are generally recommended for ceilings as they have less odor and are easier to clean up.
Ultimately, the best type of paint for your walls and ceilings will depend on your specific needs and preferences. It's always a good idea to consult with a professional or knowledgeable sales representative at a paint store for personalized advice based on your project.
What are the different finishes available for wall and ceiling paint?
There are several different finishes available for wall and ceiling paint, each with its own unique characteristics and purposes. Some common finishes include:
1. Matte: A matte finish has a flat appearance and does not reflect light. It is ideal for hiding imperfections on walls or ceilings and provides a smooth, non-reflective surface.
2. Eggshell: An eggshell finish has a slight sheen and is more durable than a matte finish. It offers a subtle glow and is easy to clean, making it suitable for high-traffic areas like living rooms and hallways.
3. Satin: A satin finish has a soft sheen and is known for its durability and washability. It provides a smooth and velvety appearance, making it a popular choice for kitchens and bathrooms.
4. Semi-gloss: A semi-gloss finish has a noticeable shine and is highly durable and resistant to moisture. It is commonly used in areas prone to splashes and stains, such as kitchens, bathrooms, and trimwork.
5. Gloss: A gloss finish has the highest level of shine and reflects light significantly. It is extremely durable, easy to clean, and often used on doors, cabinets, and trimwork for a sleek and polished look.
When choosing a finish, consider factors such as the desired aesthetic, the room's function, and the level of durability and washability required. It's always a good idea to test different finishes on a small area before committing to a specific one.
What are the recommended tools and techniques for painting walls and ceilings?
When it comes to painting walls and ceilings, there are several recommended tools and techniques that can help you achieve a professional-looking finish.
1. Tools:
– Paint roller: A roller with a nap length suitable for the surface texture is essential for covering large areas quickly and evenly. Use a shorter nap for smooth surfaces and a longer nap for textured surfaces.
– Paintbrushes: Different sizes and types of brushes are needed for cutting in edges and painting corners or smaller areas. Synthetic brushes are recommended for water-based paints, while natural bristle brushes work well with oil-based paints.
– Paint tray: A tray with a liner is ideal for holding the paint and dipping the roller or brush.
– Drop cloths: Protect the floor and furniture with drop cloths to prevent paint splatters and spills.
– Painter's tape: Use painter's tape to mask off edges, trim, and any areas you don't want to paint.
2. Techniques:
– Preparation: Clean the surfaces to be painted and repair any cracks or imperfections. Sand the walls and ceilings to create a smooth surface for the paint to adhere to.
– Priming: Apply a primer coat to create an even base and enhance paint adhesion, especially on new or unpainted surfaces.
– Cutting in: Use a brush to carefully paint along edges, corners, and other areas where the roller cannot reach. This technique helps achieve clean lines and prevents paint from getting on adjacent surfaces.
– Rolling: Load the roller with paint from the tray and start in one corner, working in a "W" or "M" shape to cover the wall or ceiling evenly. Apply light pressure and maintain a consistent speed to avoid streaks or drips.
– Multiple coats: Depending on the color and type of paint, multiple coats may be required for full coverage. Allow each coat to dry completely before applying the next.
Remember to follow the manufacturer's instructions on the paint can for specific recommendations on tools and techniques.