I Tested And Reviewed 10 Best Peel And Stick Backsplash Tiles (2023)
Looking to upgrade your kitchen or bathroom with easy-to-install backsplash tile? Peel-and-stick backsplash tiles provide a stylish and affordable option that can transform the look of any space. With so many peel-and-stick tile designs to choose from, deciding on the right style for your needs can feel overwhelming. Here are some key factors to consider before purchasing peel-and-stick backsplash tiles to ensure you select the perfect option.
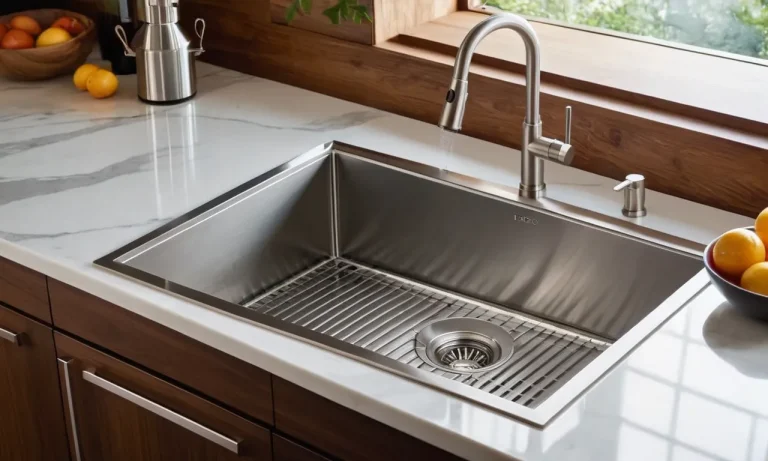
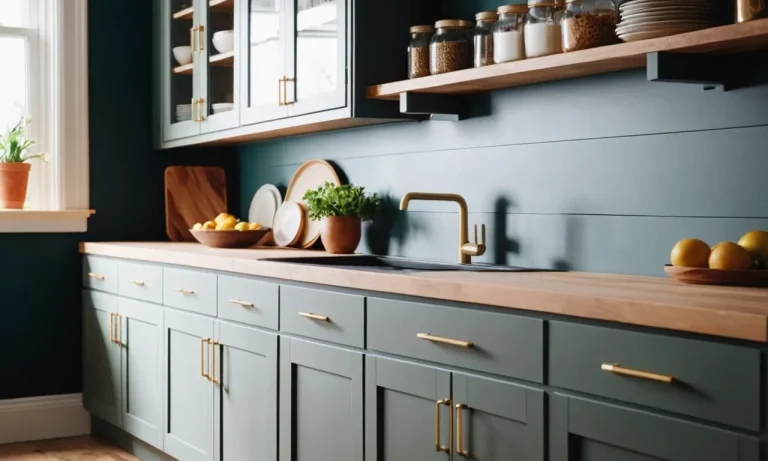
First, think about the size of your backsplash area and the amount of tile you'll need. Measure the space to determine how many full tiles will fit and if you'll need to trim any perimeter tiles. Next, consider the style and color that will complement your existing decor. Peel-and-stick tiles come in diverse materials like marble, travertine, ceramic, metallic, and more. Do you want a modern, sleek look or a rustic, natural stone aesthetic?
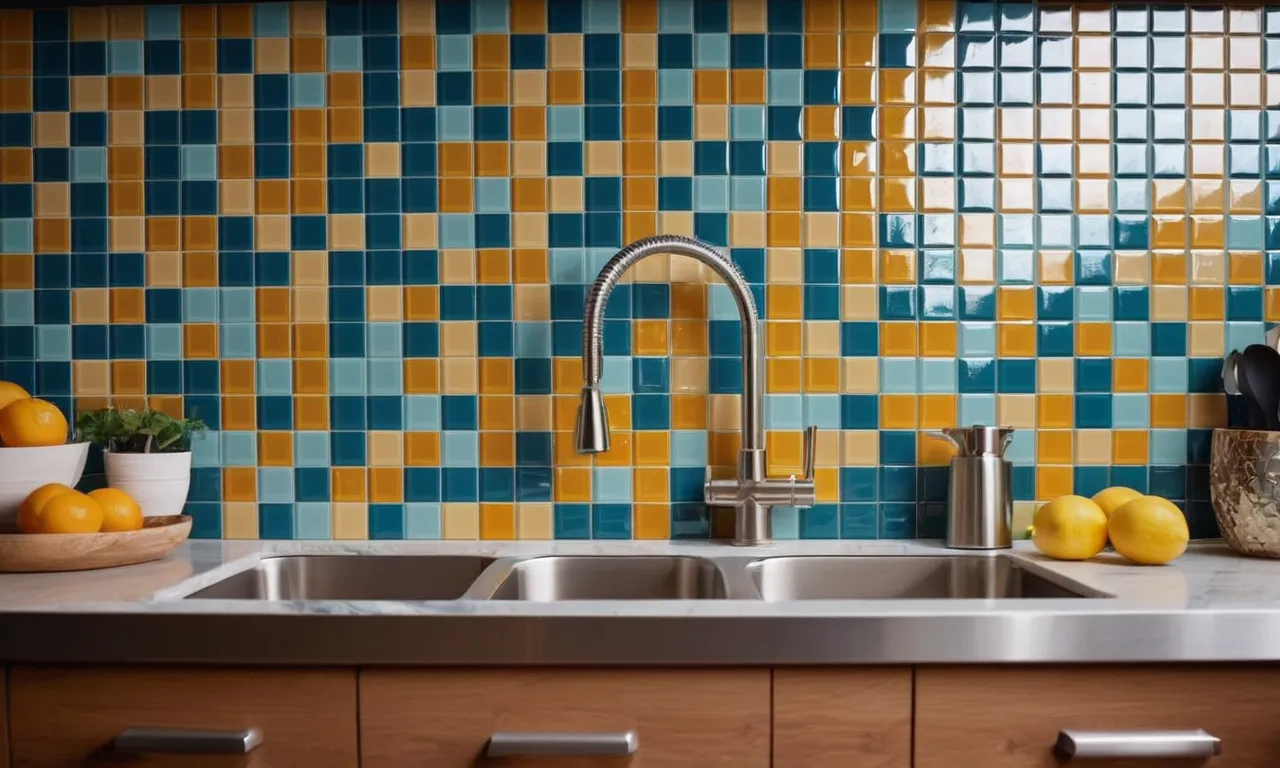
You'll also want to decide if you prefer a patterned design, like subway tiles, or a solid color. Patterned tiles can make the space appear larger and more dynamic. Additionally, think about whether you want glossy or matte finish tiles. Glossy tiles tend to be more stain-resistant while matte has an understated, classic look.
How long do you want your new backsplash to last? Peel-and-stick tiles vary in durability and longevity. Read product details and reviews to determine expected wear over time. Do the tiles need to be sealed or reapplied after several years? What's the removal process if you change your mind later? These are all important considerations.
Does the idea of installing a backsplash yourself sound daunting? Many peel-and-stick tiles are designed for easy, do-it-yourself application with no need for messy grout or special tools. Watch tutorial videos to see just how user-friendly they can be to apply.
With the right peel-and-stick backsplash tiles, you can quickly and affordably upgrade your space. Take time to consider your style, budget, and installation needs. Get ready to transform your kitchen or bathroom with beautiful new tile in just an afternoon!
10 Best Peel And Stick Backsplash Tiles
| # | Product Image | Product Name | Product Notes | Check Price |
|---|---|---|---|---|
|
1
|
 |
The product is ideal for adding an easy and affordable backsplash or wall tile solution in kitchens or bathrooms.
|
|
|
|
2
|
 |
The product is ideal for Stick on tiles ideal for quickly and effortlessly transforming kitchen and bathroom backsplashes with a modern, white subway tile look.
|
|
|
|
3
|
 |
The product is ideal for adding a decorative and convenient backsplash to your kitchen or bathroom walls.
|
|
|
|
4
|
 |
The product is ideal for creating stylish and easy-to-install backsplash surfaces in kitchens and bathrooms.
|
|
|
|
5
|
 |
The product is ideal for providing a faux white marble look and easy installation as a kitchen backsplash.
|
|
|
|
6
|
 |
The product is ideal for providing a decorative and seamless trim for backsplash tile edges or corners.
|
|
|
|
7
|
 |
The product is ideal for quickly adding a stylish and waterproof backsplash to kitchen, bathroom, or vanity walls.
|
|
|
|
8
|
 |
The product is ideal for creating a quick and easy backsplash in kitchens or bathrooms.
|
|
|
|
9
|
 |
The product is ideal for quickly and easily updating the kitchen, laundry room, or bathroom with a textured, sandstone look.
|
|
|
|
10
|
 |
The product is ideal for The Art3d Peel and Stick Backsplash Tiles for Kitchen are ideal for adding a sleek, shiny black accent to your kitchen walls.
|
|
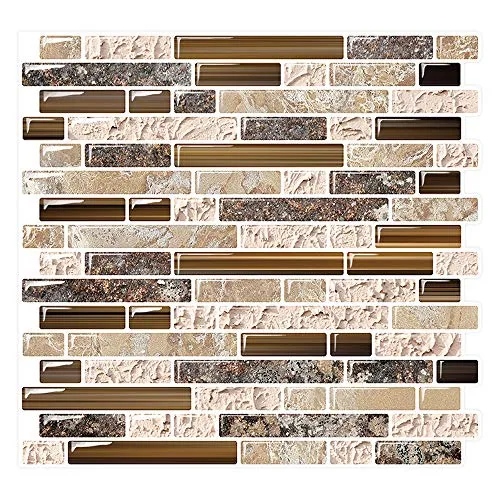
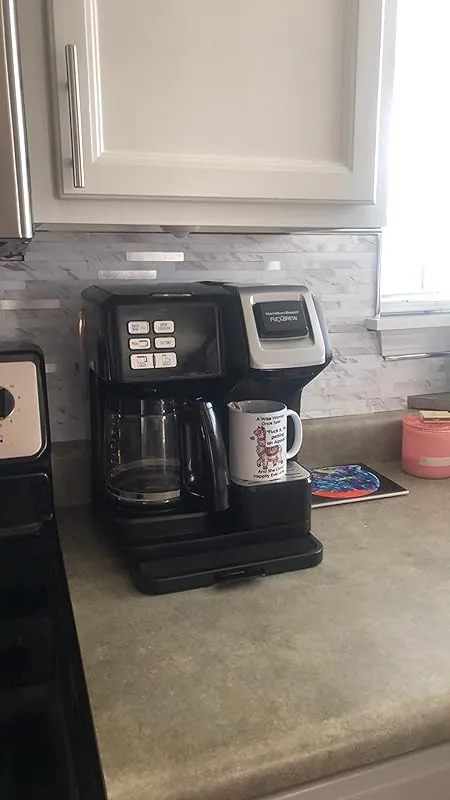
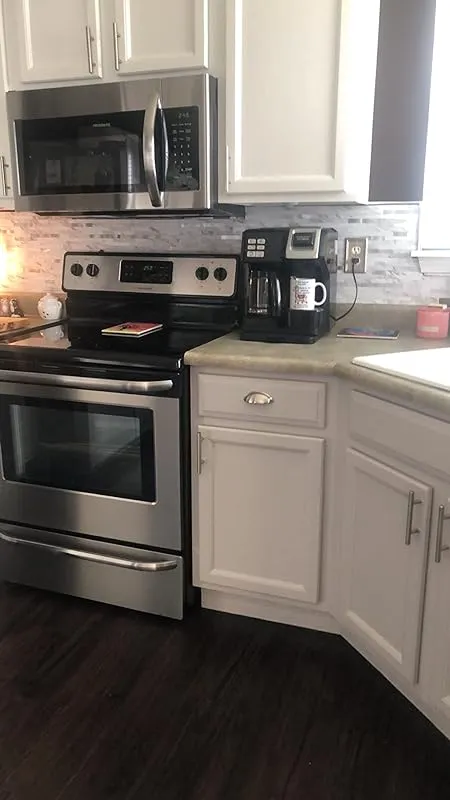
1. Peel & Stick Kitchen And Bathroom Backsplash Tiles
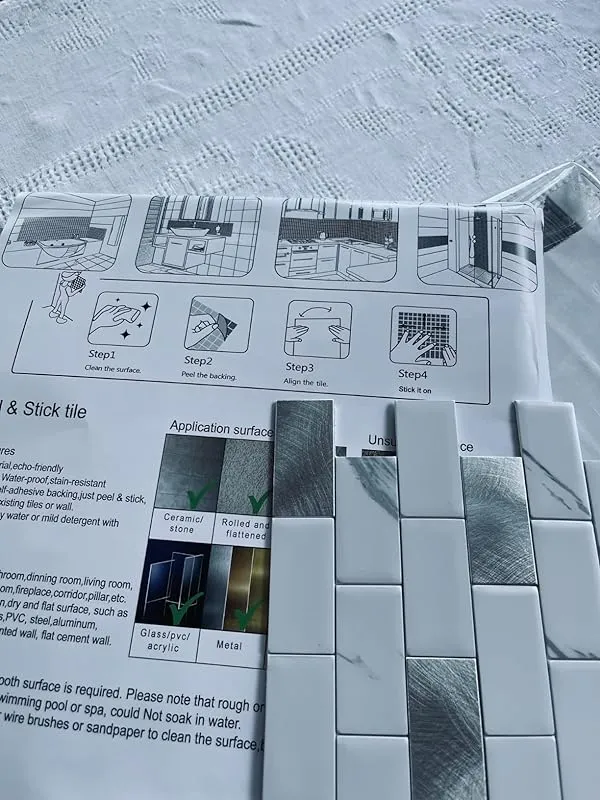

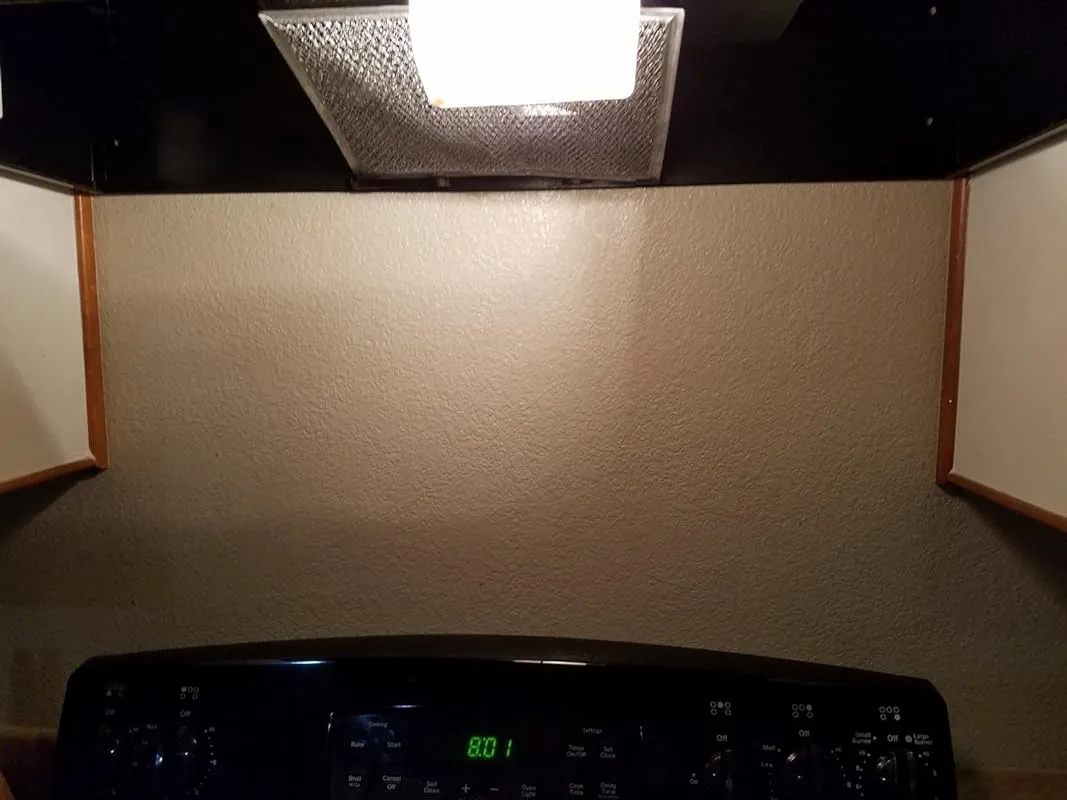
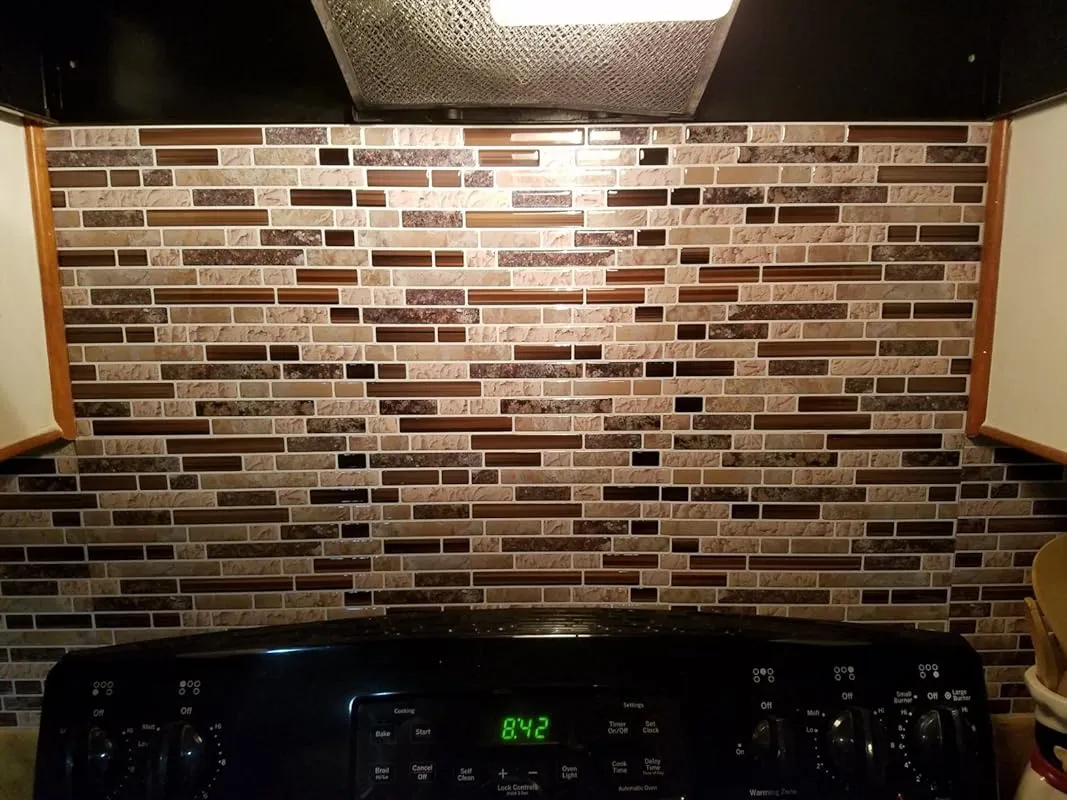
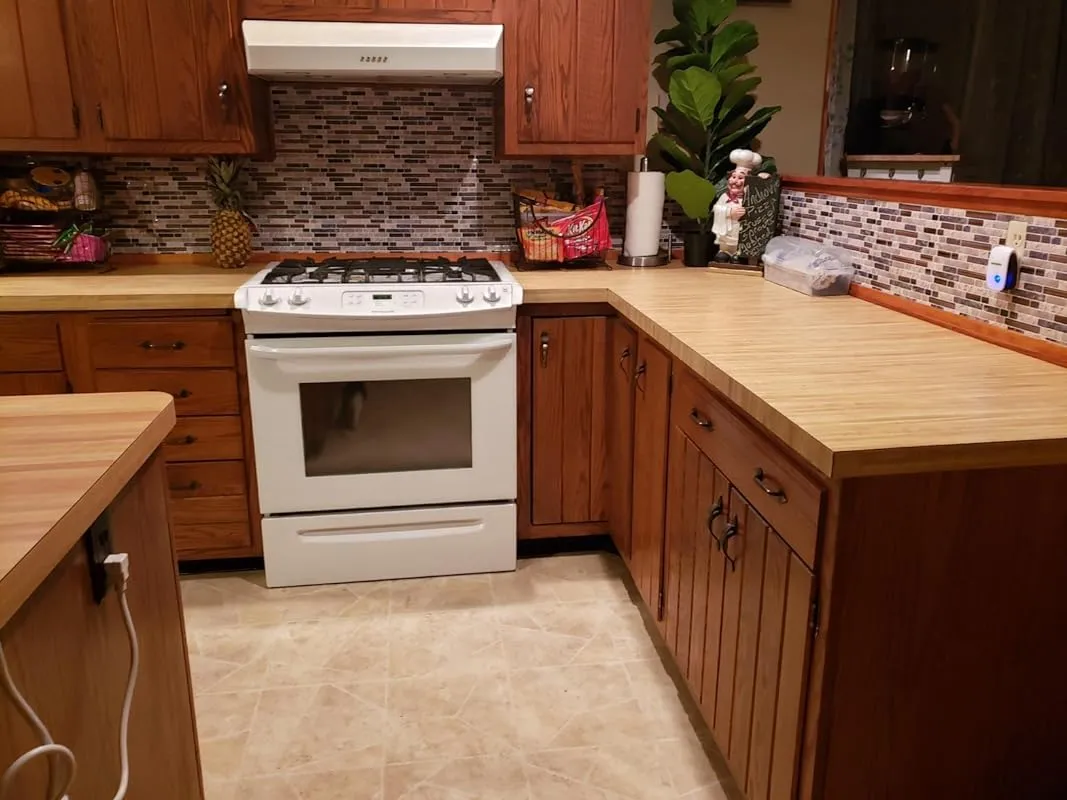
The adhesive on these tiles is small but strong, making them easy to remove. The sheets fit together like a puzzle, making them easy to apply and cut for wall placement. Overall, I am satisfied with the outcome.
The design of the tile is realistic, resembling marble despite being thin. The instructions provided are helpful, and the only skill required is the ability to cut it with a sharp blade for installation around switches or borders. I found that using a heavy rubber roller and ensuring clean hands when peeling off the back sticker helped with even pressure and adhesion. Some knowledge of measurements is also beneficial during installation.
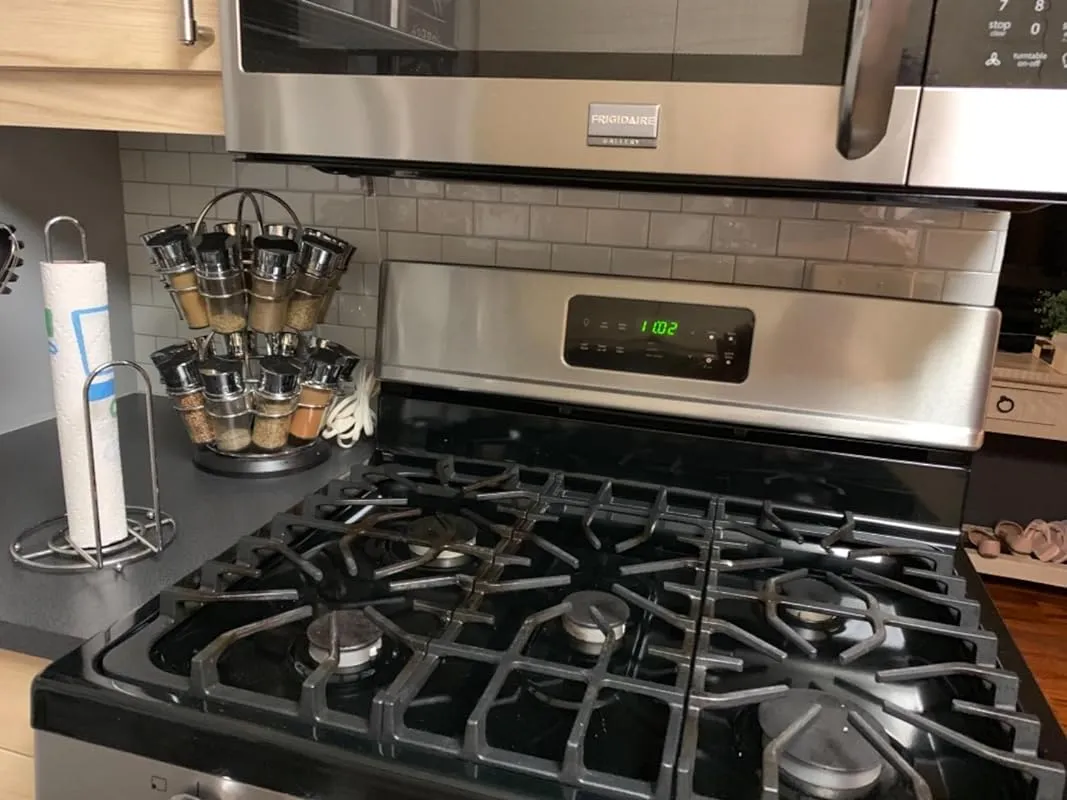
This backsplash is perfect for behind the stove and sink. The color is versatile and can easily match with any decor. The adhesive is strong enough to hold up for a while, but only time will tell how it holds in the long run.
I loved the tile itself, but I do think it would have been nice if they included a $4 knife for cutting. Considering the amount spent on tiles, it would have been a small gesture to include the necessary tool.
These tiles look amazing as a backsplash in our laundry room, behind the utility sink and cabinets. They are very pretty, and it's hard to tell that they are stick-ons. So far, the adhesion has been good, and the application process was simple.
2. Stickgoo Subway Tiles: Easy Backsplash For Kitchen & Bathroom
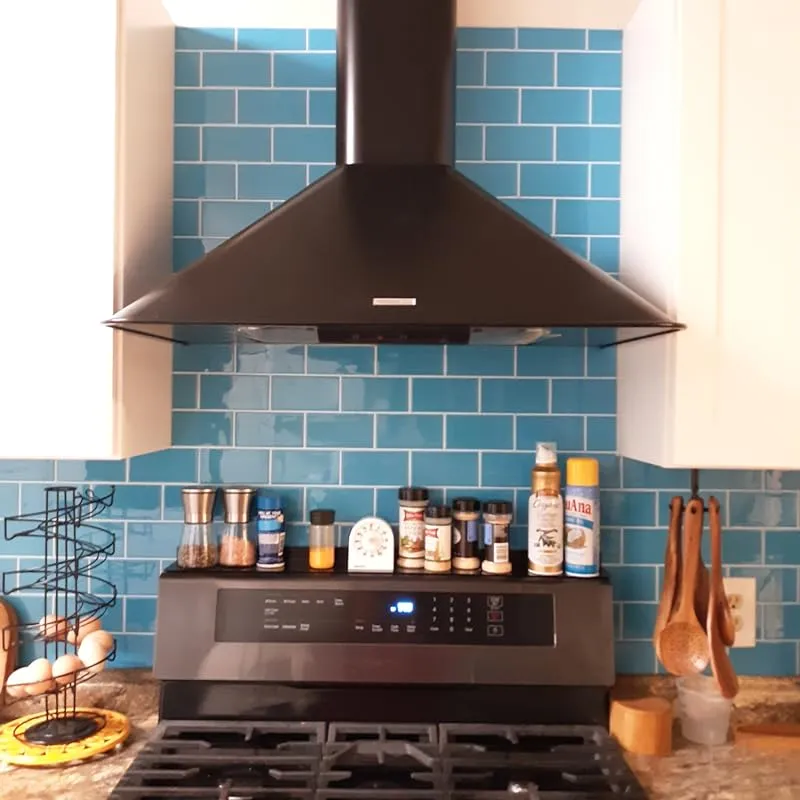
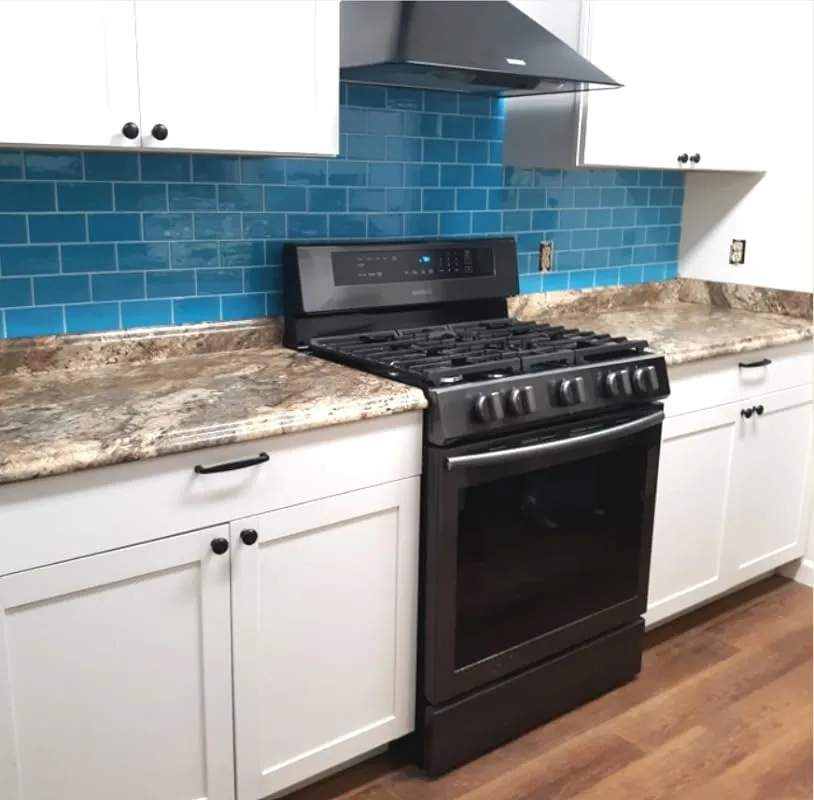
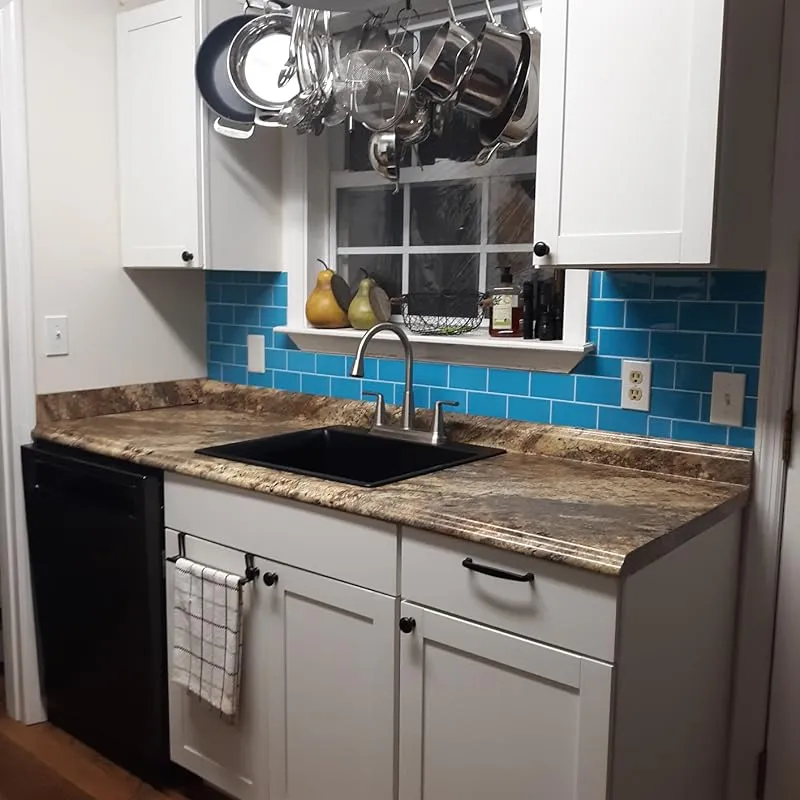
I recently completed a kitchen remodel and was struggling to find the perfect backsplash tile. I didn't want the typical white subway tile or anything too busy, as my galley kitchen needed something that would open up the space and bring energy to the room. After months of searching and ordering samples, I came across StickGoo peel and stick tile in a realistic subway tile design, but in a unique blue color.
At first, I was hesitant about the blue shade, as it seemed like a robins egg blue when I opened the package. However, when I propped up a few tiles in my kitchen, I noticed that the blue took on a slight green undertone, resembling a calypso blue. It reminded me of the beautiful blues you see in tropical oceans. Surprisingly, this color grew on me and I found that it complemented my warm white cabinets and black stainless appliances perfectly.
Now, my dilemma is deciding how far to extend the tile on the wall. I'm considering running it up to either the tops of my cabinets or all the way to the ceiling. I have a window over my black granite sink, which already has the blue backsplash, so I need to take that into account as well. The blue tile has truly energized my kitchen and reflects light, creating a cheerful atmosphere in the morning.
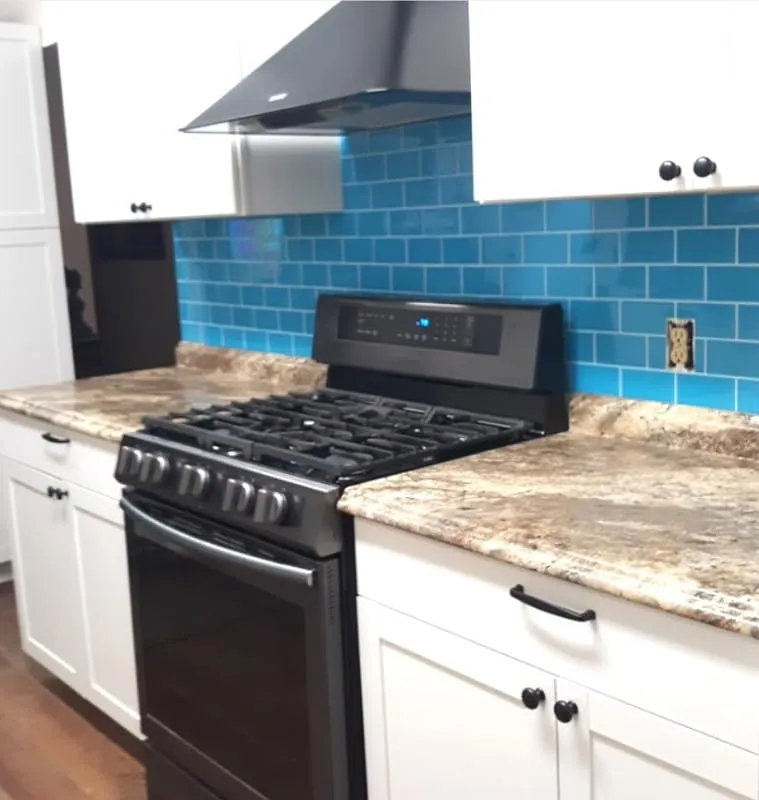
Living with the new backsplash for a week now, I've decided to run the tile up the wall to the height of the cabinet tops. However, the installation process was not without challenges. The lower backsplash portion was difficult, but the chimney hood wall was even worse. The side cabinets were not level, with one being slightly higher than the other. This meant that every edge tile required custom cutting. Additionally, the chimney hood was not centered between the cabinets, resulting in uneven spacing on each side. This required custom cutting for every tile in that area as well.
The sink side also presented challenges, with uneven electrical sockets and switches. Despite these obstacles, I was determined to align the grout lines and maintain a sense of visual balance. It took multiple layouts, but I was able to achieve a centered appearance by using the grout lines as a guide. Smaller spaces like mine tend to highlight misalignments, and it's surprising how common they are in many homes.
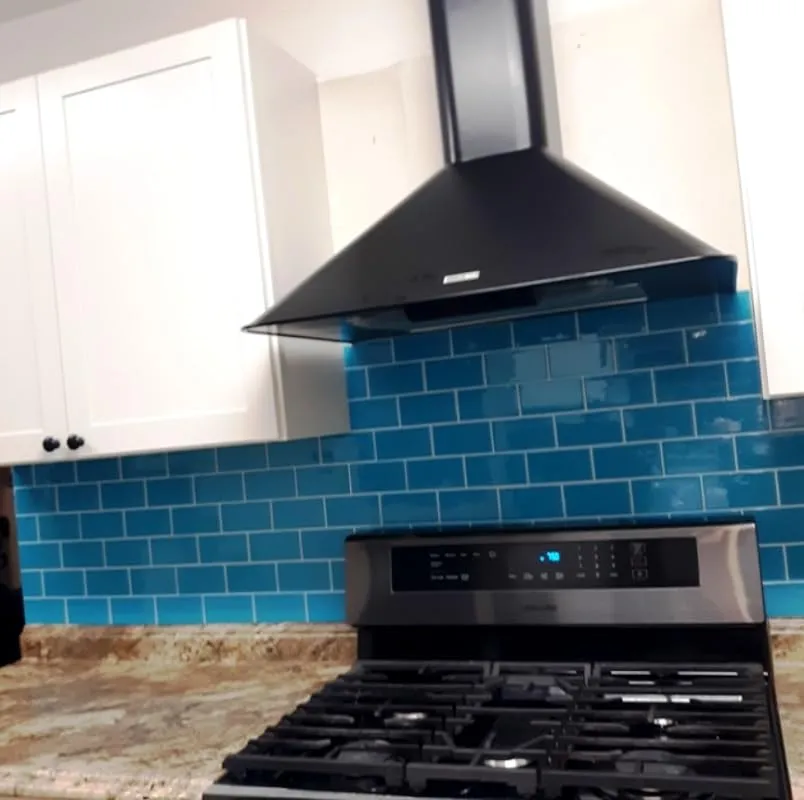
All the effort put into keeping the grout lines level, square, and perpendicular was worth it in the end. I am extremely happy with the outcome, as the backsplash looks fabulous. The color is difficult to capture accurately in photos, but the last photo I attached is the most representative.
As for adhesion, I always clean the surface with oven cleaner (Easy Off No Odor) before applying self-stick products. One round of cleaning usually does the trick, but heavily soiled surfaces may require a second round. I then wipe the area with isopropyl alcohol to ensure it's completely clean and dry. This approach has worked well for me, as my self-stick products never peel, even with changes in humidity and temperature. However, it's important to note that once the tiles are applied, they are not easy to remove and reposition.
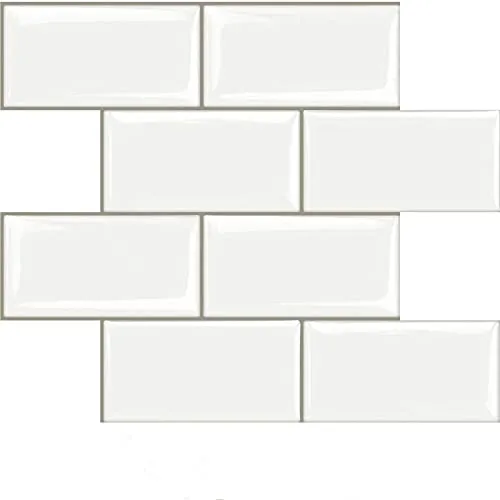
3. Dewoo White Subway Stick-On Tiles: Kitchen & Bathroom Upgrade
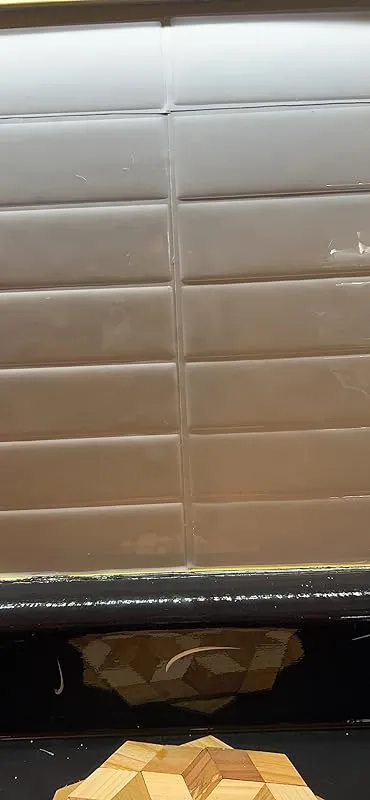
I recently had the opportunity to try out these peel and stick tiles, and I must say, I was pleasantly surprised by how easy the installation process was. As a first-timer, I was a bit apprehensive, but it turned out to be a breeze. The tile sheets were easily ripped up when I misplaced them, as I had applied them over ceramic tiles.
One of the standout features of these tiles is their lightweight nature. Initially, I was concerned about the quality due to their weight, but when I installed them on the wall, they adhered effortlessly. What's even better is that you can peel them back and reposition them without the glue losing its effectiveness. I made a couple of installation mistakes, but I was able to peel them back and reapply them with ease. The glue remained as strong as ever. Additionally, their light weight gives me confidence that they won't fall off over time.
Once I had completed the installation, I was amazed at how fantastic the tiles looked. They truly have a realistic appearance that adds a touch of elegance to any space. If you're on a low budget and in need of a backsplash solution, I highly recommend these beautiful tiles. They offer great value for money without compromising on quality.
Despite their thinness, the tiles create depth and dimension when applied directly over outdated ceramic tiles. I've tried various peel and stick tiles for different projects, and I must say that these are among the most realistic-looking ones I've come across. Their shiny finish reflects light beautifully, creating a "wow" factor when someone enters the room. While they may not be as sturdy as real tiles, they serve as an excellent alternative when genuine tiles aren't an option.
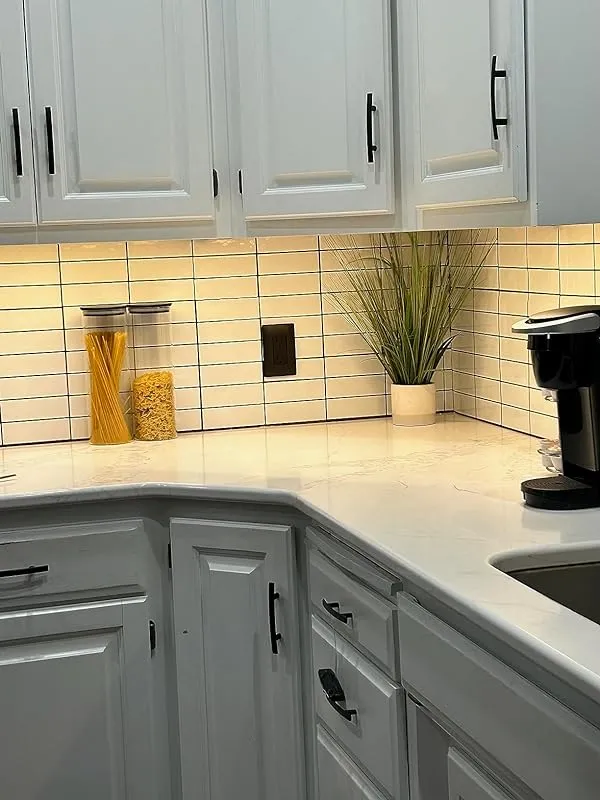
4. Art3d Peel And Stick Subway Tiles – Warm White

After living in our house for 35 years, my husband and I decided to downsize and move to an apartment. We have been loving the low maintenance and decorating responsibilities that come with apartment living. However, I couldn't help but obsess over the lack of a backsplash in our new kitchen. I didn't want to spend a fortune on real tile or deal with the permanency of it. After years of searching online, I finally found the perfect solution – this peel and stick tile from Amazon.
I immediately purchased the tile and enlisted the help of my friend's son to install it. He did an amazing job, taking about four hours to complete the installation. The end result is simply perfect. The tile blends seamlessly into the kitchen and gives it a polished look. I am thrilled with my purchase and love how it has transformed the space. It truly feels like the backsplash was always meant to be there.
In terms of the installation process, we did encounter a few hiccups. There were moments when we attached the tiles crookedly, but we quickly learned that using a hair blow dryer to warm up the adhesive and slowly peeling it off was the best way to remove it from the wall without causing damage. Once we got the hang of it, the installation became easier and we were able to achieve the desired results.
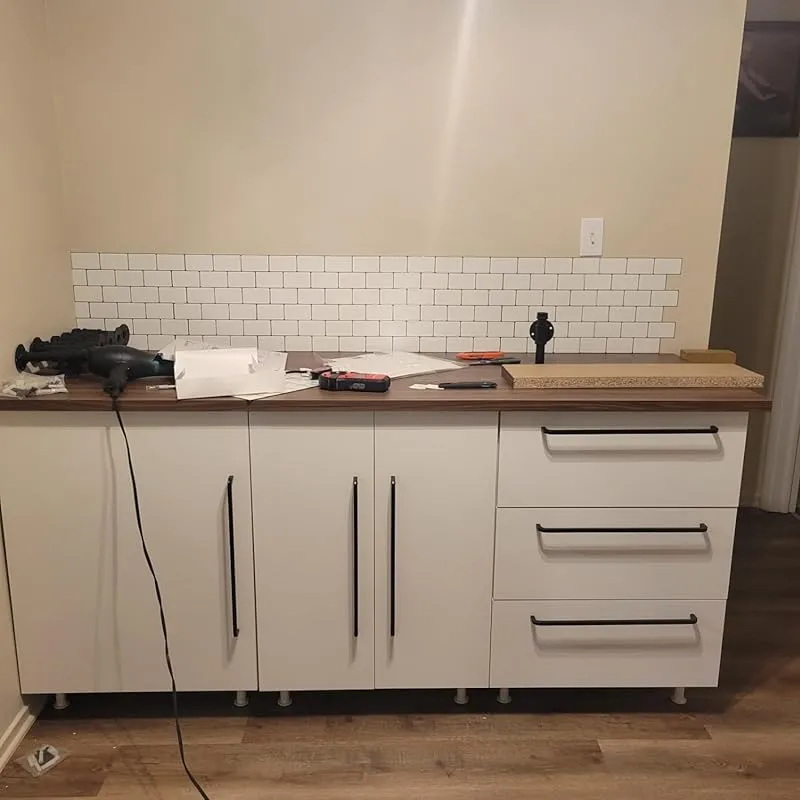
I also decided to use this backsplash in my travel trailer to add some personality to the space. It took a bit of patience, but with the help of a craft paper cutter, I was able to achieve straight lines and a great overall look. It has definitely spiced up the otherwise monotonous brown tones in the trailer.
As for the product itself, I couldn't be happier. I ordered three boxes and used every single tile. It took me about four hours to complete the installation, but that was because I had a large area to cover. The tiles were easy to cut and work with, making the process relatively smooth. The only challenge I encountered was sliding someone down to seal it properly, as the tiles are made of plastic and don't slide easily. However, I found that placing the backing in front of the tile after installing it helped with the smoothing process. Additionally, I discovered that it's easier to only remove half of the backing, attach that part well, and then remove the rest.
In terms of appearance, this backsplash looks incredibly realistic. In fact, unless someone physically touches it, they would never know that it's not real slate or tile. It adds a touch of elegance to the kitchen and truly enhances the overall aesthetic. I must say that this is one of my absolute favorite purchases from Amazon. While the installation does require patience and careful planning, the end result is well worth it. I highly recommend this peel and stick tile for anyone looking for an affordable and stunning backsplash option.
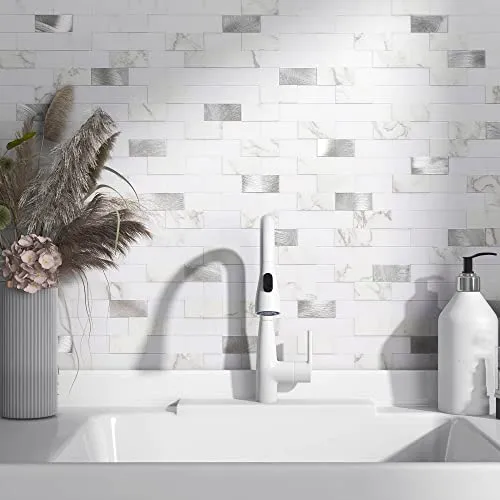
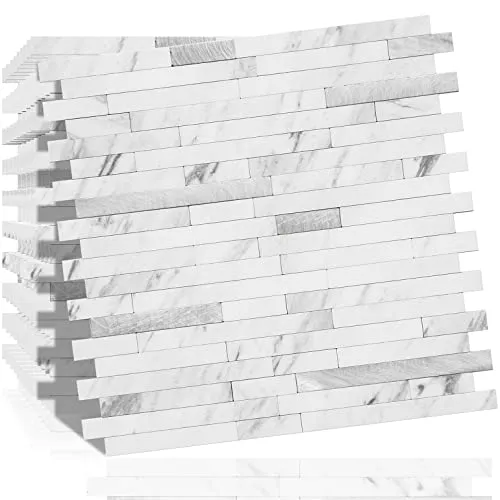
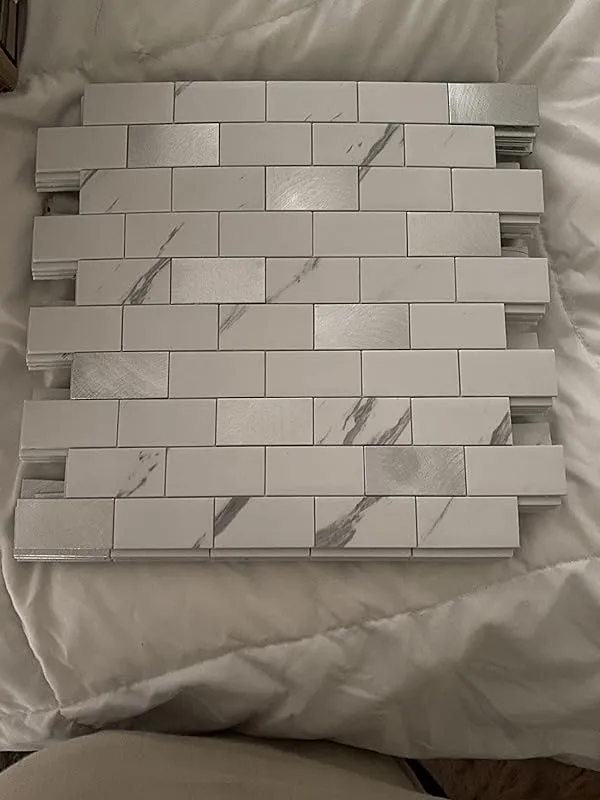
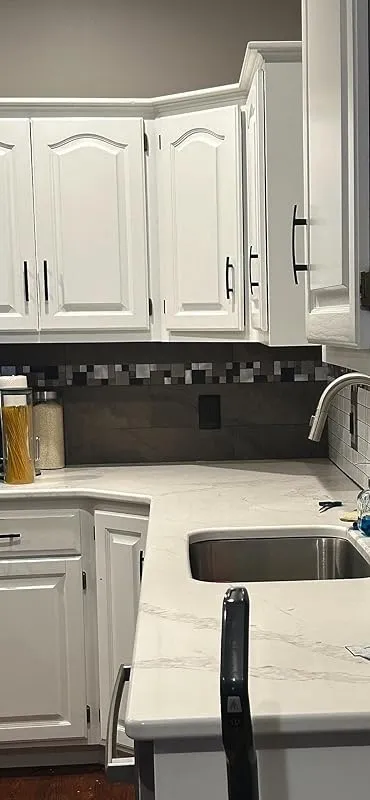
5. Marble Metal Mix Backsplash Tiles: Dicofun Kitchen Faux
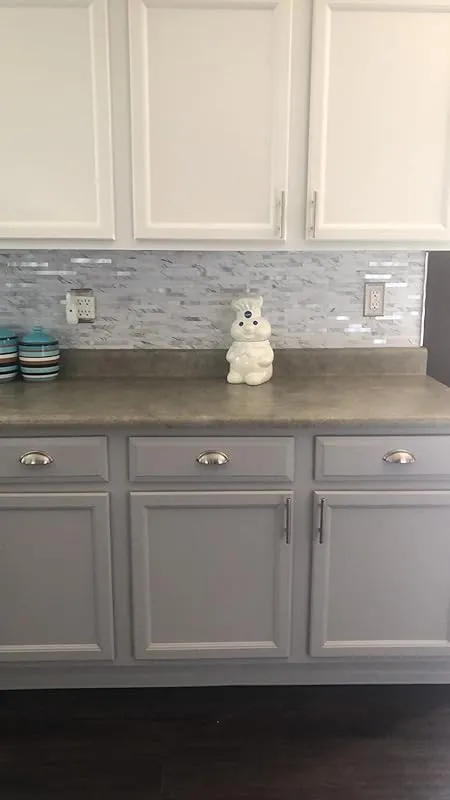
The white marble peel and stick tiles are truly a game-changer. With their gorgeous design and affordable price, they provide an easy and stylish upgrade to any space. Unlike other peel and stick options, these tiles do not feel or look cheap. They strike the perfect balance between high-end and budget-friendly.
After trying out various selections, these tiles emerged as the clear winner. They outshined two other Amazon products that were not up to par, and even surpassed the quality of tiles from Lowe's. Although the real stone option from Lowe's was a personal favorite, its high cost and additional tools required made it impractical. The white marble tiles, on the other hand, provided the desired aesthetic without breaking the bank or demanding extensive labor.
Installation was a breeze, thanks to the easy-to-use nature of these tiles. With a level base line as a starting point, a four-foot by eight-foot section was completed in less than two hours. The only challenge was cutting the tiles precisely, especially the metal pieces. However, with the use of a sewing rotary cutting tool and a metal ruler, the job was accomplished. It is worth noting that this method dulled two rotary blades, but the end result was worth it.
The colors of the tiles are true to the pictures, ensuring that you get exactly what you expect. While the tiles come with an edging product for covering exposed edges, using metal corner trim that matched the silver in the product proved to be a more stylish alternative. Although this method may be slightly more expensive, it adds a noticeable touch of elegance to the overall look.
Even for those with little to no experience in installing such products, these tiles are incredibly user-friendly. One satisfied customer even proudly installed them all by themselves, despite having no prior experience with wallpaper or similar projects. The end result exceeded expectations and added a touch of sophistication to their coffee bar area.
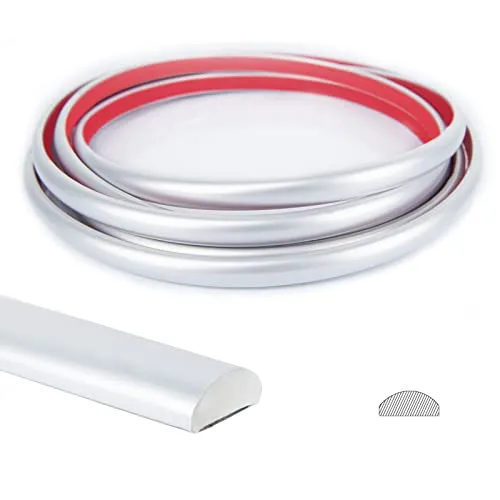
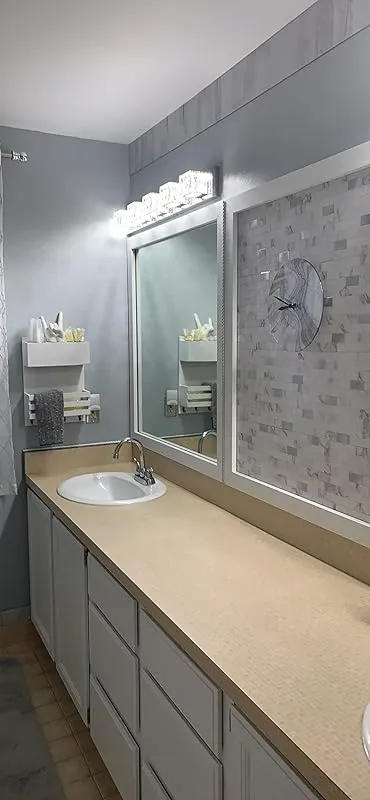
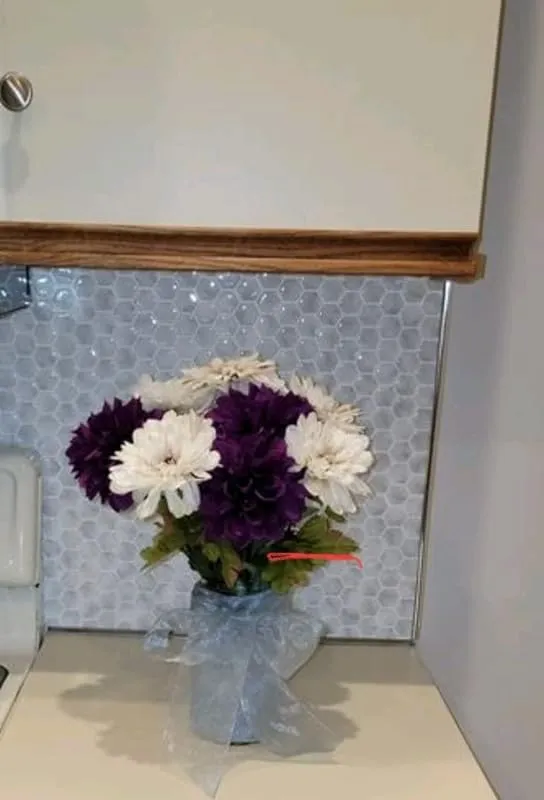
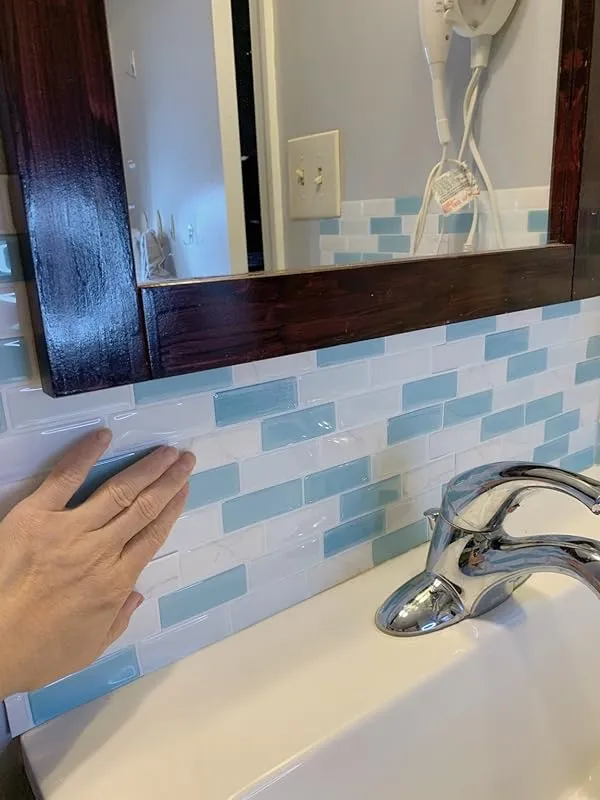
6. Silver Corner Trim: Backsplash Tile Edge Enhancement Solution
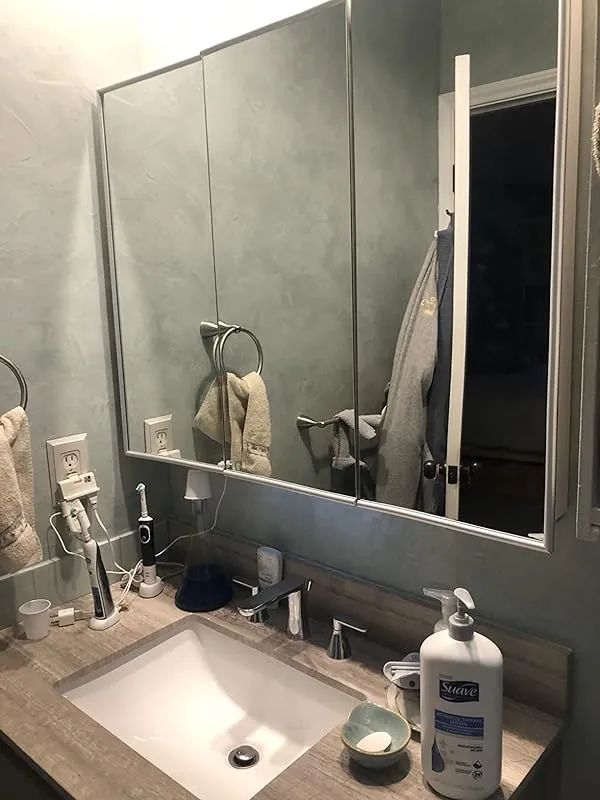
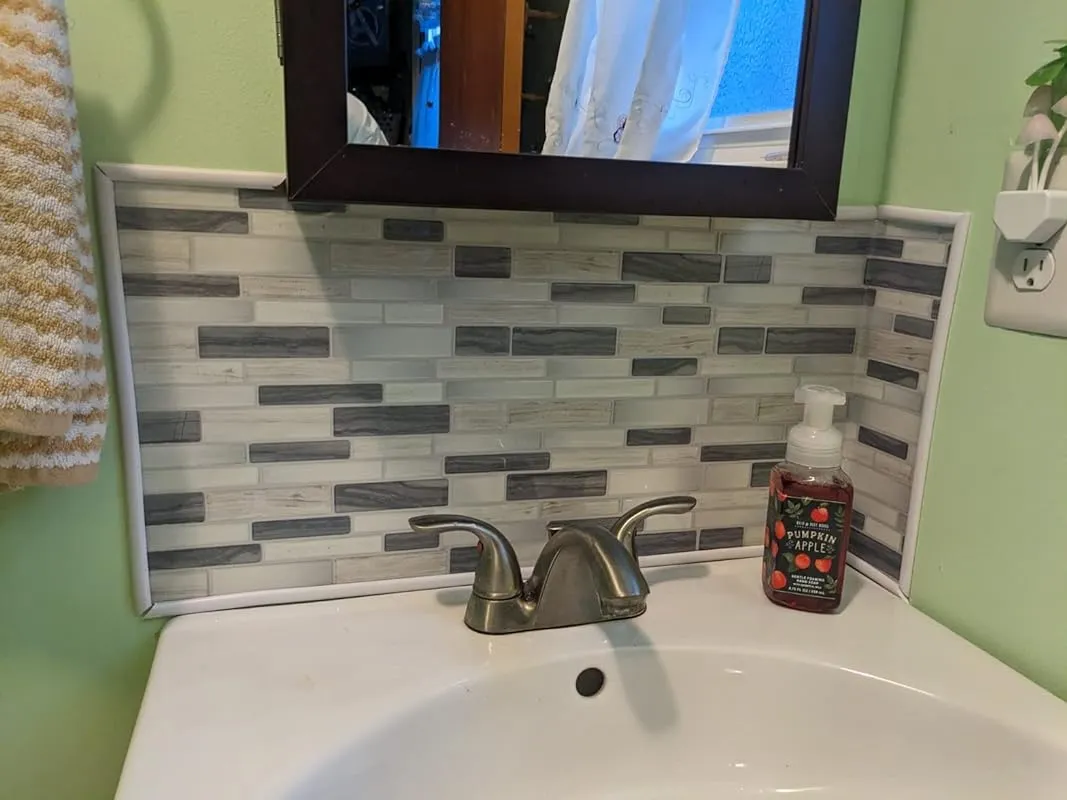
I recently purchased this trim to hide the worn edges of a beveled edge trifold mirror, and I am extremely satisfied with the result. The silver tone of the trim adds a stylish touch to the mirror. Although it was not the easiest to install neatly, my husband, who is skilled at these tasks, managed to do a great job. Following the recommendation of others, we allowed 24 hours for the trim to lay straight and used a blow dryer to aid in the installation process. I will update this review later to provide an update on how well it holds up.
In addition to using this trim for the mirror, I also used it to create a border around a peel and stick backsplash in my bathroom and kitchen. I found it to be very easy to work with, as it was simple to cut with a sharp blade and the peel and stick function made it effortless to apply. The trim gave a nice finished look to the backsplashes. The only challenge I encountered was getting the pieces straight due to the way they were rolled for shipping. However, gently rolling them in the opposite direction for a while solved this issue quite effectively.
Furthermore, I used this trim to enhance the appearance of our peel and stick backsplash, which extends beyond the cabinets to cover the entire length of the countertops. The trim added a beautiful accent to this area, making the overall appearance much better. My only complaint is that it was not easy to cut clean 45° angles to join the corners. This aspect of the application process was a bit tedious. However, apart from that, the overall application was extremely easy.
If you decide to use this trim, I would advise being extra careful when cutting it to size and sticking it to the mirror or any other surface. I found that heating it up with a hairdryer helped remove any curls. Additionally, it is important to note that the trim comes rolled, so it may be a bit tricky to unroll and lay flat for measuring. Once it sticks, it adheres firmly and is difficult to move. Therefore, having a hairdryer on hand will make the process easier. If you are working with a longer edge, it may also be beneficial to have an extra pair of hands to assist you.
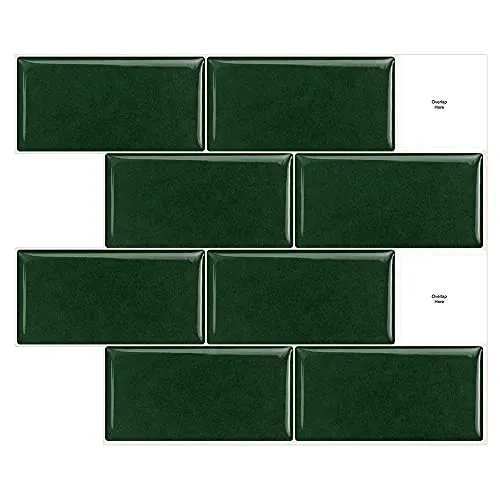
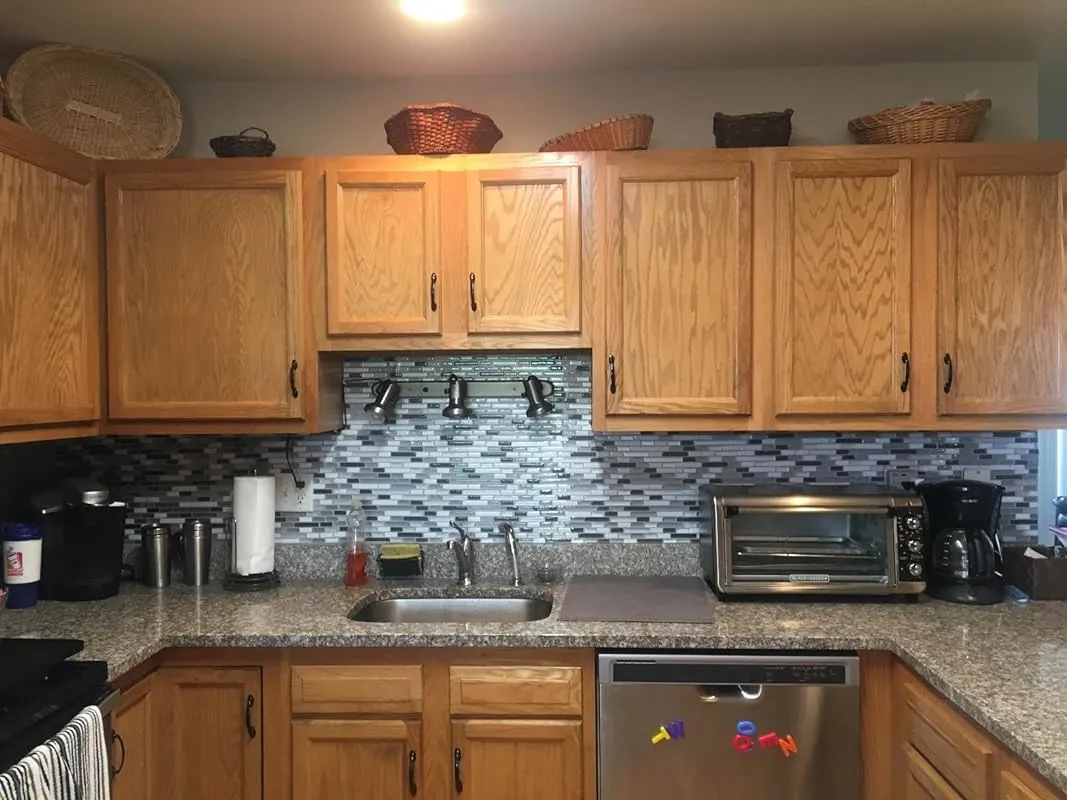
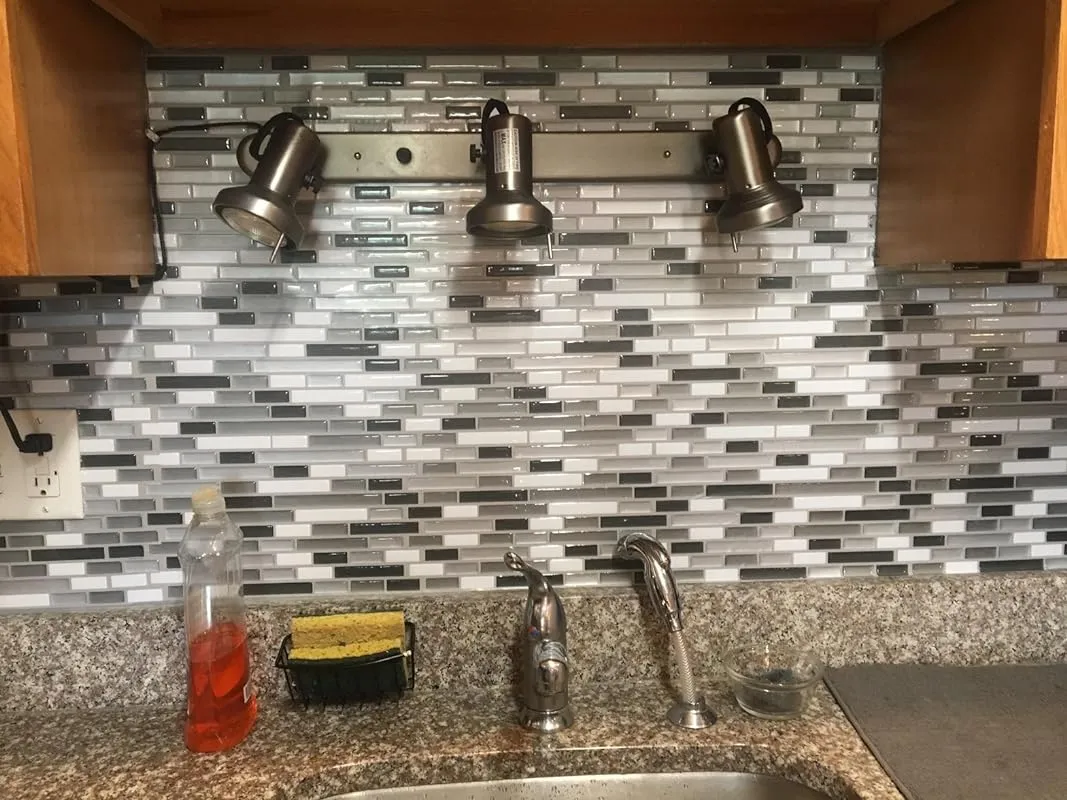
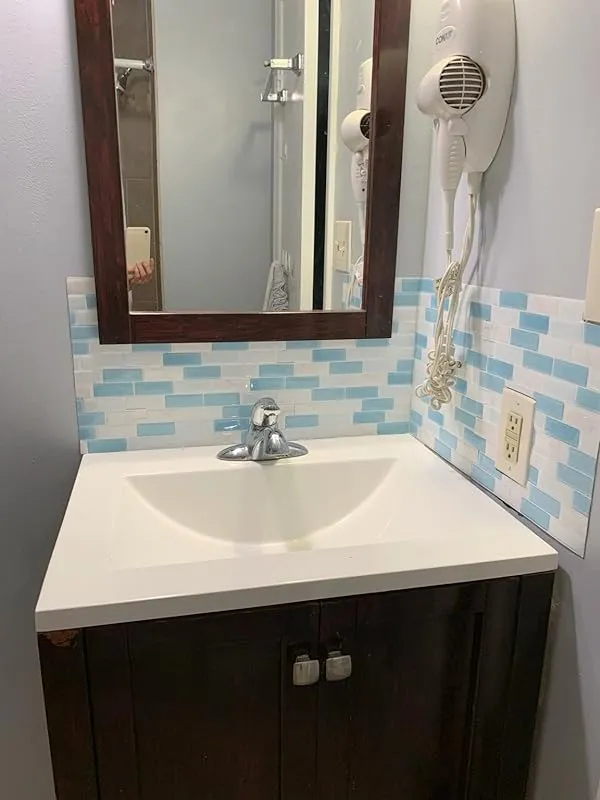
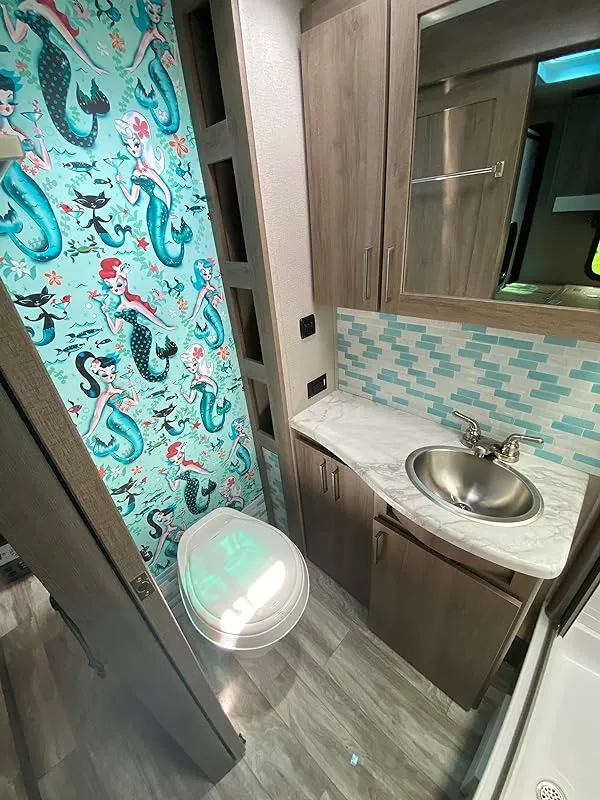
7. 3d Green Subway Splash: Peel, Stick, Spark!
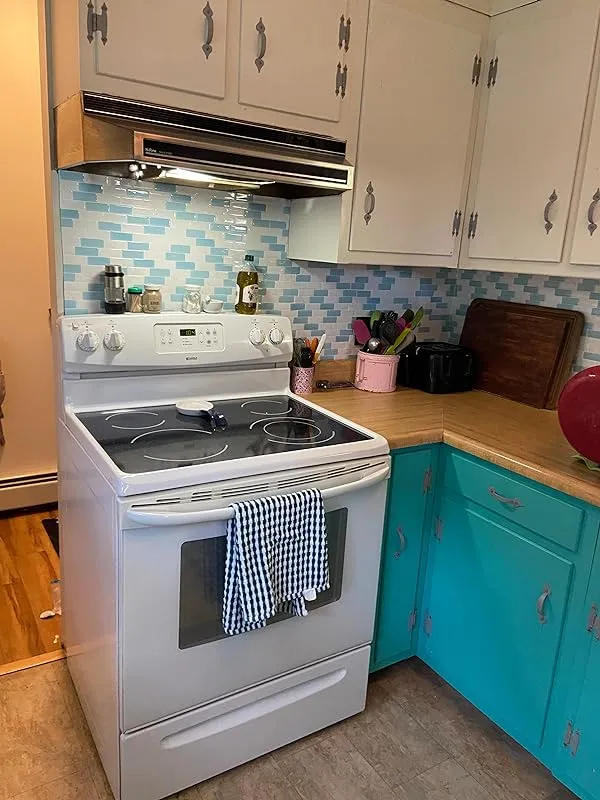
The installation process for these tiles was incredibly easy and the end result looks fantastic. I was able to install three boxes as a backsplash in my kitchen within 2.5 hours without any issues. Despite having walls that aren't perfectly square, the tiles still look seamless unless closely inspected. However, there have been a few small areas behind the stove where the adhesive has started to loosen due to pre-existing nail pops and grease on the walls. Overall, the durability of these tiles has exceeded my expectations. Moreover, they are incredibly easy to clean.
In terms of aesthetics, the peel and stick tiles have a lovely color that is not overly bright but rather a beautiful teal with marbling effect. I personally used them in my bathroom and found them to be a perfect DIY solution. They are also easy to clean and maintain.
For my kitchen backsplash, I purchased three packs of these tiles and also used them on the side of my island. I must say, it was worth every penny. The end result is stunning and I would rate it 15 out of 10.
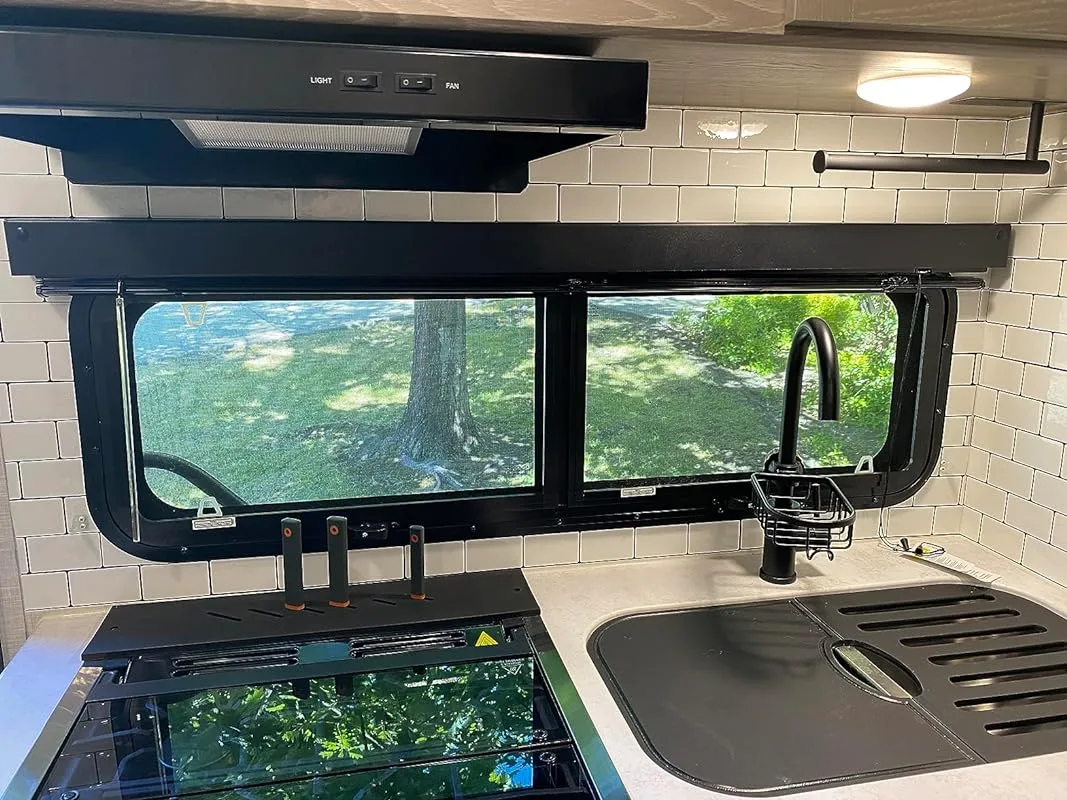
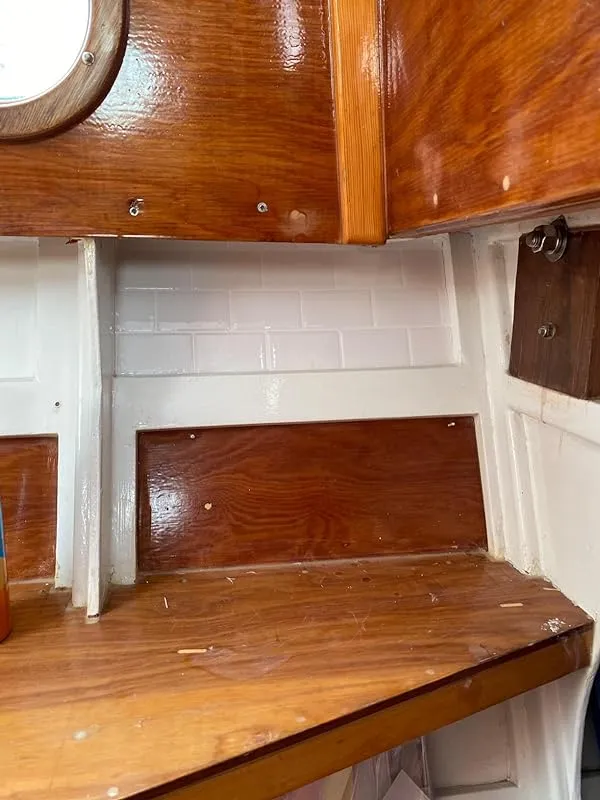
In the context of an RV bathroom, these tiles make a great backsplash. They are easy to cut and have a nice thickness that gives the illusion of real tiles. The overall effect is quite impressive.
While the colors of these tiles didn't match my kitchen and I didn't have the necessary skills for installation, I still found the product to be of great quality. It effectively prevented water from seeping through as a backsplash. If you're looking for a unique option, I would highly recommend this product, especially for larger kitchens. It's also a great temporary solution until you can afford real tiles, but you may find that it doesn't necessarily need to be changed out.
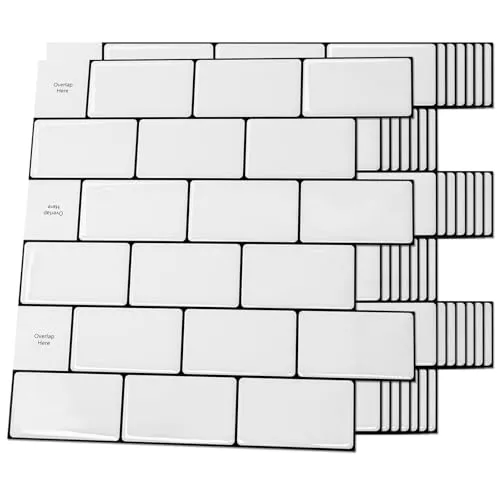
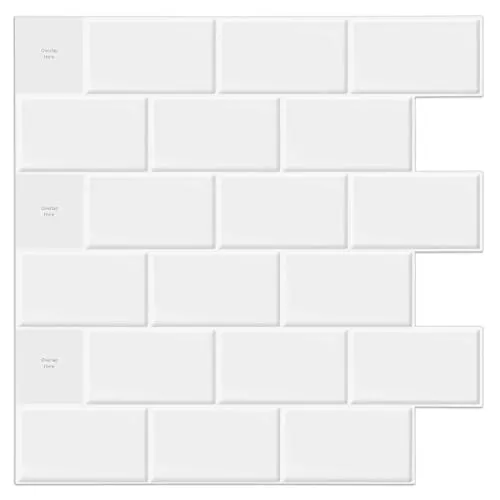
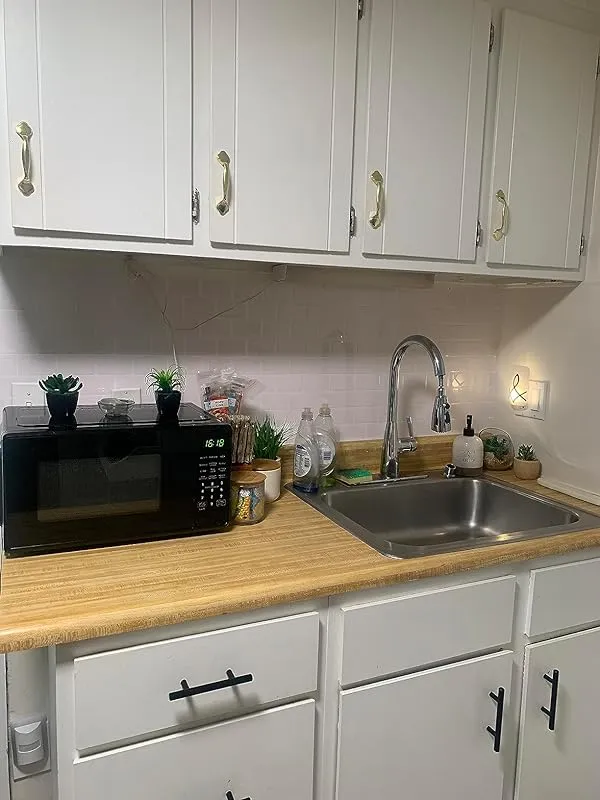
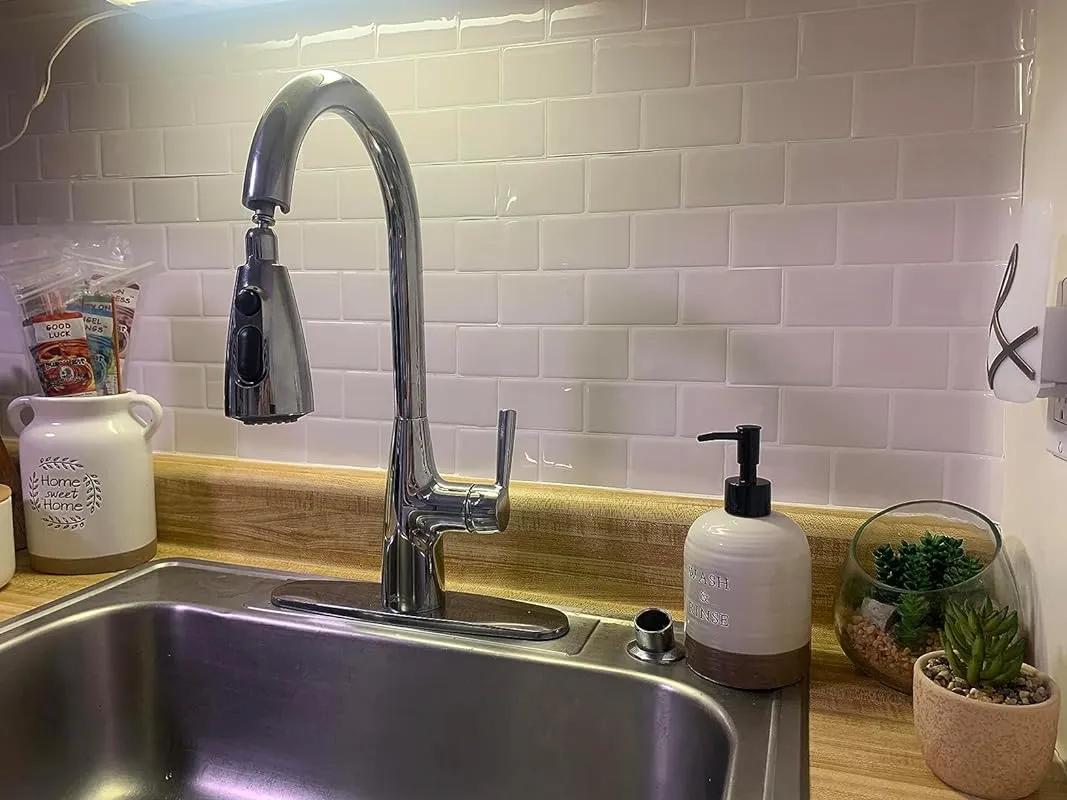
8. Longking Peel And Stick Backsplash Tile, Self-Adhesive Vinyl Subway Tiles, Stick On Tiles, 10-Pack

The placement of these tile stickers may initially be a bit tricky, but once you get the hang of it, the process becomes simple. Although they may not exactly replicate the look of real tile and grout, they are close enough that most people won't notice the difference.
For installation, some reviews recommended using a new utility knife and steel ruler, but scissors ended up being easier to handle. Keep in mind that some counters may not be level, which can pose a challenge. However, this can be easily fixed by using scraps to cut and fill in any slanted gaps along the bottom. Applying caulk to these areas will ensure a seamless finish.
The adhesive on these tile stickers is strong enough to grip well onto various surfaces, including older formica backsplashes. Using a product like Krud Kutter to remove the sheen from the surface before installation can greatly improve adhesion. Pressing down on every seam during installation is important, and going over them with a damp towel at the end will further enhance their durability.
In terms of longevity, these tile stickers have held up well in a humid state like Alabama for six months without any issues. They are resilient and maintain their appearance over time.
If you have any uneven or poorly spaced outlets or jacks on your wall, these tile stickers can effectively conceal them. It may take some time to find the right angle and lighting to blend the cover-up seamlessly, but once in place, it becomes virtually invisible.
In addition to the tile stickers, the reviewer also used the Giani countertop paint kit to transform their kitchen. The combination of these two products allowed for a complete makeover in just three days at an affordable price of under $200.
It's worth noting that these tile stickers sometimes go out of stock. However, the reviewer was able to find the exact same ones listed under "Art3d Subway Tiles" on Amazon when they needed to reorder.
9. Smart Sandstone Stick-On Backsplash Tile – Yipscazo, 10 Sheets

I recently purchased these peel and stick tiles to enhance the appearance of my kitchen, and I must say, I am extremely satisfied with the results. Initially, I bought two packs consisting of ten tiles each, and they covered a significant portion of my kitchen. In hindsight, I wish I had purchased an additional pack for some extra coverage. However, I was able to order one more pack to complete the project.
The installation process was a breeze. I used a can of spray adhesive to ensure that the tiles would adhere well to my walls. I found that the adhesive on the back of the tiles was already strong, but the extra spray adhesive provided added security. The tiles were thin enough to fit easily under my switchplates, and they seamlessly blended with the surrounding decor.
What surprised me the most about these tiles was how easy they were to work with. I am not typically a precise person, and I expected this project to be a disaster or look artificial. However, to my delight, the installation process was straightforward, and the end result looked fantastic. I used a box cutter to cut the tiles, and they easily adjusted if needed. The sheets blended together seamlessly, making it impossible to distinguish where one tile ended and another began.
I had previously tried another brand of peel and stick tiles, which I thought were easy to install. However, this particular product exceeded my expectations in terms of ease and forgiveness. It provided a quick, simple, and cost-effective solution for upgrading my kitchen.
Prior to discovering these peel and stick tiles, I was unable to afford the resources required for removing the old tiling on my kitchen walls. Additionally, I had no prior experience with such projects. However, these tiles proved to be the perfect solution in terms of affordability and aesthetics. I absolutely love the 3D style of brick on the tiles, and they look incredibly realistic.
The adjustability of the tiles was another pleasant surprise. If I initially misaligned a tile or made a mistake, I was able to easily readjust it without any issues. The material itself is thick, ensuring durability, and the adhesive on the back is strong and reliable. The installation instructions provided were clear and helpful, earning a solid 5 out of 5 rating.
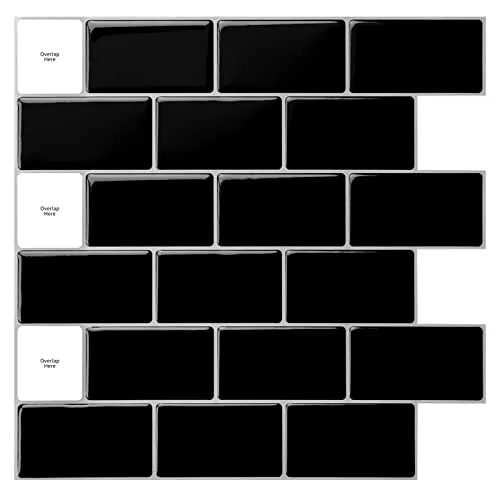
10. Art3d 12" X 12" Peel And Stick Backsplash Tiles For Kitchen, Shiny Black

After trying out these textured vinyl tiles on our boat, I must say that they have been a game-changer for our project. The straight edge provided with the tiles made cutting them a breeze, unlike using a knife or scissors which proved to be challenging. Although getting a perfect cut is not necessary thanks to the stretchability of the tiles, it's still recommended to aim for precision. I also discovered that caulking the edges gives a more authentic look to the overall finish.
Aesthetically, these tiles have impressed us, and we hope they will withstand any condensation that may occur on the hulls. However, I did encounter a slight hiccup when ordering an additional set. The tiles I received were slightly different, so I recommend ordering everything you need for your project at once to avoid getting mismatched materials.
Properly following the installation instructions is crucial for achieving a seamless tile match-up. Starting with cutting the first piece to line it up on the edge and then working your way out from there is key. If using adhesive countertop paper, I suggest applying it first and then overlapping the tiles on top for a secure seal.
When it comes to cutting the tiles, I found using scissors to be the easiest method. I left the clear protective layer on top and the non-adhesive layer on the bottom while cutting the necessary pieces. Then, I removed the clear top layer and the non-adhesive part before focusing on lining up and sticking the tiles. Planning out the layout beforehand and then executing the installation helped ensure a successful outcome.
I am pleased to report that despite the boat experiencing a lot of condensation, the adhesive has held up remarkably well. So far, so good!
In essence, these textured vinyl tiles are an affordable and time-saving alternative to traditional tile backsplashes. With proper surface preparation and installation techniques, they can transform any worn-out space into something almost brand new. I was able to revamp an elderly relative's kitchen with just this one upgrade, saving both time and money in the process.
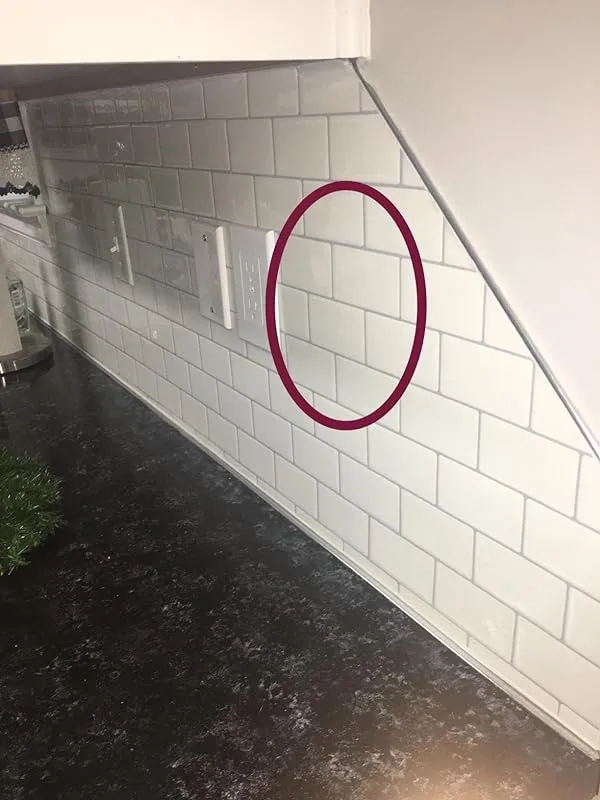
For the white tiles, it's important to install them on a light-colored or white substrate. I noticed that when installed over a dark laminate veneer, the overlapped areas appeared slightly darker white due to the opacity of the thinnest part of the panels, which is the 'grout'. However, this minor issue doesn't overshadow the overall quality and value of the product.
At the time of purchase, these tiles were priced at around $2.50 per square foot, making them an excellent budget-friendly choice. I was able to install 30 square feet in just a couple of hours, thanks to the time-saving nature of the product. Overall, considering the time and cost savings, along with the impressive end result, I highly recommend these textured vinyl tiles for anyone looking to upgrade their space without breaking the bank.
FAQs
Are peel and stick backsplash tiles resistant to water and heat?
Peel and stick backsplash tiles can vary in their resistance to water and heat depending on the specific product. Generally, these tiles are designed to be water-resistant, meaning they can withstand exposure to water without getting damaged.
However, it's important to note that excessive or prolonged exposure to water may still cause issues over time, such as peeling or discoloration.
As for heat resistance, peel and stick backsplash tiles are typically not intended to be used in areas with high heat, such as behind stovetops or near fireplaces. The adhesive used on these tiles may not be able to withstand extreme temperatures and could weaken or melt, causing the tiles to come loose.
To ensure the longevity of your peel and stick backsplash tiles, it is advisable to follow the manufacturer's guidelines and recommendations regarding water and heat exposure. If you require a backsplash that can withstand high heat or excessive moisture, you may want to explore alternative options like ceramic or glass tiles that are specifically designed for those conditions.
Are peel and stick backsplash tiles suitable for all types of surfaces?
Peel and stick backsplash tiles are generally suitable for a wide range of surfaces, but it is important to consider the specific characteristics of the surface you are working with. These tiles are designed to adhere to smooth and clean surfaces such as drywall, plywood, ceramic tiles, and even some types of countertops.
However, they may not adhere well to textured or uneven surfaces, as they rely on a strong adhesive bond. It is also important to ensure that the surface is free from dust, grease, and other contaminants that may affect the adhesive's effectiveness.
If you are unsure about the suitability of peel and stick tiles for your surface, it is recommended to test a small area first or consult with a professional for guidance. Additionally, some manufacturers may provide specific recommendations for different surface types, so it is advisable to follow their instructions for optimal results.
Are there any specific maintenance requirements for peel and stick backsplash tiles?
Yes, peel and stick backsplash tiles do have specific maintenance requirements to ensure their longevity and appearance. Here are some guidelines to follow:
1. Cleaning: Regularly clean the tiles with a mild detergent and warm water using a soft cloth or sponge. Avoid using abrasive cleaners or scrub brushes, as they can damage the tile surface.
2. Avoid Excessive Moisture: While peel and stick backsplash tiles are water-resistant, it is important to prevent excessive moisture from seeping behind the tiles. Wipe up any spills or splashes immediately to prevent water damage.
3. Avoid Heat Exposure: Peel and stick tiles may not withstand direct heat sources such as stovetops or ovens. Keep them away from intense heat to prevent warping or melting.
4. Avoid Harsh Chemicals: Do not use harsh chemicals or solvents on the tiles, as they can cause discoloration or damage. Stick to mild cleaning agents specifically designed for tile surfaces.
5. Regular Inspection: Periodically inspect the tiles for any signs of peeling, lifting, or damage. If you notice any issues, address them promptly to prevent further damage.
Following these maintenance requirements will help keep your peel and stick backsplash tiles looking their best and ensure their durability over time.
Can peel and stick backsplash tiles be easily removed without damaging the wall?
Yes, peel and stick backsplash tiles can generally be easily removed without causing significant damage to the wall. The advantage of these tiles is their adhesive backing, which allows for easy installation and removal.
However, it is important to follow the manufacturer's instructions and recommendations for proper application and removal.
To remove peel and stick backsplash tiles, start by heating the tiles with a hairdryer or heat gun. This will soften the adhesive and make it easier to peel off. Gently lift one corner of the tile and slowly peel it away from the wall.
Use a putty knife or a plastic scraper to help loosen the tile if needed. Take care not to pull too hard or forcefully, as this could damage the wall.
Once the tiles are removed, there may be some residue left on the wall. You can use a mild adhesive remover or a mixture of warm water and dish soap to clean off any remaining adhesive. Test the cleaning solution on a small, inconspicuous area of the wall first to ensure it does not damage the paint or the surface.
Overall, if the peel and stick backsplash tiles are properly installed and removed following the recommended techniques, they should not cause significant damage to the wall.
Can peel and stick backsplash tiles be used in kitchens and bathrooms?
Yes, peel and stick backsplash tiles can be used in both kitchens and bathrooms. These self-adhesive tiles are specifically designed for easy installation and are a popular choice for homeowners looking for a quick and affordable way to update the look of their kitchen or bathroom.
The peel and stick feature allows for a hassle-free installation process, as there is no need for any additional adhesives or tools. Additionally, these tiles are water-resistant and can withstand the humid conditions typically found in kitchens and bathrooms.
However, it is important to note that not all peel and stick backsplash tiles are created equal, so it is recommended to choose a high-quality product that is specifically labeled for use in wet areas.
Do peel and stick backsplash tiles require any special tools or skills to install?
Peel and stick backsplash tiles are designed to be user-friendly and convenient, making the installation process relatively simple. In most cases, you won't require any special tools or skills to install them. The tiles come with a self-adhesive backing, eliminating the need for messy glue or grout.
However, having a few basic tools can make the installation process easier and more precise.
A utility knife or a pair of scissors will be handy for cutting the tiles to fit around corners or outlets. A straight edge, such as a ruler or level, can help ensure that the tiles are applied in a straight line.
Additionally, a measuring tape can be useful for determining the dimensions of the space and calculating the number of tiles needed.
If you're new to DIY projects or unsure about your abilities, it may be helpful to watch tutorial videos or read installation guides before starting. This can provide you with tips and tricks to achieve a professional-looking result.
Overall, though, peel and stick backsplash tiles are designed to be accessible to homeowners with various skill levels.
How do peel and stick backsplash tiles compare to traditional tile installation in terms of cost?
Peel and stick backsplash tiles offer a cost-effective alternative to traditional tile installation. In terms of cost, peel and stick tiles typically come at a lower price point compared to traditional tiles.
The reason behind this is that peel and stick tiles eliminate the need for professional installation, reducing labor costs significantly. Traditional tile installation usually involves hiring a professional installer, which can add to the overall expense.
Moreover, peel and stick tiles can also save you money by eliminating the need for additional materials such as adhesives, grout, and specialized tools. These self-adhesive tiles are designed for easy DIY installation, allowing homeowners to save on installation costs.
However, it's important to note that the cost of peel and stick tiles can vary depending on the quality and brand. Higher-end peel and stick options may come at a higher price compared to basic options.
Therefore, it's advisable to consider your budget and desired aesthetic when comparing costs between peel and stick and traditional tile installation.
How durable are peel and stick backsplash tiles?
Peel and stick backsplash tiles are generally quite durable, but their longevity can depend on various factors. The quality of the tiles themselves, the surface they are applied to, and the level of maintenance all play a role in determining their durability.
High-quality peel and stick tiles are designed to withstand regular wear and tear, heat, and moisture. They are often made from materials such as vinyl or PVC, which are known for their durability. However, it is important to note that not all peel and stick tiles are created equal, so it is advisable to choose reputable brands or read customer reviews to ensure you're getting a durable product.
The surface to which the tiles are applied also affects their durability. It is crucial to properly clean and prepare the surface before installation to ensure good adhesion. Smooth, clean, and dry surfaces tend to provide better adherence for the tiles, increasing their durability.
Regular maintenance is also key to prolonging the lifespan of peel and stick backsplash tiles. Avoid using harsh chemicals or abrasive cleaners that could damage the tiles. Instead, opt for gentle cleaning solutions and non-abrasive tools.
Overall, when properly installed and maintained, peel and stick backsplash tiles can be a durable and cost-effective option for adding a stylish touch to your kitchen or bathroom.
What are peel and stick backsplash tiles and how do they work?
Peel and stick backsplash tiles are a type of self-adhesive tiles that are designed to be easily applied to walls or other surfaces. They are a convenient and affordable alternative to traditional tiles, as they eliminate the need for messy mortar or grout during installation.
These tiles typically come in a variety of materials, such as vinyl, metal, or glass, and are available in various sizes, colors, and patterns to suit different design preferences. The adhesive backing on the tiles allows them to stick securely to the surface without the need for additional adhesives.
To install peel and stick backsplash tiles, you simply need to peel off the protective backing and press the tile onto the desired surface. It is important to ensure that the surface is clean, smooth, and free of any dust or debris before applying the tiles, as this will help to ensure a strong bond.
Once the tiles are in place, you can use a rolling pin or a flat object to firmly press them down and ensure they are securely adhered to the surface. It is also possible to trim the tiles to fit around corners or other obstacles using a utility knife or scissors.
Overall, peel and stick backsplash tiles offer a quick and hassle-free way to update the look of your kitchen or bathroom without the need for professional installation or a major renovation.
What are some popular design options available for peel and stick backsplash tiles?
Peel and stick backsplash tiles offer a convenient and stylish solution for updating the look of your kitchen or bathroom. There are several design options available that can enhance the aesthetic appeal of your space:
1. Subway Tiles: Subway tiles are a timeless option that can add a classic and clean look to any backsplash. They come in various colors and finishes, allowing you to choose the one that best suits your style.
2. Mosaic Tiles: Mosaic tiles are a popular choice for adding a touch of texture and visual interest to your backsplash. They are available in a wide range of materials, such as glass, ceramic, and metal, and can be arranged in different patterns to create a unique look.
3. Patterned Tiles: If you want to make a bold statement, consider using patterned peel and stick backsplash tiles. From geometric patterns to intricate designs, these tiles can add personality and charm to your space.
4. Marble or Stone Look: If you desire a luxurious and elegant look, there are peel and stick tiles that mimic the appearance of marble or stone. These tiles can add a touch of sophistication to your backsplash without the hassle and cost of real stone.
5. Metallic Tiles: For a modern and sleek look, metallic peel and stick tiles are a great option. Whether you choose silver, gold, or copper, these tiles can reflect light and create a stunning visual effect.
Overall, the design options for peel and stick backsplash tiles are extensive, enabling you to find the perfect style that complements your overall interior design.