I Tested And Reviewed 10 Best Peel And Stick Floor Tile (2023)
Looking to give your floors an affordable makeover but don't want the hassle of a full renovation? Peel-and-stick vinyl floor tiles may be the perfect solution for you. With peel-and-stick tiles, you can transform the look of any room in just a weekend. All it takes is peeling off the backing and sticking the tiles directly onto your existing floor.
Before you run out and buy peel-and-stick tiles, there are a few key factors to consider:
What's your current floor type? Vinyl tiles can be applied over most existing hard surfaces like concrete, vinyl, and wood. However, very rough or uneven floors may need smoothing first. Pay attention to the manufacturer's recommendations.
What's your style? Peel-and-stick tiles come in a huge range of colors, textures, shapes, and sizes. Browse the options to find tiles that match your preferred aesthetic. Geometric, stone, and wood looks are very popular.
What areas will you be tiling? Kitchens and bathrooms exposed to lots of moisture may not be the best choice for peel-and-stick tiles, which can lift over time when wet. Opt for more durable porcelain or ceramic tile in wet areas.
How permanent do you want them to be? Vinyl tiles are designed for easy removal but they adhere more over time. If you want the option to switch up your floors frequently, go for tiles with less aggressive adhesives.
Ready to tackle a quick and easy flooring project? With the right prep and product selection, peel-and-stick vinyl tiles offer a stylish floor refresh in just a weekend. Get shopping for your perfect tiles today!
10 Best Peel And Stick Floor Tile
| # | Product Image | Product Name | Product Notes | Check Price |
|---|---|---|---|---|
|
1
|
 |
The product is ideal for DIY flooring in kitchens, dining rooms, bedrooms, and bathrooms.
|
|
|
|
2
|
 |
The product is ideal for FloorPops FP2475 Gothic Peel & Stick Floor Tiles, Black are ideal for easily updating and enhancing the look of any floor surface.
|
|
|
|
3
|
 |
The product is ideal for easily updating and adding style to your floors with its peel and stick design.
|
|
|
|
4
|
 |
The product is ideal for adding a colorful and multidimensional tile pattern to floors, creating a vibrant and stylish look.
|
|
|
|
5
|
 |
The product is ideal for enhancing the flooring with a sleek and stylish look using black marble-inspired vinyl tiles.
|
|
|
|
6
|
 |
The product is ideal for These peel-and-stick floor tiles are ideal for quickly transforming any space with a stylish, black tile design.
|
|
|
|
7
|
 |
The product is ideal for anyone looking for a cost-effective and easy-to-install flooring solution for their kitchen, dining room, bedrooms, or bathrooms.
|
|
|
|
8
|
 |
The product is ideal for easily and quickly installing a stylish and durable black tile floor.
|
|
|
|
9
|
 |
The product is ideal for adding a stylish and durable flooring option to any space.
|
|
|
|
10
|
 |
The product is ideal for easy and affordable DIY flooring in kitchen, dining room, bedrooms, and bathrooms.
|
|
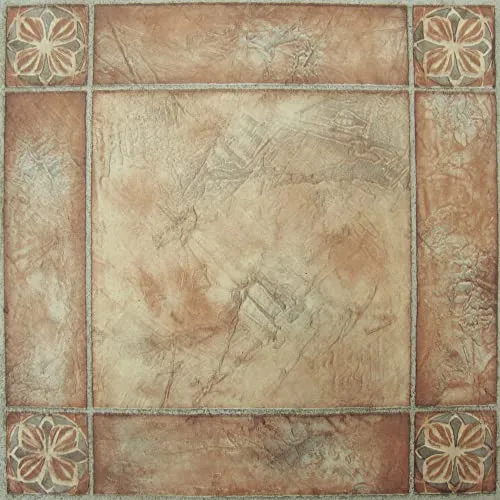
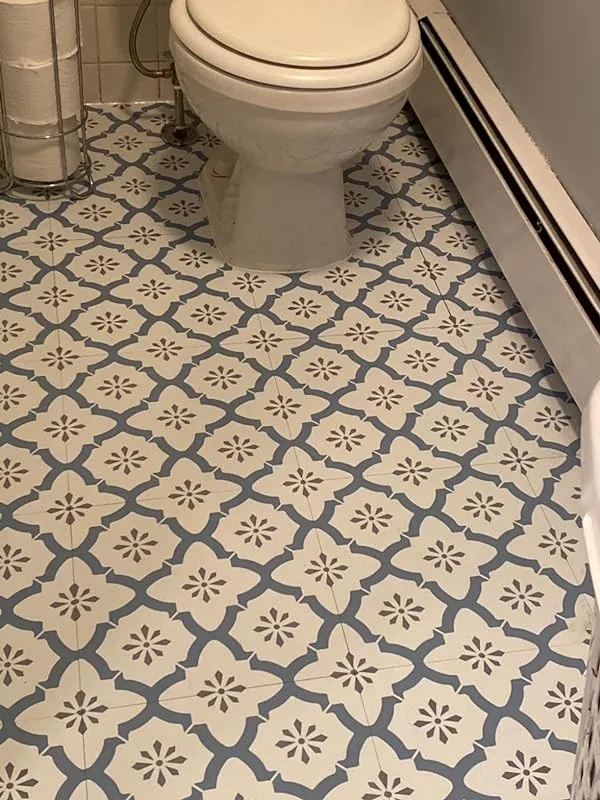
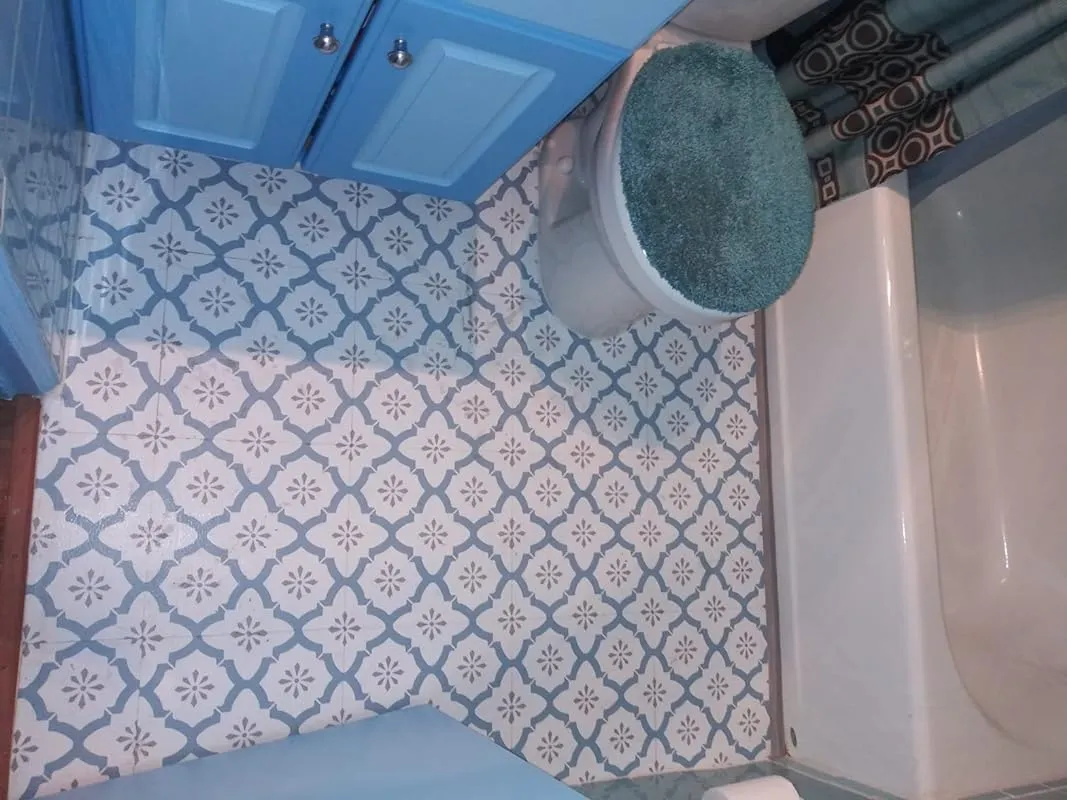
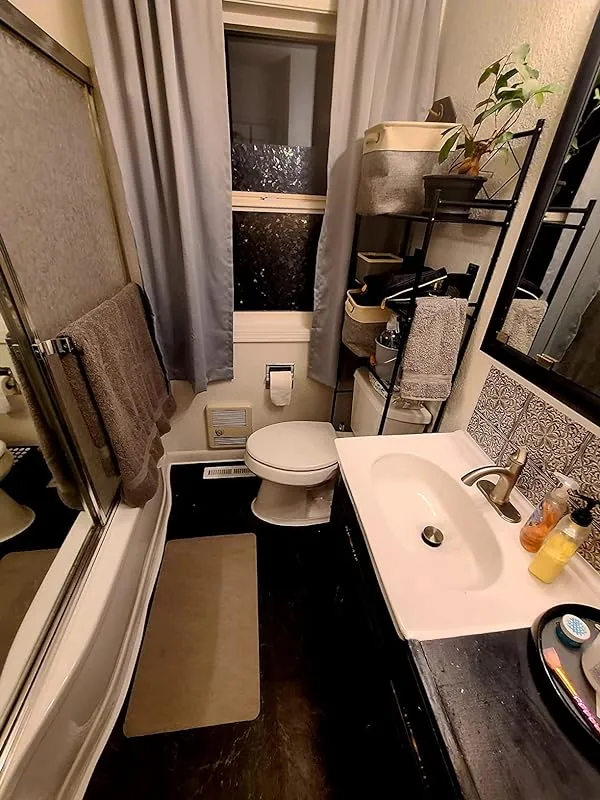
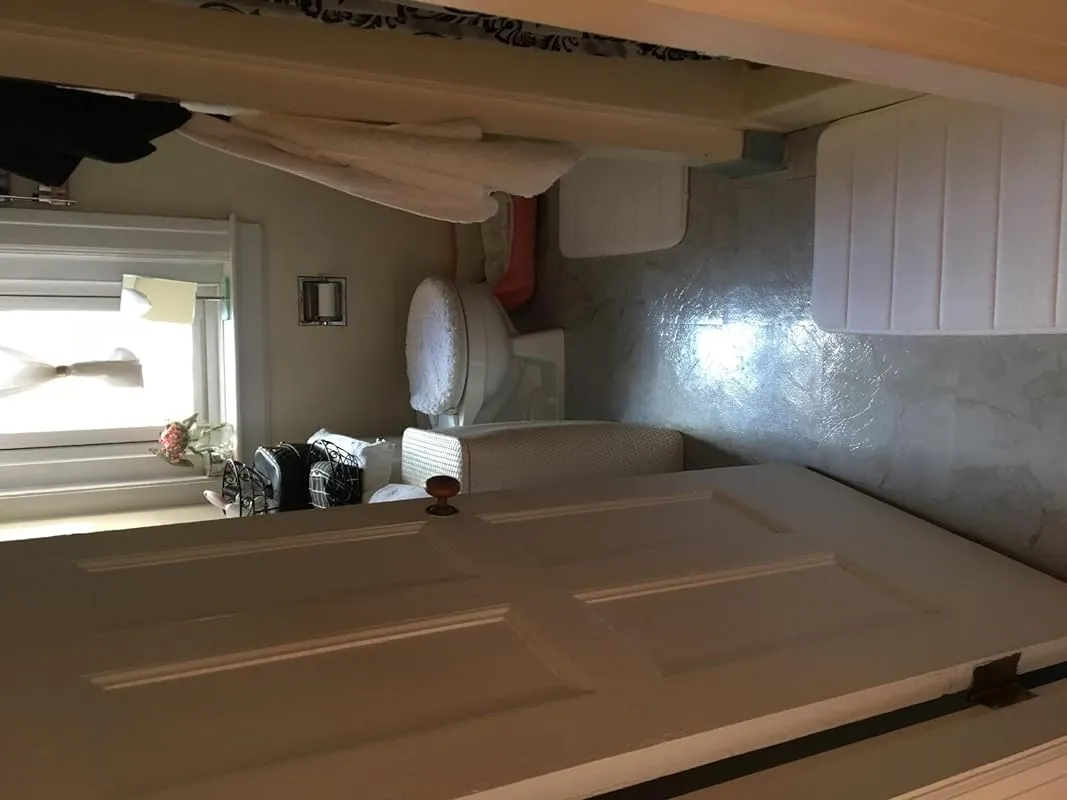
1. Nexus Spanish Rose Vinyl Tiles: Diy Flooring For Every Room.
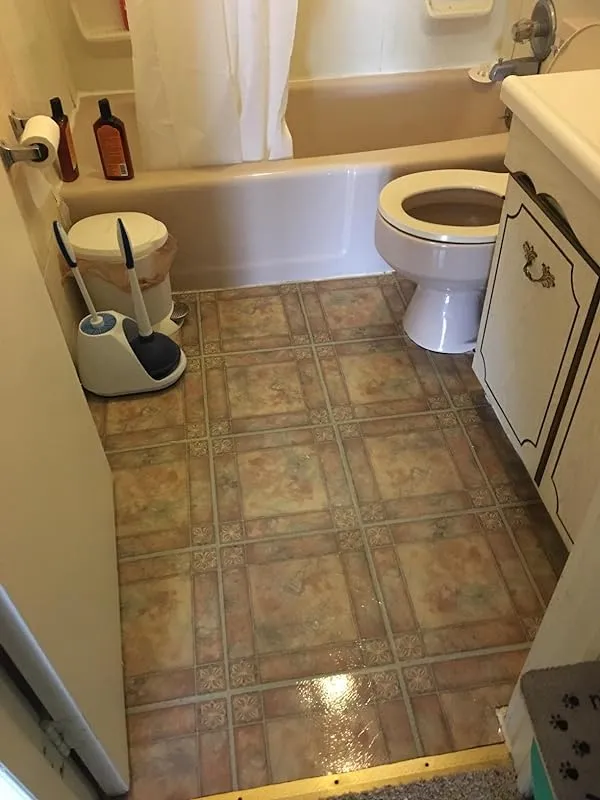

I recently purchased the peel and stick tiles for my bathroom floor and I must say, I am extremely impressed with the results. With just under $11 and an hour of work, I was able to transform my bathroom into a gorgeous space. In fact, I was so pleased with the outcome that I immediately ordered two more cases of tiles for my kitchen floor.
Installing these tiles was a breeze, even for someone with minimal DIY experience like myself. All I needed was an exacto knife and I was able to easily cut and place the tiles. In just 7 minutes, I had already made significant progress on my kitchen floor.
Not only are these tiles easy to use, but they also come at a great price. I was able to complete my bathroom and kitchen floors for only $50, which included 5 boxes of tiles. As a senior citizen female, I was hesitant to take on this project, but I am so glad I did. It not only saved me money, but it also gave me a sense of accomplishment. Plus, it served as a reminder for me to hit the gym!
When my friend suggested peel and stick tiles, I was skeptical. However, I was pleasantly surprised by the quality of the product. I wish I had taken before and after photos to show the transformation. I did have to order multiple times to ensure I had enough tiles, but it was definitely worth it. Despite having no previous experience laying flooring, everyone who has seen my kitchen floor thinks I hired a professional. I am extremely happy with the outcome and grateful to have found this product.
I understand that some reviews may be mixed, but I personally had a great experience with these tiles. I was initially hesitant to purchase due to the mixed reviews, but I am glad I took the plunge. I used floor adhesive for extra security, although I'm not sure if it was necessary. The floor turned out beautifully and my husband loves what I did to the powder room.
I will say that these tiles may not be the best option for high traffic areas, as the adhesive may not be the strongest. However, for lower-traffic areas, they are perfect. I plan on buying more to finish other areas of my home. Considering the price, I highly doubt you'll find a better option elsewhere.
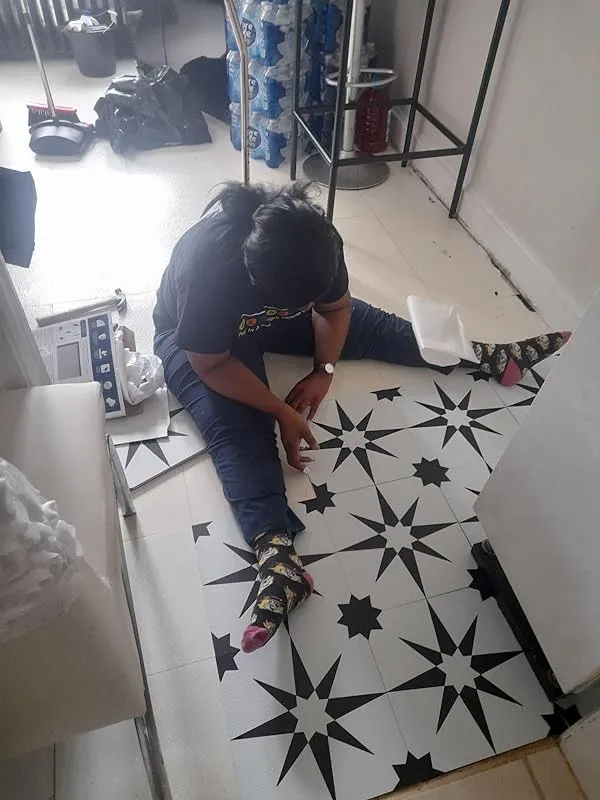
2. Floorpops Fp2475 Gothic Peel & Stick Floor Tiles, Black

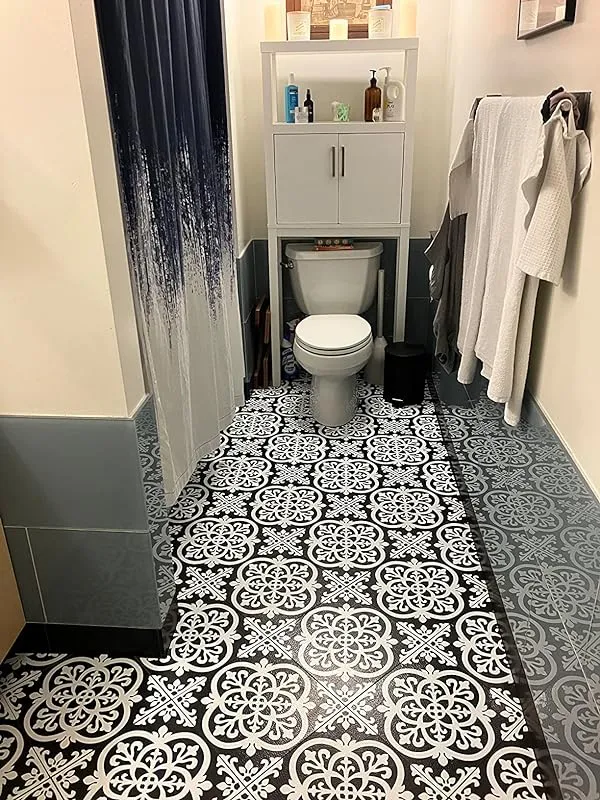
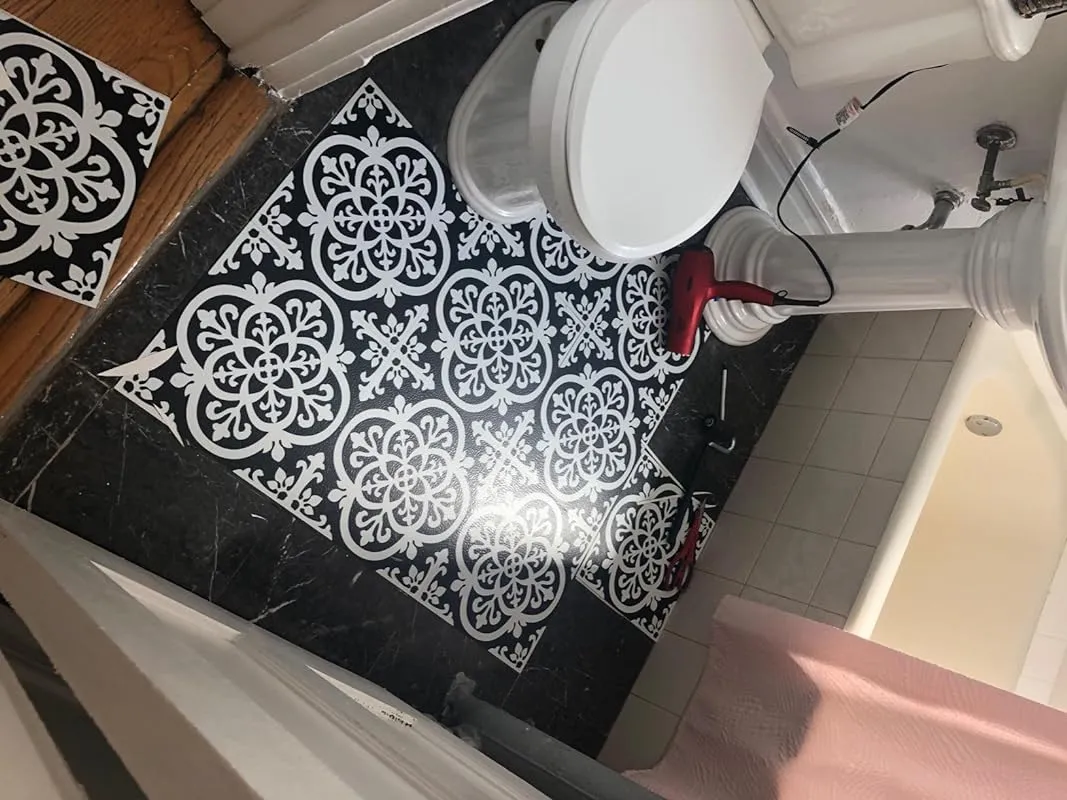
I recently purchased and installed these floor tiles and I am extremely satisfied with the results. The tiles are not only easy to use, but they also look amazing. Contrary to some reviews I came across, I found the adhesive to be very strong. In fact, it was so effective that I did not need to use any additional adhesive.
To ensure successful installation, I followed a few steps. First, I thoroughly vacuumed the area and cleaned the floor with TSP, ensuring it was rinsed and dried properly. I also made sure to clean the corners and hard-to-reach areas. Watching a video on how floor tiles are laid out helped me understand the starting point and the importance of two intersecting straight lines in the middle of the floor.
I gathered a few essential tools such as a utility knife, extra blades, sharp scissors, a marking pencil, a straight metal ruler or square, and garbage bags to keep the area clean. With these tools, I was able to easily cut the tiles to size using just a pair of scissors. The only challenging part was navigating around some tricky corners, but it wasn't too difficult to overcome.
For my project, I used 180 tiles, and it took me approximately 10 hours to complete. However, keep in mind that my room had an irregular shape and three doorways with complicated base molding to work around. To give the finished look a professional touch, I recommend ordering cove molding and adhesive. This adds a polished and refined appearance to the overall installation.
Finally, I want to emphasize that this project does require some effort and time. However, the end result is well worth it. To make the process smoother, follow these tips: clean the floor thoroughly, create paper stencils for round cuts, use a hairdryer to ease the process of cutting small round holes, invest in vinyl floor adhesive tape for areas that need extra support, and finish the look with caulking around uneven spots and the bathtub.
I hope these insights and recommendations help you successfully complete your own project. Happy tile installation!
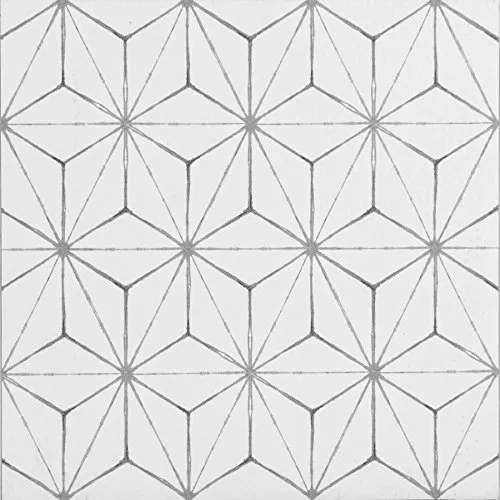
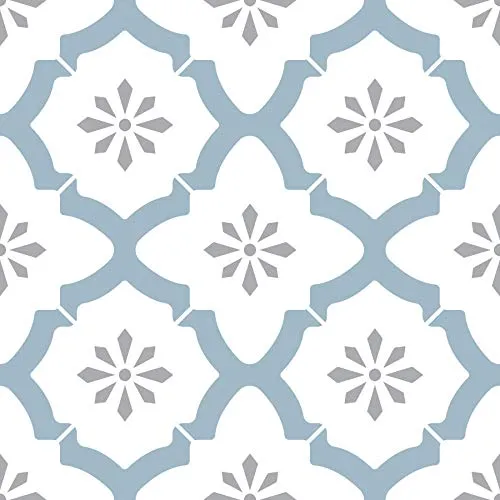
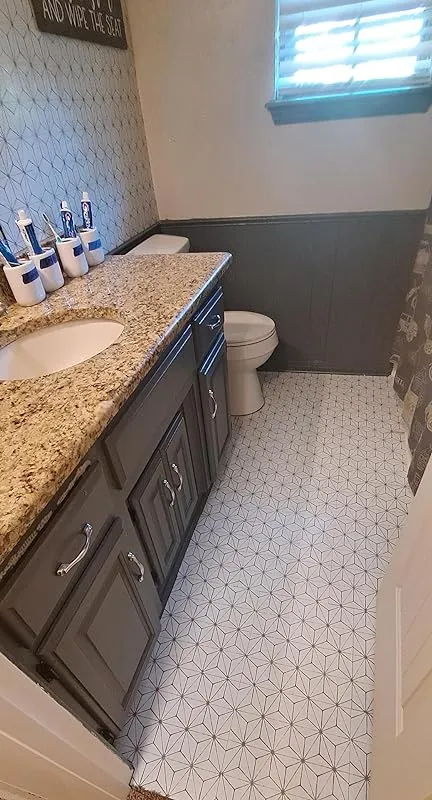
3. Floorpops Fp2481 Kikko Peel Stick Floor Tiles, White & Off-White
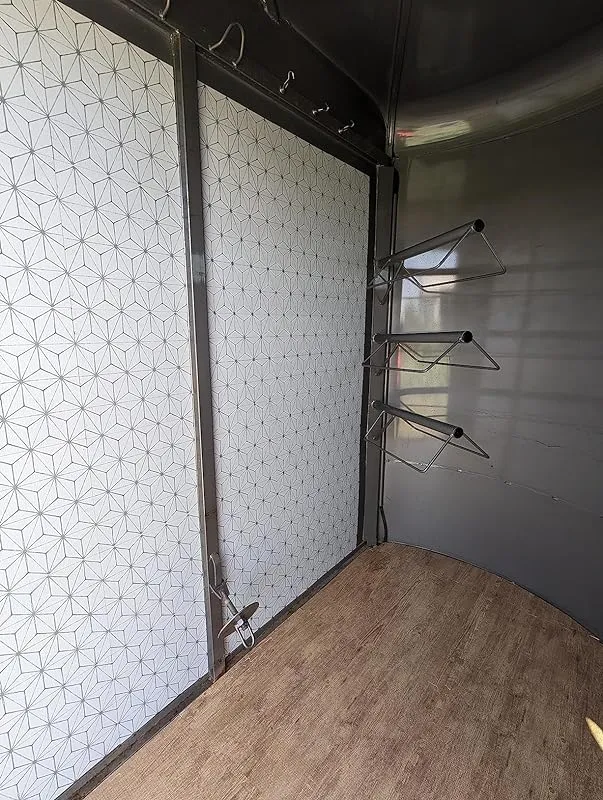

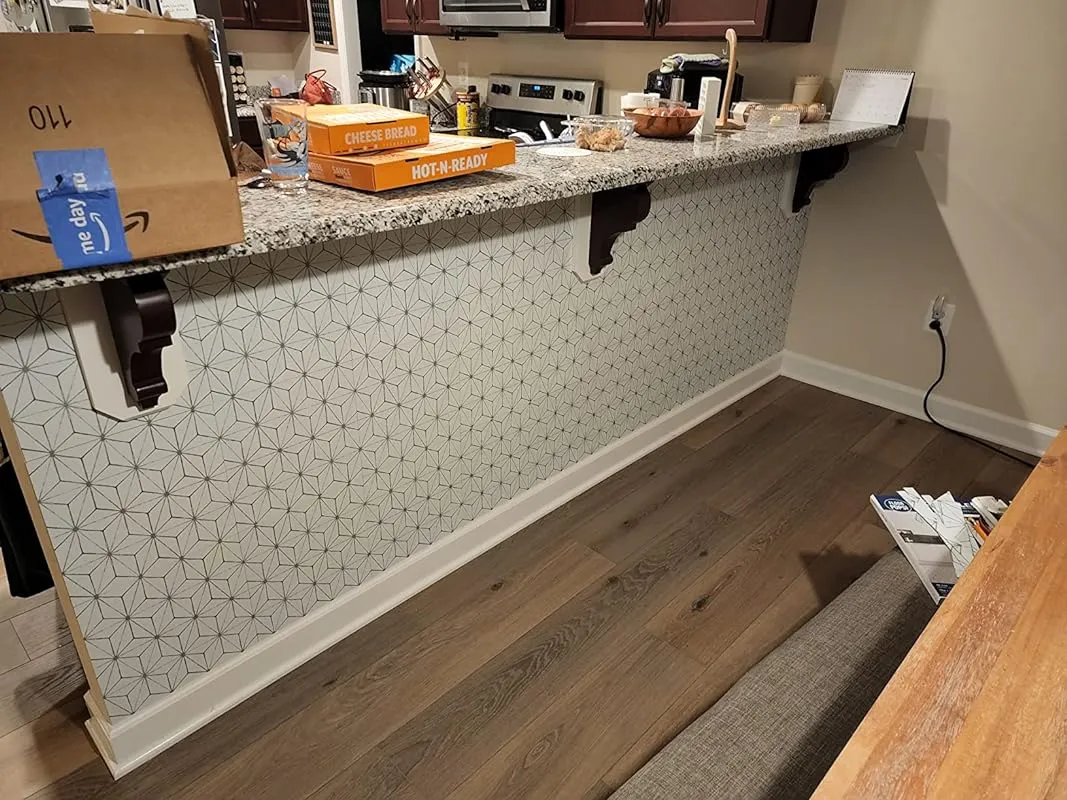
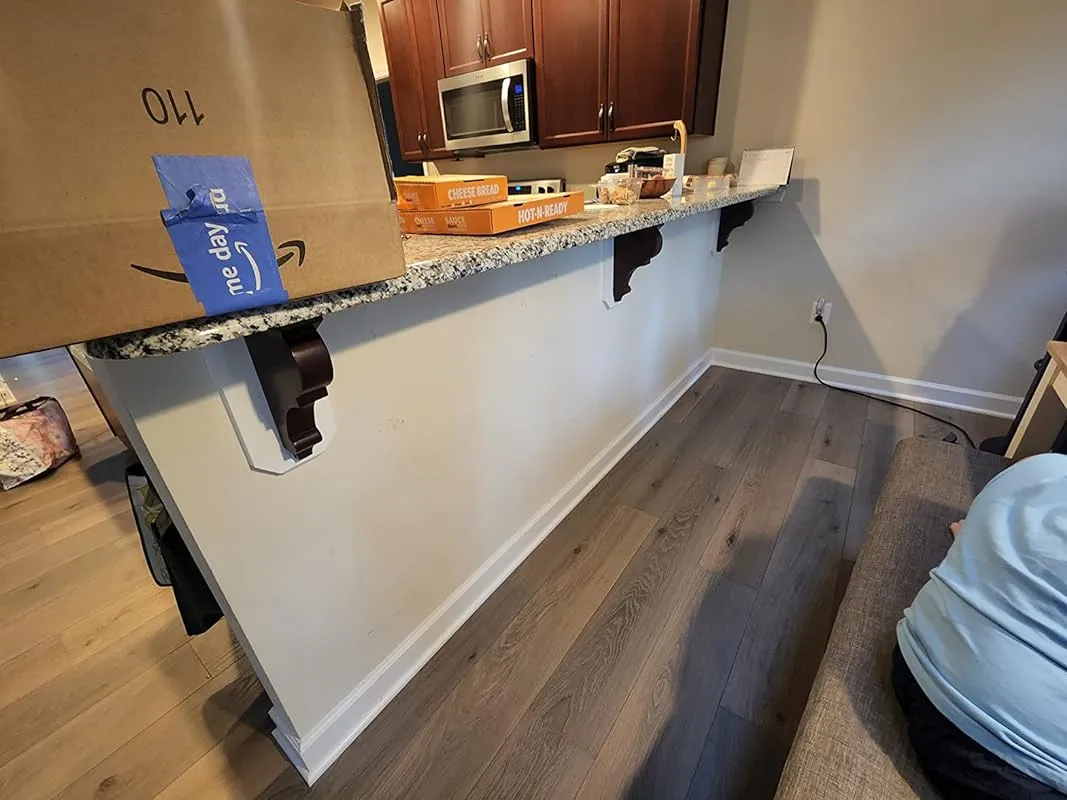
I recently used these vinyl tiles to protect my walls from scuffs and I must say, they exceeded my expectations. My OCD clean freak husband was skeptical at first, but once he saw the results, he was highly pleased. The installation process was a breeze, thanks to the clear instructions provided. I followed the step pattern and even had to cut out some weird shapes to fit under the bar, but it only took me 2.5 hours to stick 30 tiles. One pro tip I have is to tie your hair up before starting, as the adhesive can cling onto stray hairs. Overall, I would give these tiles a 10/10 for their easy installation and effective wall protection. I will definitely be ordering them again for future projects.
I also used these floor tiles on the walls of my horse trailer's tackroom and the results are fantastic. Not only do they add a visually appealing touch, but they also provide some slight padding for the tack hanging against the wall. The installation process was quick and simple, taking me only about an hour and a half. While the adhesive seemed good, I wouldn't mind adding some additional adhesive in the future if needed, considering the affordable price. The pattern was easy to match during installation and can complement a variety of decor styles.
If you're looking for a quick and inexpensive remodel, these vinyl tiles are a great option. However, if you're expecting professional perfection, you may be slightly disappointed. The designs may not line up perfectly and some boxes may have a slightly lighter shade than others. For a long-term stick, it's advisable to use some spray adhesive. These tiles work well on both floors and walls, offering versatility in their usage.
I absolutely love the peel and stick method of these tiles. It's easy to use and if done correctly, it looks really nice. In fact, it completely transformed my mother's bathroom when combined with some other changes. The peel and stick feature adds convenience and allows for a hassle-free installation process.
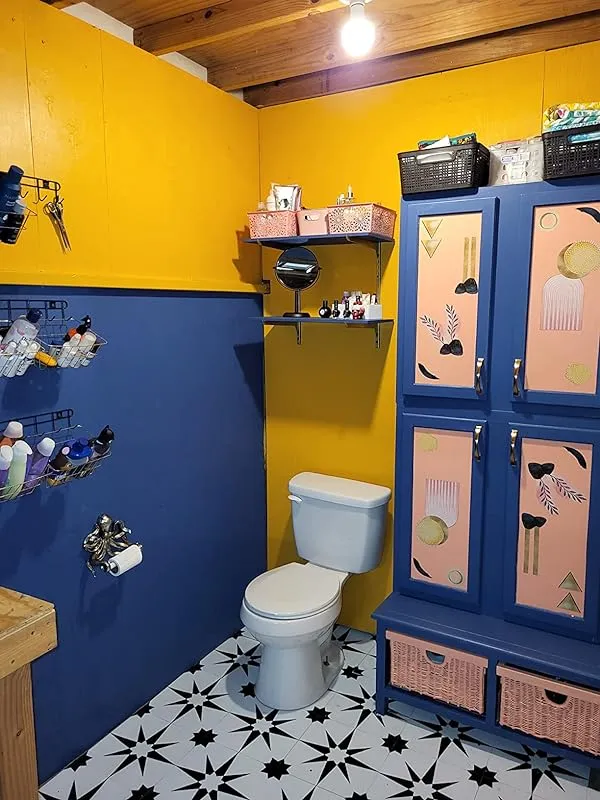
4. Floorpops Fp2943 Alfama Peel & Stick Floor Tiles, Multicolor, Blue
I recently decided to update my bathroom without breaking the bank, and I have to say, the results were amazing. Although I couldn't afford a complete remodel, I opted for a fresh coat of paint and FloorPops, and it made a world of difference. Installing the tiles was a breeze, even for someone like me who isn't as agile as they used to be. I would recommend playing around with the tiles before final placement, as they may not all be perfectly identical.
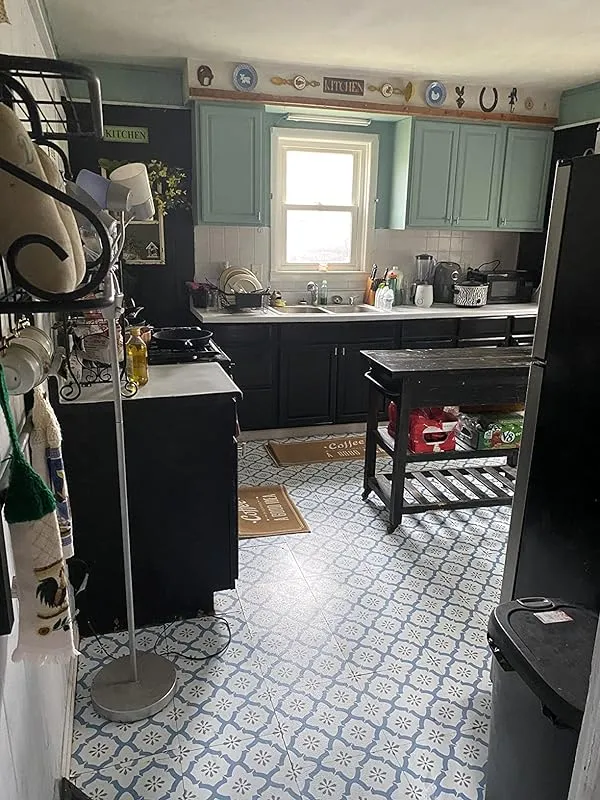
My partner and I purchased these tiles for our rental kitchen, which had an absolutely dreadful floor. It was uneven, bumpy, and just plain ugly. These temporary tiles proved to be the perfect solution. The peel and stick method was incredibly easy, even for a novice like myself. While the tile pattern didn't align perfectly no matter how many times we turned them, it wasn't noticeable once we completed the installation. It did require a bit of math to navigate corners and trim the edges, and some careful cutting was necessary. In total, it took us about 3.5 hours to lay down approximately 4.5 packs of tile. However, considering we essentially achieved a full renovation for around $50, it was well worth it. Not only do they feel great underfoot, but they also give our apartment a magazine-worthy look.
I do want to mention that our packages of tiles arrived slightly damaged, with bent corners and a few stains. While we could have returned them for replacements, we decided it wasn't worth the hassle. The good news is that you can't even tell from the photo that the tiles weren't in perfect condition. Overall, we are extremely happy with our purchase.
Unfortunately, I don't have a before picture of my project, as I don't want to relive the horror. However, I can tell you that these tiles were incredibly easy to lay and took less than 30 minutes to install. Voila!
The installation process for these tiles was a breeze. They were easy to cut to fit the edges, and they look fantastic. Plus, they're easy to clean.
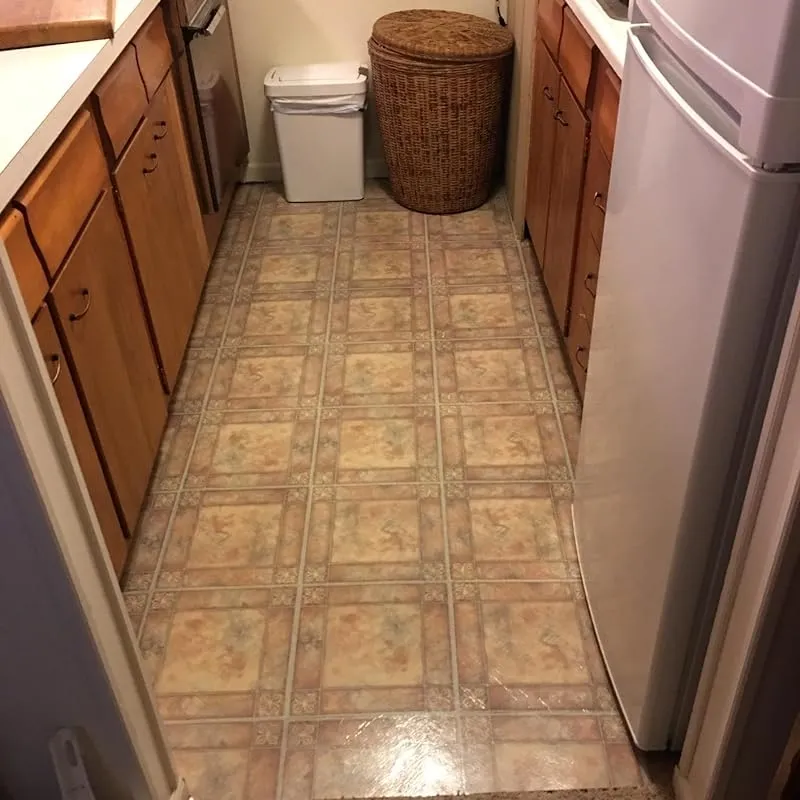
5. Faux Marble Vinyl Tiles – Chic Décor Solution
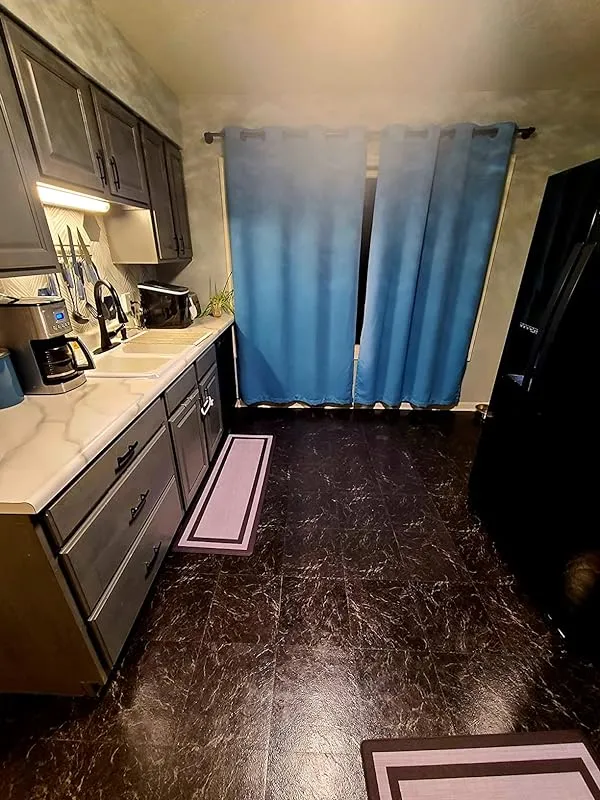
I recently used Achim Home Furnishings peel and stick tiles to transform my daughter's kitchen floors, and I must say, it was well worth the time and effort. The previous linoleum flooring had become dingy and no amount of cleaning seemed to make a difference. However, these peel and stick tiles were the perfect solution.
I purchased two boxes of these tiles, which covered an area of approximately 7 feet by 5 feet. I didn't need to move the stove or cover the entire kitchen floor, just the visible area up to the fridge. The installation process was relatively easy, and I was able to complete it within a couple of hours.
In addition to the kitchen, I also used these tiles to cover the linoleum in my bathroom. The bathroom floor was placed over plywood, and the kitchen floor was laid over the existing linoleum. I bought a total of 7 boxes and had some leftover. The bathroom was out of commission for about two weeks before I had the time to tackle the kitchen floor.
I haven't encountered any of the issues that other users have mentioned so far. There were a few cutting mistakes that I made, but I simply filled them with black caulking, and you can't even tell. My kids even helped me with the installation, and it turned out to be a fun project for all of us.
The tiles adhered well to the floor, and after just an hour, they were securely in place. I haven't noticed any signs of them budging or coming loose. I did accidentally tear one tile when moving the fridge back into place, but it was challenging to remove and replace it. However, the rest of the tiles remained intact.
Out of the 7 boxes I purchased, only one tile was damaged, but I was able to use it in an area where I needed to make cuts anyway. The only minor drawback I noticed was that one of the boxes had a slightly lighter shade, but it wasn't too noticeable once installed.
While these tiles are thin and pliable, I cannot speak to their effectiveness on floors other than kitchens and bathrooms. However, for these areas, I highly recommend giving Achim Home Furnishings peel and stick tiles a try. They offer a convenient and cost-effective solution for updating and improving the look of your floors.
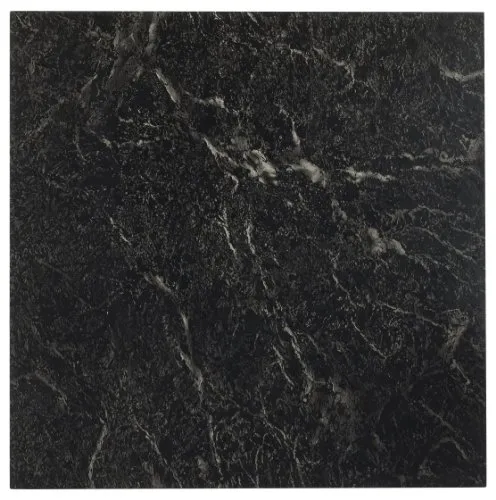
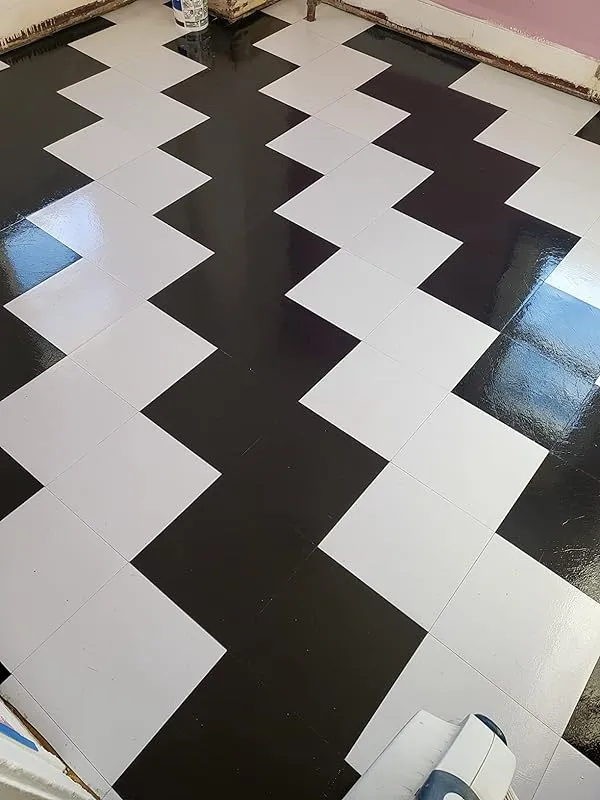
6. Floorpops Fp2948 Altair Peel & Stick Floor Tiles, Black
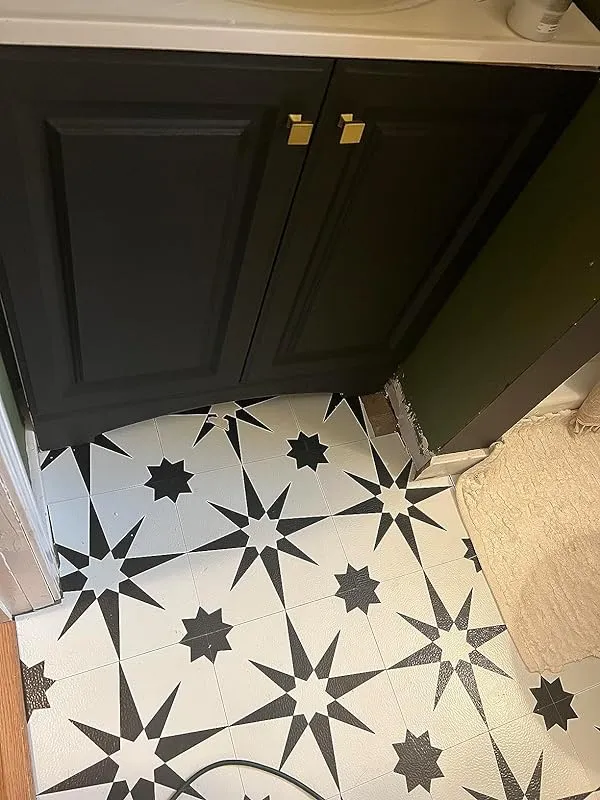
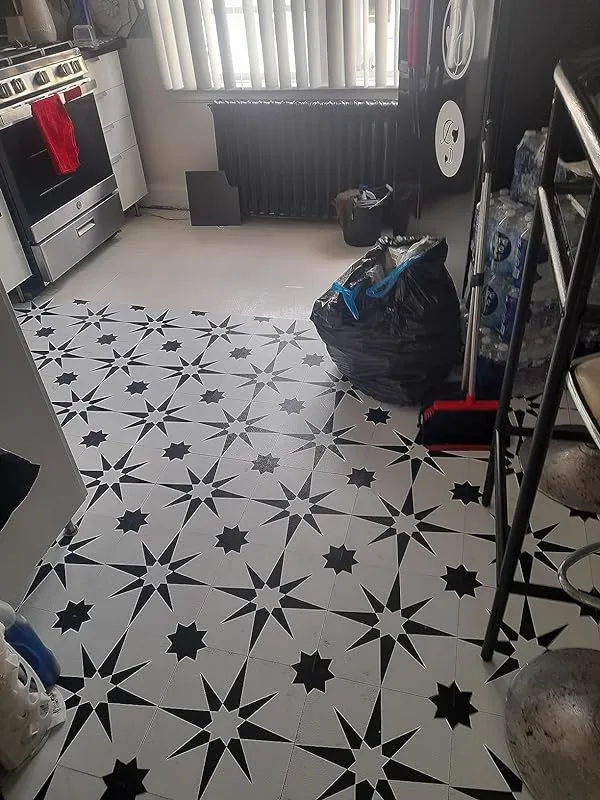
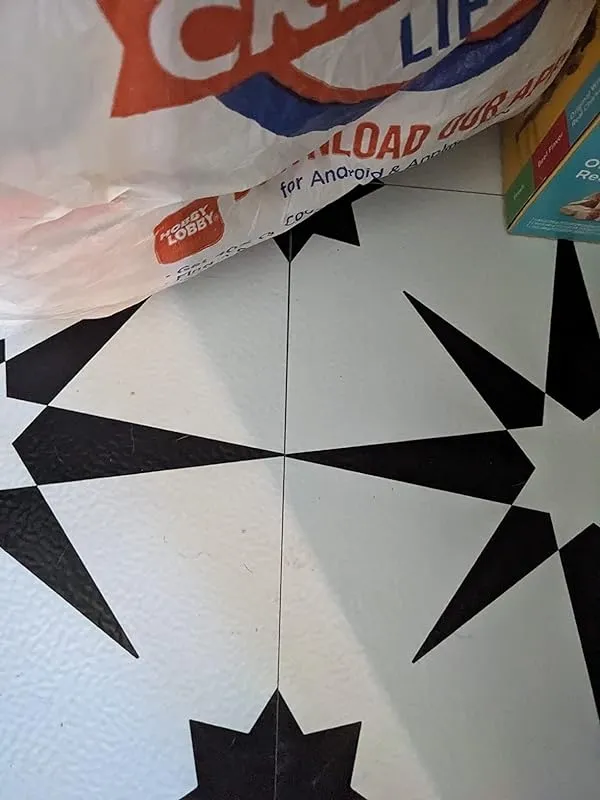
I recently purchased these tiles and I have to say, I am extremely pleased with the results. Despite some negative reviews regarding the alignment of the tiles, I found that they lined up perfectly well. The slight discrepancies were hardly noticeable and did not detract from the overall appearance of my floor. Anyone who has to scrutinize the floor so closely clearly has other issues to deal with.
When I initially ordered these tiles, I had some reservations due to their thinness. However, I was pleasantly surprised by their quality and durability. Installation was a breeze, and the end result was exactly what I had envisioned. I did underestimate the number of boxes I needed and had to order two more, but the affordability of these tiles made it easy to accommodate this additional expense within my budget.
The installation process was straightforward, and I used an all-purpose construction adhesive to ensure that the tiles remained securely in place. As some reviewers have mentioned, the pattern on the tiles may not align perfectly on every tile. However, this was not a major issue, as I was able to easily trim the tiles with regular scissors. One point that I did not come across in any other reviews is that these tiles tend to get dirty quite easily if left unsealed. Fortunately, I discovered that Zep offers a range of floor products specifically designed to seal these types of tiles. I used their sealer followed by a polish, and the result was a flawless finish.
I typically don't write reviews, but I felt compelled to do so for these tiles. I was amazed at how user-friendly they were. I stumbled upon them through a Pinterest link and decided to give them a try for my small bathroom. I must say, I am thoroughly impressed with the outcome. The bathroom is still a work in progress, but the floors already look fabulous.
The linoleum in my pantry had started to lift after 15 years and was in dire need of an upgrade. Being on a tight budget and not particularly skilled at DIY projects, I was hesitant about tackling this task. However, these tiles turned out to be a game-changer. They were easy to score and install, and all the edges lined up perfectly. Admittedly, I did a less than stellar job, but since the pantry is mostly used for storing dog supplies, I'm not overly concerned about the imperfections. It took me about 40 minutes to poorly install just six tiles. Even if these tiles only last a year, the fact that they were so affordable at $12 makes it worth it. I will definitely be purchasing them again to freshen up low-traffic areas in the future.
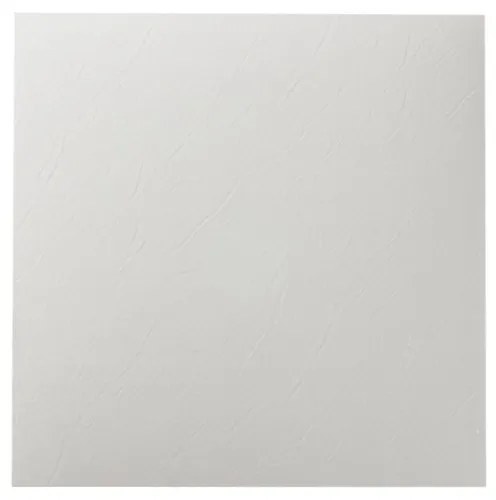
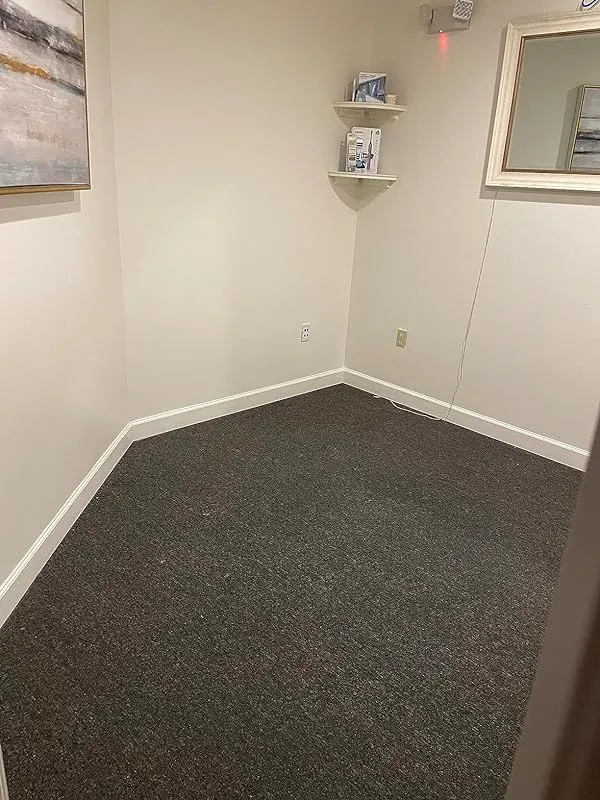
7. Nexus White Slate Vinyl Tiles – Diy Flooring
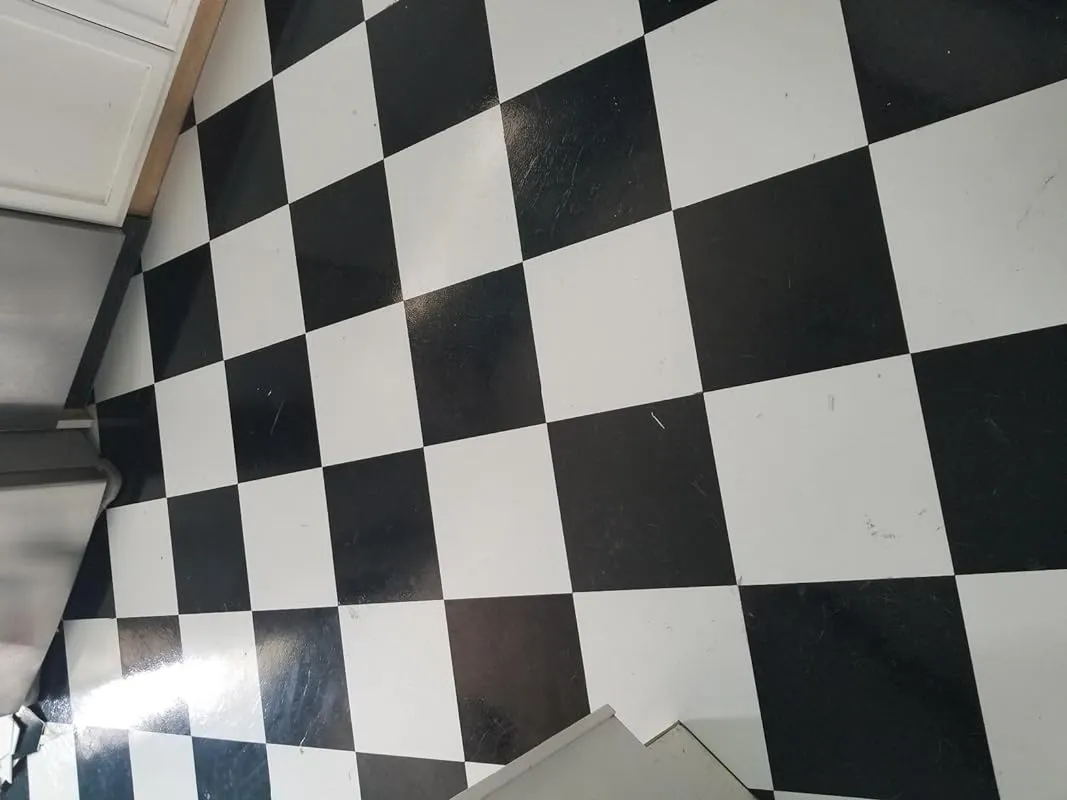
I recently installed these white peel and stick tiles along with the black tiles in my kitchen, and I must say, I am quite impressed. The installation process was incredibly easy, and considering the price, the quality is decent.
Before making my purchase, I spent some time researching various tile options online. There was a wide range of products available at different price points, but ultimately, I chose these white tiles and the matching black tiles.
In terms of appearance, these tiles look really good. They have a nice shine to them and the black and white combination adds a fantastic touch to any space. However, I would not recommend using them in high traffic areas, as they are more suitable for moderate wear.
During the installation process, I did face a few challenges. Since it was winter and my floor wasn't perfectly level, I had to heat each tile with a hot air gun and use a rubber mallet to ensure they stuck properly. Some corners did lift slightly after a few days, but I easily resolved this issue by applying a dab of high tack construction adhesive and weighting it overnight. Overall, I can't blame the tiles for these minor setbacks, as my floor was not perfectly smooth to begin with.
For the price, these tiles are great for a moderate quality level job. If you're looking for a quick and affordable way to spruce up a casual area, hobby room, or closet, these tiles are a good option. They are easy to cut with a razor knife, but be careful not to bend them too much as they can crack.
I had a professional install the tiles for me, and he added extra adhesive and a top shiny coat sealer, which has worked well so far. I would definitely recommend these tiles for anyone who wants an affordable and visually appealing option.
In my case, these tiles were a perfect solution for covering up unsightly tiles in my music studio. They were easy to install, and my fiancé, who did the job, used a tile cutter to ensure a professional-looking finish. Despite receiving foot traffic from kids, the tiles have held up beautifully and continue to shine.
Lastly, I must mention that these tiles are very cost-effective. I completed my flooring project for less than $70, with leftover tiles to spare. Overall, I am extremely happy with my purchase and I hope you find this review helpful in making your decision.
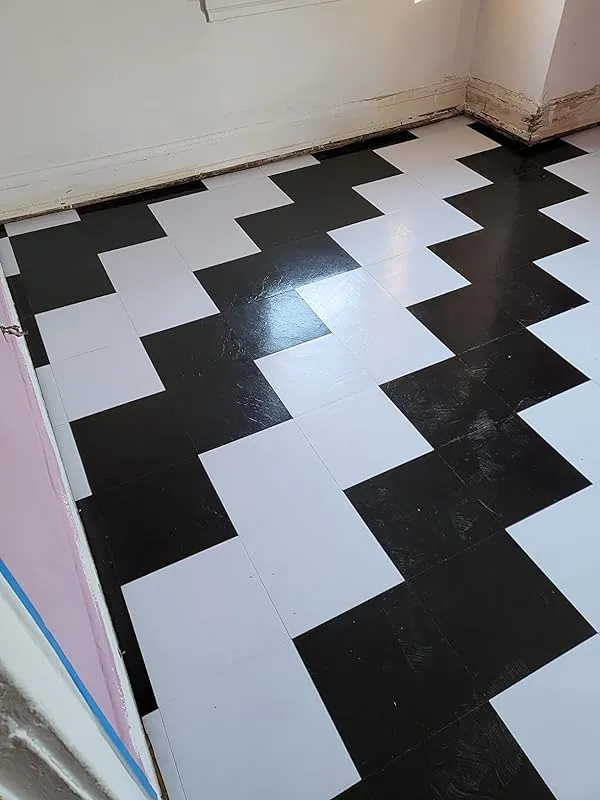
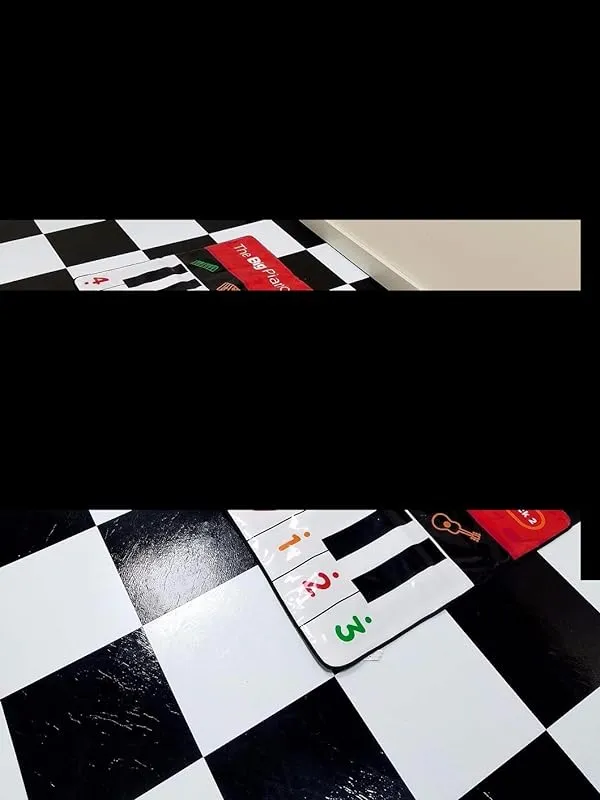
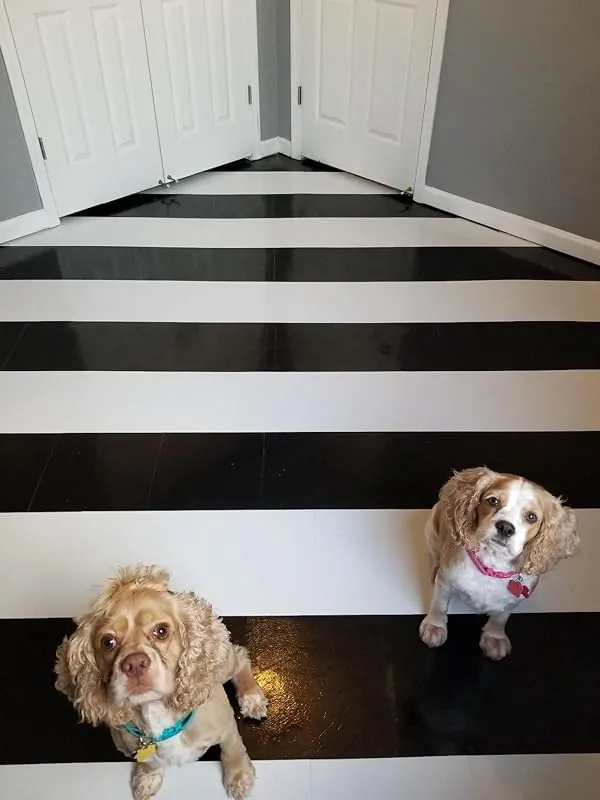
8. Floorpops Fp2945 Noleby Peel & Stick Floor Tiles, Black

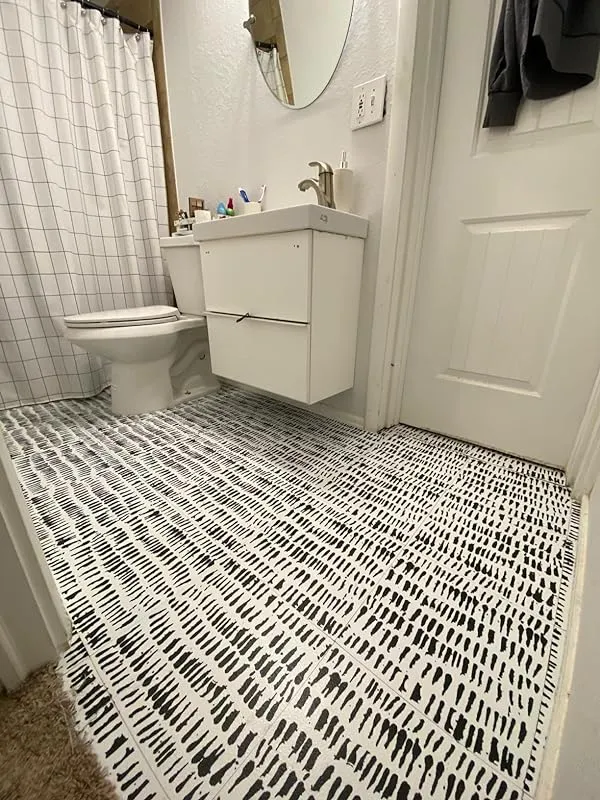
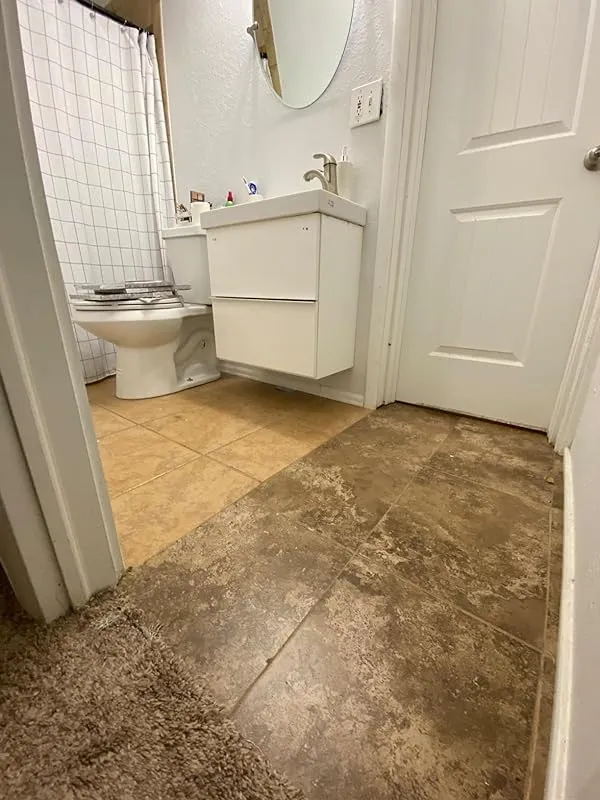
I recently purchased these tiles for my black and white themed bathroom walls, and I must say, I am extremely satisfied with the results. Although there weren't many reviews specifically for wall use, I came across one that mentioned using them in a bathroom, and it convinced me to give them a try. I'm glad I did because the outcome is beautiful.
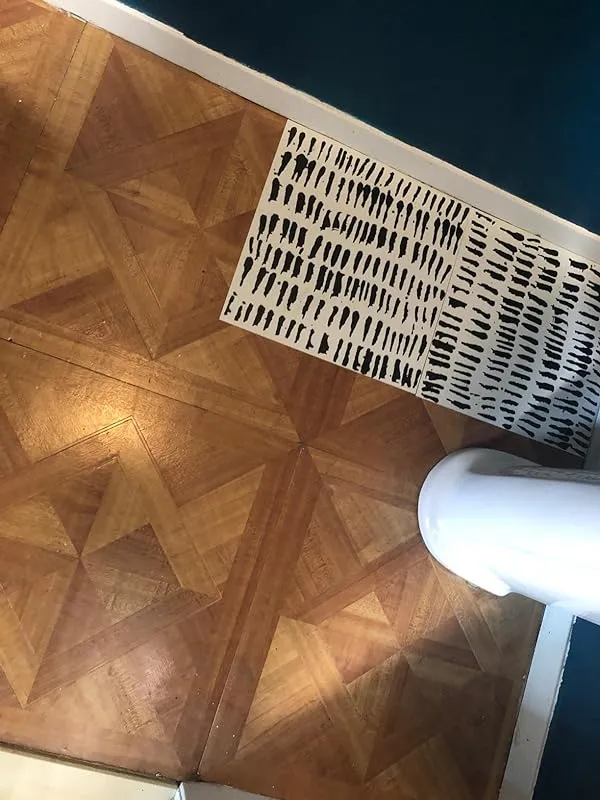
One thing to note is that some of the tiles have a slight yellowish tinge, but it's not very noticeable. Out of the 12 boxes I bought, which contained 10 tiles each, there were only around 10 tiles with this tinge. In the still photo, the top tile shows the tinge. My husband didn't even notice it when we were installing them, but I did right away. Other than that, we absolutely love them.
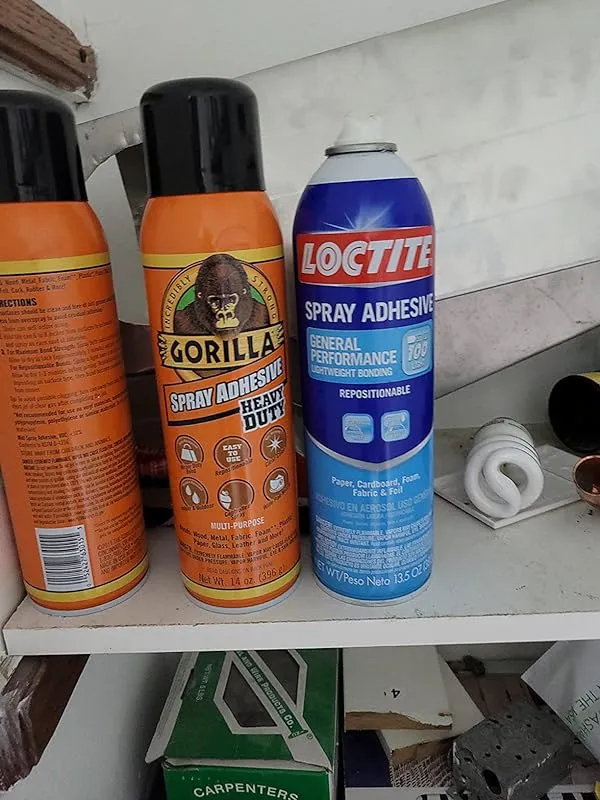
For the installation, we used a spray adhesive. We initially sprayed the tiles with Gorilla Glue spray, and when we ran out, we switched to Loctite. However, I should mention that this additional adhesive was only necessary for the walls, and it's unlikely you would need it for the floor.
I was inspired by an Instagram influencer who used these tiles in their bathroom, and I really liked the pattern. I didn't want to switch the tiles in different directions, so I followed the same design. The end result turned out great. We had two different tiles running throughout our bathroom, and this was a quick and easy way to refresh the space without going through another remodeling project.
The installation process took me about 4 hours in total. I started by laying down all the whole tiles first and then did the special cuts last. To ensure a seamless finish, I sealed everything with silicone caulking, which helped cover up any minor imperfections. The adhesive on the tiles is incredibly sticky, so it's important to make sure you're 100% ready to place them down before peeling off the backing. I used a combination of a utility knife and a paper cutter to achieve straight lines.
I am extremely happy with the end result, especially considering the affordable cost. It only cost me $24 to cover my entire bathroom, which is definitely a win in my book. I highly recommend these tiles for any type of upgrade project. I'm even planning to purchase more for future projects.
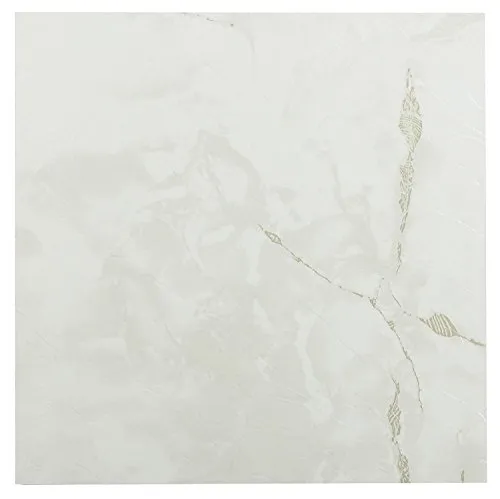
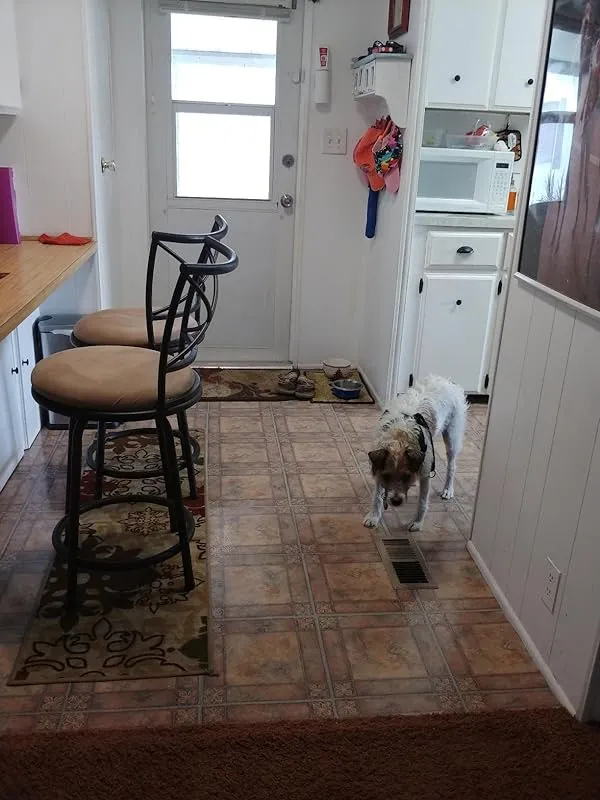
9. Nexus Marble Classic Vinyl Tiles – 12" White/grey Vein
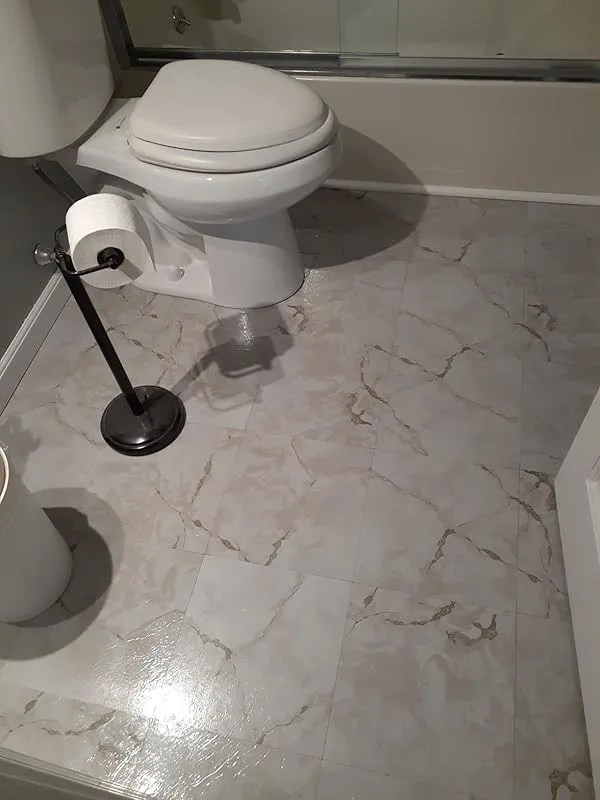


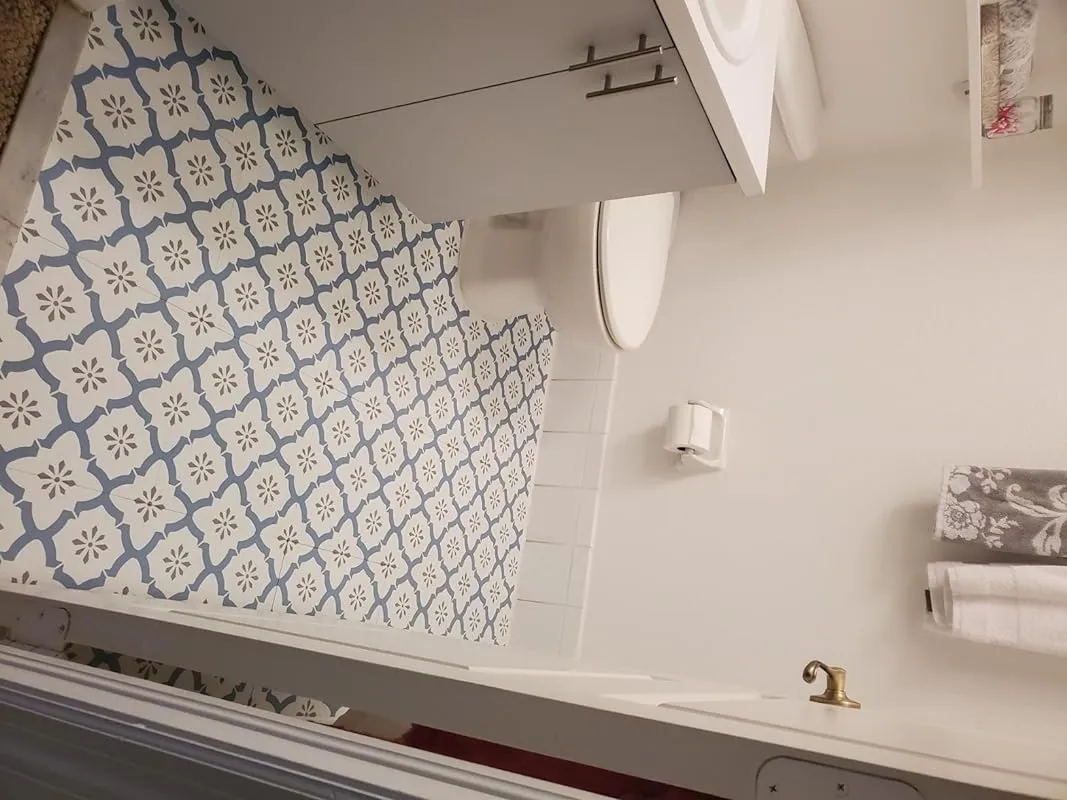
I recently purchased these tiles for my bathroom floor and I must say, they exceeded my expectations. The tiles arrived in a sturdy box, ensuring that none of them were damaged during transit. I was pleased to find that all the tiles were the same shade, creating a cohesive and uniform look. Additionally, I was pleasantly surprised to discover that I didn't need to purchase any extra adhesive or glue.
As someone who has been experiencing a lot of anxiety lately, redoing my bathroom floor was a therapeutic experience for me. These tiles made the process incredibly easy and stress-free. In fact, it only took me three hours to complete the project, despite the distractions from my playful puppy. I'm confident that I would have finished even faster if it weren't for my furry friend.
I have previously used the black and white tiles from the same brand, but unfortunately, had to remove them due to a toilet leak. However, during the few months they were down, they remained in excellent condition and looked great. When it came time to replace them, I opted for this pattern instead. The installation process was a breeze, and I found it easy to cut the tiles to fit around the toilet and other areas where a whole tile wouldn't fit.
One of the reasons I chose these tiles was because of the humid conditions in my bathroom. Despite the lack of a fan, both the black and white tiles and these new ones have shown no signs of being affected by the humidity. They are also easy to clean with my steam mop, which is an added bonus.
While I am generally satisfied with these tiles, I have noticed that they can scratch or dent easily. For instance, when I accidentally dropped my flat iron on the tiles, it left a small scratch and dent. Considering that the flat iron is relatively lightweight, I am concerned about how the tiles would hold up if something heavy or sharp were dropped on them. However, this minor issue aside, I am still very happy with my purchase and would consider using these tiles in other rooms as well.
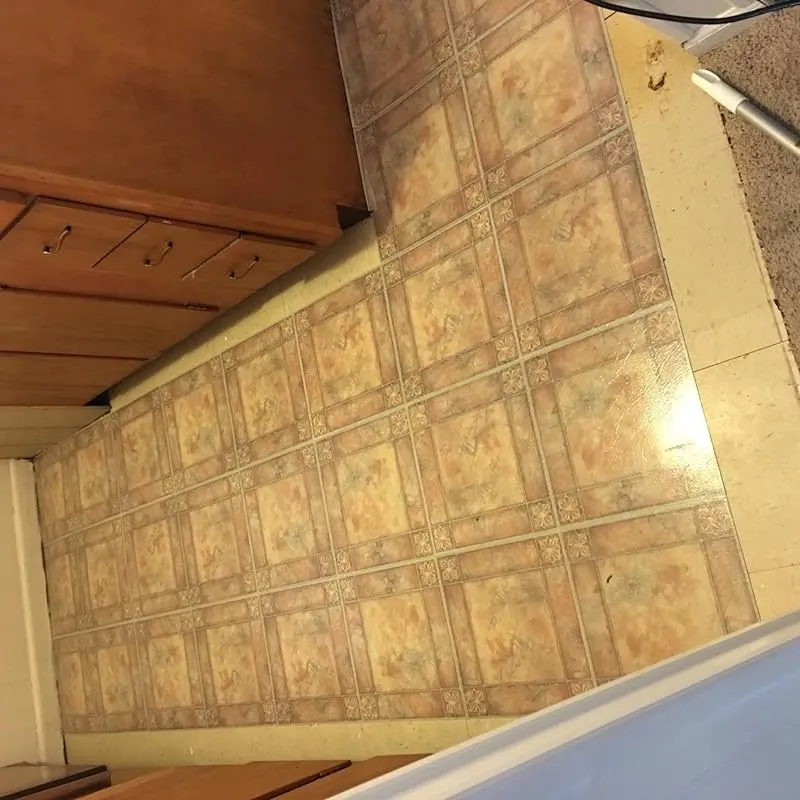
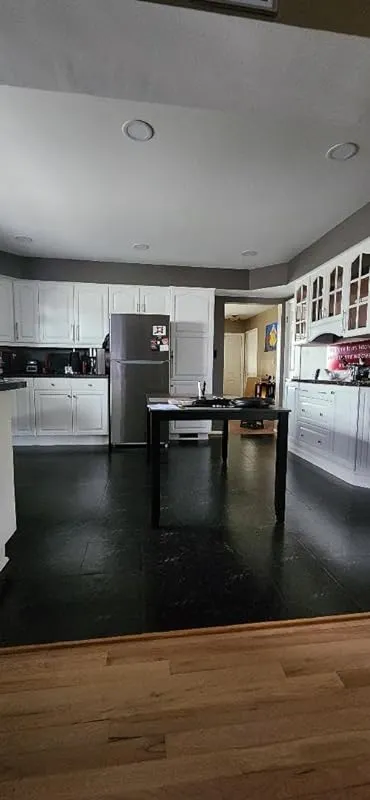
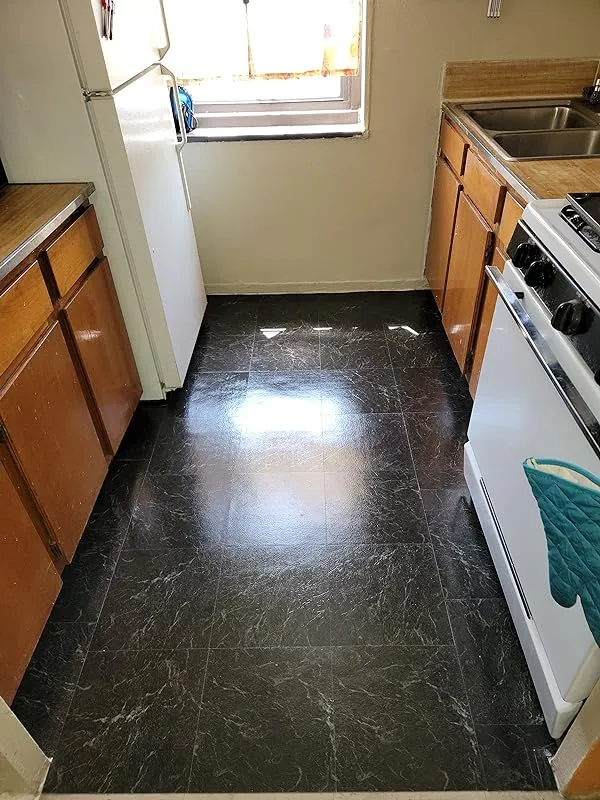
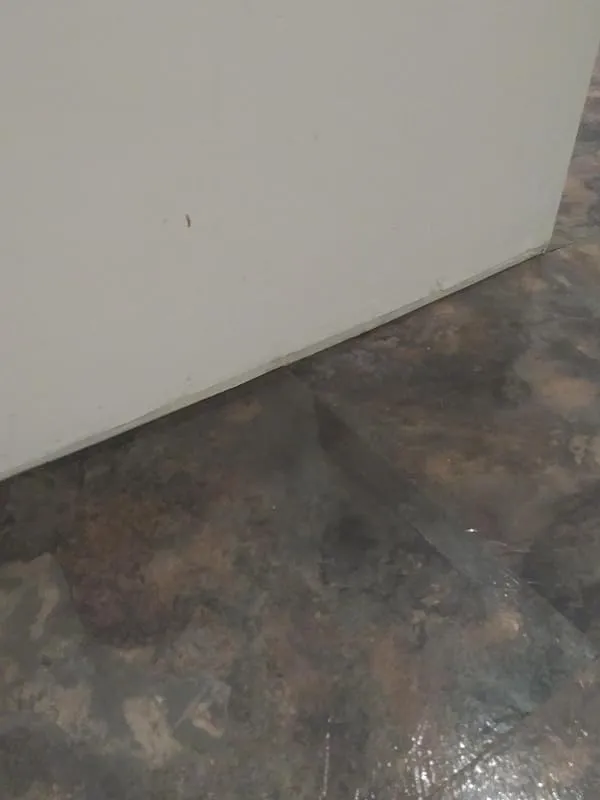
10. Nexus Dark Slate Marble Vinyl Floor Tiles: Peel & Stick
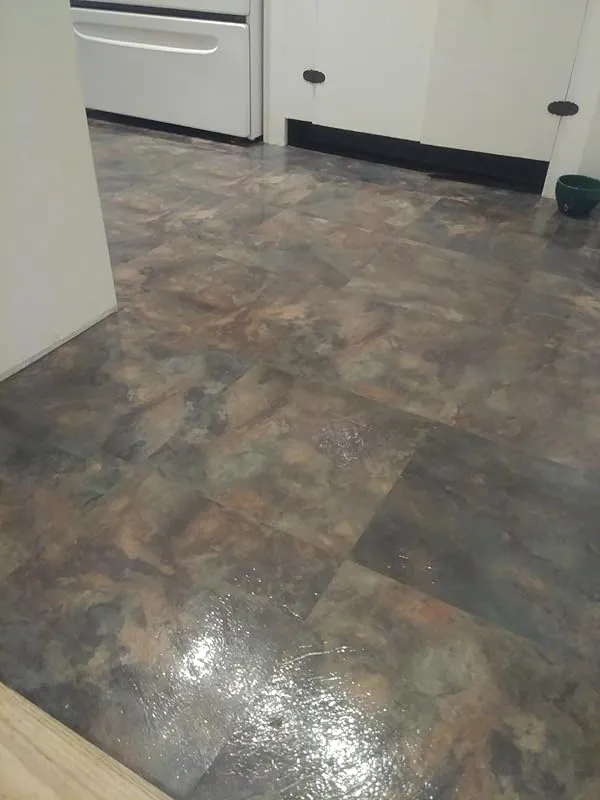
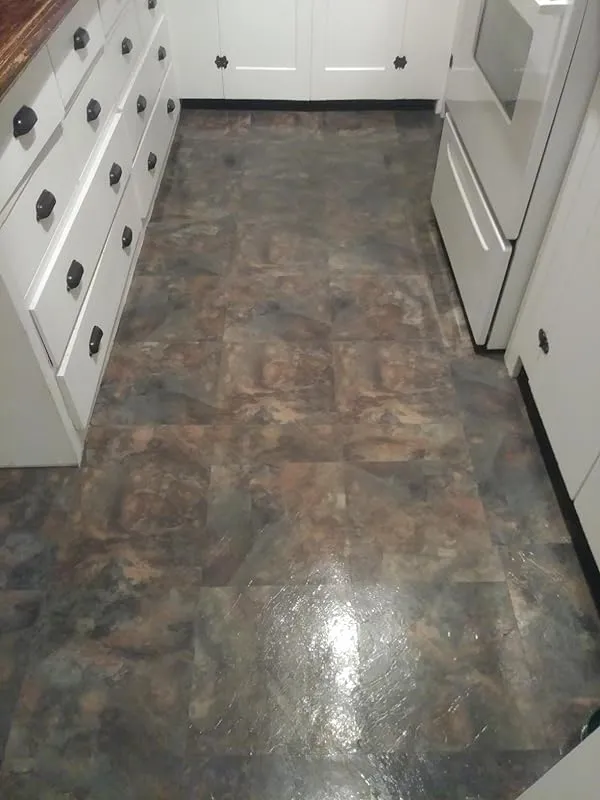
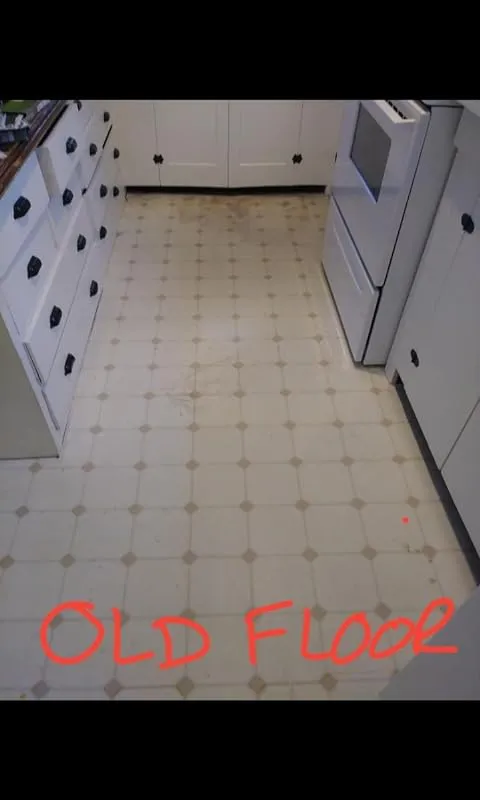
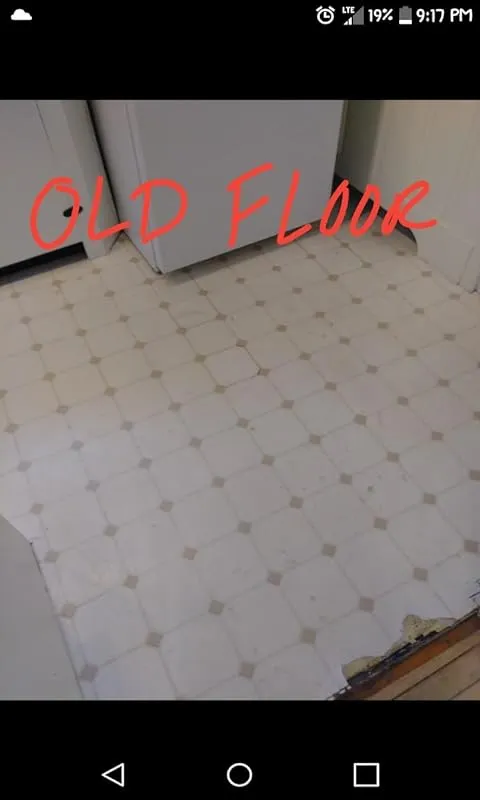
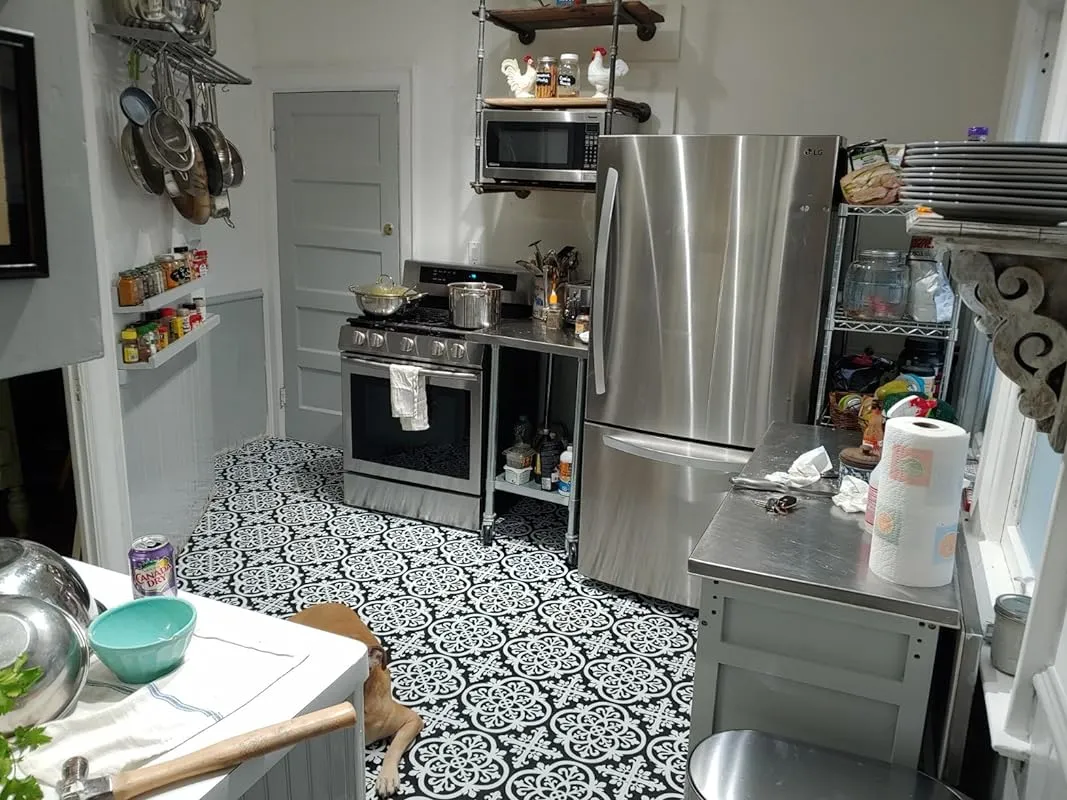
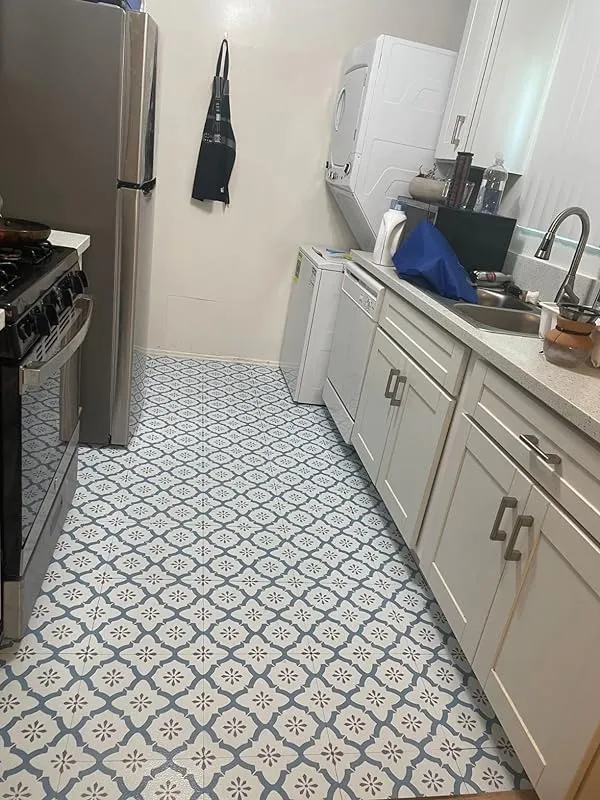
My partner and I recently had the opportunity to renovate our kitchen floor in our rented historic home built in the 1700s. The existing linoleum floor was in bad shape, with warping, stains, and deep gouges that made it impossible to keep clean. After receiving permission from our landlord, we decided to take matters into our own hands and give the kitchen a much-needed facelift.
We ordered three boxes of tiles online, which arrived promptly within two days. Although it took us a few months to finally get started due to various circumstances, we were thrilled to begin the project during quarantine in April. As complete novices in tile installation, we were a bit apprehensive at first. However, we decided to lay the new tiles directly on top of the old flooring, as it was too damaged to remove.
Using only three boxes of tiles, we were able to complete over half of our small and narrow kitchen. The installation process turned out to be surprisingly easy, even for beginners like us. Towards the end of the third box, we realized we needed some adhesive to secure the remaining tiles better. We promptly purchased flooring adhesive and ordered a fourth box to finish the job before our landlord's surprise visit from the south, which was scheduled for the following week.
Two days later, the fourth box arrived, and we were able to lay down the remaining tiles in just 20 minutes. It has now been over a week since we completed the installation, and we are pleased to report that the tiles have stayed in place perfectly without any lifting or shifting, even without extra adhesive (which we only used on a small portion of the floor). We are extremely satisfied with the outcome and love the new look of our kitchen.
In fact, we are so impressed with these tiles and how easy they were to install that we have decided to tackle our upstairs bathroom next. This project will require significantly more boxes, but we believe it will be well worth it. We highly recommend these tiles for anyone looking to update a room quickly and easily through a DIY approach.
FAQs
Are peel and stick floor tiles easy to install without professional help?
Yes, peel and stick floor tiles are generally easy to install without professional help. They are designed for DIY installation and require minimal tools and expertise. The process involves simply peeling off the backing and sticking the tiles onto a clean and level surface.
No adhesive or grout is needed.
However, there are a few factors to consider for successful installation. Firstly, it is important to properly prepare the existing floor by ensuring it is clean, dry, and free from any debris or imperfections.
Secondly, take your time to accurately measure and plan the layout of the tiles to ensure a seamless and aesthetically pleasing result. Lastly, make sure to follow the manufacturer's instructions and recommendations for installation.
While peel and stick floor tiles are generally straightforward to install, if you have limited DIY experience or are unsure about any step of the process, it may be helpful to seek advice from a professional or watch tutorial videos online.
Are peel and stick floor tiles suitable for heavy foot traffic areas?
Peel and stick floor tiles can be suitable for heavy foot traffic areas, but it depends on the quality and durability of the specific product you choose. While there are many peel and stick tiles available in the market, not all of them are designed to withstand heavy use.
It is important to look for peel and stick tiles that are specifically labeled as being suitable for high traffic areas. These tiles are often made from more durable materials and have a stronger adhesive backing, ensuring they can withstand the wear and tear of heavy foot traffic.
Additionally, thicker tiles tend to be more durable than thinner ones.
However, it is worth noting that even with high-quality peel and stick tiles, they may not be as durable as traditional flooring options like ceramic tiles or hardwood. If you anticipate extremely heavy foot traffic or if the area is prone to moisture or other harsh conditions, it might be wise to consider alternative flooring options that are specifically designed for such areas.
In summary, while some peel and stick floor tiles can handle heavy foot traffic, it is essential to choose a high-quality, durable product specifically designed for this purpose to ensure longevity and performance.
Are there any special considerations when installing peel and stick floor tiles on concrete or wooden subfloors?
When installing peel and stick floor tiles on concrete or wooden subfloors, there are a few special considerations to keep in mind.
For concrete subfloors, it is important to ensure that the surface is clean, dry, and smooth. Any bumps, cracks, or imperfections should be repaired or leveled before installation. A primer may also be recommended to promote adhesion.
Additionally, it is advisable to use a moisture barrier to prevent any moisture from seeping through the concrete and affecting the tiles.
For wooden subfloors, it is crucial to make sure they are stable and free from any signs of rot or damage. If the subfloor is uneven, it should be sanded or leveled to create a smooth surface. It is also recommended to use a moisture barrier, as wood can be prone to moisture-related issues such as warping or mold growth.
In both cases, it is essential to follow the manufacturer's instructions and guidelines for the specific peel and stick tiles being installed. This will ensure proper adhesion, longevity, and a successful installation overall.
Can peel and stick floor tiles be installed over existing flooring?
Yes, peel and stick floor tiles can be installed over existing flooring in many cases. However, it is important to consider a few factors before proceeding. First, ensure that the existing flooring is clean, smooth, and free from any debris or damage.
This will help the adhesive on the peel and stick tiles to bond properly. Additionally, it is crucial to check the manufacturer's guidelines and recommendations for the specific type of peel and stick tiles you are using.
Some types may not be suitable for certain existing flooring materials or conditions. It is also worth noting that installing peel and stick tiles over existing flooring may increase the height of the floor, which can affect door clearances and transitions to other rooms.
If you are unsure about the compatibility or suitability of peel and stick tiles for your existing flooring, it is recommended to consult with a professional installer or the manufacturer for further guidance.
Can peel and stick floor tiles be used in high-moisture areas such as bathrooms or kitchens?
Yes, peel and stick floor tiles can be used in high-moisture areas such as bathrooms or kitchens. However, it is important to choose the right type of peel and stick tiles specifically designed for these areas. Look for tiles that are labeled as waterproof or moisture-resistant.
These tiles are specially formulated to withstand the damp and humid conditions typically found in bathrooms and kitchens. Additionally, ensure that the surface you are applying the tiles to is clean, dry, and free from any moisture or water damage.
Proper installation is crucial to ensure the longevity and effectiveness of peel and stick tiles in high-moisture areas. It is always recommended to follow the manufacturer's instructions and guidelines for installation to achieve the best results.
How do you clean and maintain peel and stick floor tiles?
To clean and maintain peel and stick floor tiles, there are a few simple steps you can follow. First, start by sweeping or vacuuming the floor to remove any loose dirt or debris. Avoid using a beater bar attachment on the vacuum, as it can damage the tiles.
Next, mix a mild detergent or floor cleaner with warm water. Use a sponge or mop to gently scrub the tiles, being careful not to use excessive water. Rinse the floor with clean water and a mop, ensuring all soap residue is removed.
For stubborn stains, you can use a non-abrasive cleaner specifically designed for vinyl flooring. Avoid using harsh chemicals or abrasive tools that could scratch the tiles. Finally, allow the floor to air dry or use a clean, dry cloth to remove any excess moisture.
Regular maintenance includes sweeping or vacuuming regularly to prevent dirt buildup, promptly wiping up spills, and avoiding dragging heavy furniture across the floor. By following these steps, you can keep your peel and stick floor tiles clean and in good condition for years to come.
How durable are peel and stick floor tiles?
Peel and stick floor tiles can vary in durability depending on the brand and quality. Generally, peel and stick tiles are made from vinyl or other synthetic materials, which are known for their durability and resistance to wear and tear.
However, it is important to note that the durability of peel and stick floor tiles can also depend on factors such as the installation method, the level of foot traffic, and the maintenance practices.
When installed correctly on a clean and smooth surface, high-quality peel and stick tiles can withstand regular foot traffic and last for several years. However, it is worth mentioning that these tiles may not be as durable as traditional flooring options like ceramic or porcelain tiles.
They may be more prone to scratches, dents, and damage from heavy objects.
To ensure the longevity of peel and stick floor tiles, it is advisable to follow manufacturer instructions for installation and maintenance. Regular cleaning and avoiding excessive moisture exposure can also help preserve their durability.
If you require a highly durable and long-lasting flooring option, you may want to consider alternative materials or consult with a flooring professional for personalized advice.
What are the advantages of using peel and stick floor tiles?
Peel and stick floor tiles offer several advantages that make them a popular choice for many homeowners. Firstly, they are incredibly easy to install. With their self-adhesive backing, you can simply peel off the protective paper and stick them onto a clean and dry surface.
This eliminates the need for messy adhesives or professional installation, saving you time and money.
Another advantage is their versatility. Peel and stick floor tiles come in a wide range of colors, patterns, and designs, allowing you to find the perfect fit for your space. You can easily transform the look of any room, from kitchens and bathrooms to bedrooms and living areas.
In addition, these tiles are durable and low-maintenance. They are made from high-quality materials that can withstand daily wear and tear, making them suitable for high-traffic areas. Cleaning is also a breeze, as you can simply wipe them with a damp cloth or mop.
Lastly, peel and stick floor tiles are a great option for renters or those who frequently move, as they can be easily removed without causing damage to the underlying surface. This makes them a temporary yet stylish solution for updating your floors.
Overall, the advantages of using peel and stick floor tiles include easy installation, versatility in design, durability, low maintenance, and suitability for temporary or rental spaces.
What is the cost comparison between peel and stick floor tiles and traditional ceramic or vinyl tiles?
The cost comparison between peel and stick floor tiles and traditional ceramic or vinyl tiles can vary depending on several factors. Peel and stick floor tiles are generally more affordable compared to traditional ceramic or vinyl tiles.
These self-adhesive tiles are easier to install, eliminating the need for professional installation, which can save you money on labor costs.
Traditional ceramic or vinyl tiles, on the other hand, may have a higher upfront cost due to the materials used and the complexity of installation. Ceramic tiles are typically more expensive than vinyl tiles due to their durability and aesthetic appeal.
However, it's important to consider the long-term value and durability when comparing costs. Traditional ceramic or vinyl tiles are known for their longevity and can withstand heavy foot traffic, moisture, and wear and tear.
Peel and stick floor tiles may not have the same level of durability and may need to be replaced more frequently, which could impact long-term costs.
Ultimately, the cost comparison between peel and stick floor tiles and traditional ceramic or vinyl tiles will depend on your specific requirements, budget, and preferences. It is recommended to consider all these factors and consult with professionals or suppliers to get accurate cost estimates before making a decision.
What is the typical lifespan of peel and stick floor tiles?
The typical lifespan of peel and stick floor tiles can vary depending on various factors such as the quality of the tiles, the level of foot traffic, and the maintenance routine followed. Generally, peel and stick floor tiles are designed to be durable and long-lasting.
High-quality tiles can last anywhere from 5 to 25 years, while lower quality options may have a shorter lifespan.
To ensure the longevity of peel and stick floor tiles, it is essential to properly prepare the surface before installation, ensuring it is clean, dry, and smooth. Additionally, following the manufacturer's instructions for installation and maintenance is crucial.
Regular cleaning and avoiding excessive moisture can help extend the lifespan of the tiles.
If you are considering using peel and stick floor tiles, it is advisable to invest in higher quality options and choose tiles appropriate for the level of foot traffic in the area where they will be installed.