I Tested And Reviewed 10 Best Printer For Heat Transfer Paper (2023)
Choosing the right printer for heat transfer paper can seem like a daunting task. With so many models and features to consider, how do you know which one is the best fit for your needs? When shopping for a heat transfer printer, there are a few key factors to keep in mind.
First, you'll want to consider the type of ink. Heat transfer paper requires a special ink that can withstand the heat press process. Look for models that specify they work with heat transfer inks or sublimation inks. The wrong type of ink may not bind properly or achieve vibrant colors.
Another aspect is print quality and resolution. For sharp image detail, you'll want at least 600 dpi. Higher resolutions like 1200 dpi will provide even crisper quality for photographs and designs. Related to resolution is print speed – some models can achieve faster print speeds than others.
You'll also need to think about paper handling capabilities. Since heat transfer paper is thicker, not all standard printers can accommodate it. Be sure to check the printer's paper weight specs and whether reviewers have successfully used it for transfer paper. Features like rear paper feeds can be helpful for this media type.
Finding the perfect heat transfer printer may take some research, but asking a few key questions will steer you in the right direction. Will it produce the print quality I need for my projects? Does it work with transfer inks and paper? Does it have the right features and specs? With the right printer, you'll be creating vibrant transfers in no time.
10 Best Printer For Heat Transfer Paper
| # | Product Image | Product Name | Product Notes | Check Price |
|---|---|---|---|---|
|
1
|
 |
The product is ideal for printing and transferring designs onto dark-colored t-shirts using inkjet or laserjet printers.
|
|
|
|
2
|
 |
The product is ideal for creating customized designs on light-colored fabric using an inkjet printer.
|
|
|
|
3
|
 |
The product is ideal for creating custom and personalized designs on light-colored t-shirts using inkjet or laserjet printers.
|
|
|
|
4
|
 |
The product is ideal for transferring long-lasting printed designs onto dark fabrics using an inkjet printer and heat press.
|
|
|
|
5
|
 |
The product is ideal for creating durable and long-lasting iron-on heat transfers on dark fabric using an inkjet printer.
|
|
|
|
6
|
 |
The product is ideal for creating custom designs and transferring them onto dark fabric t-shirts, using inkjet or laserjet printers.
|
|
|
|
7
|
 |
The product is ideal for creating personalized designs or images on light-colored and white fabrics using an inkjet printer.
|
|
|
|
8
|
 |
The product is ideal for transferring designs onto dark polyester and cotton fabrics using an inkjet printer.
|
|
|
|
9
|
 |
The product is ideal for printing custom designs on light-colored t-shirts using an inkjet or laserjet printer.
|
|
|
|
10
|
 |
The product is ideal for creating vibrant and long-lasting iron-on transfers on dark fabric.
|
|
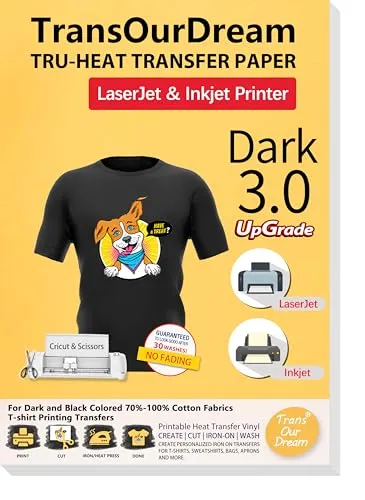
1. Dreamprint Dark Iron-On Transfer Paper: 20 Sheets


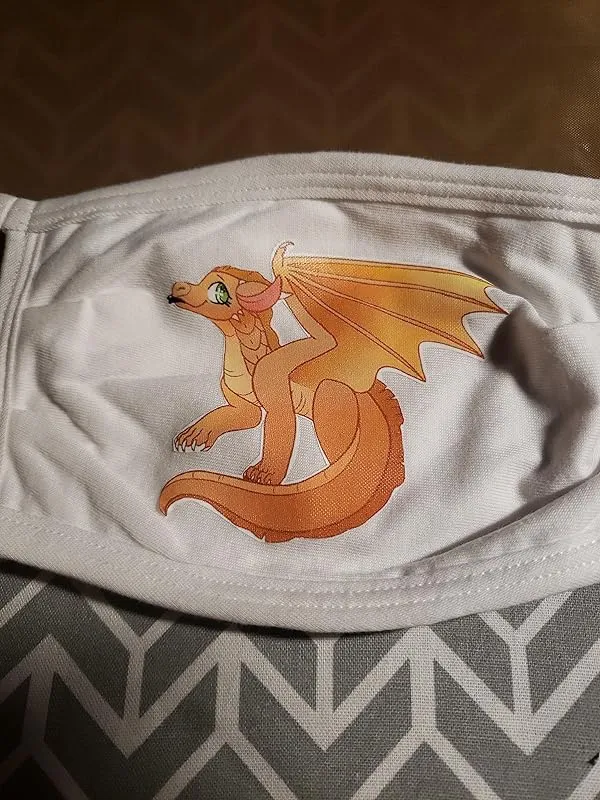
I am thoroughly impressed with this HTV (Heat Transfer Vinyl). As someone who has used HTV before, I found this product to be super easy to use and the print quality on my Epson eco tank printer was fantastic. What I particularly liked was that it didn't bleed after immediate contact with water, even after ironing. The only slight downside is that peeling it off the backing and placing it on intricate cut items can be a bit tricky. However, with a bit of patience and practice, it becomes manageable.
I used this HTV to cover a t-shirt with iron-on content and followed the instructions and tips from other reviews. I found that everything worked perfectly. Changing the printer paper type to labels and allowing the printed page to rest and cool for a few minutes before ironing yielded the expected results. Initially, the hardest part was peeling the iron page from the backing, but I discovered that peeling from the front rather than the back made it much easier. Additionally, the instructions recommend using a hard surface instead of an ironing board, so I used my dining room table. The iron-on has stayed on without any peeling, and while I haven't washed the shirt yet, I am currently not concerned about its durability.
I needed an HTV for my laser jet printer, and this was one of the first options I came across. The instructions were clear, and I had no issues with printing. Removing the backing was a bit challenging, but I used a weeding tool and my nails to find space between the transfer and the backing. I followed the instructions regarding temperature and pressing time, and I even pressed the back of the shirt for extra assurance. I could see the texture of the fabric in the transfer, indicating a solid pressing. Although the instructions recommend washing after 48 hours, I waited for about 5 days. I washed the shirt in cold water and air dried it. There was some slight fading, but I am still very impressed and happy with the results, especially considering that I don't expect the design to last too long since my son will probably outgrow it within a year.
I printed the HTV on my HP LASERJET using the label setting, and it turned out wonderfully. The only issue I encountered was with layering vinyl on top of the HTV for graduation t-shirts. It seems that it is not designed to be layered in such a way. However, overall, I cannot complain as the HTV worked great for my needs.
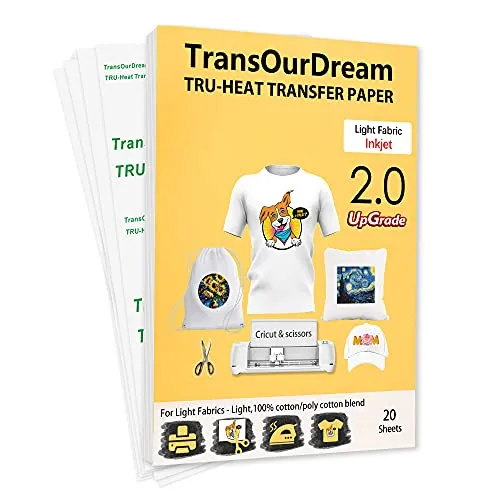
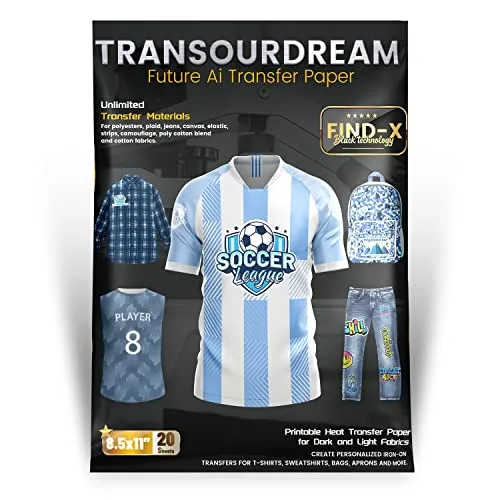
2. Transourdream Inkjet Printable Heat Transfer Paper-(20 Sheets)


The transfer paper for inkjet printers is a game-changer when it comes to creating custom designs on fabric. With just a few simple steps, you can achieve professional-looking results in no time.
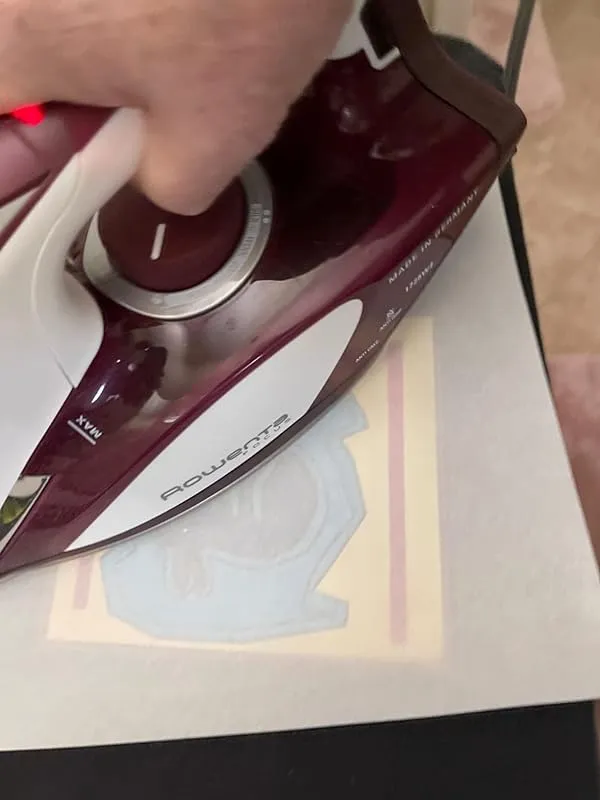
First and foremost, it's crucial to ensure that your iron is set at the appropriate temperature for the fabric you are using. This will prevent any damage or discoloration. You don't need to apply excessive pressure or iron for an extended period. Simply spend about a minute around the edges and a few times over the top.
One important tip to keep in mind is to peel off the image from the paper before ironing. Additionally, it's highly recommended to place a piece of wax paper over the image while ironing. These precautions will help ensure the best outcome.
It may take a few attempts to find the perfect technique, but once you get the hang of it, you'll be amazed at the fantastic results you can achieve. This transfer paper works exceptionally well with laser jet printers, providing even more convenience and versatility.
Many users have found this product to be incredibly user-friendly. It seamlessly integrates with regular HP home printers, requiring no mirror imaging or special adjustments. Setting your printer to the best quality will further enhance the outcome. In just a matter of minutes, you can complete your project with ease. Some have even used a mini iron press they found on Amazon for added convenience, which yielded perfect results at an affordable price.
The convenience and efficiency of this transfer paper are truly remarkable. One satisfied customer shared their experience of needing Autism Awareness shirts within a tight timeframe. Thanks to this product, they were able to design, print, and transfer the images onto shirts in record time. The entire process, from design creation on Canva to printing with an HP printer, cutting with a Cricut, and pressing onto shirts, was expedited significantly. What would have taken hours with traditional heat transfer vinyl (HTV) was completed in a fraction of the time.
While the results are generally exceptional, there can be some minor drawbacks. For instance, a few users mentioned that they experienced a bit of material wastage during the printing process. However, this seems to be more related to the design software, Design Space, rather than the transfer paper itself.
The durability of the transferred images is another aspect that customers have put to the test. One user bravely washed and dried their shirt on high heat, despite not being recommended. Surprisingly, the image held up well even after repeated washing. However, it's important to note that the manufacturer advises against such extreme treatment.
Lastly, this transfer paper has proven to be a cost-effective alternative for teachers or anyone looking to print custom designs. One teacher shared their experience of being quoted a high price for printing shirts. By using this transfer paper, they were able to take matters into their own hands. They printed the designs at their workplace's inkjet printer and had their students iron them onto the shirts. The process was hassle-free and yielded excellent results.
3. Transprint Iron On Transfer Paper: Light T-Shirts (20 Sheets)


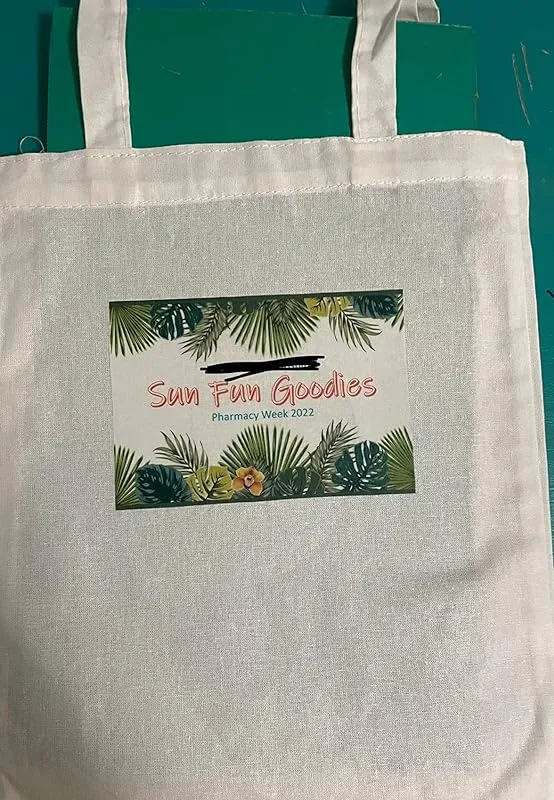
I recently had the pleasure of trying out this iron-on transfer paper, and I must say, I am thoroughly impressed. As someone who had struggled to find a transfer paper that would work with my laser printer, I was relieved to discover that this product delivered exceptional results. The printing process was seamless, and the final product, when ironed onto my canvas mini totes, was practically flawless.
One thing to note is that there was a black line across the design in the photo provided, but this was intentionally done to conceal the place of work. Moving on, I used my regular Chi iron to apply the transfers and followed the instructions provided, setting it to the highest temperature. Contrary to a previous review, I did not experience any issues with the ink rubbing off easily. In fact, the colors were incredibly vibrant and vivid, as can be seen from the photo.
It is worth mentioning that any white areas in the printed design will appear translucent when applied to the garment. Therefore, this particular transfer paper is best suited for white or light-colored fabrics. Additionally, it is worth noting that four designs of the size 4.75 inches x 3.5 inches comfortably fit on one letter-sized sheet.
For those looking to use this transfer paper, I have a pro tip to offer. While I may not be a professional, I found that waiting approximately 72 hours before washing the garment allows the iron-on to soften up. Initially, the transfer can be quite stiff, but giving it some time before washing helps in achieving a more comfortable feel.
Lastly, I would like to mention that this product is incredibly user-friendly. I created a simple design for a white tank top, and the transfer came out clear and vibrant. One pro tip I would like to share is to lint roll your fabric before ironing to prevent any unwanted cat hair from getting caught between the transferred print and the fabric.
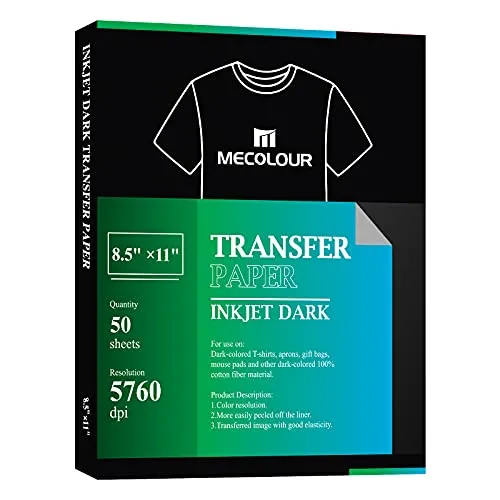
4. Inkjet Heat Transfer Paper: Dark Fabric 50 Sheets


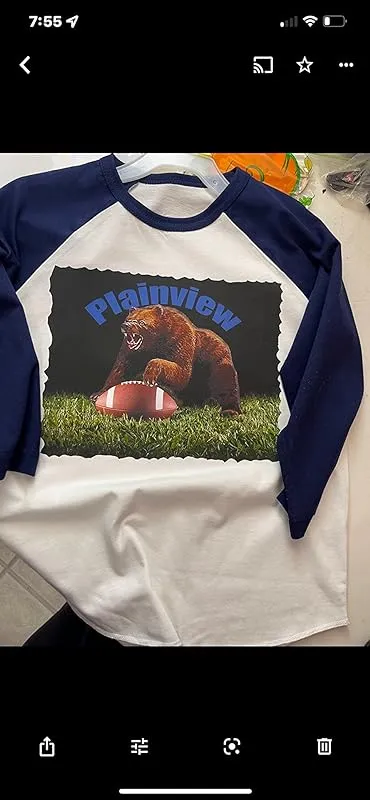
After trying out the MECOLOUR HTV paper for Dark Fabric, I must say that I am thoroughly impressed. As a newcomer to the T-shirt game, I was a bit hesitant to venture into iron-on logos, but this product exceeded my expectations.
First off, this HTV paper works seamlessly with my cricut machine. It cuts smoothly and precisely, allowing for intricate designs without any issues. The colors come out vibrant and true to what I see on my computer screen, which is a huge plus.
One of the standout features of this HTV paper is its resistance to bleeding. I have washed my shirts multiple times now, and I have not noticed any cracking, peeling, or fading of the transferred logos. This is a testament to the quality and durability of this product.
While I did encounter a slight challenge when transferring black designs, I believe it may have been due to the transfer paper I used. It is worth noting that allowing the black ink to fully dry before transferring can help alleviate this issue. However, this small inconvenience does not overshadow the overall performance of the MECOLOUR HTV paper.
What I appreciate most about this product is its ease of use. Even as a beginner, I found the process straightforward and hassle-free. The iron-on process was smooth and the logos adhered to the fabric without any problems. Additionally, the colors remained vivid and did not fade even after multiple washes.
Lastly, the longevity of the MECOLOUR HTV paper deserves a special mention. I have had a pack of this paper for quite some time now, and it has held up amazingly well. The logos have not shown any signs of wear or deterioration, which speaks volumes about its quality and durability.
5. Iron-On Dark Fabric Transfer Paper – Printers Jack

I recently purchased the 13 by 19 and the 11 by 17 sizes of this sublimation paper, and I must say, I am extremely satisfied with my purchase. Both sizes feed flawlessly through my 7720 printer, and I have not experienced any issues with paper jams.
One of the standout features of this paper is that it does not allow any color bleed through the back of the paper. This is a huge benefit, as it ensures that my prints maintain their vibrant colors and sharp detail.
In terms of versatility, this paper has exceeded my expectations. I have used it for various materials such as fabric, MDF, slate, metal, and glass, and the results have been consistently great. The colors and detail on the prints come out beautifully on all these surfaces.
I truly appreciate the quality of this paper. It consistently delivers excellent results and has not caused any disruptions in my printing process. I wholeheartedly recommend this sublimation paper to anyone in need of a reliable and high-performing option.
I cannot emphasize enough how much I love this paper. The prints produced using this paper are incredibly bright and vibrant. The colors really pop, making my designs visually stunning. I am so impressed with the output that I will definitely be ordering additional sizes in the future.
One of the reasons I switched to this brand of sublimation paper was the price. I found it to be more affordable compared to other options on the market. However, the affordability did not compromise the quality. In fact, this paper has exceeded my expectations in terms of performance and results.
Lastly, I used the transfers from this paper to create my son's Halloween costume, and I couldn't be happier with the outcome. The transfers were easy to use and provided excellent results. I highly recommend them to anyone looking for a hassle-free and impressive way to create custom designs.
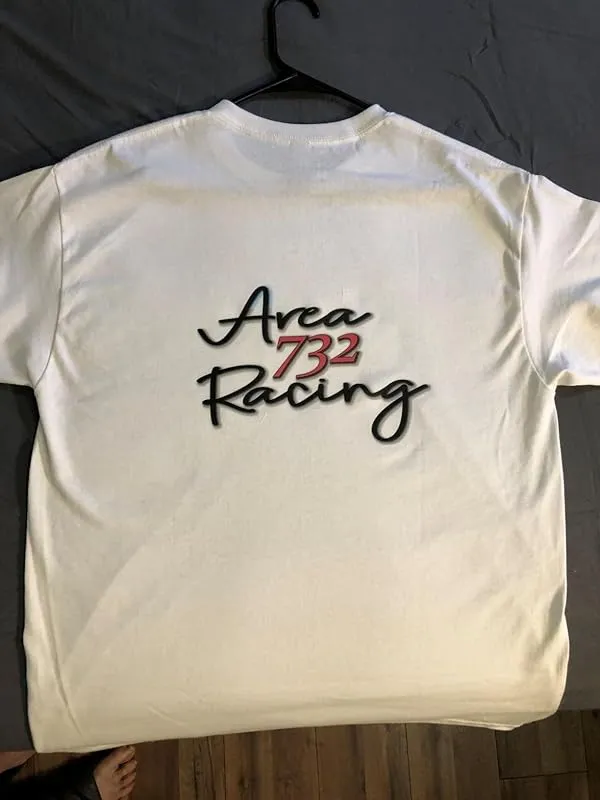
6. Dark Fabric Iron-On Heat Transfer Paper – T-Shirt Revolution


I recently had the opportunity to use this iron-on transfer paper and I must say, it was a breeze to use. The entire process, from printing to ironing, was incredibly simple and straightforward. All I had to do was print my design, cut it out, and iron it onto the fabric. The paper even came with parchment paper, which I was able to reuse multiple times.
One thing that really impressed me about this paper is that I didn't have to worry about mirror imaging or reversing my designs. This was especially helpful for worded projects, as I was able to create personalized masks without any hassle. The end result turned out great and I couldn't be happier.
I also had the opportunity to use this paper for creating logo tea shirts. Again, the process was seamless. I just printed my logo and ironed it onto the fabric, without the need to reverse or mirror image the design. The clarity of the final product was impressive and it was incredibly easy to apply.
In fact, we ordered a pack of this transfer paper for our team's Halloween shirts and it worked wonderfully. The designs came out clear and the application process was a breeze. It definitely added a fun and personalized touch to our Halloween costumes.
The only downside I found with this paper is that the sheets are not available in a larger size. This was a bit limiting, especially when I wanted to create larger designs for some t-shirts for work. However, despite this minor setback, the overall experience using this transfer paper was still fantastic.
I also used this paper to create some cutouts for our polo shirts, which we wore at our craft shows. The white designs showed up beautifully against the blue fabric and the application process was as easy as ever. Simply design, print, iron, let it cool, peel off the backing, and you're done. I followed the enclosed instructions and everything worked perfectly. It was definitely not hard at all.
7. Transourdream Clear Heat Transfer Paper For Light T-Shirts


I have been using transfer papers for DIY t-shirts since 2015, and I must say that this new transfer paper is the best one I have used so far. The results are amazing, and I have some suggestions to ensure the best outcome.
Firstly, always print on the plain side of the paper, as the brand logo is located on the back. Make sure to mirror your design and check that it looks good before printing.
Secondly, print the final design using the highest quality setting on your printer, such as Photo or High-Quality Photo. This will ensure vibrant and crisp prints.
When trimming the paper, leave a small margin of about 2mm to prevent the design from falling apart or warping while ironing.
To ensure proper heat transfer, place your garment on a firm and heat-resistant surface. I personally use a piece of wood covered with a towel. Use a hot iron set to at least the cotton/jeans setting and turn off the steam. Avoid using an ironing board as it may be too soft.
Follow the instructions provided in the pack or watch a video tutorial on their product page or YouTube. Apply firm pressure while ironing to allow the heat to transfer the print onto the fabric. By applying enough pressure and ironing properly, the print will come out correctly.
After ironing, let the garment cool down completely before lifting a corner. Patience is key to achieving excellent results.
If possible, it is advisable to give the garment a final rinse with a bit of vinegar in the water to set the dye. Line dry the shirt and tumble dry on low to soften the fabric.
I recently ordered two more packs of this transfer paper, and I am extremely satisfied. The image transferred perfectly onto the t-shirt, and the colors are bright. Even after washing, the shirt remains soft, which is impressive.
I also used these transfer papers to put logos on aprons for my son's pizzeria birthday party, and they turned out great. The logos looked professionally done, and everyone was impressed.
As someone with high graphic artist standards, I can confidently say that the print quality of these transfer papers meets my expectations. The colors are vibrant, and the details come out beautifully.
Lastly, I made this purchase without reading the reviews beforehand, but I have no regrets. Despite the product being 40% off, it was available for same-day delivery, which was crucial for my project. The transfer paper was easy to peel off after cooling down, and it came off smoothly without damaging the fabric. I followed the recommended temperature and time settings, and the results were fantastic. I have previously used the same brand's transfer paper for dark fabrics, and it worked wonderfully as well. Overall, I am extremely satisfied with both the dark and light transfer papers.
8. Dreamlite Transfer Paper For Fabrics (20 Sheets)


I recently purchased the TransOurDream heat transfer paper sheets and I must say, they have completely changed the game for me. In the world of sublimation printing and heat pressing, there are a few limitations that can be frustrating. Firstly, you are typically restricted to using polyester t-shirts and light colors. While there are sprays available to sublimate onto cotton/poly blend t-shirts, the colors are not as vibrant and don't last as long. Additionally, most sublimation printers do not print in white ink, which means you can't print white sublimation ink and are limited to lighter t-shirts.
However, with the TransOurDream heat transfer paper sheets, you can now incorporate white into your designs and "print" white onto cotton or polyester t-shirts. This opens up a world of possibilities as you are no longer restricted to polyester fabric or light colors. The process is incredibly easy and can be done using a regular inkjet printer. No special ink or sublimation ink is required.
I simply printed my design, including white areas, onto one of the TransOurDream sheets of heat transfer paper without reversing the image. After printing, I removed the vinyl printed image from the paper backing and placed it on my cotton t-shirt. I used a heat press to iron it onto the shirt, but an iron can also be used if you don't have a heat press. The pressing process took only 15 seconds and every edge of the design was firmly stuck to the material.
I have yet to wash the shirt, as it is recommended to wait 48 hours, but I am excited to see how it holds up. If there are any negative results after washing, I will be sure to update my review. Overall, these TransOurDream heat transfer paper sheets have truly impressed me and have become a game changer. While I will still use my sublimation printer, whenever I want to place a design onto a dark or cotton t-shirt, I will definitely be reaching for these sheets. They have expanded my options and allowed me to create designs with vibrant colors on a wider range of fabrics. Highly recommended!
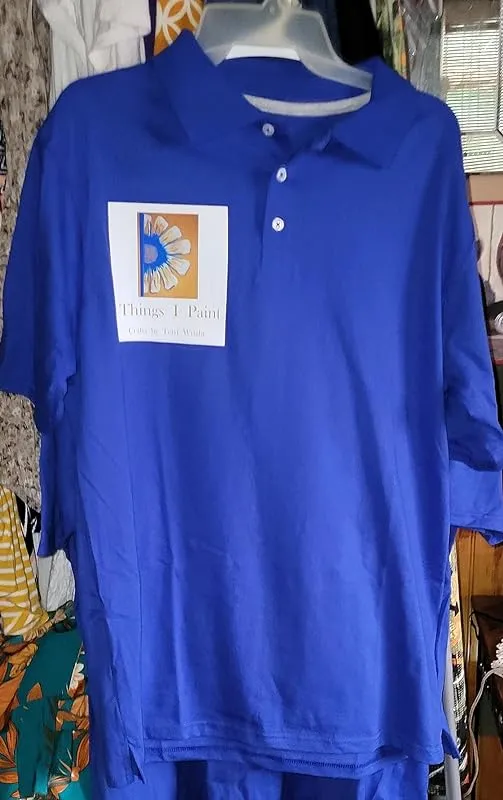
9. Light Shirt Heat Transfer Paper: 10 Sheets, Printable Vinyl


I recently had the opportunity to try out this transfer paper for creating custom shirts, and I must say, I was quite impressed. The process was smooth and the results were outstanding.
Firstly, the paper itself is of high quality. My wife printed an image on the white side of the paper using our inkjet printer, and the colors came out vibrant and true to the original design. The paper is not transparent, so if you're using it on a colored shirt, it's best to trim the excess around the image to avoid a noticeable white block. Alternatively, you can iron it onto a white shirt for a seamless look.
The application process was straightforward. After cutting out the design, we carefully removed the logo printed paper, placed the image onto the fabric, and covered it with the protective paper included in the package. The instructions didn't specify a temperature for the iron, but we used our Cricut Easy Press at 325°F. With just two 30-second cycles, the design was securely attached to the 100% cotton shirt.
One concern I had was how well the colors would hold up after washing. I'm pleased to report that the colors remained vibrant even after multiple washes. The design stayed intact both on the front and back of the shirt, without any issues.
Additionally, I was pleasantly surprised to find that this transfer paper worked well on dark shirts too, despite being intended for light shirts. While the colors may appear slightly muted on dark fabric, it still produced a great result. For light shirts, the colors come out beautifully and the design looks crisp and clear.
In terms of versatility, this transfer paper allows for multiple images on a single sheet. With a little planning and cutting, you can create different designs for various applications.
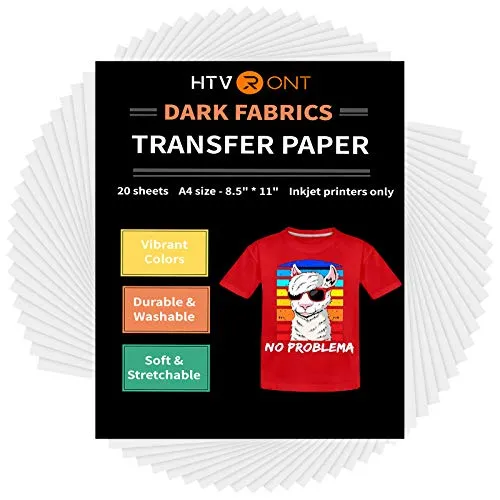
10. Colorful Vinyl Transfer Paper For Dark T-Shirts – 20 Sheets


After using this sublimation product, I can confidently say that it is much easier to use compared to a sublimation printer. As a beginner, I found the process straightforward and hassle-free. I followed the provided instructions diligently and had great results.
The first step was to design my image in Cricut Design Space. I created a print then cut image, adding different offsets for different elements. The best part was that I didn't need to mirror the design. I printed it on plain paper using the "Best" setting on my Brother EcoTank 3850 printer, which uses regular ink instead of sublimation ink.
Once the design was printed, I used my Cricut Maker to cut each element. I was cautious while peeling the vinyl off the backing as it was securely attached. I then placed the image on a 100% cotton canvas bag and covered it with the included parchment paper.
Using my Cricut Easy Press, I adhered the design to the bag by heating it at 340º (slightly higher than the recommended temperature range of 335º to 338º). I was relieved to see that there were no iron imprints on the bag, indicating that the design was pressed well.
The final result was impressive. The image felt smooth and silky on the bag, without any stiffness or thickness. It looked professional and durable. I was particularly happy that I didn't experience any issues with peeling, even after washing the shirt I made for myself multiple times.
To ensure better adhesion and longevity, I let the ink dry for at least 45 minutes before cutting and "cured" the shirts by hanging them for 2 days. I also found that washing the shirts on delicate in cold water helped maintain the design's integrity. However, I accidentally washed one on a normal cycle and it still held up well, except for a coffee stain near the image.
Based on my experience, I recommend avoiding heat drying as it may cause peeling. Instead, I suggest hang drying the shirts with vinyl designs to preserve their quality.
FAQs
Are there any specific brands or models recommended for printing on heat transfer paper?
When it comes to printing on heat transfer paper, there are several brands and models that are highly recommended by professionals in the industry. Some of the top brands for heat transfer paper printing include Avery, Neenah, Epson, and HP.
These brands offer a range of heat transfer papers that are compatible with both inkjet and laser printers.
In terms of specific models, it is important to choose a printer that is capable of producing high-quality prints with vibrant colors and sharp details. For inkjet printers, models like the Epson SureColor P800 and the Canon PIXMA Pro-100 are often recommended for heat transfer paper printing.
These printers have excellent color accuracy and are capable of handling thicker paper types.
For laser printers, models like the HP Color LaserJet Pro M281fdw and the Brother HL-L3290CDW are popular choices. These printers offer fast printing speeds and can handle heat transfer papers with ease.
Ultimately, the choice of brand and model depends on your specific requirements and budget. It is always a good idea to do some research and read reviews to find the best printer that suits your needs for heat transfer paper printing.
Are there any specific ink types or cartridges required for printing on heat transfer paper?
Yes, there are specific ink types and cartridges required for printing on heat transfer paper. Heat transfer paper is designed to transfer the printed design onto fabrics or other surfaces using heat and pressure.
To achieve high-quality and durable prints, it is important to use the right ink and cartridges.
For heat transfer paper, it is recommended to use sublimation ink or pigment ink. Sublimation ink is specially formulated to convert from a solid to a gas when exposed to heat, resulting in vibrant and long-lasting colors on the transfer paper.
Pigment ink, on the other hand, is known for its fade-resistant properties and is suitable for heat transfer applications.
In terms of cartridges, it is essential to use cartridges that are compatible with your printer model. Different printers require specific cartridges, and using the wrong ones can lead to printing issues or damage to the printer.
It is advisable to refer to the printer's manual or consult with the manufacturer to determine the appropriate ink cartridges for printing on heat transfer paper.
Overall, using the correct ink types and cartridges will ensure optimal results and longevity of your heat transfer prints.
Can any printer be used with heat transfer paper?
Not all printers are suitable for use with heat transfer paper. Heat transfer paper requires a printer that can handle high temperatures and apply enough heat and pressure to transfer the image onto the desired surface.
Inkjet printers are generally recommended for heat transfer paper as they can produce high-quality prints with vibrant colors. However, not all inkjet printers are compatible. It is important to check the specifications of your printer to ensure it supports heat transfer paper.
Additionally, it is advisable to use a printer with pigment-based inks rather than dye-based inks. Pigment-based inks are more resistant to fading and provide better durability when exposed to heat and washing.
If you are unsure about your printer's compatibility, I suggest consulting the printer's manual or contacting the manufacturer's customer support for guidance. They can provide you with specific information on whether your printer is suitable for heat transfer paper or if any modifications are required.
Can I use a laser printer for heat transfer paper, or is an inkjet printer better?
When it comes to using heat transfer paper, an inkjet printer is generally considered to be a better option compared to a laser printer. Heat transfer paper works by transferring the image printed on it onto a fabric or other surfaces using heat and pressure.
Inkjet printers are specifically designed to handle the heat transfer process more effectively.
Inkjet printers utilize water-based inks that are more suitable for the heat transfer process. These inks are designed to be absorbed by the heat transfer paper, allowing for better color vibrancy and durability when transferred onto the fabric.
On the other hand, laser printers use toner, which is a powder-based ink that is fused onto paper using heat. Since the toner is not designed to be absorbed into the heat transfer paper, the transfer process may not be as effective.
The heat from the transfer process can cause the toner to crack or peel off, resulting in a less satisfactory outcome.
In conclusion, while it is technically possible to use a laser printer for heat transfer paper, an inkjet printer is generally recommended for better results in terms of color vibrancy and durability.
Can I use an inkjet printer with heat transfer paper, or do I need a specialized printer?
Yes, you can use an inkjet printer with heat transfer paper. In fact, inkjet printers are commonly used for printing designs onto heat transfer paper. However, it is important to note that not all inkjet printers are suitable for this purpose.
To achieve the best results, it is recommended to use an inkjet printer that has pigment-based inks rather than dye-based inks. Pigment-based inks tend to be more fade-resistant and produce better results on heat transfer paper.
Additionally, it is advisable to check if your inkjet printer has a dedicated setting for printing on transfer paper. This setting adjusts the printer's ink output and ensures that the image is printed correctly on the transfer paper.
It is also recommended to follow the instructions provided by the manufacturer of the heat transfer paper to ensure optimal printing results.
If you do not have an inkjet printer with pigment-based inks or a dedicated setting for transfer paper, you may consider using a specialized printer specifically designed for heat transfer applications.
These printers often offer better color vibrancy and durability, especially for commercial or high-volume printing purposes.
How do I choose the right printer for heat transfer paper?
When choosing the right printer for heat transfer paper, there are a few key factors to consider.
Firstly, you need to ensure that the printer you choose is compatible with heat transfer paper. Look for printers that have the capability to handle thicker or specialty media, as heat transfer paper is typically thicker than regular printing paper.
Secondly, consider the type of ink that the printer uses. Heat transfer paper works best with inkjet printers, as they offer high-quality prints and are compatible with the heat transfer process. Make sure the printer uses pigment-based inks, as they are more durable and resistant to fading when exposed to heat.
Additionally, pay attention to the size and format of the printer. Consider the size of the heat transfer paper you will be using and choose a printer that can accommodate it. Look for printers that offer adjustable paper sizes and have a rear feed option to prevent bending or damaging the heat transfer paper during printing.
Lastly, read reviews and seek recommendations from other users who have experience with heat transfer printing. This can help you gauge the printer's performance, reliability, and overall suitability for your needs.
What are some common troubleshooting tips for printing on heat transfer paper with a printer?
When troubleshooting printing issues with heat transfer paper, there are several common tips that can help resolve the problem:
1. Ensure proper paper compatibility: Make sure the heat transfer paper you are using is compatible with your printer. Check the manufacturer's recommendations for the specific printer model.
2. Use the right settings: Adjust the printer settings to match the heat transfer paper. Set the paper type to "transfer paper" or "specialty paper" in the printer settings menu. Also, ensure that the paper size is set correctly.
3. Clean the printer: Dust and debris can affect print quality. Regularly clean the printer, including the paper feed rollers, to prevent any obstructions or smudging.
4. Check ink levels: Ensure that there is sufficient ink in the printer cartridges. Low ink levels can lead to faded or incomplete prints.
5. Test with a different sheet: If you encounter issues with a specific sheet of heat transfer paper, try using a different sheet from the same batch. This can help identify if the problem lies with the paper itself.
6. Adjust print quality: Experiment with different print quality settings to find the optimal balance between resolution and ink saturation for your specific heat transfer paper.
If the troubleshooting tips above do not resolve the issue, it may be helpful to consult the printer's user manual or contact the manufacturer's customer support for further assistance.
What are the best printers for heat transfer paper?
When it comes to selecting the best printer for heat transfer paper, there are a few factors to consider. Firstly, you would want a printer that offers high-resolution printing capabilities to ensure clear and crisp designs on the transfer paper.
Additionally, it should have the ability to handle thick and specialty papers, as heat transfer paper is typically thicker than regular printing paper.
One popular option is an inkjet printer, as it can provide excellent print quality and versatility for heat transfer paper. Epson SureColor P800 and Canon PIXMA Pro-100 are two inkjet printers that are commonly recommended for heat transfer paper printing due to their high-quality output and wide color gamut.
Alternatively, laser printers can also be suitable for heat transfer paper printing. They offer fast printing speeds and can handle thicker paper. The HP Color LaserJet Pro M281fdw and Brother HL-L8360CDW are two laser printers that are often suggested for heat transfer paper printing.
Ultimately, it is important to check the printer's specifications and ensure compatibility with heat transfer paper before making a purchase.
What features should I look for in a printer for heat transfer paper?
When selecting a printer for heat transfer paper, there are several important features to consider. Firstly, make sure the printer is compatible with heat transfer paper. Look for a printer that can handle different paper sizes, including the size required for your heat transfer projects.
Next, consider the print quality. Look for a printer with high resolution and color accuracy to ensure vibrant and sharp transfers. It's also beneficial to choose a printer with multiple ink cartridges for better color representation.
Speed is another factor to consider. If you have a high volume of heat transfer printing, look for a printer with fast printing speeds to improve efficiency.
Additionally, connectivity options are essential. Choose a printer that offers both wired and wireless connectivity, allowing you to conveniently print from various devices.
Lastly, consider the durability of the printer. Look for a printer that is built to handle continuous use and can withstand the high temperatures involved in heat transfer printing.
Considering these features will help you find a printer that meets your specific requirements for heat transfer paper printing.
What is the maximum resolution a printer should have for printing on heat transfer paper?
The maximum resolution a printer should have for printing on heat transfer paper depends on various factors, such as the type and quality of the heat transfer paper, the desired level of detail, and the capabilities of the printer.
In general, a resolution of 300 dots per inch (dpi) is considered sufficient for most heat transfer applications.
Heat transfer paper is typically designed to work with inkjet printers, which commonly offer resolutions ranging from 300 to 1200 dpi. However, it is important to note that higher resolution does not always equate to better print quality on heat transfer paper.
Excessively high resolutions may not provide significant benefits and can even lead to longer printing times and potential compatibility issues.
To ensure optimal results, it is recommended to consult the printer manufacturer's guidelines and the specifications of the heat transfer paper being used. Additionally, performing test prints and adjustments may help determine the optimal resolution for a specific printer-paper combination.