I Tested And Reviewed 10 Best Wood Stain For Outdoor Furniture (2023)
Choosing the right wood stain for outdoor furniture can seem daunting, but it doesn't have to be. With some knowledge about the factors that impact performance, you'll be ready to select a product that protects your patio set while enhancing its beauty.
When researching wood stains, you'll want to consider the types of wood your furniture is made of, your local climate and weather conditions, and the tone and finish you hope to achieve. Prepare to make compromises between aesthetics and durability. And don't forget the prep work of cleaning and lightly sanding the wood first!
What level of protection from moisture, mildew, and UV rays do you need? How often are you willing to reapply to maintain appearance? Does color consistency matter, or do you prefer a stain that weathers over time? Asking these questions will guide you toward the best stain for your needs.
With some thoughtful evaluation of your priorities, you'll be ready to choose a wood stain that keeps your outdoor furniture looking its best for longer. Confidently shop knowing you've prepared for this important purchase. The right stain is out there to meet your unique needs.
10 Best Wood Stain For Outdoor Furniture
| # | Product Image | Product Name | Product Notes | Check Price |
|---|---|---|---|---|
|
1
|
 |
The product is ideal for staining wood furniture, decks, and fences with a fast-drying, water-based formula and color guarantee.
|
|
|
|
2
|
 |
The product is ideal for protecting outdoor wood surfaces such as decking, fences, sheds, and furniture from water damage.
|
|
|
|
3
|
 |
The product is ideal for protecting and enhancing the appearance of outdoor wood decks, fences, siding, and furniture.
|
|
|
|
4
|
 |
The product is ideal for staining and enhancing the appearance of wood surfaces.
|
|
|
|
5
|
 |
The product is ideal for nourishing and protecting outdoor wooden furniture and decks.
|
|
|
|
6
|
 |
The product is ideal for protecting furniture and fine wood surfaces.
|
|
|
|
7
|
 |
The product is ideal for achieving a golden oak finish on wooden surfaces.
|
|
|
|
8
|
 |
The product is ideal for staining and preserving timber surfaces, such as decks, fences, and outdoor furniture.
|
|
|
|
9
|
 |
The product is ideal for enhancing and protecting outdoor wooden surfaces.
|
|
|
|
10
|
 |
The product is ideal for staining and finishing wood surfaces to achieve a deep black color.
|
|
1. Zero Odor Wood Stain: Fast-Drying Furniture Deck & Fence


I am extremely satisfied with this product. As a clock and antiquities restorer, I have found it to be perfect for raw antique wood. The depth of color it provides is exactly what I desire – deep, dark, and nondescript. I have conducted compatibility tests with older "ink" type stains, and it is fairly pH neutral, which is crucial for a restoration specialist like myself. I am genuinely impressed.
Not only is this product more affordable than India Ink, but it also offers the same stable, deep color that is indistinguishable from the original. The heavy-duty container is definitely a bonus and adds to the overall value of the product.
Sometimes, taking a risk with a new product pays off, but in this case, I didn't have to worry. I have found the perfect solution for my needs with this stain. It is truly a game-changer for my clock restorations. I highly recommend it.
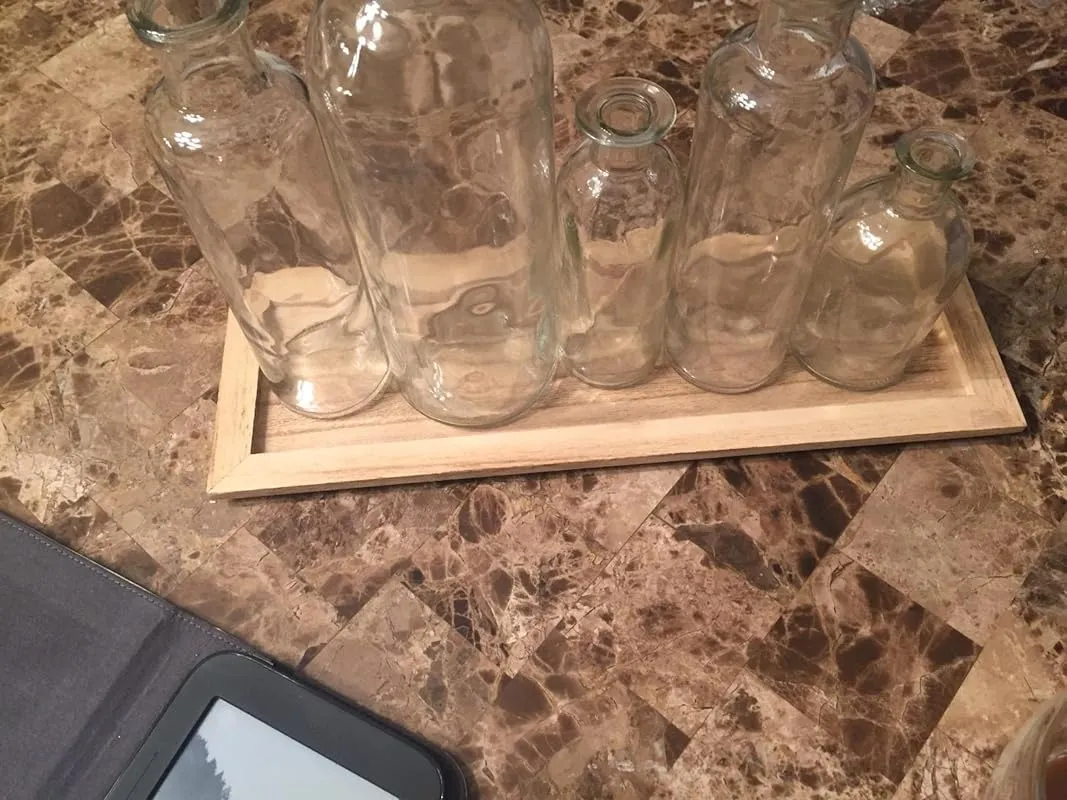
Moving on to another user review, I was in search of an odorless water-based stain for my wood desk, and I must say, this product delivered. The color and texture of my desk after drying were absolutely perfect. It provided a perfect match and the application process was a breeze. I was pleasantly surprised by how quickly it dried and the easy cleanup process. What's even better is that there was no odor at all. This will undoubtedly be the only stain I use indoors from now on. I am so satisfied that I will be purchasing more.
Furthermore, I needed a water-based stain for some very dense bamboo decking, and this product did the job exceptionally well. The end result looks great, and I am thoroughly pleased with the outcome. It provided the perfect finish for my decking.
2. Roxil Wood Waterproof Sealer: 10 Year Outdoor Wood Treatment


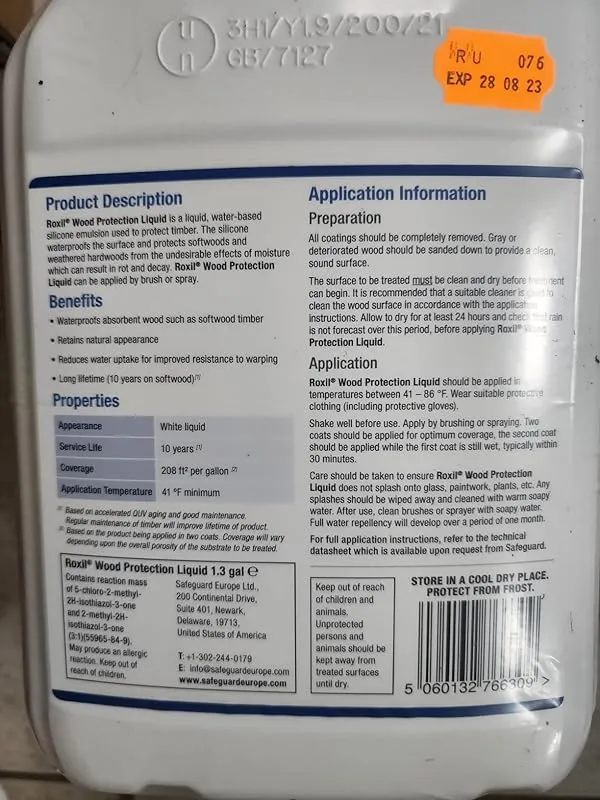


I recently had the opportunity to try out the Roxil wood sealer on my neglected pergola in the backyard, and I must say, I am quite satisfied with the results. The previous owner had neglected the pergola, and although I treated it a couple of years ago, it was starting to look neglected once again.
Applying the sealer was a breeze. It can be applied with either a sprayer or a brush, but I personally preferred using a brush with a long handle. This allowed me to reach all parts of the pergola without having to get on a ladder and stay out of the drip zone. It is important to note that the wood should be cleaned prior to applying the sealer and should be dry. Additionally, the temperature should not exceed 86 degrees Fahrenheit during application.
The sealer itself has the consistency of watered-down milk and goes on easily. I applied two coats, as recommended, and the wood definitely looked better after the treatment. While I cannot vouch for the claimed 10-year durability, I would be more than happy with a product that lasts for 5 years. The sealer does seem to be waterproof after the treatment, which is a great bonus.
In addition to the pergola, I also used the Roxil wood sealer on a small deck that I built a couple of months ago. The application process was quick and easy, and the sealer dried clear, leaving a great finish. So far, it has held up well, but I am eagerly waiting to see how it performs during the winter season. If there are any issues, I will make sure to update this review.
I also had to replace a few rotten wooden slats on my deck, and I used the Roxil wood sealer for that as well. The application was easy and fast, and the sealer dried clear. I applied two coats to ensure maximum protection.
Lastly, I used the Roxil wood sealer on the flooring of my shed. Since the flooring is untreated, it needed to be treated to protect against wet feet and rain. The sealer applied easily, and I applied two coats in sections, as recommended. It has only been a couple of weeks, but so far, it seems to be doing what it claims to do. I did not notice any strong fumes during the application, unlike other brands I have used in the past.
3. Woca Denmark Exterior Wood Oil – Natural Finish


I purchased the blue/black 'Anthracite' shade from WOCA around six years ago and applied it to the exterior walls of my wooden cottage in Louisiana, USA. I also used it on the picket fence at the front and the grey shade on the porch floor. I must say, it was money well spent because I still love it after all these years. Now, I'm about to freshen it up for the first time in six years to restore the original rich luster.
One of the best things about this product is that I will never have to sand my house ever again. This is a huge relief and a major time-saver. I can't thank WOCA enough for this. The durability of the product is truly impressive.
Moving on to the application process, it was fairly easy to use. The oil had a glossy finish when I first applied it, which I wasn't a fan of. However, after it dried (which took around 3 hours in the sun), it turned into a matte finish, which I absolutely love. I have attached some before and after photos to show the difference.
In terms of coverage, some people may be surprised that the quantity of oil doesn't fully cover the recommended area. This is because textured surfaces like my picket fence absorb more oil compared to smooth surfaces, and the surface area is much larger. Additionally, the amount of oil used may also depend on whether it is the first coat or not. In my case, I used around 0.5-0.7 liters of oil for a 4 square meter area, and I applied a generous amount of oil. Overall, I found the product to be highly efficient.
WOCA oil is not only great for exterior use but also for interior use on hardwood floors. I have used their products inside my home as well, and they have proven to be amazing and long-lasting. It's important to note that using the WOCA Cleaner and Refresher is crucial in maintaining the wood's quality.
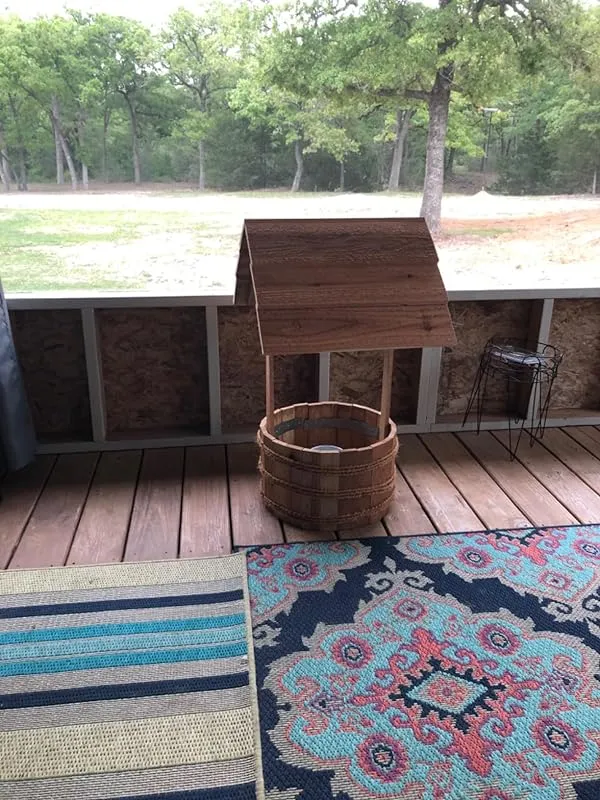
Recently, I ordered WOCA oil for an uncovered deck, and I applied it a couple of months ago. I have high expectations for its durability, as I believe it will outperform the regular deck oil I used in the past, which had a very short life.
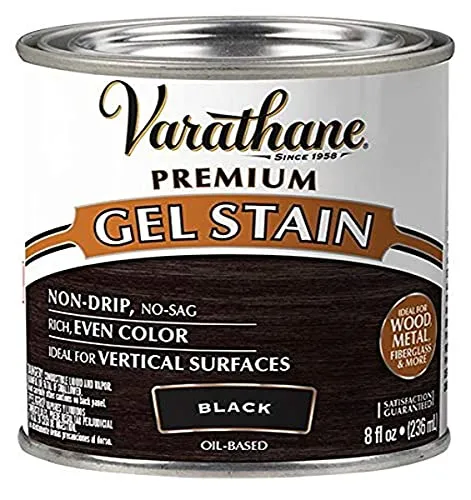
4. Varathane 358322 Premium Gel Stain, Half Pint, Black


I recently had the opportunity to use the Varathane Gel Stain in Dark Walnut, and I must say, the results were absolutely beautiful. I followed the recommended application process and found it to be incredibly easy and hassle-free. Using a foam brush, I applied two coats of the stain, allowing each coat to dry for 24 hours before applying the next. To finish off the project, I used the Minwax water-based wipe-on poly, which provided a smooth and glossy finish.
What impressed me the most about this gel stain was the rich mahogany hue it gave to my pieces. The color was exactly what I was looking for, and I received numerous compliments on the finished product. The gel stain really brought out the natural beauty of the wood, and the grain was visible but blended in seamlessly, giving the wood a smooth and polished look.
I also appreciated the ease of use and the affordability of the foam brushes I purchased. They worked exceptionally well with this gel stain and made the application process even smoother. I would highly recommend using these foam brushes if you decide to use this stain.
One particular success story that stands out to me is how the Varathane Gel Stain helped me repair a pair of overlapping doorswings in my home. The previous owner had left unsightly holes in the doors, and I had tried various methods to fix them, all of which failed. After months of frustration, I decided to give the Varathane Gel Stain a try, and I'm so glad I did. The stain not only covered up the patches but also blended seamlessly with the natural wood, making the repair work completely invisible.
5. Minwax Available 671004444 Teak Oil, Quart, Clear, 32 Fl Oz


I recently had the opportunity to restore my teak yard furniture and I am extremely pleased with the results achieved using this teak oil. Initially, I was considering replacing the furniture but after watching some instructional videos on YouTube, I decided to give restoration a try.
First and foremost, it is important to note that this teak oil resembles more of a varnish than an oil and it does emit strong fumes during application. Therefore, I highly recommend conducting this process outdoors. I opted to use a brush and applied a single coat, which was readily absorbed by the wood. Surprisingly, there was no residue to wipe off, which was a pleasant surprise.
Before applying the teak oil, I thoroughly cleaned the furniture using teak cleaner and brightener, followed by sanding it twice with an electric sander. This preparation ensured optimal results. With just one coat, I managed to cover approximately one-third of a small can, and I still have additional pieces to work on, prompting me to order more of this product.
The finish achieved with this teak oil is reminiscent of tung oil or varnish. While it may require a bit more effort compared to using polyurethane, the end result is undeniably superior. I typically apply between six to eight thin coats, buffing after each coat once it becomes tacky (one coat per 24 hours). If necessary, I may also use 600 grit sandpaper between coats to enhance the depth and warmth of the wood. This teak oil truly brings out the beauty of figured woods and is particularly suitable for antique or special hand-made furniture. Although it is not durable enough for outdoor use, it is well worth the extra effort for these types of pieces.
As a first-time user of this product, I found it to be incredibly user-friendly and forgiving, especially when compared to polyurethane products. I applied two heavier coats using an old sock, followed by a third thinner coat after light sanding. The finish is not tacky at all and after a couple of days, it has cured quite well. There is a slight increase in shine compared to the original finish, but the level of protection is significantly improved. I am considering sanding down and applying another coat for added durability. Overall, I highly recommend this product based on my positive experience.
Having used other teak oils in the past that did not last long or provide a desirable luster, I was pleasantly surprised by the quality and end result of this particular product. It is important to closely read and follow the instructions, as leaving the oil on the wood for more than 20 to 30 minutes can result in stickiness. I found that working for approximately 15 minutes and using a lint-free rag to dry the wood yielded excellent results.
6. Saman Brazilian Cherry Interior Wood Seal & Stain


I purchased this product to restore a damaged tabletop and I must say, I am extremely pleased with the results. As someone who has no prior experience in woodworking or staining, I found this product to be incredibly easy to use and it exceeded my expectations.
One of the main reasons I chose this product was because it provided an all-in-one solution, eliminating the need to purchase multiple products for the job. This not only saved me money but also prevented any wastage, considering I do not plan on undertaking such a project again.
The application process was straightforward. After sanding the tabletop with both coarse and fine sandpaper, I followed the instructions on the can and used a new dish sponge to apply the stain with the wood grain. The stain was forgiving, allowing me some time to correct any mistakes before it dried. I applied thin layers and used a paper towel to wipe off any excess.
I opted for two coats of the stain, which resulted in a slight darkening of the color. However, it matched the existing stain perfectly, much to my delight. The stain dried quickly, even in humid and cold conditions, and left a smooth satin finish. I noticed that liquids bead on the finish, indicating good water resistance.
The pictures provided by other users accurately represent the color and finish achieved with this stain. The 'antique' color showcased in the images was achieved after two coats. The first coat left the wood feeling slightly rough, but the second coat provided a much smoother finish.
7. Varathane Less Mess Wood Stain And Applicator, 4 Oz, Golden Oak


I recently tried this product to refinish a table, and I must say, I was amazed by the results. The coverage provided by this product was exceptional, and the color was absolutely fantastic. Although it did feel slightly tacky even after a day, I believe that this will wear off with time. Overall, I am extremely satisfied with this product and would highly recommend it.
I also used this product to restore a bathroom sink cabinet that had been scuffed while cleaning out denim blue hair dye. The wood had faded and looked porous, which was quite unappealing. However, after using this product, the cabinet looked as good as new. The transformation was remarkable, and you can't even tell that there was any damage. I even have a video example of how well it worked on an old dresser. Trust me, this product is incredibly easy to use and delivers outstanding results.
Initially, I was a bit concerned about how the product would perform on the original wood, as I wanted some of the brown to show through. However, it worked perfectly. The application was a breeze, with no mess or clean up required afterwards. In the end, I achieved the desired color without any hassle. I highly recommend this product for anyone looking to achieve a beautiful finish on their wood surfaces.
One coat of this product was all it took to achieve the desired color on my fretboard. I compared the before and after pictures, and the difference was remarkable. Some reviews mentioned issues with the applicator, but I personally did not face any problems. I am thrilled with the outcome and would definitely use this product again.
We had a section of our wood floors that needed repair, but the repair guy didn't stain the wood to match the existing color. He simply applied a clear coat, which looked odd. To rectify this, I decided to sand the area and apply this product. I am pleased to say that it matched seamlessly with the rest of the floor. The color blending is perfect, and I couldn't be happier with the results. This product is a lifesaver for anyone needing to fix or touch up their wood surfaces.
8. Cabot 140.0003460.005 Australian Timber Oil Stain, One Quart, Jarrah Brown


I am extremely grateful to have come across this product. My deck was in a severely weather damaged state, with years of deferred maintenance by the previous owner. While contractors suggested tearing it down and replacing it, I wanted to find a more cost-effective solution since the wood seemed structurally sound. The deck had a solid stain that was applied years ago, and I disliked it because it concealed the natural beauty of the wood. It was more like paint used to hide underlying problems.
To prepare the deck for staining, I power washed it to remove as much of the solid stain as possible. I also used a wood grain filler to fill in deep cracks and gouges, hoping to enhance the wood's durability. Afterward, I used hand sanding blocks and a wood floor sander to remove the stubborn stain and surface defects. To eliminate years of embedded algae stains, lichen, wood tannins, and UV damage, I used a wood cleaner and brightener. Once everything was done, I allowed the deck to dry for a couple of days before proceeding with the staining process.
For staining the guard rails, I used a lambskin painting glove, and for the horizontal decking, I utilized Cabot's own stain pad. Staining the rails was time-consuming, but luckily, this stain only required a single coat application. The deck surface, on the other hand, was surprisingly quick and easy to stain compared to the rails. I managed to stain the entire surface in about 2 hours, while the rails took around 6 to 8 hours to complete. Unfortunately, I stained one of the guard rails before checking the weather, and it started raining gently about an hour later. I covered the stained area with plastic to protect it until it had dried for 48 hours. Although the rain caused some light water spots, I gently brushed over them after everything dried out. After applying a very light second coat, the spots mostly faded into the rest of the appearance, and they are hardly noticeable now. I recommend checking the weather forecast closely and waiting for at least 24 to 48 hours of dry weather before staining.
While my deck may not be the most visually appealing in town, I am extremely pleased with how it turned out and its beautiful appearance compared to its initial condition. I used the Jarrah Brown color and only used 3 out of the 5 gallons I purchased. I plan to keep the remaining 2 gallons for future touch-ups when the deck needs to be restained to maintain its good shape.
I highly recommend this product to anyone looking to revive an old or weathered deck, but only if you are willing to invest the time and effort into properly preparing the deck. It is relatively easy to work with, doesn't create a huge mess, and the odor is not as strong as expected from an oil-based stain. However, I learned the hard way that it's important to thoroughly wipe away excess stain to avoid uneven appearances caused by dripping or running down the sides.
Update after 1 year: Since it had been a long time since our deck was properly maintained, I decided to apply a second coat approximately 1 year after the first application. I thought it would penetrate deep into the wood and provide extra protection. It has been about 4 days since the second coat, and I am impressed with its resistance to heavy rain. The deck still looks great, and I have shared a new picture showcasing its durability.
9. Krylon K03607000 Wood Stain Earthen Brown Spray Stain


I recently purchased this spray stain and it turned out to be exactly what I was looking for. The application process was incredibly easy and it blended seamlessly with just a paper towel. The end result looks great and I am very happy with it.
One concern I had was whether the stain would dry well without any transfer issues, but so far I haven't experienced any problems. I will update if I notice any issues in the future. Additionally, I was initially worried that I had applied too much spray in certain areas, but after wiping it with a paper towel, the stain looked perfect. It's worth noting that this product does require wiping in some way as it initially appears like paint on the surface. However, multiple layers can be applied if a darker shade is desired.
Before and after pictures were provided and they clearly showed the positive transformation achieved with this stain. I had read some mixed reviews before purchasing, but I am extremely glad that I chose this spray stain. I used it on my gray and weathered mailbox post and it worked wonders. It took me just five minutes to spray all the sides on a hot summer afternoon. Any overspray or splotches were easily wiped away with a paper towel. While some stains on the post are still visible, I did not attempt to clean it before applying the stain. The spraying process was effortless and the stain dried quickly. The earthen brown color transformed the weathered gray post into a beautiful brown shade. The woodgrain is still visible through the stain, and I achieved the desired look with just one coat.
I also used this spray stain on a wooden seat and back that I made out of pallet wood for my patio swing. The application was a breeze and the resulting rich earthen brown color is absolutely beautiful. The stain even repelled rainwater and has kept my bench seat looking stunning. It was so much quicker and easier to use compared to brushing on stain.
In another project, I used this spray stain to refresh an acacia wood bench. The spray-on application made it effortless to cover all parts of the bench. I simply wiped off any excess stain with paper towels, just like I would with any wiping stain. Although one section of the bench initially appeared lighter than the rest, I applied another coat of stain after 15 minutes and managed to even out the color. I was initially concerned that the stain would be too dark or too brown, but the "earthen brown" shade actually toned down the orangeness of the original stain. Overall, I am extremely pleased with the results.
10. Minwax Wood Finish 227644444, 1/2 Pint, True Black


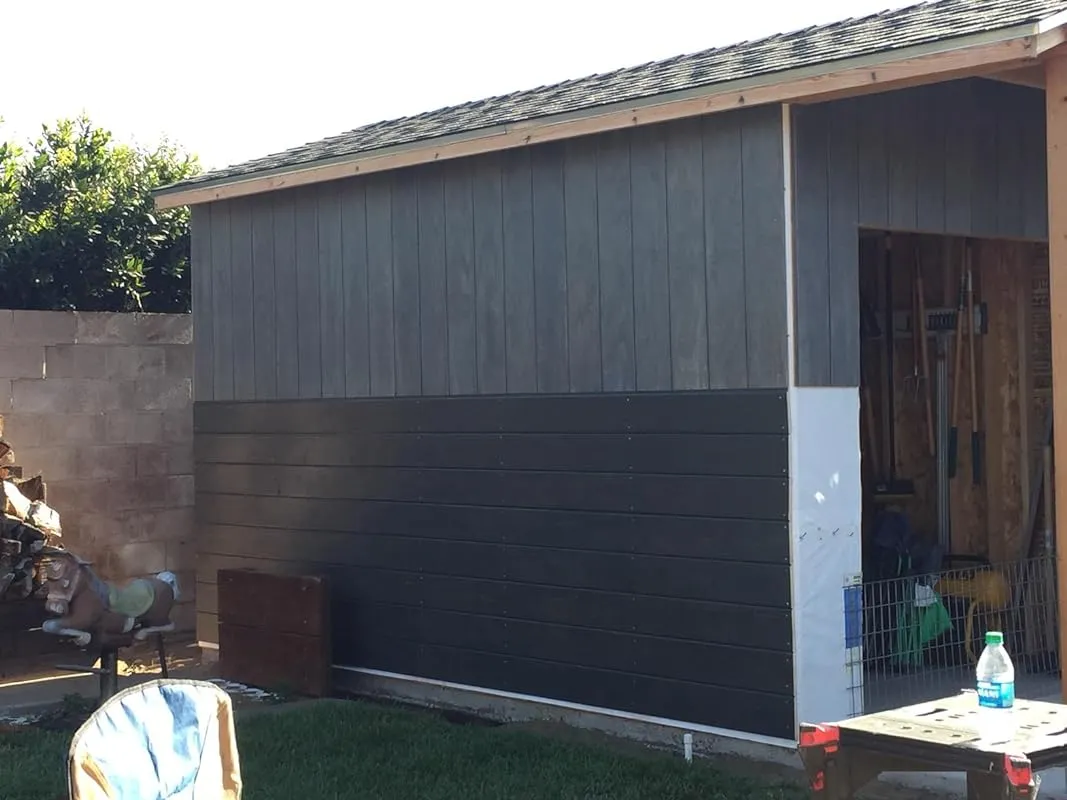
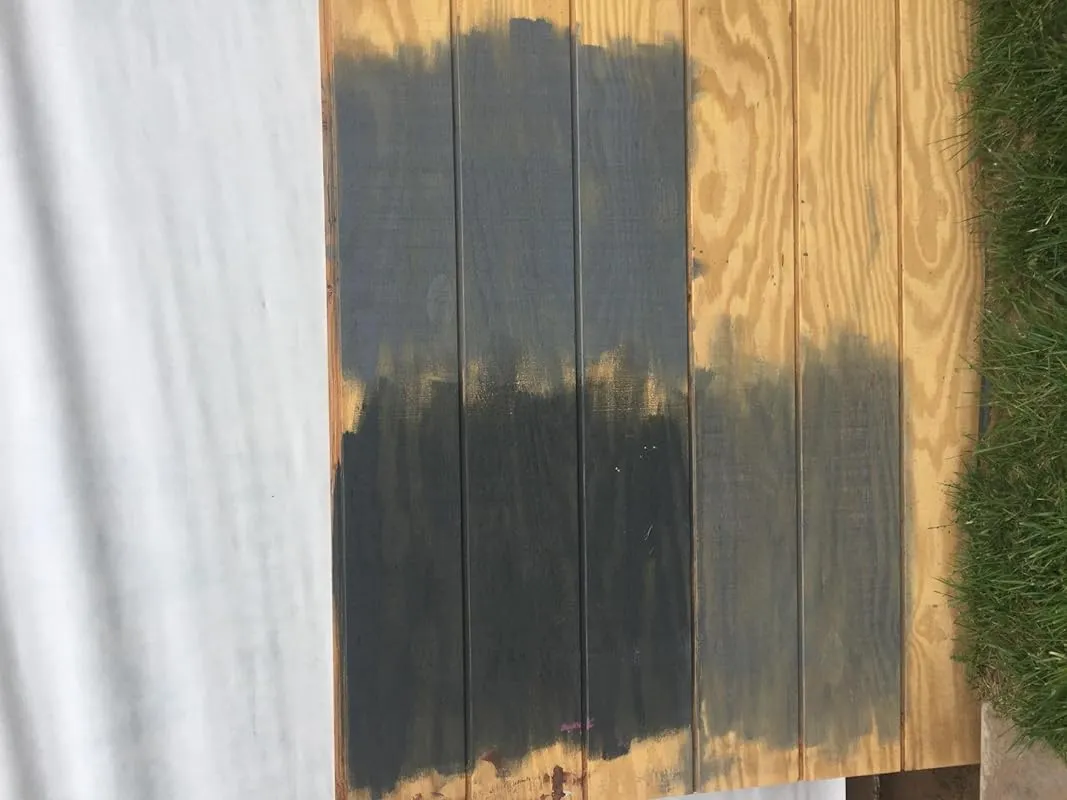
When it comes to staining wood, I have found that Minwax oil-based stains are the way to go. I recently used the Minwax Classic Grey for the top half of my shed's T-11 siding and Varathane Carbon Grey for the shiplap bottom half. I applied two coats of the Classic Grey on the T-11 since it was left unsanded. Although the instructions recommend wiping off excess, the porous surface of the T-11 soaked it all in. On the smooth shiplap, I followed the directions and wiped off the excess.
I can't recall if I applied one or two coats of the Varathane on the shiplap, but after that, I applied four coats of Minwax Helmsman Water Based Indoor/Outdoor Spar Urethane on everything. The finished result of all these coats can be seen in the picture of the shed siding.
For me, Minwax oil-based stains have consistently delivered a higher level of finish compared to other brands I have tried in the past. I'm not a fan of stains that are mixed with polyurethane sealants as a single application because it becomes challenging to control the absorption rate. With a straight oil-based stain, like Minwax, you have better control over the absorption and color.
Once I achieved the desired stain penetration and color, I applied the Minwax polyurethane/spar separately. In my opinion, Minwax stains have a deeper, truer, and more luxurious look compared to other brands, even the higher-priced ones. The combination of Minwax stain and polyurethane/spar works best for me.
In the past, when applying the stain, I have used a HVLP sprayer, especially for large areas to ensure an even coat. When using the HVLP sprayer, I would use the same sprayer for both the stain and polyurethane. To ensure a smooth finish, I would cut the polyurethane/spar with penetrol, which helps it lay down like a sheet of glass. I sometimes used the activator known as Jap dryer to accelerate the drying time.
I have used this method for various projects, including exterior and interior doors, cabinetry, moldings, and trim. Regardless of the cost of the HVLP sprayer (ranging from affordable to expensive), they always produced beautiful results. I have tried other brands in the past, but none have matched the satisfaction I get from using Minwax oil-based stains and polyurethane/spar.
FAQs
Are there any environmentally friendly or non-toxic wood stain options for outdoor furniture?
Yes, there are environmentally friendly and non-toxic wood stain options available for outdoor furniture. One popular option is water-based wood stains, which are made with natural ingredients and have low levels of volatile organic compounds (VOCs).
These stains are free from harmful chemicals such as solvents and heavy metals, making them safer for the environment and human health.
Another eco-friendly choice is plant-based or vegetable oil-based wood stains. These stains are made from renewable resources and do not release harmful fumes or toxins into the air. They provide a natural, non-toxic finish that is safe for both the furniture and the surrounding environment.
It's important to note that when choosing an environmentally friendly wood stain, look for products that are labeled as "low VOC" or "eco-friendly." Additionally, consider using wood stains that are certified by reputable organizations such as Green Seal or the Forest Stewardship Council (FSC), as these certifications ensure that the product meets certain environmental standards.
If you're unable to find a suitable non-toxic wood stain for your outdoor furniture, an alternative suggestion would be to consider using natural methods to protect and enhance the wood, such as applying a clear sealant or using a combination of oils like linseed oil or tung oil.
These options can help preserve the wood while minimizing the use of potentially harmful chemicals.
Are there any specific considerations when staining different types of outdoor furniture, such as teak, cedar, or wrought iron?
Yes, there are specific considerations when staining different types of outdoor furniture.
For teak furniture, it is important to note that teak naturally contains oils that protect it from moisture and decay. Therefore, staining teak furniture is not necessary for its durability. However, if you prefer a particular color or want to maintain a consistent look, you can apply a teak oil or finish to enhance its appearance.
When it comes to cedar furniture, staining is recommended to prolong its lifespan and protect it from weathering. Cedar is naturally resistant to rot and insects, but it can still be affected by moisture and UV rays.
Choose a stain specifically designed for cedar, as it will penetrate the wood and provide the necessary protection. Opt for a semi-transparent or transparent stain to showcase the natural beauty of cedar.
On the other hand, wrought iron furniture requires a different approach. Since wrought iron is not susceptible to rot or decay, staining is not necessary. However, you can paint wrought iron furniture to provide a protective barrier against rust.
Make sure to clean the surface thoroughly before painting and use a rust-inhibiting primer and paint specifically formulated for metal.
In summary, while staining is not always necessary for teak and wrought iron furniture, it can be beneficial for cedar furniture. Consider the natural properties of each type of outdoor furniture and choose the appropriate stain or finish accordingly.
Are there any specific maintenance requirements for outdoor furniture after applying wood stain?
Yes, there are specific maintenance requirements for outdoor furniture after applying wood stain. While wood stain helps protect the furniture from the elements, it is still important to regularly maintain and care for it to ensure its longevity.
Firstly, it is recommended to clean the furniture regularly to remove dirt, debris, and any mildew that may accumulate. You can use a mild soap and water solution or a specialized wood cleaner for this purpose.
Avoid using harsh chemicals or abrasive cleaners as they can damage the wood and the stain.
Secondly, it is crucial to protect the furniture from excessive exposure to sunlight and moisture. Consider using furniture covers or storing the pieces indoors during harsh weather conditions. This will help prevent fading, warping, or cracking of the wood.
Additionally, it is advisable to inspect the furniture periodically for any signs of wear or damage. If you notice any scratches or areas where the stain has worn off, touch them up with a matching wood stain to maintain the appearance and protection.
Lastly, reapplying wood stain periodically is essential to maintain the furniture's beauty and protection. The frequency of reapplication will depend on various factors, such as the type of wood, climate, and usage.
Follow the manufacturer's guidelines or consult a professional for the recommended reapplication schedule.
By following these maintenance requirements, you can ensure that your outdoor furniture stays in good condition and retains its aesthetic appeal for years to come.
Can wood stain protect outdoor furniture from UV damage?
Yes, wood stain can provide some protection against UV damage for outdoor furniture. Wood stains typically contain pigments and chemicals that can help block harmful UV rays from the sun. These pigments act as a barrier, absorbing and reflecting some of the UV radiation that can cause fading, discoloration, and deterioration of the wood.
However, it's important to note that not all wood stains offer the same level of UV protection. Some stains are specifically formulated to provide enhanced UV resistance, while others may offer minimal protection.
When choosing a wood stain for outdoor furniture, it is advisable to look for products that explicitly mention UV protection or are designed for exterior use.
In addition to applying a wood stain, it is also recommended to regularly maintain and reapply the stain as needed, as exposure to the elements can gradually wear away the protective layer. Additionally, using other protective measures such as covering the furniture when not in use or placing it in a shaded area can further help to minimize UV damage.
Can you use regular interior wood stain for outdoor furniture?
Using regular interior wood stain for outdoor furniture is not recommended. Interior wood stain is specifically formulated for indoor use and is not designed to withstand the harsh outdoor elements. Outdoor furniture is exposed to sunlight, rain, humidity, and temperature variations, which can cause the stain to fade, crack, peel, or deteriorate over time.
Instead, it is advisable to use a specially formulated exterior wood stain or finish for outdoor furniture. These products are designed to provide protection against UV rays, moisture, and other outdoor conditions. They contain additives that enhance durability and resistance to weathering.
When choosing an exterior wood stain, look for one that is labeled specifically for outdoor use. Additionally, consider the type of wood you are working with and the desired finish. Some stains offer different levels of transparency or color options.
By using the appropriate exterior wood stain, you can ensure that your outdoor furniture remains beautiful and protected for years to come.
How can I choose a wood stain color that complements my outdoor furniture and surroundings?
When choosing a wood stain color that complements your outdoor furniture and surroundings, there are a few factors to consider.
First, take a look at the existing colors in your outdoor space. Consider the color of your furniture, the surrounding landscape, and any other elements that are present. You want to choose a wood stain color that harmonizes with these existing colors rather than clashes with them.
Next, think about the overall style or theme you want to achieve. Are you going for a rustic, natural look? Or do you prefer a more modern and sleek aesthetic? Different stain colors can help you achieve different styles, so choose one that aligns with your desired outcome.
It's also important to consider the type of wood you are staining. Different woods have different natural tones and characteristics, and the stain color you choose should enhance these features rather than hide them.
Lastly, it's a good idea to test the stain color on a small, inconspicuous area before applying it to the entire piece of furniture. This will give you a better idea of how the color will look in your specific outdoor environment.
If you're still unsure about which wood stain color to choose, I suggest consulting with a professional at a local home improvement store or seeking advice from an interior designer or decorator. They can provide you with expert guidance and help you make the best decision for your outdoor space.
How long does a wood stain for outdoor furniture typically last?
The longevity of a wood stain for outdoor furniture depends on several factors, including the quality of the stain used, the type of wood being stained, and the environmental conditions the furniture is exposed to.
Generally, a well-applied wood stain can last anywhere from 2 to 5 years on outdoor furniture.
To ensure the stain lasts longer, it is important to choose a high-quality stain specifically designed for outdoor use. Look for a stain that offers UV protection and is resistant to water, mold, and mildew.
Properly preparing the wood surface by cleaning and sanding it before staining can also contribute to the stain's longevity.
However, it's essential to note that exposure to harsh weather conditions, direct sunlight, and heavy use can accelerate the deterioration of the stain. To maintain the appearance and protection of your outdoor furniture, periodic maintenance such as cleaning, reapplication of a protective topcoat, or re-staining may be necessary.
What are the best types of wood stain for outdoor furniture?
When it comes to choosing the best types of wood stain for outdoor furniture, there are a few factors to consider. Firstly, you'll want to choose a stain that provides protection against moisture, UV rays, and other outdoor elements. Look for stains that are specifically formulated for exterior use.
One popular type of wood stain for outdoor furniture is oil-based stain. Oil-based stains penetrate deep into the wood, providing excellent protection and enhancing the natural beauty of the grain. They are durable and long-lasting, making them a great choice for outdoor furniture.
Water-based stains are another option for outdoor furniture. They are easier to clean up and have less odor compared to oil-based stains. They also offer good protection against UV rays and moisture.
Gel stains are thicker and provide better coverage for outdoor furniture with uneven or rough surfaces. They are easy to apply and can be a good choice if you want to achieve a more uniform look on your furniture.
Ultimately, the best type of wood stain for your outdoor furniture will depend on your specific needs and preferences. It's always a good idea to test the stain on a small, inconspicuous area before applying it to the entire piece.
What are the common mistakes to avoid when staining outdoor furniture?
When staining outdoor furniture, there are several common mistakes that you should avoid to ensure a successful and long-lasting finish:
1. Insufficient preparation: One of the most common mistakes is not preparing the surface properly. Make sure to clean the furniture thoroughly to remove any dirt, grease, or old finishes. Sanding the surface lightly can also help the stain adhere better.
2. Skipping a primer: Some people tend to skip applying a primer before staining, especially if the furniture is made of wood. However, using a primer can help seal the wood and create a smooth base for the stain, resulting in a more even and durable finish.
3. Overlooking weather conditions: Staining outdoor furniture requires careful consideration of weather conditions. Avoid staining on a rainy or extremely humid day, as it can prevent the stain from drying properly.
Similarly, staining in direct sunlight can cause the stain to dry too quickly, leading to uneven results.
4. Applying too much stain: Applying too much stain can result in a thick and uneven finish. It's important to follow the manufacturer's instructions and apply the stain in thin, even coats. You can always add more layers if needed.
5. Neglecting to seal the stain: After staining, it's crucial to apply a sealant to protect the furniture from the elements. This step helps to prevent fading, moisture damage, and prolongs the life of the stain. Choose a high-quality outdoor sealant and apply it according to the instructions.
In summary, proper preparation, using a primer, considering weather conditions, applying the right amount of stain, and sealing the finish are crucial steps to avoid common mistakes when staining outdoor furniture.
What is the most effective way to apply wood stain to outdoor furniture?
The most effective way to apply wood stain to outdoor furniture is to follow a few key steps. First, ensure that the surface of the furniture is clean and free of any dirt, dust, or previous finishes. Use a mild detergent and water to clean the furniture, and allow it to dry completely before proceeding.
Next, lightly sand the surface with fine-grit sandpaper to create a smooth and even surface for the stain to adhere to. Be sure to sand in the direction of the wood grain to avoid any unwanted scratches.
Before applying the stain, it is important to protect the surrounding areas by covering them with drop cloths or plastic sheeting. This will prevent any accidental spills or drips from staining other surfaces.
Once the preparation is complete, apply the wood stain using a brush, roller, or sprayer, depending on the size and design of the furniture. Start by applying a thin and even coat, following the direction of the wood grain.
Allow the stain to penetrate the wood for the recommended time specified on the stain product label.
Finally, remove any excess stain by wiping the surface with a clean cloth. For added protection and durability, consider applying a clear sealant or topcoat after the stain has dried completely. This will help to preserve the color and enhance the longevity of the outdoor furniture.