Can You Paint Over Gel Nails? A Detailed Guide
Gel nail polish is known for its durability and long-lasting shine. But what happens when you want to change up your nail color? Can you simply paint over gel nails with regular nail polish? Here’s a quick answer to your question: Yes, you can paint over gel nails, but you need to properly prepare the nails first for the new polish to adhere correctly.
In this comprehensive guide, we’ll go over everything you need to know about painting over gel manicures. You’ll learn the right steps to take for prepping gel nails, choosing the right regular nail polish, and techniques for applying new polish over gel.
We’ll also provide tips for making your new manicure last. Read on for the complete details!
Properly Remove the Gel Polish
When it comes to painting over gel nails, it’s crucial to start with a clean slate. Properly removing the gel polish is the first step towards achieving a flawless new manicure. Here’s a detailed guide on how to do it:
Use acetone to break down the gel
The most effective way to remove gel polish is by using acetone. Acetone is a powerful solvent that breaks down the gel, making it easier to remove. Here’s how to do it:
- Start by soaking a cotton ball in acetone.
- Place the soaked cotton ball on top of your nail, making sure it covers the entire surface.
- Secure the cotton ball in place by wrapping aluminum foil around your finger.
- Leave the acetone-soaked cotton ball on for about 10-15 minutes to allow the gel polish to loosen.
- Gently remove the foil and cotton ball, and you’ll notice that the gel polish has started to dissolve.
Remember to be patient during this process, as rushing can cause damage to your natural nails. If the gel polish doesn’t come off easily, you can repeat the process or use a wooden cuticle pusher to gently scrape off any remaining gel.
File away residue for a smooth surface
After removing the gel polish, you may notice some residue or unevenness on the surface of your nails. To achieve a smooth canvas for your new manicure, follow these steps:
- Using a fine-grit nail file, gently buff the surface of your nails to remove any leftover gel residue.
- Be careful not to file too aggressively, as this can weaken your nails.
- Once you’ve achieved a smooth surface, wipe away any dust or debris with a lint-free cloth.
By properly removing the gel polish and filing away any residue, you’ll ensure that your new paint job adheres evenly and lasts longer. Don’t forget to moisturize your nails and cuticles after the process to keep them healthy and hydrated.
For more information on gel nail removal and other nail care tips, you can visit www.nailcarehq.com. They provide detailed guides and expert advice on all things related to nail care.
Buff and Dehydrate the Nail
Before painting over gel nails, it is crucial to properly prepare the nail surface to ensure the longevity and quality of the new coat of polish. The first step in this process is to gently buff the nails using a nail file.
This helps to remove any shine or residue from the previous gel polish, creating a rougher surface for the new polish to adhere to. Be careful not to over-buff the nails, as this can weaken them and cause damage.
Gently buff with nail file
To begin the buffing process, start by using a fine-grit nail file. Gently move the file back and forth across the surface of each nail, applying light pressure. This will help to smooth out any ridges or imperfections and create a slightly rough texture.
Remember, the goal is not to remove the entire gel polish but rather to create a suitable base for the new coat of polish.
Wipe nails with dehydrator/cleanser
After buffing the nails, it is important to remove any dust or debris left behind. This can be done by wiping the nails with a dehydrator or cleanser specifically designed for nail preparation. These products help to remove any oils or residue on the nails, ensuring that the new polish adheres properly.
Apply the dehydrator or cleanser to a lint-free pad and gently wipe each nail, paying close attention to the nail bed and edges.
By buffing and dehydrating the nails, you are creating the ideal canvas for a fresh coat of polish. This step is essential for achieving a long-lasting and flawless manicure. Remember to always follow the manufacturer’s instructions for any products used and take care not to damage the natural nail in the process.
Apply Base Coat
When it comes to painting over gel nails, applying a base coat is an essential first step. The base coat helps to protect your natural nails and provides a smooth surface for the nail polish to adhere to. It also helps to prevent staining and promotes longer-lasting nail color.
Before applying the base coat, make sure your nails are clean and dry. Use a nail file to shape and smooth your nails, and gently push back your cuticles. Applying a thin layer of base coat will ensure that the nail polish adheres properly and lasts longer.
It’s important to choose a high-quality base coat that is specifically formulated for gel nails. Look for a base coat that is clear and has a smooth consistency. Some popular brands include OPI, CND, and Gelish.
These brands are known for their long-lasting formulas that provide a strong foundation for your gel manicure.
Once you have applied the base coat, cure it under a UV or LED lamp according to the manufacturer’s instructions. This will ensure that the base coat is fully dry and ready for the next step.
Remember, the base coat is a crucial step in the gel nail painting process. It not only helps to protect your natural nails, but it also provides a smooth and even surface for the nail polish to be applied on. So, don’t skip this step if you want a flawless and long-lasting gel manicure!
Choose the Right Nail Polish
When it comes to painting over gel nails, it’s important to choose the right nail polish. Here are some tips to help you make the best choice:
Opt for quality polish
Using a high-quality nail polish is essential for achieving long-lasting and professional-looking results. Look for brands that are known for their durability and pigmentation. These polishes tend to adhere better to gel nails and provide a smooth and even finish.
One popular brand that is highly recommended by nail professionals is OPI. Their wide range of colors and formulas ensures that you can find the perfect shade for your gel nails.
Another reputable brand is Essie. They offer a variety of shades and finishes, including their Gel Couture line, which delivers a gel-like shine without the need for a UV lamp.
Consider long-wearing formulas
If you want your painted gel nails to last as long as possible, consider opting for long-wearing formulas. These polishes are specifically designed to withstand daily wear and tear without chipping or fading.
One popular long-wearing nail polish brand is Sally Hansen. Their Miracle Gel line provides up to 14 days of color and shine, making it a great option for those looking for a long-lasting manicure.
Another option to consider is the CND Vinylux Weekly Polish. This polish is known for its chip-resistant formula and high-gloss finish. It can last up to a week without the need for a base coat or UV lamp.
Remember, when choosing a nail polish, always read reviews and look for recommendations from trusted sources to ensure you’re getting a quality product that will give you the best results.
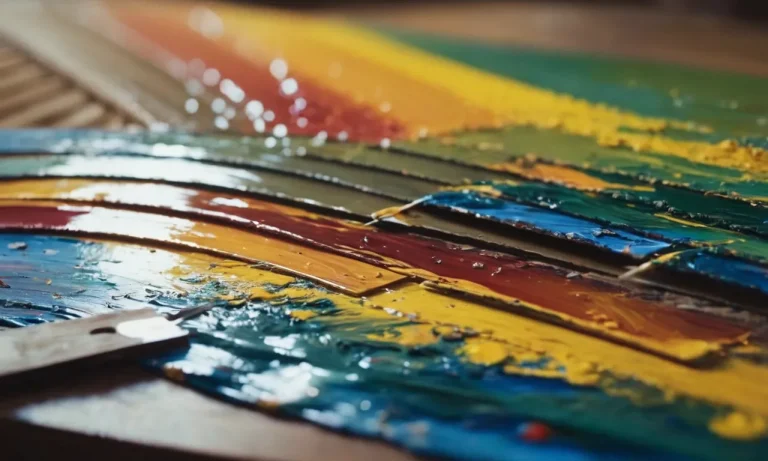
Paint on Polish and Seal
When it comes to painting over gel nails, it’s important to follow a few key steps to ensure a flawless and long-lasting finish. The first step is to choose a high-quality nail polish that is specifically formulated for gel nails.
These polishes are designed to adhere well to the gel surface and provide a smooth and even application.
Apply thin, even coats
Applying thin, even coats is crucial for achieving a professional-looking result. Start by applying a thin layer of the polish to each nail, making sure to cover the entire surface. Allow each coat to dry completely before applying the next one.
This will help prevent smudging or streaking and ensure a smooth and opaque color.
Pro tip: If you’re using a sheer or light-colored polish, you may need to apply an extra coat or two to achieve the desired level of opacity. Just remember to keep each layer thin to avoid a thick and clumpy finish.
Finish with a top coat
Once you’ve applied your desired number of color coats, it’s time to seal the polish with a top coat. A top coat not only adds shine but also helps protect the color from chipping and fading. Apply a thin layer of top coat to each nail, making sure to cover the entire surface and seal the edges.
Pro tip: Look for a top coat that is specifically formulated for gel nails, as these tend to be more durable and long-lasting. Additionally, some top coats offer additional benefits such as UV protection or quick-drying formulas, which can be a great time-saver.
By following these steps and using high-quality products, you can easily paint over gel nails and achieve a beautiful and long-lasting manicure. Remember to take your time, allow each coat to dry properly, and finish with a top coat for added protection and shine.
Extend Wear and Avoid Chipping
One of the key concerns when it comes to gel nails is how to extend their wear and prevent chipping. Fortunately, there are several effective strategies you can follow to achieve long-lasting and chip-free gel nails.
Use nail oil for hydration
Nail hydration is crucial for maintaining the health and longevity of your gel nails. Regularly applying nail oil can help to keep your nails moisturized, preventing them from becoming brittle and prone to chipping.
The oil nourishes the nail bed and cuticles, promoting healthy nail growth and preventing breakage. So, make sure to incorporate nail oil into your nail care routine for strong and durable gel nails.
Be gentle on your hands
Being mindful of how you use your hands can also contribute to the longevity of your gel nails. Avoid using your nails as tools to open packages or scrape off stickers, as this can lead to chipping or lifting of the gel polish.
Instead, use appropriate tools for these tasks to minimize the risk of damage to your nails. Additionally, wearing gloves when performing household chores or gardening can help protect your gel nails from exposure to harsh chemicals and moisture.
Consider gel-like top coats
If you want to extend the wear of your gel nails without committing to a full gel manicure, you may consider using gel-like top coats. These top coats provide a similar glossy and long-lasting finish as gel polish, but they can be easily removed with regular nail polish remover.
They help to seal and protect your regular nail polish, making it more resistant to chipping and peeling. Look for top coats labeled as “gel-like” or “long-wear” for the best results.
By following these tips, you can extend the wear of your gel nails and minimize the chances of chipping. Remember to take care of your nails by keeping them hydrated, being gentle on your hands, and considering gel-like top coats.
With a little extra care, your gel nails can stay looking great for longer periods of time.
Conclusion
With the right prep work and techniques, you can successfully paint over gel manicures with regular nail polish. Just be sure to thoroughly remove the gel, buff and dehydrate nails, and choose a high quality polish formula. Apply the new color carefully and finish with a protective top coat.
Caring properly for your freshly painted nails will help extend wear. Switching up your nail color doesn’t mean you have to fully remove your gel manicure every time. Follow these tips for easily painting over gel polish. Happy manicures!