Can You Paint Over Mod Podge? Everything You Need To Know
Mod Podge is a popular decoupage glue and sealer that allows crafters to adhere paper, fabric, photos and more to various surfaces. Its versatility and easy application make it a go-to choice for DIY projects. But what if you want to paint over a Mod Podged surface? Can you do it?
If you’re short on time, here’s a quick answer: Yes, you can paint over Mod Podge once it has fully cured. The key is allowing enough drying time first.
How Long Does Mod Podge Take to Dry?
When working on a crafting project, it’s important to know how long it will take for Mod Podge to dry. The drying time can vary depending on several factors, so it’s essential to consider these factors before moving forward with your project.
Drying times depend on factors like:
- The thickness of the Mod Podge layer
- The level of humidity in the environment
- The temperature at which the Mod Podge is drying
- The type of finish used (matte or glossy)
Thin layers dry faster
If you apply Mod Podge in thin layers, it will generally dry faster. This is because there is less moisture to evaporate, allowing the Mod Podge to dry more quickly. So, if you’re in a hurry to complete your project, consider applying thinner layers of Mod Podge.
Thick layers take longer
Conversely, if you apply Mod Podge in thick layers, it will take longer to dry. Thick layers contain more moisture, which takes more time to evaporate. If you want to speed up the drying process, consider applying thinner layers or using a hairdryer on a low heat setting to gently blow-dry the Mod Podge.
High humidity slows drying
Humidity plays a significant role in the drying time of Mod Podge. High humidity levels can slow down the evaporation process, causing the Mod Podge to take longer to dry. If you’re working in a humid environment, consider using a dehumidifier or waiting for a day with lower humidity levels to ensure quicker drying.
Low temps slow drying
Similarly, low temperatures can also impact the drying time of Mod Podge. Cold temperatures can slow down the evaporation process, making it take longer for the Mod Podge to dry. If you’re working in a cold environment, try using a space heater or moving your project to a warmer area to speed up the drying process.
Matte finishes dry faster than glossy
The type of finish you choose for your Mod Podge can also affect the drying time. Generally, matte finishes tend to dry faster than glossy finishes. This is because glossy finishes contain more additives and may take longer to dry. If you’re looking for a quicker drying time, opt for a matte finish.
Remember, these are general guidelines, and drying times can vary depending on the specific conditions of your environment. It’s always a good idea to test a small area before applying Mod Podge to your entire project to ensure that it dries within your desired timeframe.
Tips for Quicker Mod Podge Drying
Mod Podge is a popular crafting medium that is used for a variety of projects, from decoupage to collage. However, one common issue that many crafters face is the drying time of Mod Podge. Waiting for Mod Podge to dry can be time-consuming, especially if you’re working on a project with multiple layers.
Apply in thin, even coats
One of the best ways to speed up the drying time of Mod Podge is to apply it in thin, even coats. When you apply Mod Podge in thick layers, it takes longer for each layer to dry. By applying thin coats, you allow each layer to dry faster, resulting in a quicker overall drying time.
Additionally, thin coats also help to minimize the appearance of brush strokes and bubbles on your finished project.
Use a hair dryer
If you’re looking for an even quicker way to dry Mod Podge, you can use a hair dryer. Simply set your hair dryer to the lowest heat setting and hold it a few inches away from your project. The warm air from the hair dryer will help to speed up the drying process.
However, be careful not to hold the hair dryer too close to your project, as this can cause the Mod Podge to bubble or warp.
Add a drying accelerator
Another option to speed up the drying time of Mod Podge is to add a drying accelerator. Drying accelerators, such as Mod Podge Quick-Dry, are specially formulated to help Mod Podge dry faster. Simply mix a few drops of the drying accelerator into your Mod Podge before applying it to your project.
This can significantly reduce the drying time and allow you to move on to the next step of your project more quickly.
Try baking the project
If you’re working on a smaller project, you can try baking it to speed up the drying time of Mod Podge. Place your project on a baking sheet and put it in the oven at a low temperature (around 200°F) for about 15-20 minutes. Keep a close eye on your project to prevent any burning or warping.
Baking the project helps to evaporate the moisture from the Mod Podge, resulting in faster drying times.
Remember, it’s always important to follow the manufacturer’s instructions when working with Mod Podge. While these tips can help speed up the drying time, it’s still important to allow your project to dry completely before handling or painting over it.
With these tips in mind, you’ll be able to enjoy quicker drying times and get back to crafting in no time!
Testing if Mod Podge is Fully Dry
Before painting over Mod Podge, it is crucial to ensure that it has fully dried. Here are some simple tests you can perform to determine if the Mod Podge is ready for the next step.
Touch the surface – Should feel smooth, not tacky
One way to check if Mod Podge is dry is by gently touching the surface. It should feel smooth to the touch, without any stickiness or tackiness. If your finger leaves a mark or if it feels sticky, it is an indication that the Mod Podge hasn’t dried completely.
Give it more time to dry before proceeding with painting.
Press firmly – Surface shouldn’t indent
Another test you can do is to press firmly on the Mod Podge surface with your finger or a blunt object. If the surface indents or leaves an impression, it means the Mod Podge is still wet underneath. A fully dried Mod Podge should remain firm and not easily indent.
Rub with tissue – Shouldn’t pick up any adhesive
Take a tissue or a piece of paper towel and gently rub it across the Mod Podge surface. If the tissue picks up any adhesive or leaves behind residue, it indicates that the Mod Podge is not dry yet. Wait until the surface is clean and free from any sticky residue before proceeding with painting.
Wait the full cure time to be safe
While it may be tempting to rush the drying process, it is always recommended to wait the full cure time mentioned on the Mod Podge label. This ensures that the Mod Podge is completely dry and ready for the next steps.
The cure time can vary depending on factors such as humidity and the thickness of the Mod Podge layer. Following the recommended cure time will help prevent any issues when painting over Mod Podge.
It’s important to note that the drying time for Mod Podge can vary depending on the project and environment. Always refer to the manufacturer’s instructions for specific drying and cure times.
For more detailed information on Mod Podge and its drying process, you can visit the official website of Plaid Crafts, the company behind Mod Podge, at plaidonline.com/mod-podge.
Preparing the Mod Podged Surface for Paint
So, you’ve used Mod Podge to create a beautiful decoupage project, and now you’re wondering if you can paint over it. The good news is, yes, you can paint over Mod Podge! However, there are a few steps you need to take to ensure the best results.
Here’s everything you need to know about preparing the Mod Podged surface for paint:
Lightly sand for better paint adhesion
Before you start painting, it’s important to lightly sand the Mod Podged surface. This step helps to create a rougher texture, allowing the paint to adhere better to the surface. Use a fine-grit sandpaper and gently sand the entire area you want to paint.
Be careful not to sand too vigorously, as it may damage the Mod Podge layer.
Wipe away any dust
After sanding, make sure to wipe away any dust or debris from the surface. You can use a clean, dry cloth or a tack cloth to remove any loose particles. This step is crucial to ensure a smooth and clean painting surface.
Apply primer or gesso before painting
To ensure the best paint adhesion and a more even finish, it’s recommended to apply a primer or gesso before painting over Mod Podge. Primer acts as a base coat, creating a smooth surface for the paint to adhere to.
Gesso, on the other hand, provides a slightly textured surface that can help with paint adhesion and prevent the paint from soaking into the Mod Podge layer.
Both primer and gesso can be applied with a brush or a foam roller. Make sure to follow the instructions on the product label and allow it to dry completely before moving on to the next step.
By following these steps, you’ll be able to paint over Mod Podge and create a beautifully finished project. Remember to take your time, be patient, and enjoy the process!
Choosing the Right Paint for Mod Podge
When it comes to painting over Mod Podge, selecting the right type of paint is crucial for achieving the best results. Here are some options to consider:
Acrylic paint works well
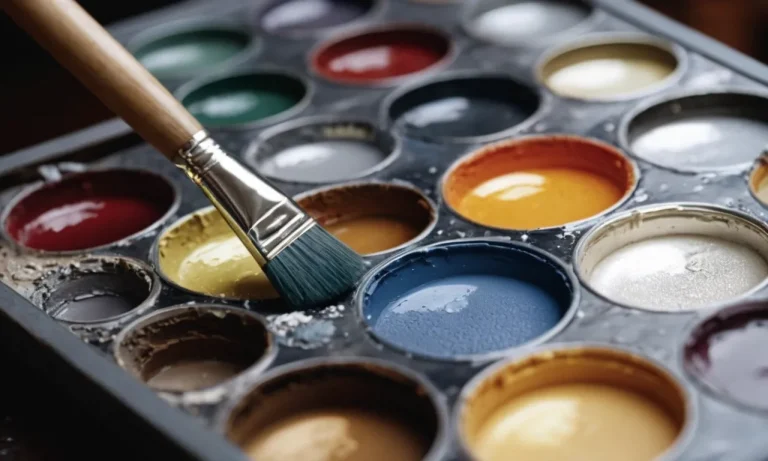
Acrylic paint is a popular choice for painting over Mod Podge due to its versatility and compatibility. It adheres well to the Mod Podge surface and provides a smooth and even finish. Additionally, acrylic paint is available in a wide range of colors, making it easy to find the perfect shade for your project.
Some enamel and spray paints also suitable
Enamel paints and spray paints can also be used successfully on Mod Podge surfaces. These types of paints provide a durable and long-lasting finish. Enamel paints are known for their glossy appearance, while spray paints offer a convenient and quick application process.
Just be sure to follow the manufacturer’s instructions for proper usage and drying times.
Avoid oil-based paints – long cure time
While oil-based paints can be used with Mod Podge, they are not the most ideal choice. Oil-based paints have a longer cure time, meaning they take longer to fully dry and harden. This can lead to smudging or damage to the painted surface if not handled carefully.
It is recommended to use faster-drying options like acrylic or enamel paints instead.
Test compatibility on scrap first
Before painting over your Mod Podge project, it is always a good idea to test the compatibility of the paint on a small scrap piece. This will help you determine if the paint adheres well to the Mod Podge surface and if it provides the desired finish.
By doing a test run, you can avoid any potential issues or surprises when applying the paint to your main project.
For more in-depth information on painting over Mod Podge and to explore different techniques, you can visit Mod Podge Rocks, a trusted website dedicated to all things Mod Podge.
Conclusion
With proper drying time and surface prep, most types of paint can be successfully applied over Mod Podge for creative, customizable projects. Just be sure to allow the Mod Podge layer to fully cure before painting for best results.
Test out paint compatibility before starting your project to avoid any issues down the line. With a little planning and patience, you can paint over Mod Podge with beautiful, lasting results.


