How Many Times Can You Paint A Wall?
If you’re looking to freshen up the look of a room with a new coat of paint, you may be wondering – how many times can you paint a wall before you need to strip everything down and start over? The answer depends on a few key factors, but in most cases, walls can be painted over successfully 5-10 times if proper preparation is done.
In this comprehensive guide, we’ll walk through everything you need to know about repainting walls, including how to prepare for a new coat of paint, signs it’s time to fully strip the wall, top tips from professional painters, and a general timeline for how often you should plan on repainting.
Proper Wall Preparation
Clean the Wall
Before painting a wall, it is crucial to properly prepare the surface. One of the first steps in wall preparation is to clean the wall thoroughly. Dust, dirt, and grease can prevent the paint from adhering properly and can result in a less-than-desirable finish.
Use a gentle detergent and warm water to wash the wall, and don’t forget to rinse it well to remove any residue. This will ensure a clean and smooth surface for painting.
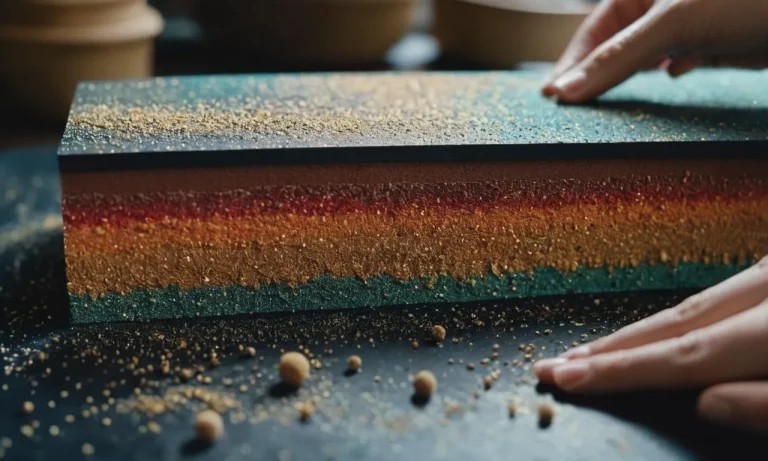
Sand Glossy Surfaces
If the wall has glossy or shiny surfaces, it is important to sand them before painting. Glossy surfaces can make it difficult for the paint to adhere properly. Use a fine-grit sandpaper to lightly sand the glossy areas, creating a rougher surface that the paint can grip onto.
Be sure to wipe away any dust or debris after sanding to ensure a clean surface for painting.
Fill Holes and Cracks
Another crucial step in wall preparation is to fill any holes or cracks on the surface. These imperfections can affect the appearance of the paint and can even cause it to peel or chip over time. Use a patching compound or spackle to fill the holes and cracks, and then smooth it out with a putty knife.
Allow it to dry completely before sanding it down to create a smooth surface. This will result in a seamless finish once the wall is painted.
Use Primer
Using a primer before painting can greatly improve the overall look and longevity of the paint job. Primer helps to create a uniform surface, seals any stains or discolorations, and provides a base for the paint to adhere to.
It also helps to reduce the number of coats of paint needed for full coverage. Apply a coat of primer to the wall, following the manufacturer’s instructions, and allow it to dry completely before applying the paint.
By properly preparing the wall before painting, you can ensure a professional-looking finish that will last. Taking the time to clean the wall, sand glossy surfaces, fill holes and cracks, and use a primer will help you achieve the best results for your painting project.
Signs It’s Time to Strip the Wall
Flaking or Peeling Paint
If you notice that the paint on your wall is starting to flake or peel, it’s a strong indication that it’s time to strip the wall. Flaking or peeling paint can occur due to various reasons, such as poor surface preparation, moisture damage, or the use of low-quality paint.
It not only looks unsightly but can also lead to further damage if left unattended. Stripping the wall and applying a fresh coat of paint will not only improve the aesthetic appeal but also protect the wall from further damage.
Glossy Paint Build Up
Over time, multiple layers of paint can result in a build-up of glossy paint, especially if you have been painting the wall without stripping it in between. This build-up can make it difficult for new paint to adhere properly, leading to an uneven finish.
If you notice a glossy paint build-up on your wall, it’s a good idea to strip the wall before applying a new coat of paint. Stripping the old layers will ensure a smooth and even surface for the fresh paint to adhere to, resulting in a professional-looking finish.
Unwashable Marks or Stains
If your wall has stubborn marks or stains that can’t be washed off, it might be time to consider stripping the wall. Certain types of marks or stains, such as crayon marks, grease stains, or water stains, can be particularly challenging to remove.
In such cases, stripping the wall can help eliminate these unsightly marks and provide a clean canvas for a new paint job. Remember to use appropriate cleaning solutions and techniques before resorting to stripping the wall.
Moisture Damage
Moisture damage can wreak havoc on your walls, causing paint to bubble, crack, or peel. If you notice signs of moisture damage, such as water stains, mold growth, or a musty odor, it’s crucial to address the underlying issue and strip the wall if necessary.
Ignoring moisture damage can lead to further deterioration of the wall and even structural problems. Consult with a professional if you suspect moisture damage to ensure proper remediation and avoid future issues.
Remember, these signs are indications that it might be time to strip the wall, but the decision ultimately depends on the condition of your wall and your desired outcome. If you’re unsure, it’s always best to consult with a professional to assess the situation and provide expert advice.
Tips from Professional Painters
When it comes to painting a wall, there are several factors to consider in order to achieve the best results. Professional painters have years of experience and expertise in this area, so their tips can be invaluable.
Here are some tips from professional painters to help you paint your walls effectively and efficiently.
Lightly Sand Between Coats
One tip that professional painters often recommend is to lightly sand between coats of paint. This helps to create a smooth and even surface, ensuring that each coat adheres properly. By sanding lightly, you can remove any imperfections or rough spots, allowing the subsequent coat of paint to be applied more smoothly.
It’s important to note that you should only sand lightly, as excessive sanding can damage the wall.
Use a High-Quality Paint
Another important tip from professional painters is to use a high-quality paint. Investing in a good quality paint can make a significant difference in the final result. High-quality paints tend to have better coverage, durability, and color retention.
They also provide a smoother finish, making the walls look professionally painted. Look for paints that are specifically designed for the surface you are painting, whether it’s drywall, wood, or concrete.
Consider Skipping Primer on Previously Painted Walls
When painting previously painted walls, professional painters often suggest considering skipping the primer. If the existing paint is in good condition and you are using a paint with a similar sheen, skipping the primer can save you time and effort.
However, if the existing paint is damaged or you are changing the sheen, it’s recommended to use a primer to ensure better adhesion and a more uniform finish.
Use Proper Painting Techniques
Using proper painting techniques is crucial for achieving professional-looking results. Professional painters emphasize the importance of using smooth and even strokes, starting from the top and working your way down.
It’s also important to maintain a wet edge, which means overlapping each stroke while the paint is still wet. This helps to prevent visible brush or roller marks. Additionally, using the right tools, such as high-quality brushes and rollers, can make a noticeable difference in the final outcome.
Maintain Consistent Paint Choices Over Time
Lastly, professional painters advise maintaining consistent paint choices over time. This means using the same brand and color of paint for touch-ups or future painting projects. Paint colors can vary slightly between batches, so using the same paint ensures a seamless and consistent look.
Keeping track of the specific paint colors used in each room can be helpful for future reference.
By following these tips from professional painters, you can achieve a beautifully painted wall that looks like it was done by a pro. Remember, painting requires patience, attention to detail, and the right techniques, so take your time and enjoy the process!
General Timeline for Repainting
When it comes to repainting walls, it’s important to consider how often you should refresh the color. While there isn’t a one-size-fits-all answer, there are general guidelines to follow based on the different areas of your home.
High-Traffic Areas: 2-3 Years
High-traffic areas such as hallways, entryways, and kitchens tend to experience more wear and tear than other parts of the house. These areas are prone to scuffs, stains, and dirt accumulation. To keep these spaces looking fresh and vibrant, it’s recommended to repaint them every 2-3 years.
This will not only give your walls a clean and polished appearance but also help protect them from further damage.
Living Spaces: 3-5 Years
Living spaces, such as your living room, dining area, and family room, generally don’t see as much traffic as high-traffic areas but still require periodic repainting. Over time, the color on these walls can fade or become outdated.
Repainting every 3-5 years can give these spaces a renewed look and help maintain a cozy and inviting atmosphere for your family and guests.
Bedrooms: 5-10 Years
Bedrooms are often considered low-traffic areas, as they mainly serve as a place for rest and relaxation. As a result, the walls in bedrooms tend to stay in good condition for a longer period. Repainting every 5-10 years is generally sufficient to keep these spaces looking great.
However, if you want to change the color scheme or if the walls show signs of wear and tear, it’s always a good idea to repaint sooner.
Keep in mind that these timelines are general guidelines and can vary depending on several factors such as the quality of the paint, the type of finish, and the amount of natural light the walls receive.
It’s always a good idea to assess the condition of your walls and make a decision based on their specific needs.
For more information on wall painting and maintenance, you can visit websites like DIY Network or Better Homes & Gardens.
Conclusion
When preparing to paint over an already painted wall, proper preparation is key to getting an attractive, long-lasting finish. With the right prep work and quality paint, you can expect to repaint most interior walls successfully 5-10 times before needing to strip the layers down to the bare surface.
Pay attention for any signs of paint failure, and follow the best practices outlined here for flawless results you’ll love.