How To Clean A Faucet Aerator Without Removing It
If your faucet has suddenly lost water pressure or is sputtering and spraying water, a clogged aerator is likely the culprit. But before you reach for your toolbox, there’s an easy fix—you can clean the aerator without removing it from the faucet.
In just a few simple steps, you can have your faucet working like new again.
If you’re short on time, here’s a quick answer to your question: You can clean your faucet aerator without removing it by soaking it in vinegar, scrubbing it with an old toothbrush, and rinsing it thoroughly with water.
What is a Faucet Aerator and What Does it Do?
A faucet aerator is a small device that is attached to the end of the faucet spout. It is designed to mix air with the water flow, creating a foamy stream that helps to reduce splashing and conserve water.
The aerator works by restricting the flow of water, which in turn increases the pressure and improves the water efficiency of the faucet.
The main purpose of a faucet aerator is to save water. By mixing air with the water flow, it reduces the amount of water that comes out of the faucet without compromising the water pressure. This not only helps to save water, but it also saves money on utility bills.
According to the Environmental Protection Agency (EPA), installing a faucet aerator can reduce water usage by up to 30%.
In addition to water conservation, a faucet aerator also helps to prevent splashing. The foamy stream created by the aerator is gentler and less likely to cause water to splash onto the surrounding area.
This is especially useful when washing hands or dishes, as it helps to keep the sink area clean and dry.
Faucet aerators come in different sizes, with the most common sizes being 1.5 gallons per minute (gpm) and 2.2 gpm. Some aerators may also have adjustable flow rates, allowing you to customize the water flow to your preference.
It is important to choose the right aerator size for your faucet to ensure optimal performance.
Signs You Need to Clean Your Faucet Aerator
Regular maintenance of your faucet aerator is important to ensure optimal water flow and prevent any issues that may arise. Here are some signs that indicate it’s time to clean your faucet aerator:
Reduced Water Flow
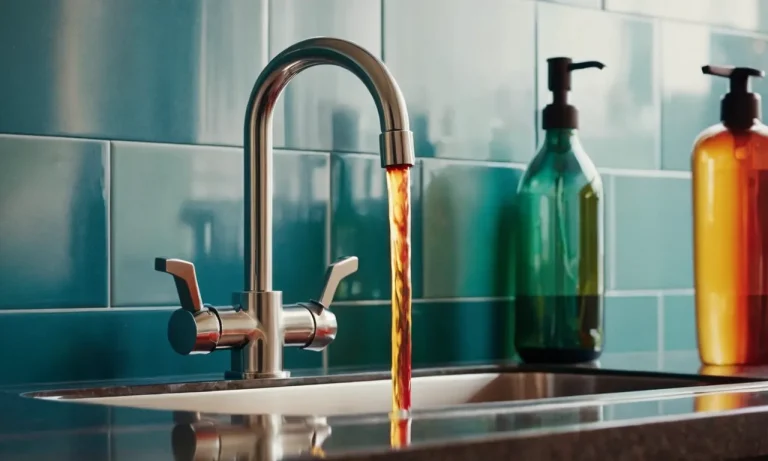
If you notice a decrease in water pressure or a reduced flow of water from your faucet, it could be a sign that your aerator is clogged. Over time, mineral deposits, sediment, and debris can accumulate in the aerator, restricting the flow of water.
This can be particularly noticeable in older homes or areas with hard water.
Did you know? According to a study conducted by the Environmental Protection Agency (EPA), mineral deposits can reduce faucet aerator flow by up to 50% if left unchecked.
Sputtering or Spraying Water
Another sign that your faucet aerator needs cleaning is if you experience sputtering or water spraying in different directions when you turn on the faucet. This can occur when there is a blockage or buildup within the aerator, causing the water to be unevenly distributed.
Pro tip: To check if your aerator is causing the sputtering or spraying, try removing it temporarily and running the water. If the water flows smoothly without any issues, then it’s likely that your aerator needs cleaning.
Cleaning your faucet aerator regularly not only improves water flow but also helps maintain the efficiency of your faucet. It is a simple task that can be done without removing the aerator, saving you time and effort.
How to Clean a Faucet Aerator Without Removing It
Keeping your faucet aerator clean is important for maintaining a steady and efficient water flow. Over time, mineral deposits and debris can build up in the aerator, causing reduced water pressure or even clogging.
While removing and cleaning the aerator is the most effective method, it can be time-consuming and sometimes tricky. However, there is a way to clean your faucet aerator without removing it. Here’s how:
Step 1: Gather Your Supplies
Before you begin, make sure you have all the necessary supplies. You’ll need a container large enough to hold the aerator, white vinegar, an old toothbrush, and a cloth or towel. These items can easily be found in your kitchen or bathroom.
Step 2: Soak the Aerator in Vinegar
Start by filling the container with enough white vinegar to completely submerge the aerator. Vinegar is a natural cleaning agent that dissolves mineral deposits and helps remove debris. Place the aerator into the container and let it soak for at least 30 minutes.
For tougher build-up, you can leave it overnight.
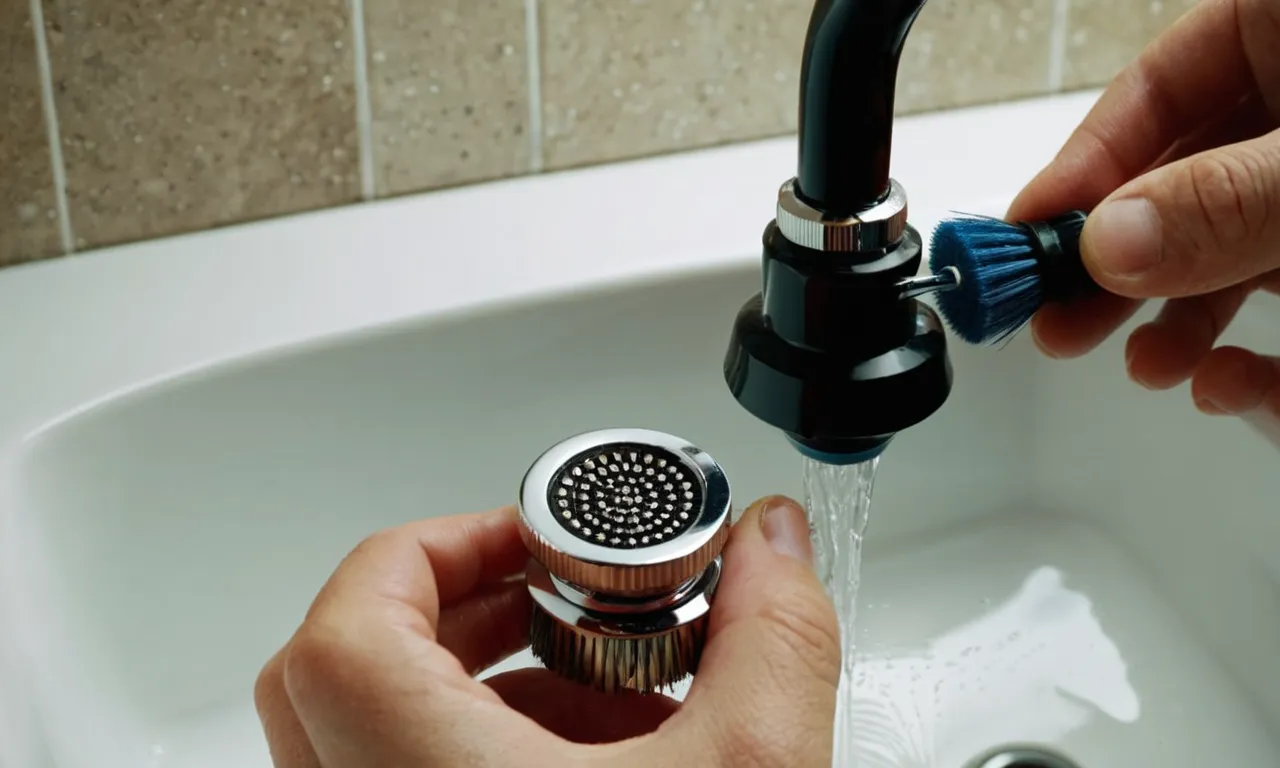
Step 3: Scrub with an Old Toothbrush
After the aerator has soaked, take it out of the vinegar and gently scrub it with an old toothbrush. The bristles will help loosen and remove any remaining deposits or debris. Pay special attention to the small holes in the aerator, as these can easily get clogged.
Scrub both the inside and outside of the aerator until it looks clean and free of any build-up.
Step 4: Rinse Thoroughly
Once you’ve scrubbed the aerator, rinse it thoroughly under running water. Make sure to remove any vinegar residue or loosened debris. You can also use the toothbrush to brush away any remaining particles. After rinsing, dry the aerator with a cloth or towel before reattaching it to the faucet.
By following these steps, you can effectively clean your faucet aerator without having to remove it. Regularly cleaning your aerator will help maintain a steady water flow and prevent any potential clogs.
Remember to perform this maintenance task periodically to ensure the longevity and efficiency of your faucet.
Tips for Preventing Clogs
Clogged faucets can be a frustrating and inconvenient problem to deal with. Preventing clogs in your faucet aerator can save you time and money in the long run. Here are some useful tips to help you keep your faucet aerator clean and free from clogs without having to remove it.
Flush Regularly
One of the simplest ways to prevent clogs in your faucet aerator is to flush it regularly. By running water through the aerator, you can help remove any sediment or debris that may have accumulated. Simply turn on the faucet and let the water flow for a few minutes.
This can help keep your aerator clean and prevent clogs from forming.
Install a Water Filter
Installing a water filter can also help prevent clogs in your faucet aerator. Water filters are designed to remove impurities and sediment from your water supply, which can help keep your aerator clean.
By installing a water filter, you can reduce the risk of clogs and ensure that your water flows smoothly through the aerator.
Replace Old Aerators
If you have an older faucet aerator that is prone to clogs, it may be time to replace it. Over time, aerators can become clogged with sediment and debris, which can impede the flow of water. By replacing old aerators with new ones, you can ensure that your faucet continues to function properly and prevent clogs from occurring.
Remember, regular maintenance and cleaning are key to preventing clogs in your faucet aerator. By following these simple tips, you can keep your faucet aerator clean and free from clogs without the need for removing it.
When to Call a Plumber
While cleaning a faucet aerator can be a simple task that most homeowners can handle on their own, there are certain situations where it’s best to call a professional plumber. Here are a few instances when it’s recommended to seek the assistance of a plumber:
1. Persistent Blockage
If you’ve tried cleaning the faucet aerator yourself but are still experiencing a persistent blockage, it may be time to call a plumber. A professional plumber has the knowledge and tools to effectively remove stubborn debris and mineral buildup that may be causing the blockage.
They can also inspect the rest of your plumbing system to ensure there are no underlying issues contributing to the problem.
2. Leaking or Damaged Faucet
If you notice that your faucet is leaking or damaged after attempting to clean the aerator, it’s best to let a plumber handle the repair. A leaking faucet can waste a significant amount of water and lead to higher utility bills.
A plumber can diagnose the cause of the leak and make the necessary repairs to ensure your faucet functions properly.
3. Lack of Experience or Confidence
If you’re not comfortable or confident in your ability to clean the faucet aerator yourself, it’s always a good idea to call a plumber. They have the expertise and experience to handle the task efficiently and safely.
Additionally, attempting to clean the aerator without the proper knowledge or tools can potentially cause further damage to the faucet or plumbing system.
Remember, it’s important to assess your own abilities and comfort level before attempting any plumbing repairs. If you’re unsure about how to proceed or if the issue seems beyond your capabilities, it’s best to leave it to the professionals.
Calling a plumber can save you time, money, and the frustration of dealing with a plumbing problem that may worsen if not properly addressed.
Conclusion
A clogged faucet aerator is an easy fix you can tackle yourself without any special tools. With just some household white vinegar, an old toothbrush, and a little elbow grease, you can remove mineral deposits and debris to get your faucet working properly again.
Just remember to give it a good rinse and you’ll be back to full water pressure in no time. This simple DIY method can save you the hassle and expense of calling a plumber or replacing the aerator altogether.