How To Paint On Silk: A Comprehensive Guide
Painting delicate designs on silk has been a beloved art form for centuries. Whether you want to make a one-of-a-kind gift or decorate your home with beautiful silk art, learning the basics of silk painting is easier than you may think.
If you’re short on time, here’s a quick answer to your question: Start with a pre-treated silk fabric and acrylic paints made for silk. Stretch and secure the silk on a frame, sketch your design, and use special silk brushes and tools to fill in your artwork.
Allow paints to dry thoroughly and steam or iron the finished piece.
In this comprehensive guide, we will cover everything you need to know to get started with silk painting, from choosing the right materials to basic techniques for applying paint to finished pieces.
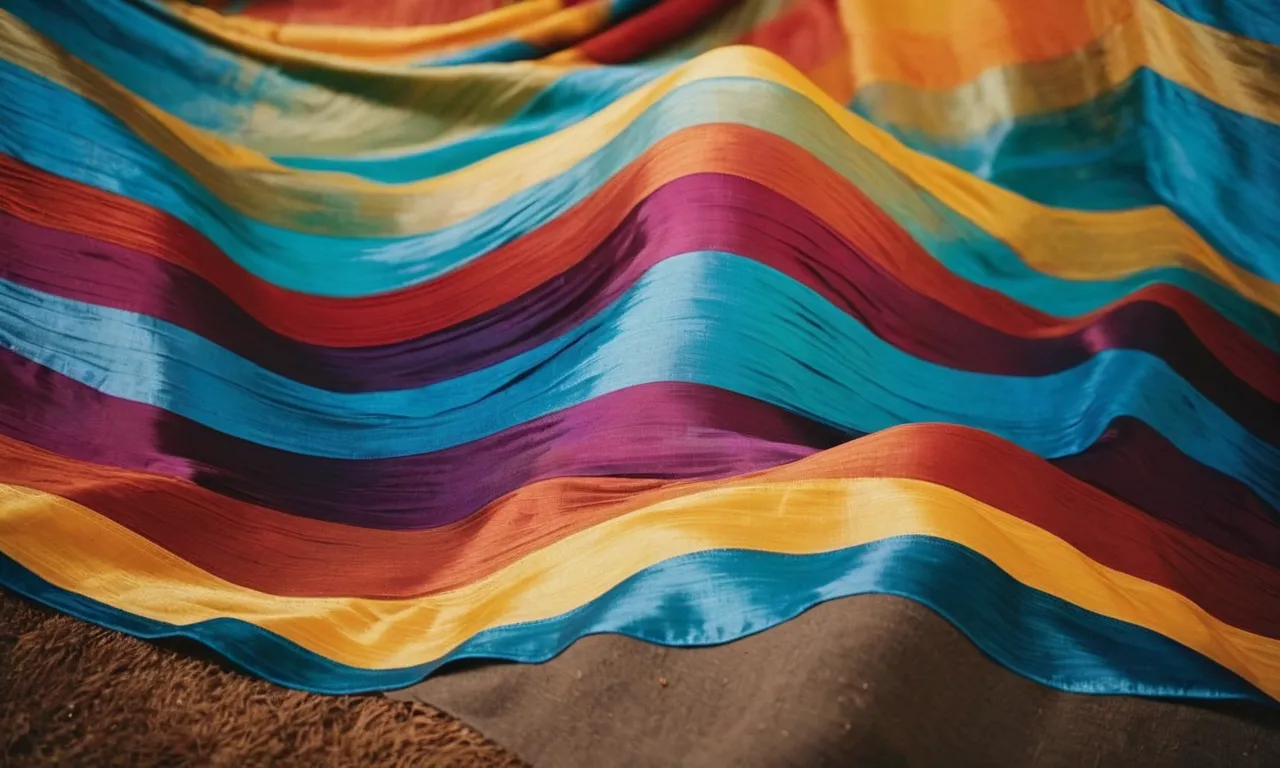
Choosing Your Silk Fabric
Raw silk vs. pre-treated silk
When it comes to painting on silk, one of the first decisions you’ll need to make is whether to use raw silk or pre-treated silk. Raw silk, as the name suggests, is untreated and has a natural texture and sheen. It can be a great option if you want a more organic and textured look in your artwork.
However, keep in mind that raw silk may require additional preparation before painting to ensure the colors adhere properly.
On the other hand, pre-treated silk has been specially processed to make it easier to paint on. It has a smoother surface and is often treated with chemicals that help the colors absorb and set more effectively.
This type of silk is generally recommended for beginners or those who prefer a more controlled painting experience.
Ultimately, the choice between raw silk and pre-treated silk depends on your personal preference and the desired outcome of your artwork. It’s worth experimenting with both to see which works best for you.
Types of silk fabric for painting
There are various types of silk fabric available for painting, each with its own unique characteristics. Here are some popular options:
- Habotai silk: Also known as China silk, habotai silk is lightweight and has a smooth surface. It is a commonly used silk fabric for painting due to its affordability and versatility.
- Chiffon silk: Chiffon silk is sheer and lightweight, making it a great choice for creating delicate and flowing designs. It has a slightly rougher texture compared to habotai silk.
- Crepe de Chine: Crepe de Chine is a medium-weight silk fabric with a slightly crinkled texture. It provides a beautiful drape and is often favored for its luxurious feel.
- Organza silk: Organza silk has a stiff and translucent quality, which can create interesting effects when painting. It is commonly used for adding texture and depth to artwork.
When selecting a silk fabric for painting, consider factors such as the desired effect, the type of paint you’ll be using, and your level of experience. It’s always a good idea to experiment with different types of silk to see which one suits your artistic style the best.
For more information on silk painting techniques and tips, you can visit www.thesilkpainter.com. They offer a wealth of resources and tutorials to help you master the art of painting on silk.
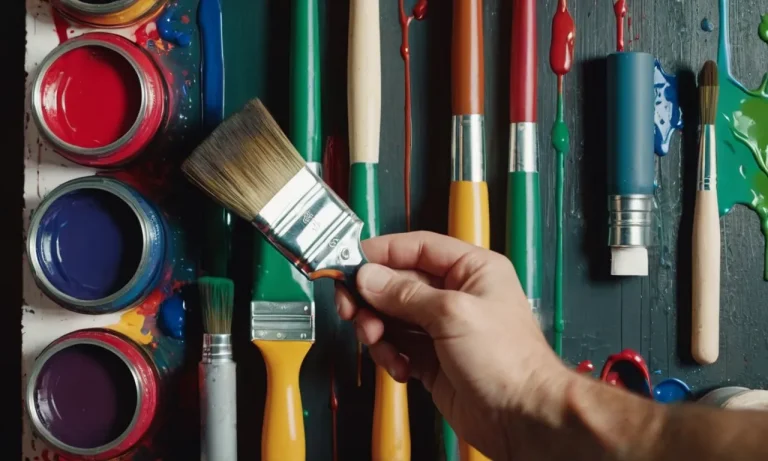
Selecting Paints and Tools
Acrylic vs. Textile Paints
When it comes to painting on silk, one of the first decisions you’ll need to make is whether to use acrylic or textile paints. Both options have their pros and cons, so it’s essential to understand the differences before making a choice.
Acrylic paints are versatile and widely available. They are known for their vibrant colors and excellent colorfastness. However, they can leave the fabric feeling stiff and less flexible compared to textile paints.
On the other hand, textile paints are specially formulated for fabric and tend to blend better on silk. They are softer and more flexible, allowing the fabric to retain its natural drape.
Ultimately, the decision between acrylic and textile paints depends on the desired effect and the specific project you’re working on. Experimenting with both types of paints can help you determine which one works best for your style and preferences.
Brushes, Gutta, and Resists
Choosing the right brushes is crucial for achieving precise and beautiful results when painting on silk. It is recommended to use soft synthetic brushes that have a good level of flexibility. These brushes allow for smooth application and help prevent streaking or smudging.
Gutta and resists are essential tools for creating boundaries and preventing the paint from bleeding into unwanted areas. Gutta is a water-based paste that is applied to the silk to create outlines and barriers. It acts as a resist, preventing the paint from spreading beyond the designated areas.
Resists come in various forms, such as wax or rubber, and are used to create unique textures and patterns on the silk.
When working with gutta and resists, it’s important to ensure that they are compatible with the type of paint you’re using. Always read the manufacturer’s instructions and test a small area before applying them to your entire project.
Other Helpful Tools
In addition to paints, brushes, gutta, and resists, there are a few other tools that can enhance your silk painting experience. These include:
- Stretching frames: These frames help keep the silk taut and prevent it from shifting or wrinkling during the painting process.
- Water containers: Having separate containers for clean and dirty water can help maintain the integrity of your colors and prevent cross-contamination.
- Palette: A palette is essential for mixing and diluting your paints. You can use a traditional palette or opt for a non-porous surface like a glass or plastic palette.
- Heat-setting tools: After completing your painting, heat-setting is necessary to make the colors permanent. An iron or a heat press can be used for this purpose, but always follow the manufacturer’s instructions to avoid damaging your silk.
These tools, along with your creativity, will empower you to create stunning works of art on silk. Remember to explore different techniques, experiment with colors, and most importantly, have fun with your silk painting journey!
Preparing Your Silk
Washing and treating raw silk
Before you begin painting on silk, it is essential to properly prepare the fabric. One important step in this process is washing and treating raw silk. This helps remove any impurities or chemicals present in the fabric, ensuring a clean surface for your artwork.
To wash raw silk, fill a basin with lukewarm water and a mild detergent specifically formulated for delicate fabrics. Gently agitate the fabric in the water, being careful not to rub or twist it too harshly. Rinse the silk thoroughly to remove all traces of detergent.
After washing, it is recommended to treat the silk with a fabric conditioner or softener to enhance its texture and make it easier to paint on. This step not only improves the feel of the silk but also helps the paint adhere better to the fabric.
Follow the instructions on the fabric conditioner bottle and apply it to the washed silk. Alternatively, you can use a mixture of vinegar and water as a natural softener for silk.
Stretching silk on a frame
Stretching silk on a frame is another crucial step in preparing it for painting. This process ensures that the fabric remains taut and smooth, allowing you to create detailed and precise artwork. There are several methods you can use to stretch silk on a frame, depending on your preference and the size of the fabric.
One common method is using a stretcher frame, which consists of wooden bars that can be adjusted to accommodate different sizes of silk. Simply lay the silk on the frame, making sure it is centered and straight.
Then, use staples or small tacks to secure the fabric to the frame, pulling it tightly as you go. Make sure the silk is evenly stretched across the frame to avoid any wrinkles or sagging.
Another method is using a hoop or embroidery frame, especially suitable for smaller silk pieces. Place the silk over the hoop, making sure it is centered. Tighten the hoop by twisting the screw or fastening mechanism until the fabric is taut.
This method is especially useful for silk scarves or smaller art pieces.
By properly washing and treating raw silk and stretching it on a frame, you are setting the foundation for a successful painting on silk project. These steps ensure that the silk is clean, smooth, and ready to absorb the paint, resulting in vibrant and long-lasting artwork.
Sketching Your Design
Freehand vs. Transfer Method
When it comes to sketching your design on silk, you have two main options: freehand or using the transfer method. The freehand method involves directly drawing your design onto the silk fabric using a pencil or fabric marker.
This method allows for more artistic freedom and spontaneity, as you can easily make changes and adjustments as you go along. However, it does require a steady hand and some drawing skills.
On the other hand, the transfer method involves transferring a pre-drawn design onto the silk fabric. There are various ways to transfer a design, such as using carbon paper, tracing paper, or even iron-on transfers.
This method is great for those who may not feel confident in their drawing abilities or want to recreate a specific design accurately. It gives you a clear outline to follow and eliminates the need for intricate freehand drawing.
Tip: If you’re using the transfer method, make sure to choose a transfer method that won’t leave permanent marks on the silk. Test it on a scrap piece of fabric before transferring it onto your main piece.
Tips for sketching on silk
Sketching on silk can be a delicate process, so here are some tips to help you achieve the best results:
- Start with a clean and smooth surface: Before you begin sketching, make sure your silk fabric is clean and free from any dirt or debris. Iron it to remove any wrinkles and create a smooth surface for drawing.
- Use a light touch: Silk is a delicate fabric, so it’s important to use a light touch when sketching. Apply gentle pressure with your pencil or fabric marker to avoid damaging the fabric.
- Practice on a scrap piece: If you’re new to sketching on silk, it’s a good idea to practice on a scrap piece of fabric first. This will help you get a feel for the fabric and test out different techniques before working on your main piece.
- Experiment with different tools: Don’t be afraid to try different tools and techniques when sketching on silk. Some artists prefer using fabric markers, while others find that pencils or even watercolor pencils work best for them. Find what works for you and experiment with different effects.
- Embrace imperfections: Remember that silk painting is an art form, and imperfections can add character to your design. Don’t be too hard on yourself if your sketch isn’t perfect – embrace the uniqueness and beauty of handcrafted work.
For more detailed tutorials and inspiration on sketching on silk, you can visit websites like Dharma Trading Co. or Silk Painting Gallery. These websites offer a wealth of resources and guidance for silk painters of all skill levels.
Painting Techniques
Wet-on-wet vs. Dry brush
When it comes to painting on silk, there are two primary techniques that artists often use: wet-on-wet and dry brush. Wet-on-wet involves applying wet paint onto wet fabric, which allows the colors to blend and create soft, flowing patterns.
This technique is perfect for creating ethereal landscapes or abstract designs that have a dreamy quality. On the other hand, dry brush technique involves using a brush with very little paint and lightly dragging it across the fabric.
This produces sharper lines and more defined details, making it ideal for intricate designs or adding fine details to a painting.
Layering and mixing paints
Layering and mixing paints is an essential part of creating depth and dimension in a silk painting. By layering different colors on top of each other, artists can create rich and vibrant hues. Mixing paints allows artists to create custom colors that are not readily available in a paint set.
For example, by mixing blue and yellow, you can create a beautiful shade of green. It’s important to note that when layering or mixing paints, it’s best to work from light to dark colors to avoid muddying the colors.
This technique requires patience and experimentation, but the results can be truly stunning.
Special effects
For those looking to take their silk painting to the next level, there are various special effects that can be added to create unique and eye-catching designs. One popular technique is using salt to create a textured effect.
After applying wet paint to the fabric, sprinkle salt over it and watch as the salt absorbs the water, leaving behind interesting patterns. Another technique is using alcohol to create a tie-dye effect.
By dripping alcohol onto wet paint, it causes the colors to spread and blend in unpredictable ways, resulting in a beautiful marbled effect. These special effects can add an extra touch of creativity and excitement to your silk paintings.
Finishing and Setting Your Artwork
Setting paints with heat
After completing your silk painting masterpiece, it is important to set the paints to ensure the longevity and durability of your artwork. One popular method for setting silk paints is using heat. This involves using an iron or a steamer to heat set the paints, which helps to permanently bond the colors to the fabric.
To set the paints with an iron, follow these steps:
- Place a clean cloth or paper towel over your painted silk.
- Set your iron to the silk setting and ensure that the steam function is turned off.
- Gently press the iron onto the cloth-covered silk, moving it in a circular motion for about 3-5 minutes.
- Allow the silk to cool completely before removing the cloth.
It’s important to note that different brands of silk paints may have specific instructions for heat setting, so be sure to read and follow the manufacturer’s guidelines for best results.
Framing, display, and care
Once your silk painting is complete and the paints are set, you’ll want to consider how you will display and protect your artwork. Framing your silk painting can not only enhance its visual appeal but also protect it from dust, moisture, and other potential damages.
When choosing a frame, opt for one that complements the style and colors of your artwork. Avoid frames with glass, as it can cause a reflection that may detract from the vibrancy of the silk paints. Instead, consider using a frame with a clear acrylic or plexiglass cover to protect the painting while still allowing it to be viewed clearly.
In addition to framing, proper care is essential for preserving the beauty of your silk painting. Avoid exposing the artwork to direct sunlight for extended periods, as this can cause the colors to fade over time.
Dust the painting regularly with a soft, dry cloth or a feather duster to keep it clean. If necessary, you can also gently spot clean the silk using a mild detergent and cold water, but be sure to test in an inconspicuous area first.
By taking these steps to finish and care for your silk painting, you can ensure that it remains a stunning piece of art for years to come.
Conclusion
With the right materials and a bit of practice, you can create gorgeous painted silk artworks. Approach your first projects with patience for yourself as you get the hang of stretching and prepping the fabric, sketching designs, and experimenting with paints and effects.
The joy is in the process – don’t worry about perfection right away. Let your creativity flow and have fun with this beautiful art form!
Silk painting allows for imaginative self-expression through flowing colors on a luminous surface. Master the fundamentals in this guide, then make the medium your own. Whether displayed in your home or given as heartfelt gifts, your hand-painted silk creations will be treasured for years to come.