How To Paint Plantation Shutters
Plantation shutters are a classic window covering that can instantly elevate the look of any room. But over time, those pristine white shutters can start to yellow, chip or just look dull. Don’t replace them – paint them instead!
Painting plantation shutters is an easy, budget-friendly way to refresh their appearance.
If you’re short on time, here’s a quick answer to your question: Start by cleaning the shutters, sanding them lightly and applying primer. Then use a small paintbrush or paint pad to apply two coats of interior paint, letting each coat dry completely before adding the next.
Make sure to paint both sides of each slat!
Assess the Shutters and Prepare the Workspace
Inspect shutters for damage
Before you start painting your plantation shutters, it’s important to carefully inspect them for any signs of damage. Look for cracks, chips, or any areas that may need repair. If you notice any issues, make sure to address them before proceeding with the painting process.
This will ensure that your shutters look their best once they are painted.
Clean the shutters
Prior to painting, it’s essential to clean your shutters thoroughly. Use a mild detergent and warm water to remove any dirt, dust, or grime that may have accumulated over time. Be sure to pay extra attention to the slats and corners.
Once clean, allow the shutters to dry completely before moving on to the next step.
Set up the workspace
Creating a suitable workspace is crucial when painting plantation shutters. Find a well-ventilated area with enough space to comfortably work on your shutters. Lay down a drop cloth or plastic sheet to protect your floor or any nearby surfaces from paint splatters.
If possible, set up a worktable or sawhorses to elevate the shutters for easier access while painting.
Gather supplies
Ensure you have all the necessary supplies before you begin painting. These may include:
- Paintbrushes or foam rollers
- Primer
- Paint in your desired color
- Sandpaper or sanding block
- Tack cloth or lint-free cloth
- Painter’s tape
Having everything you need at hand will make the painting process more efficient and enjoyable.
For more detailed instructions and tips, you can visit DIY Network, a reputable website that provides step-by-step guides on various home improvement projects.
Sand and Prime the Shutters
Before painting your plantation shutters, it is essential to prepare the surface properly. This ensures that the paint adheres well and provides a smooth and long-lasting finish. The first step in this process is to sand the shutters lightly.
This helps to remove any rough patches or imperfections on the surface, creating a clean canvas for the paint. Use a fine-grit sandpaper and gently sand in the direction of the wood grain.
Lightly sand shutters
Start by lightly sanding the shutters using a fine-grit sandpaper. This step helps to create a rough surface that allows the primer and paint to adhere better. Sanding also helps to remove any existing paint chips or blemishes, ensuring a smooth finish.
Take your time and be thorough in this step to achieve the best results.
Wipe away dust
After sanding, it is important to wipe away any dust or debris from the shutters. Use a clean, lint-free cloth or a tack cloth to ensure that the surface is completely clean. This step is crucial as any remaining dust particles can affect the adhesion of the primer and paint, leading to an uneven finish.
Make sure to clean both the front and back of the shutters to ensure a thorough job.
Apply primer
Once the shutters are sanded and free of dust, it is time to apply the primer. Primer helps to create a smooth base for the paint and improves its durability. Using a high-quality primer specifically designed for wood surfaces, apply a thin and even coat using a brush or roller.
Allow the primer to dry completely before moving on to the next step.
When it comes to choosing the right primer and paint for your plantation shutters, it is always a good idea to consult with professionals or seek advice from reputable sources like Sherwin Williams or Benjamin Moore.
They can provide valuable insights and recommendations based on your specific needs and the type of shutters you have.
Paint the Shutters
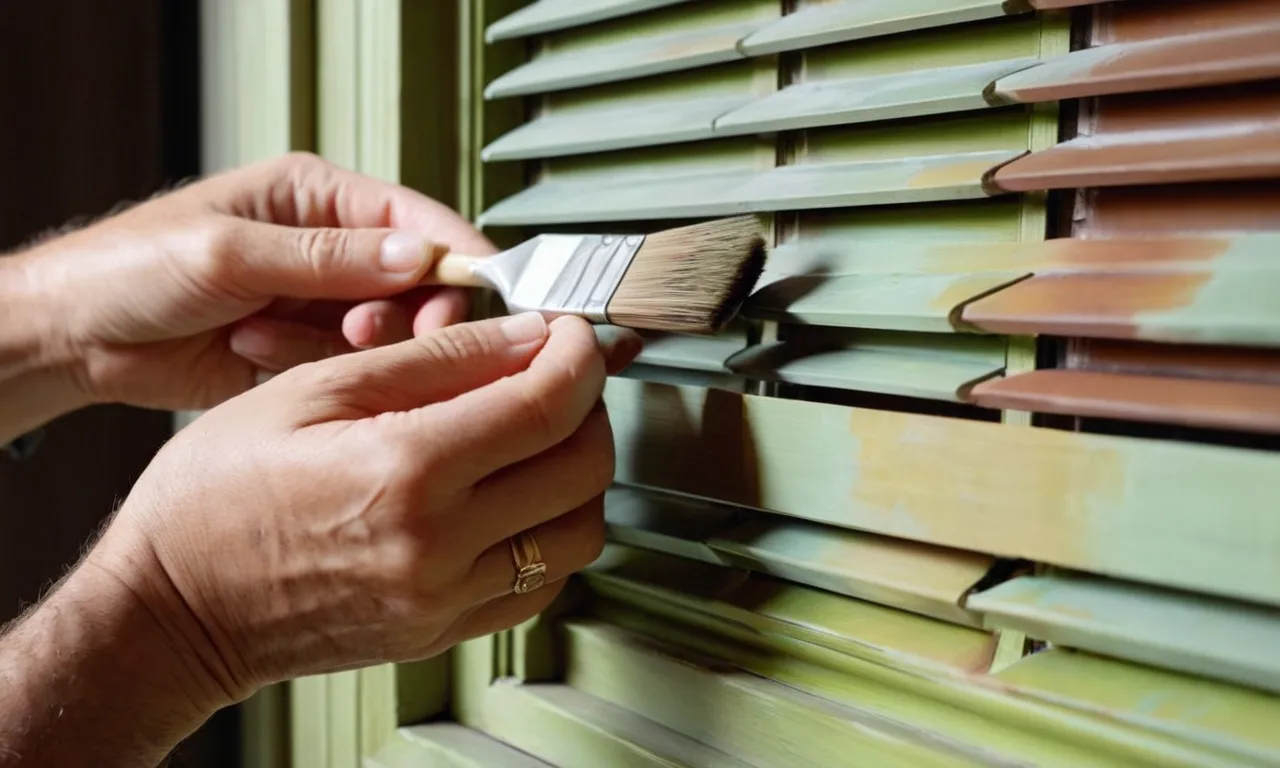
One of the key steps in painting plantation shutters is to actually paint the shutters themselves. This step involves using a small brush or pad to carefully apply the paint to the surface of the shutters.
It’s important to choose a brush or pad that is small enough to reach all the nooks and crannies of the shutters, ensuring an even and thorough coat of paint.
Use a small brush or pad
When it comes to painting plantation shutters, using a small brush or pad is essential. These tools allow for greater precision and control when applying the paint. A small brush with fine bristles will help you reach the tight spaces between the slats and corners of the shutters.
Alternatively, a small foam pad can also be used to achieve a smooth and even finish.
Apply two coats
Applying two coats of paint is recommended to ensure a durable and long-lasting finish on your plantation shutters. The first coat will act as a base, providing coverage and a foundation for the second coat. Allow the first coat to dry completely before applying the second coat.
This will help to prevent any streaks or unevenness in the final result.
Allow proper drying time
After applying the final coat of paint, it’s important to allow the shutters to dry properly. This will ensure that the paint adheres well to the surface and avoids any smudging or smearing. The drying time may vary depending on the type of paint used, so be sure to check the manufacturer’s instructions.
It’s better to wait a little longer to ensure the paint is fully dry before handling or reinstalling the shutters.
Remember, painting plantation shutters can be a time-consuming process, but it’s worth the effort to achieve a fresh and updated look for your windows. Take your time, follow these steps, and you’ll soon have beautifully painted shutters that enhance the overall aesthetic of your home.
Reinstall the Freshly Painted Shutters
Let paint fully cure before rehanging
Once you have finished painting your plantation shutters, it is important to allow the paint to fully cure before reinstalling them. This ensures that the paint has enough time to dry and harden, preventing any smudging or damage during the reinstallation process.
The curing time will vary depending on the type of paint used, so be sure to follow the manufacturer’s instructions for the recommended drying time.
Reattach hardware
Before hanging the shutters back up, it is essential to reattach any hardware that was removed during the painting process. This includes hinges, knobs, and any other components that were taken off to make painting easier.
Make sure to clean the hardware thoroughly and inspect it for any damage or wear. If necessary, replace any worn or broken pieces to ensure that the shutters are securely attached once reinstalled.
Hang shutters back up
Now that the paint has cured and the hardware is reattached, it’s time to hang the freshly painted shutters back up. Start by aligning the hinges with the corresponding holes on the window frame or wall. Use a screwdriver or drill to secure the hinges in place, making sure they are tightly fastened.
Once all the shutters are back in their original positions, give them a gentle push to ensure they are properly aligned and functioning smoothly.
Remember, if you are unsure about any step of the process, it is always a good idea to consult professional guidance or refer to reputable sources such as DIY Network or Better Homes & Gardens for detailed instructions and tips.
Conclusion
With some simple preparation, primer and paint, you can give those old plantation shutters new life. The transformation will be amazing. No need to incur the expense of installing brand new shutters when a fresh coat of paint does the trick.
Just be sure to properly prep the surface, apply primer and use thin, even coats of interior paint. Follow the steps outlined here and you’ll have professionally painted shutters in no time.

