How To Install Wood Floors On Concrete
Installing beautiful wood floors can completely transform the look and feel of a room. But putting wood flooring directly onto a concrete slab comes with some unique challenges that have to be addressed to ensure it lasts.
If you’re short on time, here’s a quick answer to your question: Proper moisture testing, vapor barriers, underlayments, expansion gaps, and acclimation are key to ensuring wood floors adhere properly and avoid issues like buckling and gapping when installed over concrete.
In this comprehensive guide, we’ll discuss common problems with concrete subfloors and how to create the right conditions for a successful wood flooring installation. We’ll cover the step-by-step process including testing, prep work, underlayments, selecting plank flooring, and best practices for installation and care.
Understanding Concrete’s Moisture Issues
When it comes to installing wood floors on concrete, understanding the moisture issues that concrete presents is crucial. Concrete has a natural ability to absorb moisture, which can cause problems if not properly addressed before installation.
Concrete Absorbs Moisture Easily
Concrete is a porous material, meaning it has tiny pores or openings that allow water and moisture to seep through. This is why concrete is often used in basements or as a foundation for buildings, as it can help prevent water damage.
However, when installing wood floors on concrete, this moisture-absorbing property can pose a challenge.
Concrete can absorb moisture from the ground or from any source of water nearby. This can include high humidity levels in the environment, plumbing leaks, or even minor water spills. If the moisture is not properly addressed, it can lead to problems such as warping, cupping, or buckling of the wood flooring.
Moisture Can Damage Wood Flooring
Wood is a natural material that can be greatly affected by moisture. When wood absorbs moisture, it expands, and when it dries out, it contracts. This constant expansion and contraction can lead to significant damage to the wood flooring, causing it to warp, crack, or become uneven.
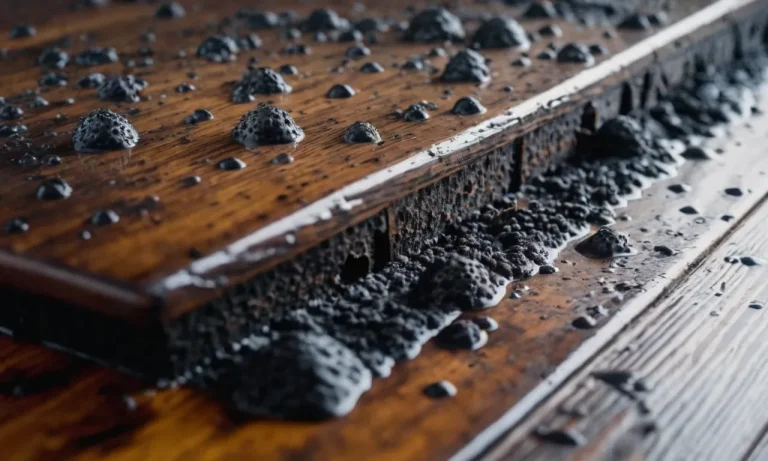
In addition to the physical damage, moisture can also create an environment where mold and mildew can thrive. These can not only ruin the appearance of the wood floors but also pose health risks to occupants of the space.
Test Concrete Moisture Before Installation
Before installing wood floors on concrete, it is essential to test the moisture levels of the concrete. There are various moisture testing methods available, such as the calcium chloride test or the moisture meter test.
These tests can help determine if the concrete has excessive moisture content that could potentially damage the wood flooring.
It is recommended to consult with a professional flooring installer or contractor who has experience in dealing with concrete moisture issues. They can guide you on the appropriate testing methods and provide recommendations on how to mitigate any moisture problems before proceeding with the installation.
By understanding the moisture issues that concrete presents and taking the necessary precautions, you can ensure a successful installation of wood floors on concrete, and enjoy the beauty and durability of wood in your space.
Preparing the Concrete Slab
Before installing wood floors on concrete, it is important to properly prepare the concrete slab. This will ensure a smooth and successful installation process. Here are some key steps to follow:
Grind Down Any Irregularities
The first step in preparing the concrete slab is to grind down any irregularities. This includes removing any bumps, dips, or uneven areas on the surface. These imperfections can prevent the wood flooring from sitting flat and may cause issues down the line.
By grinding down the concrete, you create a level and even surface for the wood flooring to be installed on.
Clean Thoroughly
After grinding down the concrete, it is important to clean the slab thoroughly. This helps to remove any dust, debris, or contaminants that could interfere with the installation process. Use a vacuum cleaner or a broom and dustpan to sweep away any loose particles.
Then, mop the surface with a mild detergent and water solution to ensure it is clean and ready for the next step.
Use a Vapor Barrier
One crucial step in preparing the concrete slab is to use a vapor barrier. A vapor barrier is a moisture-resistant layer that helps to prevent moisture from seeping into the wood flooring. This is particularly important when installing wood floors on concrete, as concrete is porous and can allow moisture to pass through.
By installing a vapor barrier, you protect the wood flooring from potential damage caused by moisture.
There are various types of vapor barriers available, including sheets, rolls, or coatings. Choose a vapor barrier that is appropriate for your specific project and follow the manufacturer’s instructions for installation.
It is important to ensure that the vapor barrier is properly sealed and covers the entire concrete surface before proceeding with the wood flooring installation.
By following these steps to prepare the concrete slab, you can create a solid foundation for the installation of wood floors. This will help to ensure a successful and long-lasting flooring project.
Choosing the Right Underlayment
When it comes to installing wood floors on concrete, choosing the right underlayment is crucial. Underlayment serves as a barrier between the concrete and the wood, providing stability, insulation, and moisture protection.
There are several types of underlayment options available, including cork, rubber, and foam.
Underlayment Types and Options
Before deciding on the type of underlayment for your wood floors, it’s important to consider factors such as the subfloor condition, the type of wood flooring being installed, and any specific requirements from the manufacturer. Each type of underlayment has its own unique properties and benefits.
Cork
Cork underlayment is a popular choice for wood flooring installations. It offers excellent sound insulation, thermal properties, and moisture resistance. Cork is also a sustainable and eco-friendly option, as it is made from the bark of the cork oak tree.
Its natural properties make it resistant to mold and mildew, making it a great choice for areas with high moisture levels.
Additionally, cork underlayment provides cushioning and helps to absorb impacts, reducing noise and footstep sound. This makes it ideal for use in multi-level buildings or areas where noise reduction is important, such as bedrooms or apartments.
Rubber
Rubber underlayment is another option to consider when installing wood floors on concrete. Rubber provides excellent shock absorption and noise reduction, making it ideal for areas where impact sound needs to be minimized, such as gyms or playrooms.
It is also moisture-resistant and helps to prevent the transfer of moisture from the concrete to the wood flooring.
Furthermore, rubber underlayment is durable and long-lasting, providing a stable base for wood flooring. It is available in various thicknesses and densities, allowing for customization based on specific installation requirements.
Foam
Foam underlayment is a cost-effective option for wood flooring installations. It is lightweight, easy to install, and provides basic sound insulation and moisture protection. Foam underlayment is available in different thicknesses and densities, allowing for flexibility in choosing the right level of cushioning and support for the wood flooring.
However, it is important to note that foam underlayment may not provide the same level of sound reduction or moisture protection as cork or rubber. Therefore, it may be more suitable for areas with lower moisture levels or where noise reduction is not a major concern.
Ultimately, the choice of underlayment will depend on various factors, including budget, specific installation requirements, and personal preferences. It is recommended to consult with a flooring professional or refer to the manufacturer’s guidelines for the best underlayment option for your wood flooring installation on concrete.
Picking the Best Flooring Material
When it comes to installing wood floors on concrete, it is essential to choose the right flooring material. While there are various options available, one of the best choices for concrete is engineered hardwood.
Engineered Hardwood Best for Concrete
Engineered hardwood is specifically designed to be more resistant to moisture and temperature fluctuations, making it an ideal choice for concrete subfloors. Unlike solid wood planks, engineered hardwood is constructed with multiple layers of wood, with a top layer of real hardwood.
This construction helps to minimize the risk of warping, cupping, or expanding that can occur when solid wood is installed on concrete.
Engineered hardwood flooring also offers a wide range of styles, colors, and finishes, allowing you to achieve the look you desire for your space. It is important to choose a reputable brand and ensure that the engineered hardwood you select is suitable for installation on concrete.
Avoid Solid Wood Planks
While solid wood planks may be a popular choice for wood flooring, they are generally not recommended for installation directly on concrete. Solid wood is more susceptible to moisture and temperature changes, which can cause the wood to warp or buckle over time.
Additionally, solid wood planks require a plywood subfloor to be installed on top of the concrete, adding to the overall cost and complexity of the installation process.
If you have your heart set on solid wood flooring, it is best to consider other options such as a floating floor system or a plywood subfloor. These methods create a barrier between the concrete and the wood, helping to minimize the potential issues associated with moisture and temperature fluctuations.
Consider Plank Thickness
When choosing the right flooring material for installation on concrete, it is also important to consider the thickness of the planks. Thicker planks provide more stability and can help to minimize the risk of warping or buckling.
Most engineered hardwood flooring comes in various thicknesses, typically ranging from 3/8″ to 3/4″.
Thicker planks are generally recommended for areas with higher foot traffic or if you plan to install the flooring in a basement or below-grade space. Thinner planks may be suitable for areas with lower foot traffic or if you are working with a tight budget.
Ultimately, selecting the right flooring material for your concrete subfloor is crucial for a successful installation. By choosing engineered hardwood and considering factors such as plank thickness, you can ensure a durable and beautiful floor that will last for years to come.
Installing the Flooring
When it comes to installing wood floors on concrete, there are a few important steps to follow to ensure a successful installation. Here are some key points to consider:
Acclimate the Flooring
Before installing the wood flooring, it is crucial to acclimate it to the environment in which it will be installed. This step is necessary because wood is a natural material that can expand or contract based on the temperature and humidity levels in the room.
By allowing the flooring to sit in the room for a few days, it can adjust to the conditions and minimize the risk of warping or buckling after installation.
Allow Proper Expansion Gaps
Wood flooring needs room to expand and contract, so it’s important to leave proper expansion gaps along the perimeter of the room and around any fixed objects, such as columns or cabinets. These gaps allow the wood to move without causing damage to the flooring.
The recommended gap size varies depending on the type of wood and the manufacturer’s instructions, so be sure to follow their guidelines.
Follow Manufacturer Instructions for Installation
Every type of wood flooring may have specific installation instructions provided by the manufacturer. It is crucial to read and follow these instructions carefully to ensure a proper installation. These instructions may include details on the type of adhesive or underlayment to use, the proper installation technique, and any additional steps that need to be taken to ensure the longevity of the flooring.
Consider Using Flooring Nails or Glue
When installing wood floors on concrete, there are a few different methods to consider. One option is to use flooring nails or cleats, which are hammered into the wood and then fastened to the concrete subfloor.
Another option is to use a flooring adhesive, which is applied to the concrete and then the wood is pressed onto it. Both methods have their advantages and disadvantages, so it’s important to research and choose the best option for your specific needs.
By following these steps and taking the time to properly install wood floors on concrete, you can enjoy the beauty and warmth of wood flooring in any room of your home.
Caring for Your New Wood Floor
Let the Adhesive Fully Cure Before Regular Use
Once you have successfully installed wood floors on concrete, it is important to allow the adhesive to fully cure before subjecting the floor to regular use. This curing process can take anywhere from a few days to a few weeks, depending on the specific adhesive used and the humidity levels in your home.
During this time, it is recommended to avoid heavy furniture placement, excessive foot traffic, and any activities that could potentially damage the floor.
For more information on the curing time of your specific adhesive, it is advisable to consult the manufacturer’s guidelines or reach out to a professional installer.
Maintain Proper Humidity Levels
Wood is a natural material that can be affected by changes in humidity levels. To ensure the longevity and stability of your new wood floor, it is crucial to maintain proper humidity levels in your home.
Excessively dry conditions can cause the wood to shrink and potentially result in gaps between the floorboards. On the other hand, excessive moisture can lead to expansion and warping of the wood.
To maintain an optimal humidity level, consider using a humidifier in dry climates or during the winter months when indoor air tends to be drier. Conversely, use a dehumidifier or air conditioner in humid climates or during the summer months when humidity levels are higher.
Clean and Protect the Finish
Regular cleaning and proper maintenance are essential for preserving the beauty and durability of your wood floor. Here are some tips to help you clean and protect the finish:
- Use a soft-bristle broom or a vacuum with a brush attachment to remove dust and dirt regularly.
- Avoid using excessive water or wet mops, as they can damage the wood. Instead, use a damp mop or a specialized wood floor cleaner.
- Wipe up spills immediately to prevent any potential damage to the wood or finish.
- Place protective pads under furniture legs to prevent scratches and dents.
- Consider using area rugs or mats in high-traffic areas to minimize wear and tear.
By following these simple maintenance practices, you can keep your new wood floor looking great for years to come.
Conclusion
Installing wood flooring over concrete comes with some unique challenges, but following the proper steps for moisture testing, prep work, underlayments and installation practices can lead to beautiful, long-lasting results.
Always be sure to follow the flooring manufacturer’s recommendations closely. With careful planning and preparation, you can have the warm, natural look of wood floors flowing seamlessly throughout your rooms – even over concrete subflooring.


