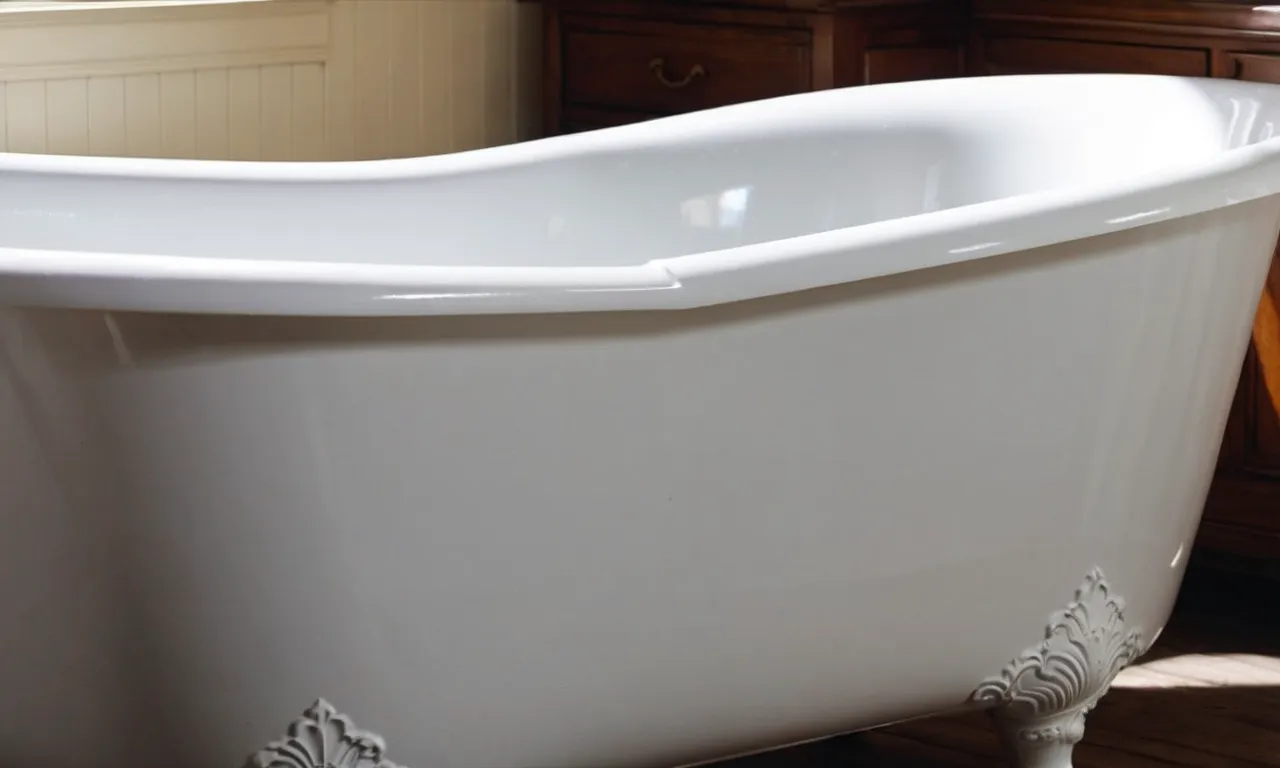
I Tested And Reviewed 10 Best Cast Iron Tub Refinishing Kit (2023)
Looking to restore that vintage charm to your cast iron tub? A cast iron tub refinishing kit may be just what you need. With so many options on the market, choosing the right refinishing kit can be overwhelming. Before making a purchase, consider factors like the condition of your tub, the type of finish you want, and the effort involved in application and cleanup.
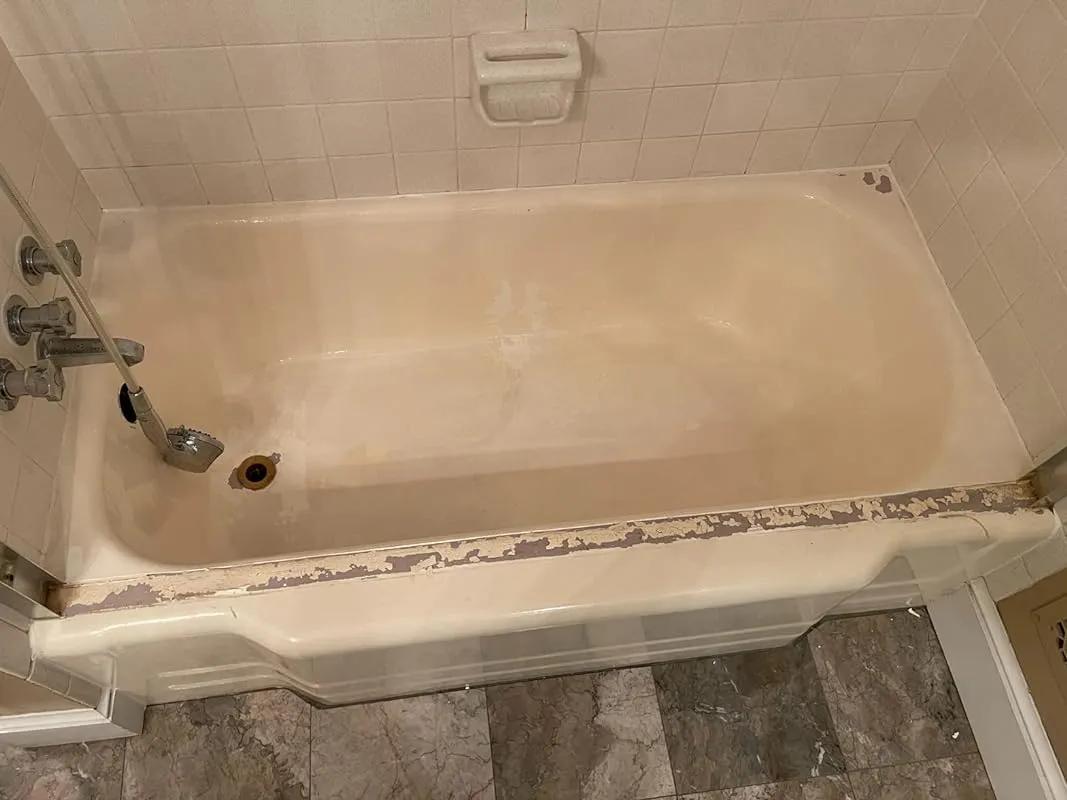
The condition and age of your cast iron tub will determine the type of prep work and products needed. For minor scratches and stains, a basic cleaning and light sanding may suffice before applying a new coating. Heavily corroded or damaged tubs will require more intense sanding, patching, and sealing for successful results.
The new finish can range from a simple gloss coating to a colored enamel that mimics vintage style. Consider durability, ease of cleanup, aesthetic preference and cost when deciding on a finish. Enamel finishes often provide the most durable and decorative option.
Be sure to assess the effort and process involved too. Some products require thorough cleaning and sanding while others are formulated to bond over existing surfaces with minimal prep. Easy application and cleanup is ideal for DIYers. With so many quality cast iron tub refinishing kits now available, you can restore the beauty of your vintage bath with the right products and a little elbow grease.
10 Best Cast Iron Tub Refinishing Kit
| # | Product Image | Product Name | Product Notes | Check Price |
|---|---|---|---|---|
|
1
|
 |
The product is ideal for repairing cracks or chips on bathtubs, sinks, tiles, and basins in a white color.
|
|
|
|
2
|
 |
The product is ideal for repairing and refinishing sinks and tubs with a bright glossy coating.
|
|
|
|
3
|
 |
The product is ideal for refinishing sinks and bathtubs, providing an odorless DIY solution.
|
|
|
|
4
|
 |
The product is ideal for refinishing and providing non-slip protection for bathtubs and tiles in a white color.
|
|
|
|
5
|
 |
The product is ideal for refinishing and restoring tubs and tiles to a white, glossy finish.
|
|
|
|
6
|
 |
The product is ideal for refinishing and reglazing bathroom and kitchen surfaces like bathtubs, sinks, and countertops.
|
|
|
|
7
|
 |
The product is ideal for refinishing and restoring worn, damaged, or discolored bathtubs to a fresh, like-new appearance.
|
|
|
|
8
|
 |
The product is ideal for resurfacing and repairing bathtubs, sinks, toilets, showers, and countertops during bathroom renovation.
|
|
|
|
9
|
 |
The product is ideal for refinishing bathtubs and tiles, providing a durable, odorless, and non-toxic coating.
|
|
|
|
10
|
 |
The product is ideal for refinishing bathtubs, tiles, and wall surrounds, providing a high gloss finish within 24 hours.
|
|
1. Bathworks Tub And Tile Chip Repair Kit; 4 Oz; Bathtubs, Sinks, Tiles, Basins (White)


I highly recommend the Bathworks Tub and Tile Chip Repair Kit. This product exceeded my expectations in repairing a chip on my bathroom vanity. The repair was so seamless that you cannot even tell where the chip was originally. I was truly amazed at how well this product worked.
However, it is important to note that this repair kit should not be used in confined spaces without proper ventilation. The fumes can be quite potent, so it is necessary to ensure there is adequate airflow when using this product.
One downside to this product is that it may come with a return slip from a previous customer. In some cases, the product may have been returned and resold, leading to potential issues. For instance, I found that the filler in my kit was almost empty, with less than a teaspoon of filler remaining. Luckily, I had just enough to complete my project, which was about the size of a quarter. This lack of filler raises concerns about the trustworthiness of the product.
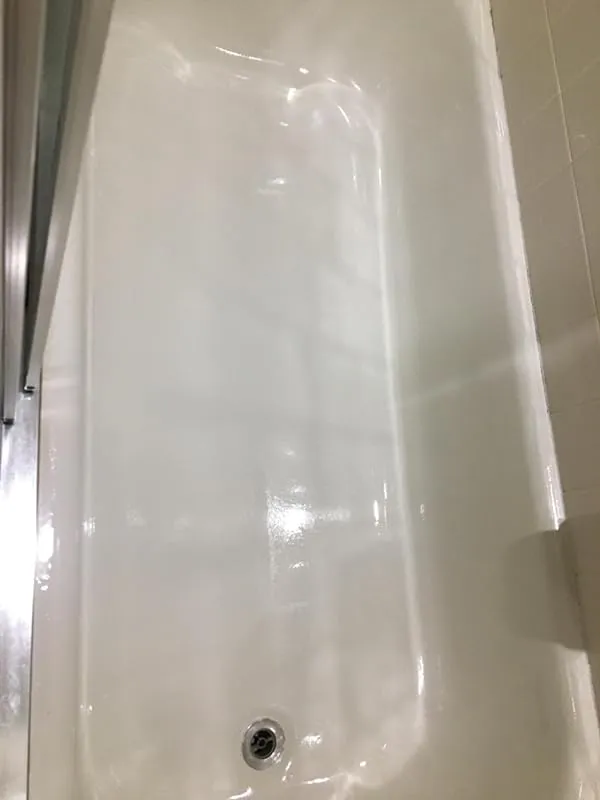
Despite this issue, the Bathworks Tub and Tile Chip Repair Kit still performs exceptionally well. It is perfect for repairing chipped cast iron tubes and can also fix deep scratches in bathtubs, sinks, tiles, and basins. The best part is that there is no mess or fuss involved in using this kit. I was able to use my bathtub within hours of completing the repair.
2. Touch-Up Tub Refinishing Kit – Odorless, Diy, Glossy


I am extremely impressed with the durability of this product. It has truly transformed my tub, making it look brand new again. The availability of instructional videos online has been a great help in understanding how to properly use the product. I followed the instructions and used the entire Ekopel kit to resurface my tub. However, I made a mistake by waiting too long while working on the front face, which caused some drips to form. Instead of attempting to fix the drips with the touchup kit, I decided to create a wood panel for the front face, similar to the after picture. Once I clean up the tile, I am confident that the overall result will be amazing.
In addition to the tub, I also used this product to repair my porcelain sink which had cracks and was causing rusting underneath. After sanding, cleaning, and filling in the big cracks with jb weld, I applied the coating and it did a fantastic job of restoring the sink. I initially tried applying multiple coats, but this caused drips to form. From my experience, I would recommend pouring all of the coating on the top part of the sink and then using a foam roller to even out the coating, rather than using a brush.
I recently used this product on my apartment's basin, which had numerous chips and was an eyesore. I took the time to sand down the surface and create an even base before applying the coating with a foam roller. After approximately 12 hours, the half of the basin that I had completed was dry to the touch. I decided to wait a little longer before touching it to ensure I didn't accidentally ruin the finish. I am now confident that I will receive my deposit back as the results are impressive. In my opinion, this product is easier to use than painting. I highly recommend giving it a try.
This product has truly saved my tub. Despite being a first-time user, I found it easy to use and the results were outstanding. I was able to use the shower just 24 hours after the application, and there were no issues whatsoever. I am extremely satisfied with this product and have even purchased another kit for future use.
I initially purchased this kit to repair a small area of my bathtub that was losing its finish. However, I was pleasantly surprised to find that the amount provided was more than enough to cover the entire drain area and even some additional areas that were chipped. The product's quality is excellent and it is the same as the one included in their full tub refinishing kit.
3. Ekopel Premium Diy Tub Refinishing Kit – Odorless, Made In Usa


We recently used this product to refinish an old cast iron double bowl kitchen sink and drainboard, and we were blown away by the results. First of all, the lack of smell was a huge plus for us. Many other refinishing products we've used in the past had a strong odor, but not this one.
The sink and drainboard had seen better days and were showing signs of wear and tear. The cast iron was visible in certain areas, and previous attempts at refinishing had been quick and cheap. However, after using this product, you would never know that the cast iron was exposed. The sink and drainboard now look better than ever.
We aren't professionals, but we do a lot of DIY repairs, and this product was easy to use. We followed the instructions carefully, watched application videos, and read reviews for tips and recommendations. It's important to avoid common mistakes that can ruin the finish, so we made sure to take all necessary precautions.
One of the best pieces of advice we can give is to make sure the area you're refinishing is dustproof. This will ensure a flawless finish. Additionally, if possible, disconnect the drain to make the process easier. It's also important not to overmix the product and to tape off fixtures and handles to prevent any damage.
We also had to drill a hole in the sink for a new sprayer, and we were pleased to find that it didn't affect the finish at all. It blended seamlessly, and someone who didn't know the sink's history would think the sprayer was original.
It's been almost a year since we refinished the sink, drainboard, and claw foot tub, and they still look brand new. Our relative, for whom we did the job, continues to rave about the product. We're confident that this is a high-quality, long-lasting solution.
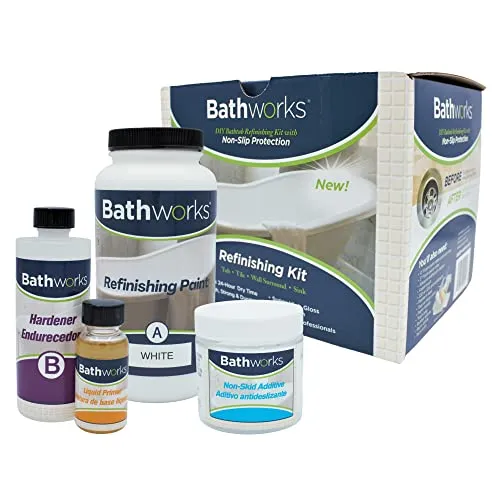
4. Bathworks Bathtub Refinishing Kit Standard 22 Oz. Tub & Tile W/non-Slip Protection White


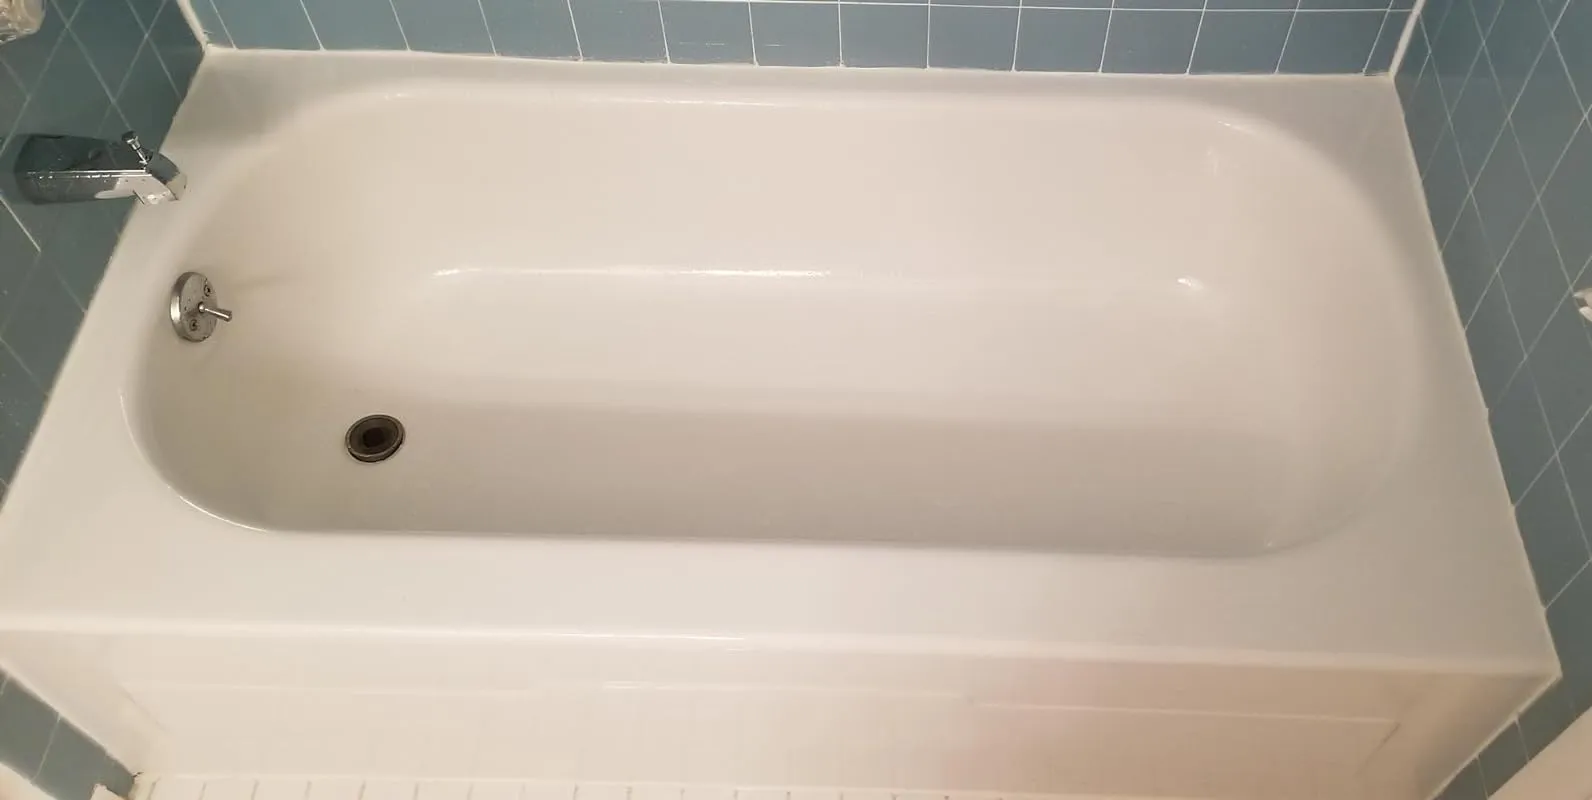
I recently purchased this tub refinishing kit and I have to say, it exceeded my expectations. The tub in my house was in terrible condition, but after using this kit, it looks like new. I highly recommend also getting the etching paste for optimal results.
As someone who is not particularly skilled in DIY projects, I was initially nervous about using this product. However, I made sure to thoroughly prepare the tub and the surrounding area, and I was amazed by the outcome. My 1920s cast iron tub, which was worn down to the metal, now looks brand new. The paint application was smooth and even, and I appreciated the option to add aggregate for a better grip on the tub's bottom.
The only downside was the strong smell, but it was bearable. Additionally, it took a bit longer than expected for the paint to dry, but that may have been due to the rainy day when I applied it. Overall, I am extremely satisfied with this product and I can't wait to use it on other surfaces in my home, such as my washer/dryer and utility sink.
I should note that I had to remove an old layer of paint from my tub before using this kit. I used Jasco paint and epoxy remover, following the instructions provided. The before picture I attached shows the tub after completing this step and thoroughly cleaning it.
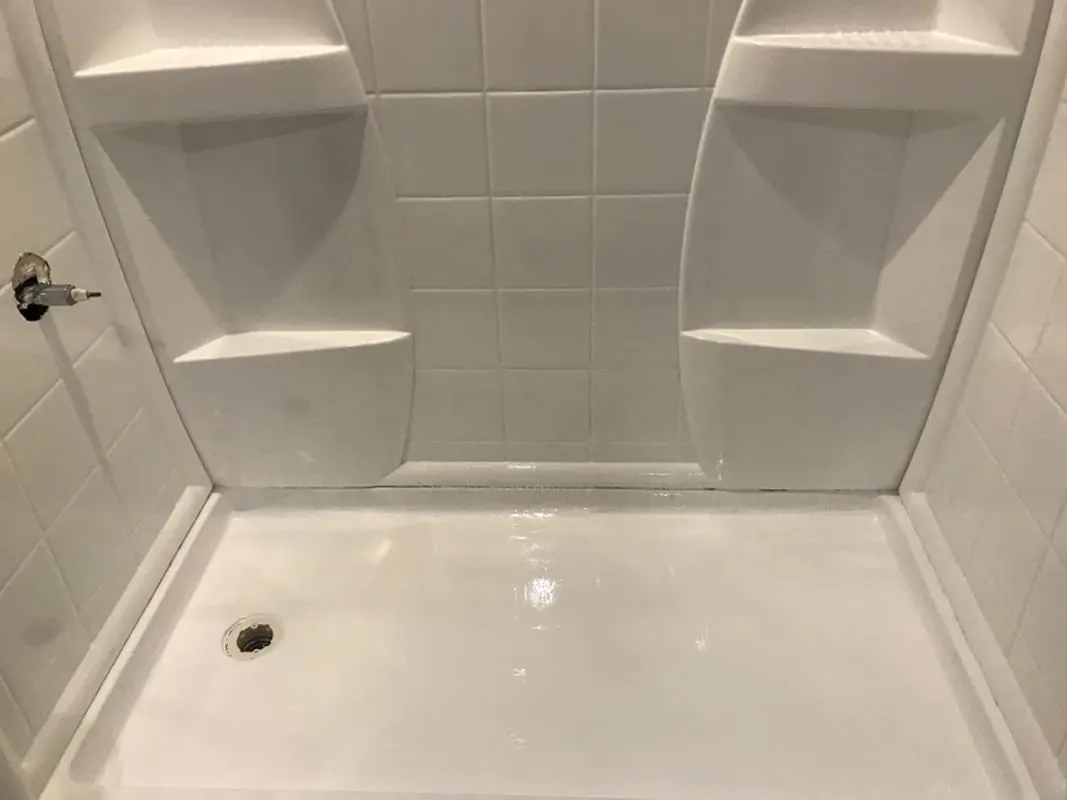
This is actually the second time I've used this product. The first time, I used it on the floor of a shower stall and the results were fantastic. So, I can confidently say that this kit works well on various surfaces.
To achieve the best results, it's important to properly ventilate the room and follow the instructions provided. I can assure you that if you clean, sand, and clean again until the surface is smooth, you will have a successful refinishing job.
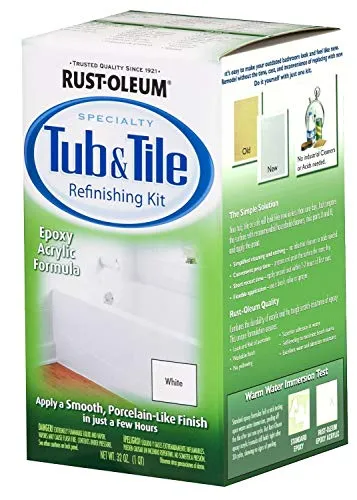
5. Rust-Oleum 7860519 Acrylic Tub And Tile Refinishing 2-Part Kit, White 2 Pack
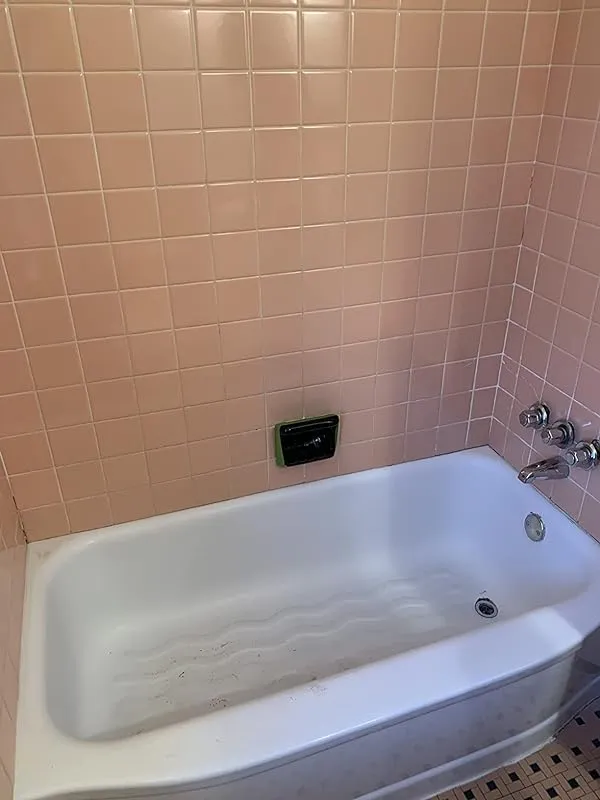


The transformation of my bathroom using this product was truly amazing! I had an outdated salmon pink tile from the 50's that desperately needed a makeover. After purchasing 2 cans of this product, I quickly realized that I needed a third can to ensure complete coverage and prevent any traces of the pink color from showing through. With the extra paint, I was able to successfully paint both the wall tile and the bathtub.
It's important to note that the foam rollers I initially bought from Amazon didn't hold up well and fell apart quickly. However, I found a different brand of foam roller at Home Depot that worked much better. As other reviews have mentioned, it's crucial to replace the roller as soon as it starts to fall apart to avoid any undesirable texture on the painted surface.
One thing to be aware of is the strong smell of this product. To mitigate the smell, I taped a box fan into my bathroom window and wore a respirator while painting. It took about a week and a half for the smell to dissipate, even with daily ventilation. So, it's important to give yourself enough time for the painted area to air out before fully enjoying the newly transformed space.
In terms of preparation, thorough cleaning of the old tile is essential for proper adhesion. I recommend using Clorox, followed by TSP (trisodium phosphate), and then water with a magic eraser to ensure a clean surface. This step is crucial to achieving a long-lasting finish.
Although this product dries quickly and can be challenging to work with, the end result is well worth the effort. Depending on the color of your tile, you may need to apply multiple coats for complete coverage. However, with patience and attention to detail, the finished product looks absolutely wonderful.
6. Nadamoo Diy Tub & Tile Refinishing Kit – White


I was pleasantly surprised by the effectiveness of this tub glazing kit. While the preparation process was a bit tedious, the actual painting was straightforward. The square footage calculation provided by the product was accurate, and I found that using the 3 bucket kit along with an additional bucket I purchased separately worked well.
The durability of the paint has been impressive so far. However, it's important to note that the tiles should not be touched for a full 7 days, especially if the temperature is kept at 75 degrees. I made the mistake of moving furniture on the second day and ended up scratching one tile. But after the 7-day mark, the paint hardened and became rock solid.
One tip I would like to share is to avoid using colored shampoo in the bathroom where the painted tiles are. Another reviewer mentioned that the paint can be discolored by certain hair products, so I make sure to use a different bathroom to color my hair.
I would only recommend this product if you are willing to invest a significant amount of time and effort into the preparation process. Watching YouTube videos and following their prep instructions is crucial. Cleaning the tiles thoroughly, sanding them by hand (to avoid damaging old tiles with an orbital sander), etching the surface with toilet bowl cleaner (which can be quite smelly), and taping off drains meticulously are all necessary steps before painting.
As a professional painter, I found the application process to be fairly easy. The paint is self-leveling and user-friendly, even for novices. I applied three coats, and the results have been impressive. I used this kit to glaze a hand-me-down tub in August, and as of today (December 29th), it still looks beautiful. The paint has withstood the installation of tiles around it, as well as contact with dark grout, mastic, and even drywall mud. It has been easy to wipe clean, and I believe it would hold up well even with regular use.
For optimal results, I recommend applying several thin coats of paint. I was pleasantly surprised to find that the leftover paint was still usable several months later, allowing me to touch up any scratches that appeared after tiling. I kept the paint sealed tightly and stored it in a climate-controlled basement.
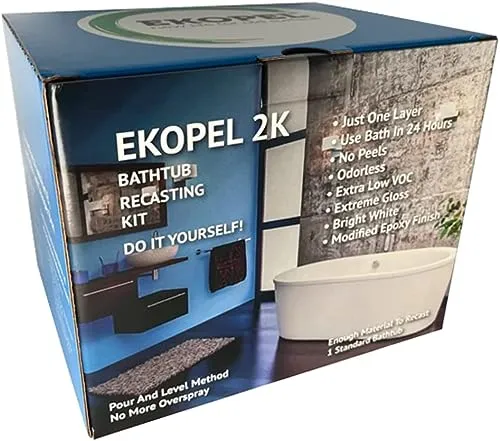
7. Usa-Made Bathtub Refinishing Kit – Easy Pour-On Application, Odorless, White Epoxy-Coating – 2.7 Kg


I recently decided to tackle a DIY project in my rental house, specifically the bathroom. The bathtub in the bathroom was over 50 years old, had chips and stains all over it, and always felt dirty no matter how much I cleaned. I had successfully painted and epoxied the counter in the past, so I thought, why not try it on the bathtub as well?
After doing some research, I opted to invest a little more money into a higher-quality product rather than risk using a cheap option that many people seemed to have had failures with. I spent two weekends prepping the tub, which involved scrubbing, sanding, and fixing the chips. Finally, the time came to pour the product and get started.
I have to admit, it was not as easy as those instructional videos made it seem. I encountered several challenges along the way. The plastic I had taped to protect the surroundings came off within minutes, causing paint to splatter everywhere. I ended up with paint on my face, neck, arms, ears, feet, and even my stomach. The heat in the bathroom made me sweat profusely, which became problematic as the product cannot get wet. I had to constantly wipe my face on a hanging towel, which I made sure to have handy.
Additionally, due to the misplaced plastic, I ended up with a pool of paint on the floor surrounding the tub. Luckily, I had plans to cover the old linoleum anyway, but it could be an issue for someone planning to keep their floor intact. After an hour and a half, I was exhausted, overheated, and desperately in need of a break. The front of the tub had several drips and imperfections, and I considered scraping it all off and starting over.
After cleaning myself up and disposing of the paint-stained clothes, I mustered the courage to go back into the bathroom. To my surprise, the drips on the front had disappeared, and the surface was level. Removing the tape from the drains was a messy task, unlike the easy job shown in the instructional video, but I managed to get it done.
In the end, all the mess, sweat, and crumpled plastic were worth it. The tub turned out perfect, without a single mistake or drip. It looks brand new! This experience taught me that anyone, even an amateur like me, can successfully complete this project. As long as you invest time in the prep work, it's difficult to mess up the application. However, be prepared for the messy process and decide if saving money on a tub is worth a few hours of chaos.
I am absolutely thrilled with the results and would consider buying this product again despite the challenges I faced. Unfortunately, I don't have any pictures to share as my phone doesn't have that capability. But trust me, the transformation is incredible!
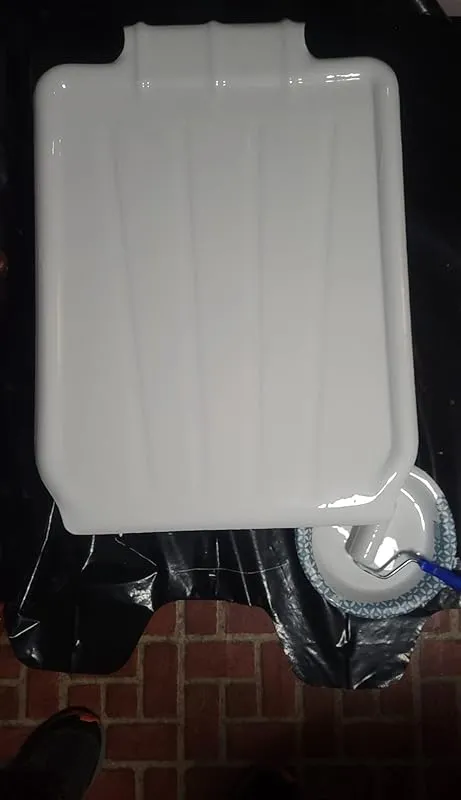
8. Tubbydiy Bathroom Renovation Kit: Easy Roll-On Tub & Tile Refinishing


I recently used this refinishing kit on my ceramic backsplash and overall, I was pleased with the results. Initially, I was concerned that the ceramic surface wouldn't be rough enough for the paint to adhere properly, so I used some additional sandpaper. However, I found that the kit's contents were sufficient as the paint adhered well to the grout and the ceramic surface.
The application process was straightforward – I painted the grout first and then went over the entire area twice. The paint dried quickly, which was a plus. Although it has only been a few weeks since I painted, I cannot comment on the durability of the finish yet. However, I have found that the painted surface is very easy to clean, which is a great convenience.
One thing to note is that the quantity of the product provided in the kit may not be enough for larger projects. In my case, I had to purchase three kits to finish a normal-sized tub and shower-wall area. While the product itself is great, the cost can add up when you need multiple kits for a bigger job.
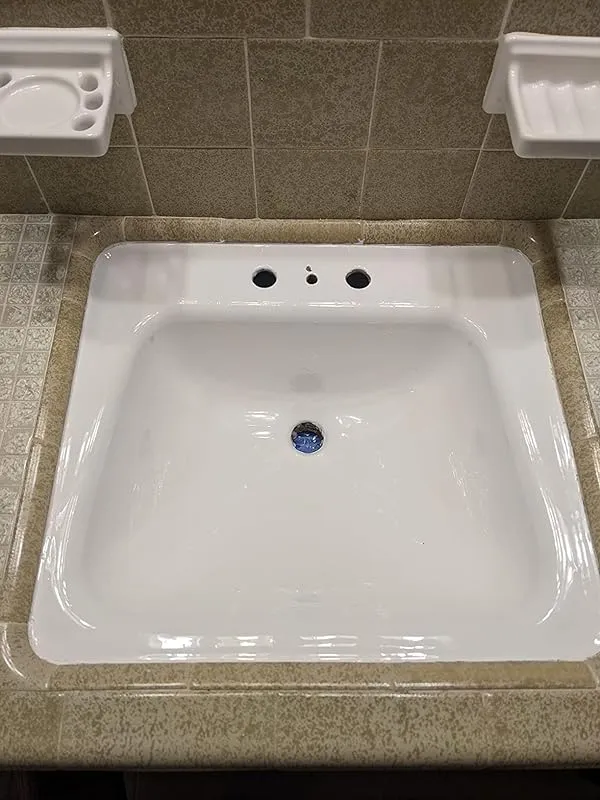
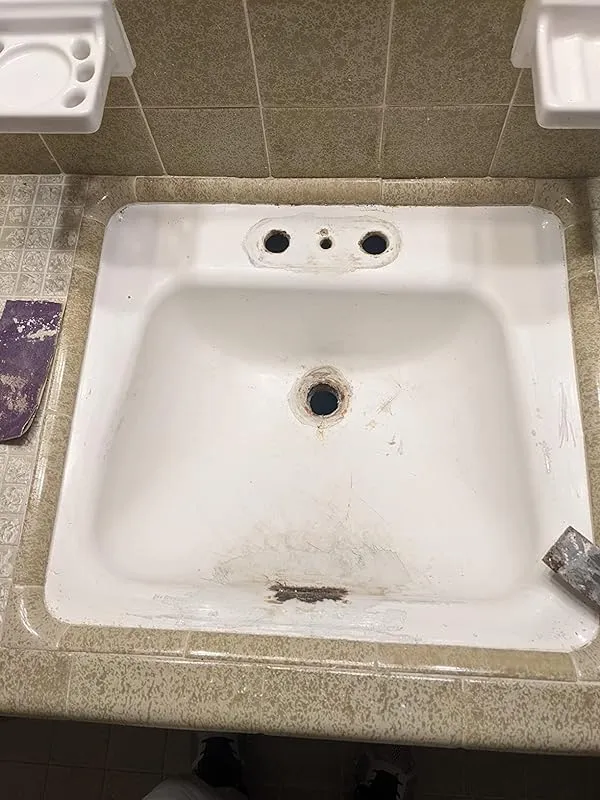
I also used this refinishing kit on my old-style bathroom sink, which had cracks. Instead of replacing the entire countertop, I decided to give this kit a try. I followed the directions carefully, and the finished result exceeded my expectations. The process does involve multiple steps, but it is well worth the effort compared to the expense of buying a new counter and sink.
Although I haven't applied the product yet, I am excited to do so. I am waiting for a few days when I have ample time to complete the entire process, as it involves cleaning, sanding, buffing, and drying. I appreciate that this kit provides all the necessary materials and tools for most projects, eliminating the need to purchase additional items.
While this particular brand may not be as well-known, I am optimistic about the results based on the positive reviews and the versatility of the product. It can be used on various surfaces such as tile, porcelain, and ceramic, making it suitable for a wide range of applications. Although the kits can be a bit pricey, they are still a more cost-effective alternative to replacing tubs and sinks.
9. Usa-Made Odorless Tub Coating: 20x Thicker & Never Peels


I must confess, I made several amateur mistakes during my DIY bathtub resurfacing project. However, despite the challenges I faced, the end result was truly amazing. I hope my experience can serve as a learning opportunity for others.
First and foremost, I want to emphasize that resurfacing a tub is not a simple task for DIY enthusiasts. The preparation work involved is extensive and should not be taken lightly. In my case, I spent around 3 hours cleaning the tub, sanding it down, removing caulk, and uninstalling drains and fixtures. Since my tub was quite old, removing the corroded tub drain proved to be quite a challenge. I had to make multiple trips to the hardware store and spend an additional $80 on a tub drain remover tool. Had I known about these unexpected expenses beforehand, I would have gladly hired a professional to handle it.
Stirring the heavy resurfacing material in the bucket provided me with a great arm workout. It required some effort, but the product poured onto the tub nicely and evenly. With the help of a foam roller, I managed to achieve an even coat. Following the instructions from instructional videos, I started from the edges, then moved to the center, and finally worked my way to the outside. I made sure to over pour and let the excess material drip, which I collected. At this point, I felt like a true professional, with no sticky mess anywhere except in the tub. I watched as the product leveled out, feeling proud of my accomplishments and even deciding to grab a beer to celebrate.
Unfortunately, this is where I made my first mistake. I used the beer bottle as a makeshift dam to prevent the goo from dripping into the drain. Two hours later, when I returned to remove any residual goo around the drain, I realized the consequences of my actions. Not wearing gloves was my second mistake, as I ended up getting my hands covered in the thick and sticky substance. In my attempt to clean up, I left a trail of white goo on the closet handles while searching for Goo Gone. Eventually, I was able to apply more solution and even out the affected area.
Next, I proceeded to remove the dam around the drain. However, the solution had thickened significantly, making it difficult to pull up the bottle. In my attempt to control the dripping goo, I accidentally pulled up the taped-off drain cover. To make matters worse, the last few drops of beer landed in the center of the tub. At this point, I had two problems to tackle. Fearing the need to call a plumber, I decided to focus on the white goo spilling into the drain first. I used Goo Gone on a paper towel to clean the threads of the drain and set up a dam using painter's tape. Eventually, I managed to wipe down most of the drops in the middle of the tub with a wet paper towel. However, the next day, I discovered mistake number seven – some dog hair had found its way onto the paper towel, leaving behind small artifacts on the surface.
Despite these mishaps, after approximately 20 hours, the solution had dried and hardened significantly. There were only a few minor imperfections left, but overall, my bathtub looked significantly better than before. I used an abrasive pad to remove any stray hairs that had ended up in the tub.
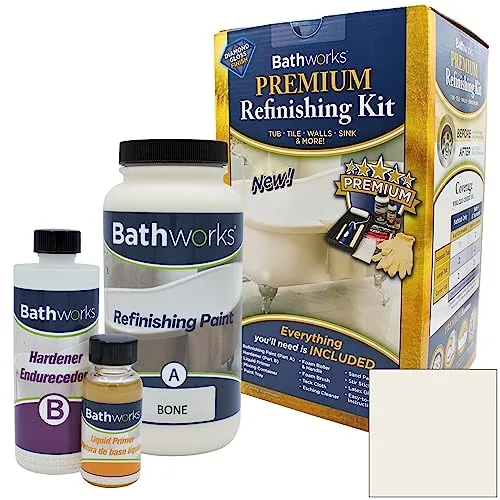
10. Bathworks Premium Bathtub Refinishing Kit: High Gloss Resin


I recently used Bathworks to refinish an old porcelain tub that was in a less than desirable harvest gold color. After extensive research, I decided to go with Bathworks because it met all of my criteria and objectives for the project. I was particularly concerned about the application process and found that rolling with a foam roller worked best for me. I had no issues with the odor or any other aspects of the application.
Before applying the Bathworks coating, I spent three days thoroughly cleaning the tub and used the recommended EZ Etch for preparation. I must say that the EZ Etch is a crucial step and I highly recommend using it. I even consulted with a representative from Sherwin Williams who confirmed its effectiveness and strongly advised its use. Cleaning is a vital part of the process, and having worked with ceramic paints before, I developed a cleaner and primer for optimal adhesion.
Once the tub was perfectly clean, the application of the Bathworks coating was a breeze. I followed the instructions provided and rolled it on as shown in their video. It's important not to rush and to ensure you have enough time to coat the tub evenly. I learned not to apply too much paint on the roller but just enough to achieve good coverage. Additionally, it's crucial not to dry roll. When applying the second coat, it's important not to overdo the paint as it can lead to runs on the straight sides. The self-leveling properties of the paint mean that too much paint on the second coat can result in visible runs. If you do encounter runs or other imperfections, my advice is to address them without adding more paint to the roller to prevent making the issue worse.
Although I did develop a few runs during my application, I decided to leave them alone and let the self-leveling paint work its magic. After a few days, the runs were nearly gone and hardly noticeable. I then allowed the paint to cure for 30 days without use. I have three bathrooms, so this was a feasible option for me. The paint dried to a rock-hard finish and looks absolutely stunning. It adhered well, providing a glossy and high-quality appearance.
I am so pleased with the results of using Bathworks that I have decided to refinish another tub using this product. Having gained a better understanding of the application process, I am confident that I can avoid any runs this time around. While the process can be time-consuming, it is not difficult, especially when armed with the right knowledge and product.
The only suggestion I have for the Bathworks video is to include troubleshooting tips for dealing with runs. This would have been immensely helpful for me during my first application. Overall, I am extremely satisfied with my choice of Bathworks and would highly recommend it to others undertaking a similar project. Good luck with your refinishing endeavors!
FAQs
Are cast iron tub refinishing kits easy to use for DIYers or should professional help be sought?
Cast iron tub refinishing kits can be used by DIYers, but it is important to consider the level of expertise and experience one has with this type of project. Refinishing a cast iron tub requires careful preparation and application of the refinishing materials, as well as attention to detail.
If you have prior experience with DIY projects and feel confident in your abilities, using a cast iron tub refinishing kit can be a cost-effective option. However, it is crucial to closely follow the instructions provided with the kit and ensure that you have all the necessary tools and materials.
On the other hand, if you are unsure or lack confidence in your DIY skills, seeking professional help may be a wise decision. Professional refinishing services have the expertise, experience, and specialized equipment to ensure a high-quality and long-lasting result.
They can also address any underlying issues or damage that may need to be repaired before refinishing.
Ultimately, the decision to use a cast iron tub refinishing kit or seek professional help depends on your comfort level, skill set, and the desired outcome.
Are there any potential risks or drawbacks to using a cast iron tub refinishing kit?
While cast iron tub refinishing kits can be a cost-effective solution to restore the appearance of your tub, there are a few potential risks and drawbacks to consider.
Firstly, the refinishing process involves using strong chemicals and toxic fumes, so it's important to take proper safety precautions and ensure proper ventilation during the application. Additionally, if not done correctly, the chemicals used in the kit can cause skin and eye irritation, so it's crucial to wear protective gear.
Furthermore, the durability of the refinishing may not be as long-lasting as a professional refinishing job. Over time, the finish may start to peel, chip, or discolor, requiring touch-ups or a complete reapplication.
Lastly, refinishing kits may not be suitable for tubs with extensive damage or deep cracks. In such cases, it's recommended to consult a professional for repair or replacement options.
To minimize these risks, carefully follow the instructions provided with the kit and consider consulting a professional if you have any concerns or doubts about the process.
Are there any specific maintenance requirements for a cast iron tub refinished with a kit?
Yes, there are some specific maintenance requirements for a cast iron tub that has been refinished with a kit. Here are a few important points to keep in mind:
1. Avoid harsh chemicals: Refinished cast iron tubs are more delicate than the original enamel, so it's important to avoid using abrasive or acidic cleaners. These can damage the finish and cause it to deteriorate over time.
Instead, use mild, non-abrasive cleaners specifically designed for refinishing.
2. Gentle cleaning: Regularly clean the tub with a soft sponge or cloth and a non-abrasive cleaner. Avoid using abrasive scouring pads or brushes that can scratch the surface. Be sure to rinse thoroughly after cleaning to remove any residue.
3. Avoid heavy objects: Refinished cast iron tubs can be susceptible to chipping or cracking if heavy objects are dropped on them. Be cautious when placing or removing items in the tub to prevent any potential damage.
4. Regular maintenance: To maintain the refinished surface, it's recommended to periodically apply a non-abrasive wax or polish. This can help protect the finish and keep it looking its best.
5. Follow manufacturer's instructions: Every refinishing kit may have specific instructions and recommendations for maintenance. It's important to carefully read and follow the manufacturer's guidelines to ensure the longevity of the refinished cast iron tub.
Remember, proper maintenance is key to preserving the beauty and durability of a refinished cast iron tub. By following these guidelines, you can enjoy your tub for many years to come.
Can a cast iron tub refinishing kit be used on any type of bathtub?
While cast iron tub refinishing kits are specifically designed for cast iron bathtubs, they may not be suitable for other types of bathtubs such as acrylic, fiberglass, or porcelain. Each type of bathtub requires a different refinishing process and specific products that cater to their unique material properties.
For example, acrylic bathtubs are more prone to scratches, so using a cast iron tub refinishing kit on them may not yield the desired results. Similarly, fiberglass bathtubs have a gel coat finish that requires different refinishing techniques.
To ensure a successful refinishing process, it is recommended to use refinishing kits that are specifically formulated for the type of bathtub you have. These kits are readily available in the market, and they come with detailed instructions and appropriate materials for refinishing different types of bathtubs.
If you are unsure about the type of bathtub you have or the appropriate refinishing kit to use, it is best to consult a professional or reach out to the manufacturer for guidance.
Can a cast iron tub refinishing kit fix chips, scratches, or other damages on the tub's surface?
Yes, a cast iron tub refinishing kit can indeed fix chips, scratches, and other damages on the tub's surface. These kits typically come with materials and instructions that allow you to repair and refinish the tub on your own.
The process usually involves cleaning the tub, filling in any chips or scratches with a specialized filler, sanding down the repaired areas, applying primer to the entire surface, and then applying the refinishing coating.
This coating not only restores the appearance of the tub but also provides a protective layer that can help prevent future damage. It is important to carefully follow the instructions provided with the kit and ensure that you have the necessary tools and materials for the job.
If you are unsure of how to proceed or have extensive damage, it may be best to consult a professional refinishing service.
Do cast iron tub refinishing kits come in different colors or finishes?
Yes, cast iron tub refinishing kits do come in different colors and finishes. These kits are designed to provide homeowners with a cost-effective solution to update and revitalize their existing cast iron tubs without the need for a complete replacement.
They typically include all the necessary materials and instructions to complete the refinishing process.
When it comes to colors and finishes, there are a variety of options available in the market. While white is the most common color, there are also kits that offer other color choices such as almond, biscuit, or even custom colors.
Additionally, some kits may offer different finishes like matte, gloss, or textured finishes to suit personal preferences.
Before purchasing a cast iron tub refinishing kit, it is important to carefully read the product description and specifications to ensure that it offers the desired color and finish options. It is also advisable to consult with a professional or follow the manufacturer's guidelines for the best results.
How long does it typically take to refinish a cast iron tub using a kit?
The time it takes to refinish a cast iron tub using a kit can vary depending on several factors. Generally, the process involves several steps such as cleaning, sanding, applying primer, and applying multiple coats of refinishing material.
On average, the entire refinishing process can take anywhere from 2 to 4 days. However, it is important to note that this time frame can be extended or shortened based on the condition of the tub, the complexity of the kit, and the skill level of the person performing the refinishing.
If the cast iron tub is in relatively good condition with minimal damage or imperfections, it may take less time to refinish. Conversely, if the tub requires extensive repairs or has a complicated design, it may take longer to complete the refinishing process.
To ensure the best results and a durable finish, it is recommended to carefully read and follow the instructions provided with the kit, and allocate sufficient time for each step of the refinishing process.
What are the benefits of using a cast iron tub refinishing kit instead of replacing the tub?
Using a cast iron tub refinishing kit offers several benefits compared to replacing the tub entirely. Firstly, it is a cost-effective solution. Refinishing kits are significantly cheaper than purchasing a new tub and hiring professionals for installation.
You can save a substantial amount of money by opting for a refinishing kit.
Secondly, refinishing allows you to preserve the original charm and character of your cast iron tub. If your tub has unique features or designs, refinishing ensures that they remain intact. Replacing the tub might mean losing these distinctive elements.
Moreover, refinishing is a quicker process compared to tub replacement. Instead of dealing with the time-consuming process of removing the old tub, installing a new one, and waiting for additional plumbing work, refinishing can be completed in a matter of days.
This means less disruption to your daily routine.
Lastly, using a cast iron tub refinishing kit is an environmentally friendly choice. By extending the lifespan of your existing tub, you are reducing waste and minimizing the amount of material that ends up in landfills.
Overall, opting for a cast iron tub refinishing kit is a cost-effective, time-saving, and eco-friendly alternative to replacing the tub entirely.
What is a cast iron tub refinishing kit and how does it work?
A cast iron tub refinishing kit is a product designed to restore the appearance and functionality of a worn-out or damaged cast iron bathtub. It typically contains a combination of cleaning agents, primers, and coatings that are specifically formulated for cast iron surfaces.
The process of using a cast iron tub refinishing kit involves several steps. First, the tub needs to be thoroughly cleaned and any rust or stains should be removed using the provided cleaning agents. Once the tub is clean and dry, a primer is applied to ensure proper adhesion of the coating.
After the primer has dried, multiple layers of the refinishing coating are applied using a brush or roller, allowing each layer to dry before applying the next one.
The refinishing coating creates a durable and waterproof finish that not only enhances the appearance of the tub but also protects it from further damage. It can effectively cover up scratches, chips, and other imperfections, giving the tub a fresh and renewed look.
Following the instructions provided with the kit is essential to achieve the best results.
What is the average cost of a cast iron tub refinishing kit?
The average cost of a cast iron tub refinishing kit can vary depending on the brand, quality, and included materials. On average, a basic cast iron tub refinishing kit can range from $50 to $100. However, there are also premium kits available that can cost upwards of $200 or more.
These higher-end kits often include additional refinishing materials and tools, and may provide better results in terms of durability and appearance. It is important to consider the specific needs of your cast iron tub, as well as your budget, when choosing a refinishing kit.
Additionally, it is recommended to read reviews and compare different brands before making a purchase, as the quality and effectiveness of these kits can vary significantly.