I Tested And Reviewed 9 Best Toilet Fill Valve Replacement Kit (2023)
Selecting the right toilet fill valve replacement kit is critical for proper toilet function and longevity. With so many options on the market, it can be overwhelming trying to determine which kit is best suited for your needs. When shopping for a fill valve replacement, there are a few key factors to consider.
First, look at the valve's compatibility. Toilet valves come in different sizes and configurations, so you'll need one made specifically for your existing toilet model. Measure the old fill valve carefully and check dimensions before purchasing a new kit to ensure proper fitting. Additionally, newer valves are often compatible with both gravity-fed and pressurized water supply lines, so double-check to get one that works with your plumbing setup.
You'll also want to consider adjustability and ease of installation. Look for a valve kit with adjustable components, allowing you to customize water levels and flows. Tool-free and easy hookup options are ideal for hassle-free replacement. And of course, make sure the product is durable and made of quality materials that won't result in leaks or need frequent repairs down the road.
Taking the time to find the optimal toilet fill valve replacement kit will pay off with years of reliable performance. Do your research, measure precisely, and choose a top-rated valve compatible with your existing toilet. A high-quality fill valve replacement kit gets the job done right the first time.
9 Best Toilet Fill Valve Replacement Kit
| # | Product Image | Product Name | Product Notes | Check Price |
|---|---|---|---|---|
|
1
|
 |
The product is ideal for repairing and improving the performance of 2-inch flush valve toilets.
|
|
|
|
2
|
 |
The product is ideal for replacing toilet flush valves and ensuring a water-saving, high-performance, and noiseless toilet operation.
|
|
|
|
3
|
 |
The product is ideal for replacing the fill valve in toilets to ensure efficient and quiet filling.
|
|
|
|
4
|
 |
The product is ideal for DIY toilet installations to prevent siphoning and ensure proper filling.
|
|
|
|
5
|
 |
The product is ideal for saving water and repairing toilets with a dual flush valve system.
|
|
|
|
6
|
 |
The product is ideal for repairing and replacing the fill valve and flapper in a toilet.
|
|
|
|
7
|
 |
The product is ideal for replacing old or damaged toilet flappers in Toto toilets and other similar models.
|
|
|
|
8
|
 |
The product is ideal for repairing and improving the functionality of a toilet's fill valve, flapper, rod, and float.
|
|
|
|
9
|
 |
The product is ideal for repairing and replacing faulty toilet fill valves in a cost-effective manner.
|
|
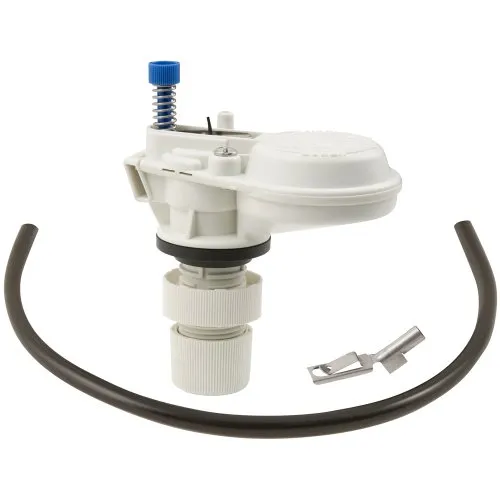
1. Fluidmaster Repair Kit: High-Performance All-In-One For 2-Inch Toilets
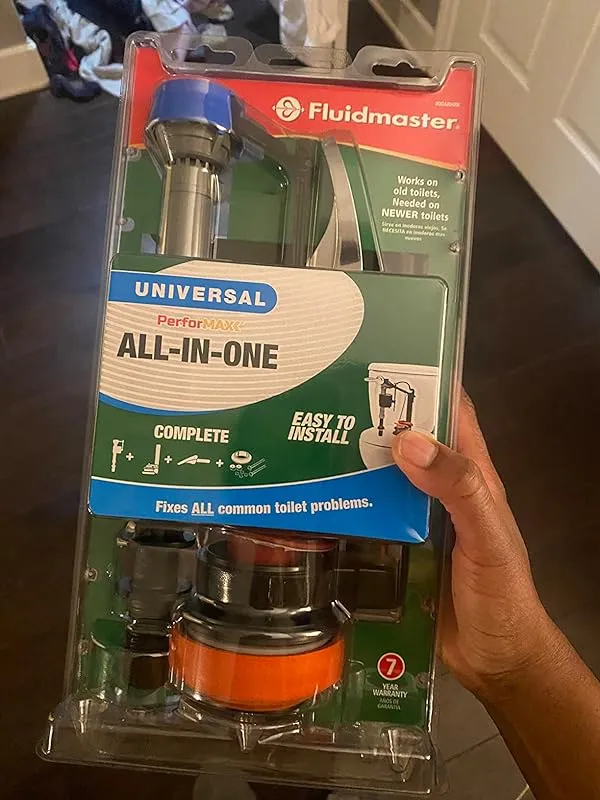
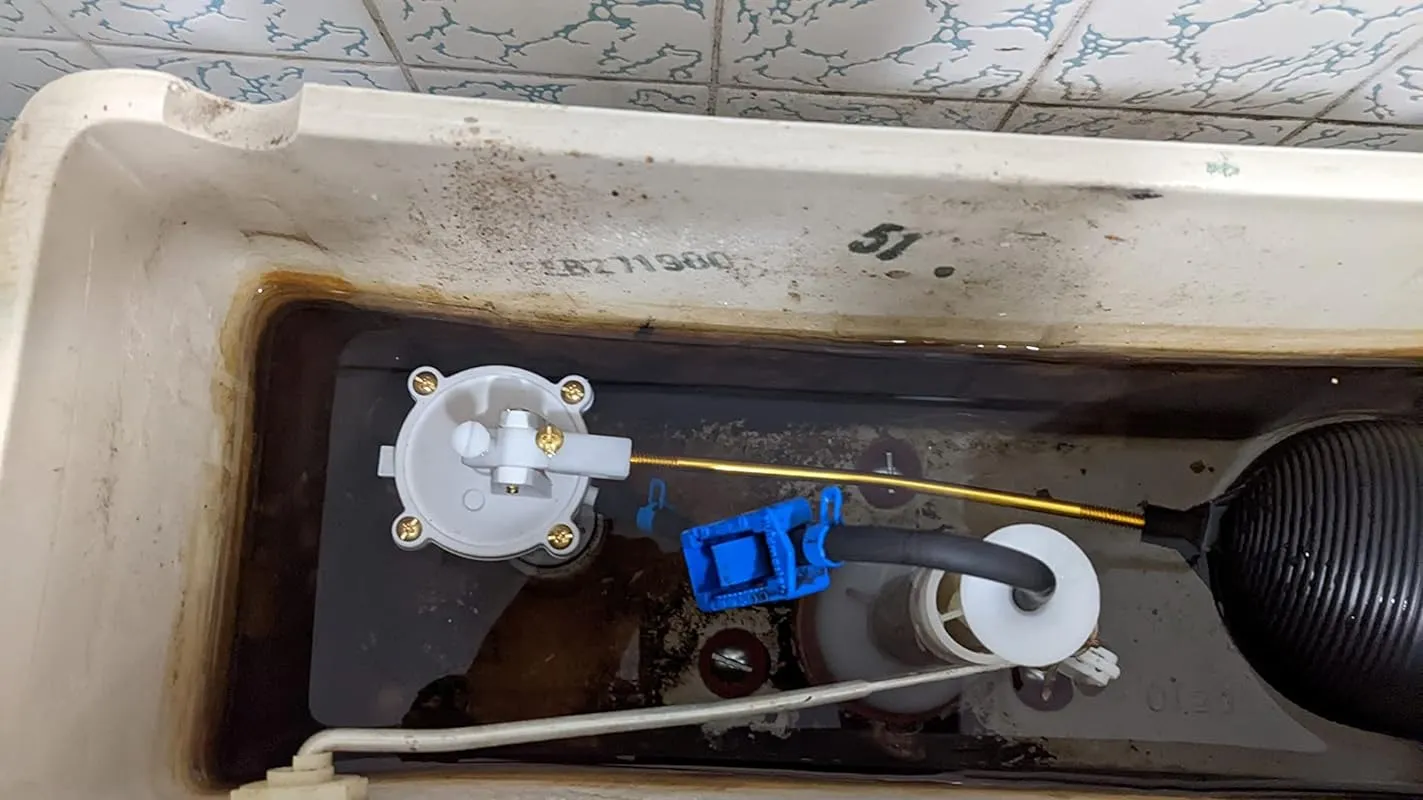
The FluidMaster kit is a comprehensive solution for replacing all the flushing components in your toilet tank. It is designed for toilets with a 2-inch diameter tank flush valve opening, which is the standard size for most toilets. However, it is important to verify the size of your valve before purchasing to avoid any compatibility issues.
I recently replaced a 22-year-old Danco flush system with this FluidMaster kit, and I am pleased with the results. The old system had a float ball on the end of a rod to control the water supply flow, but it often caused my toilet to run endlessly after flushing. While I could have tried to fix the old system or replace specific parts like the flapper and chain, I decided to upgrade the entire tank with this kit to ensure everything was in optimal condition.
One of the standout features of the FluidMaster kit is its adaptability. It allows you to adjust the fill valve float height, overflow tube height, tank water usage, and water level in the toilet bowl. This level of customization ensures that you can tailor the performance of the kit to meet your specific needs.
The installation process was relatively straightforward and took me about an hour from start to finish. The FluidMaster flush mechanism is not the quietest option on the market, but it is not overly noisy either. It does take slightly longer to complete a flush cycle compared to my old Danco system. Initially, the flush cycle took almost 2 minutes, which felt like a waste of water. However, the kit includes a thumb-roll valve on the bowl fill tube, which allows you to adjust the flow rate of water back into the bowl during tank refilling. By restricting the flow rate, I was able to reduce the noise, shorten the refill time, and prevent excess water from overflowing into the waste line. This adjustment feature was particularly useful for me, considering the proximity of the toilet to my bedroom.
The only component of the kit that I did not use was the new flush lever handle and arm. The original lever that came with my toilet was still in good shape and made of high-quality chromed metal. In comparison, the new lever in the kit was made of lightweight chromed plastic, which did not impress me. Therefore, I would recommend reusing your old lever if it is in good condition, as it will work well with the other new components in the tank.
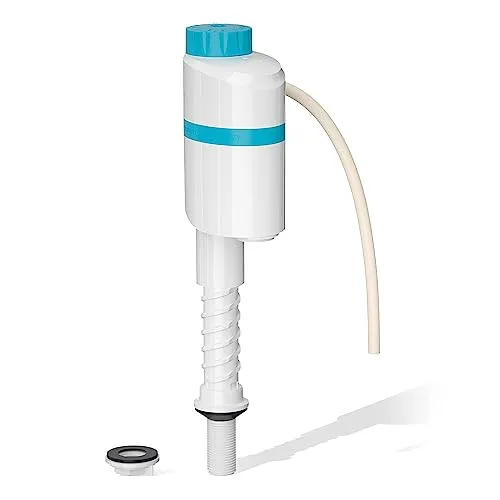
2. Samodra Adjustable Water Level Toilet Valve Kit
I recently purchased the SAMODRA fill valve and I am extremely pleased with my purchase. The installation process was a breeze, thanks to the easy-to-follow instructions provided. I experienced no issues or complications during or after the installation.
One thing to note is that the product photos may give the impression that you are purchasing additional components such as the overflow tube, flush valve, and flapper. However, this is not the case. You will only receive the fill valve assembly and its various parts. This was not a problem for me, as I was specifically looking for a fill valve assembly.
In terms of performance, the SAMODRA fill valve has exceeded my expectations. It is incredibly quiet, much quieter than the Fluidmaster valve it replaced. The water fills up quickly, and I particularly appreciate the easy adjustment of the water level using the knob at the top. This feature allows for personalized water level preferences.
I was also pleasantly surprised to find a special note in the instructions cautioning against the use of bleach tablets in the toilet tank. It appears that these tablets can degrade the components of the SAMODRA valve. This attention to detail demonstrates the manufacturer's commitment to maintaining the longevity and functionality of their product.
In addition to its impressive performance, the SAMODRA fill valve has resolved a longstanding issue I had with whistling noises from my previous Fluidmaster valves. Despite clearing the lines and replacing the valves, the annoying whistling persisted. However, since installing the SAMODRA fill valve, the whistling noise has completely disappeared. I am delighted to have finally found a solution to this problem.
As a musician, noise can be a significant irritant for me. The sound of toilet tank filling is one of those noises that can be particularly bothersome. However, since purchasing the SAMODRA fill valve, I have been able to enjoy a quiet and peaceful flushing experience. The noise reduction has greatly improved my overall satisfaction with my toilet.
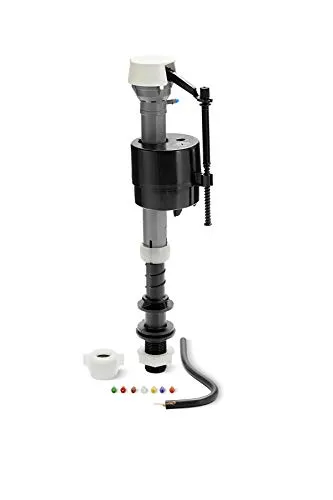
3. Kohler Genuine Part Gp1138930 Silent Fill Toilet Fill Valve Kit, 12.5" L X 3.5" W X 3" H Inches

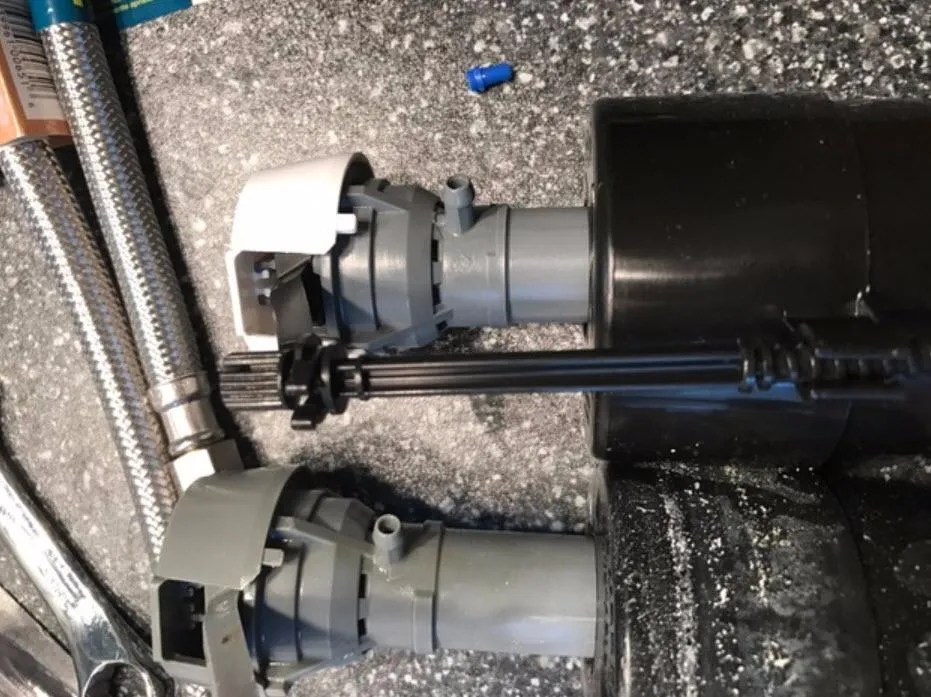
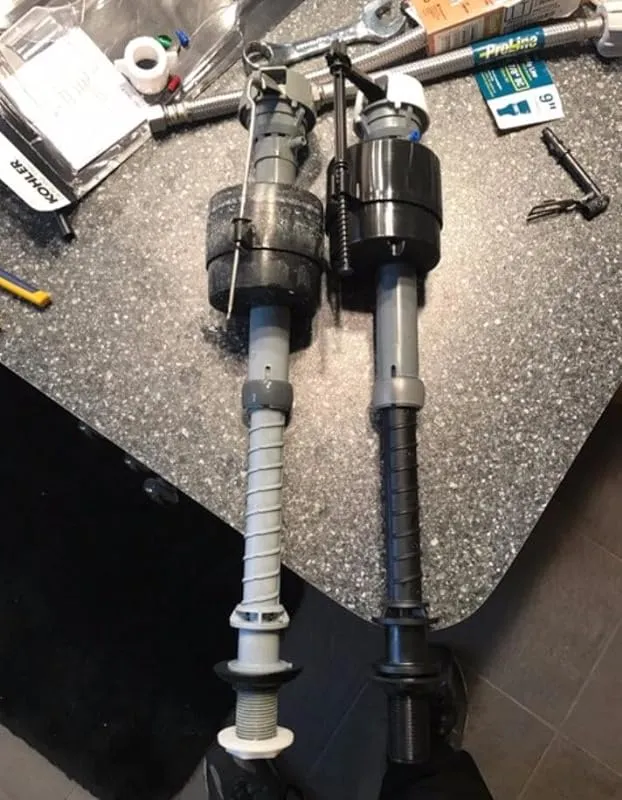
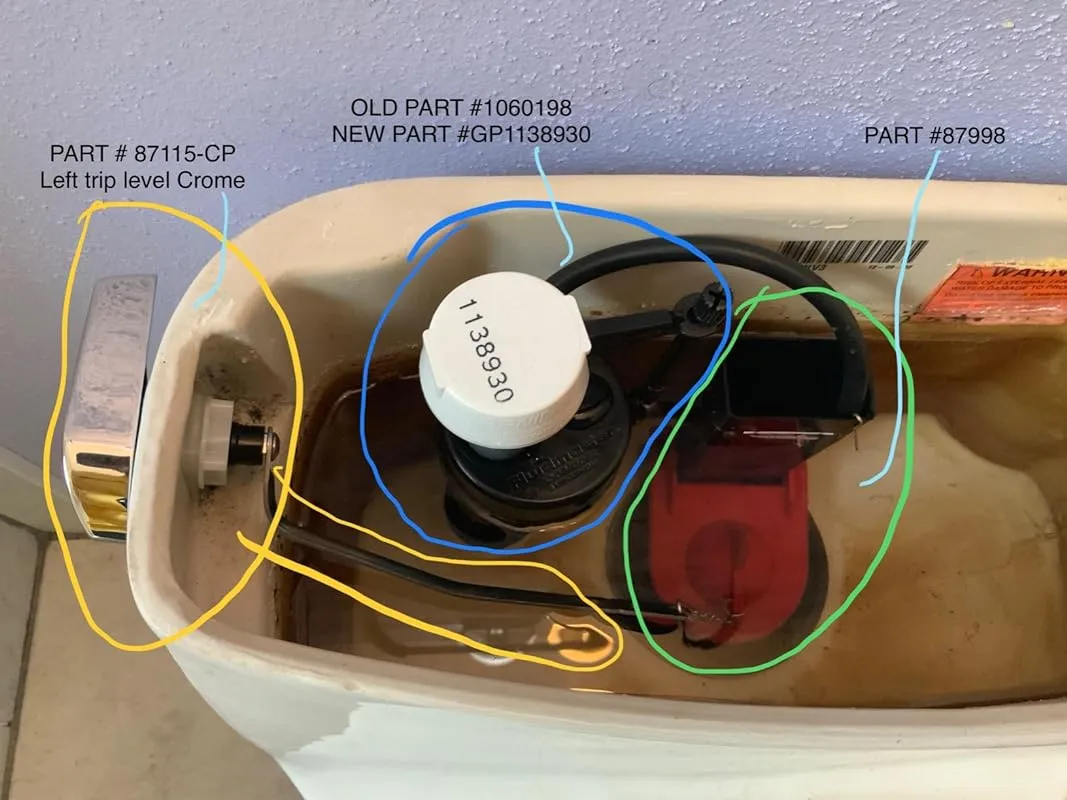
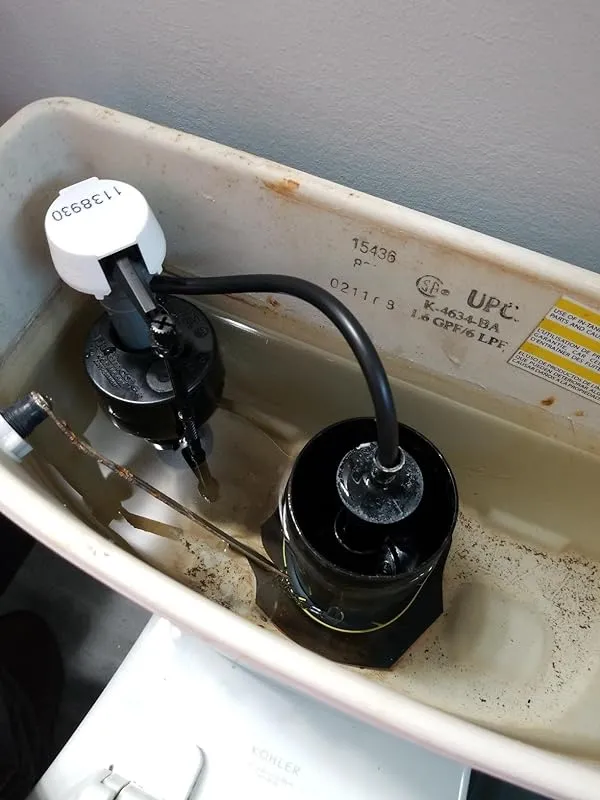
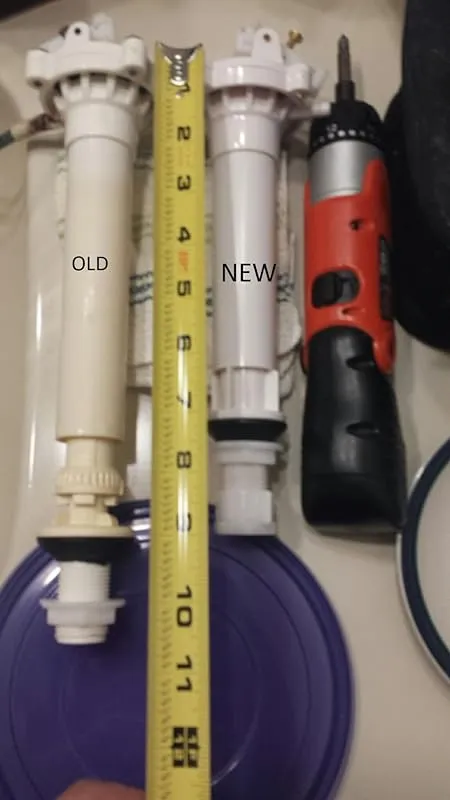
I recently purchased the Kohler GP1138930/400a fill valve to replace my old one that lasted an impressive 25 years. The longevity of the original valve was remarkable, but it had started to show signs of wear and needed to be replaced. After doing some research, I decided to order this valve from Amazon.
Upon receiving the valve, I immediately noticed that it was almost identical to my old one. The major difference was the change from a metal float adjustment rod to a threaded plastic screw rod. I found this change to be a positive improvement, as it made adjusting the float much easier.
One feature worth noting is that the new valve is expandable in length, allowing it to fit tanks up to 14 inches in depth. This was the same setup as my old valve, so I simply matched the length to what was previously set. The gray valve stem has 1-inch increments up to 13 inches, making it simple to adjust.
The valve also comes with color-coded water restrictors for the output hose. While my old valve did not have any restrictors, I opted not to use them with the new valve. However, depending on your situation, they may be necessary.
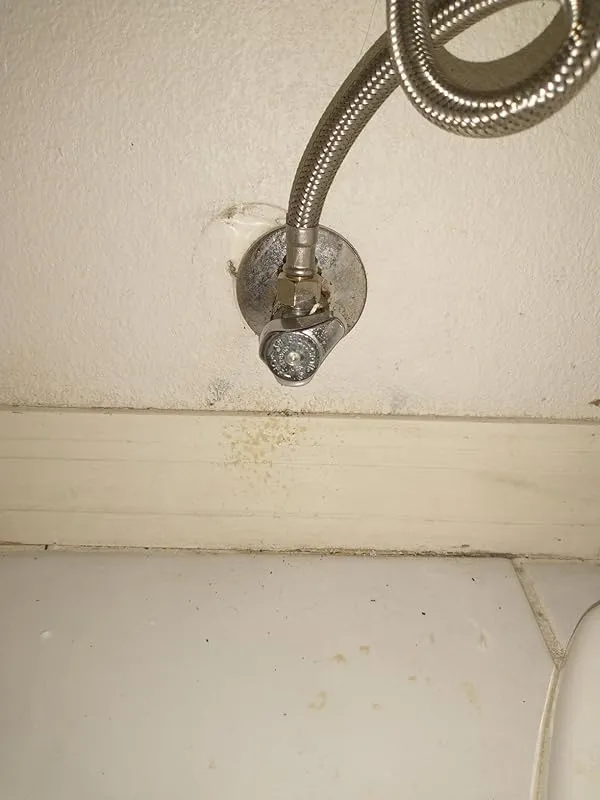
Installation of the new valve was straightforward, and I was able to complete it in under an hour. As someone who is not particularly skilled in plumbing, I appreciated the simplicity of the installation process. Only one trip to the hardware store was needed for a new stainless supply line, which I decided to replace alongside the valve.
The Kohler GP1138930/400a valve is not only easy to install but also easy to adjust for fluid flow and shutoff height. Even for someone like me, who struggles with plumbing, this valve was a breeze to work with.
Based on my positive experience, I have decided to order two more valves, along with new stainless flex water lines and flush handles, for the other toilets in my house. If one valve lasted nearly 25 years, I can only assume that the others are nearing the end of their lifespan as well.
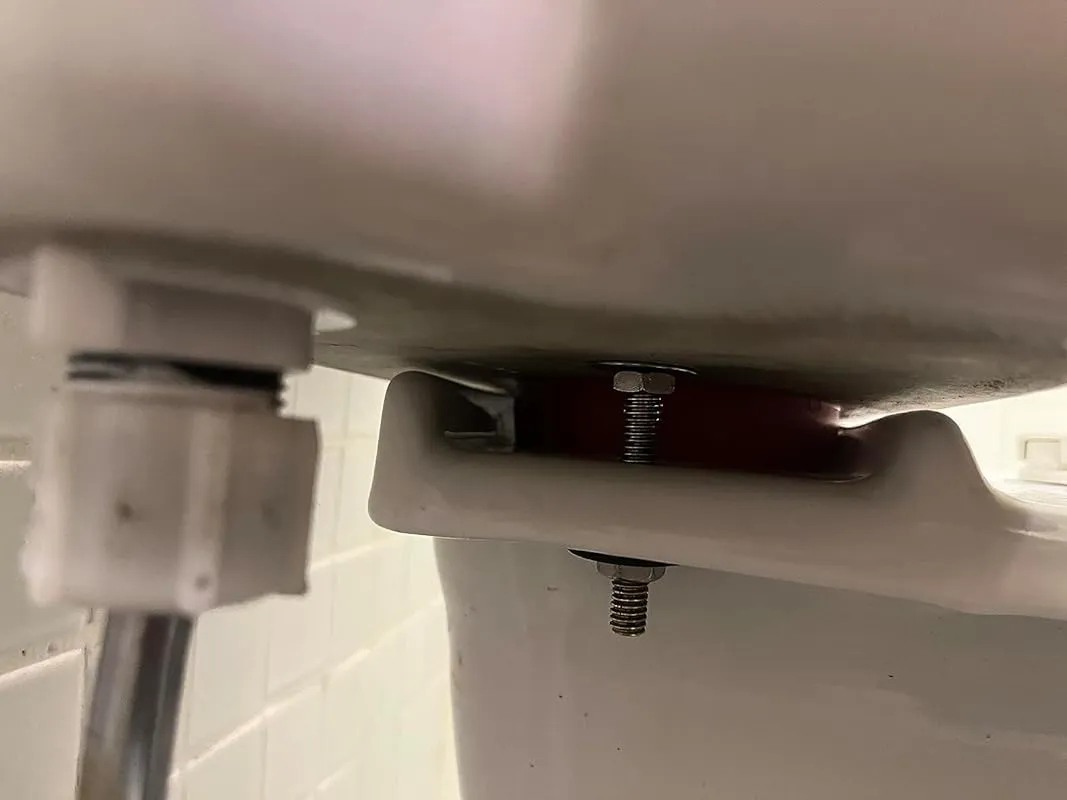
4. Plumbcraft 7030050 Waxman Toilet Fill Valve Replacement-Diy Anti-Siphon Installer Kit-White
I recently replaced my old fill valve with a new one and I couldn't be happier with the results. The old fill valve was causing me a lot of trouble, especially as it got older. It took forever to refill the tank and it was just a hassle overall. So, I decided to try out a new brand and I'm glad I did.
The new fill valve I purchased has a similar style of refilling, but it works much better. It fills the tank in about 15 seconds, which is a huge improvement compared to the minute and a half I had to wait before. It's also fairly quiet, not completely silent, but definitely not as noisy as the old one. Installation was a breeze and I was able to easily replace the old valve with the new one.
I read some reviews before purchasing and noticed that there were mixed opinions. However, I can only speak for the product I received, and it definitely deserves a 5-star rating. The installation process was simple and straightforward. I turned off the water, flushed the toilet, and dried out the tank. Then, I removed the old valve, installed the new one, and reconnected the water supply line. It took me around 10 minutes from start to finish, and my wife is happy with the lack of running water noise.
The new fill valve has a rugged and simple design, but it works exactly as advertised. It's a durable piece of equipment that is easy to install and adjust. The only downside is that it emits a high-pitched sound when it's nearing the fill line, but it's not too loud and doesn't bother me much.
I must admit, I was used to the old ballcock or float around the tube setup, but the new fill valve is a much better alternative. It functions flawlessly and I have been using it for about 3 years now without any issues. It gets flushed multiple times a day by both kids and adults, and it still works perfectly fine.
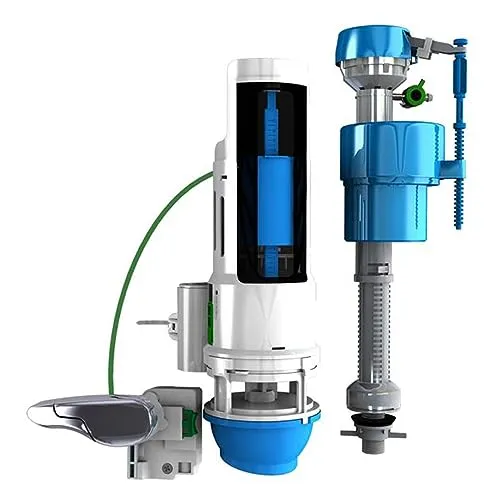
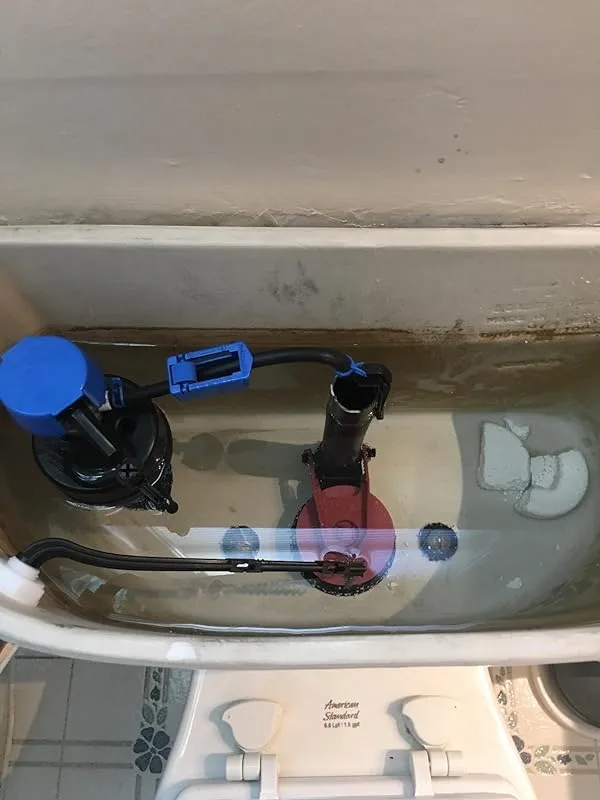
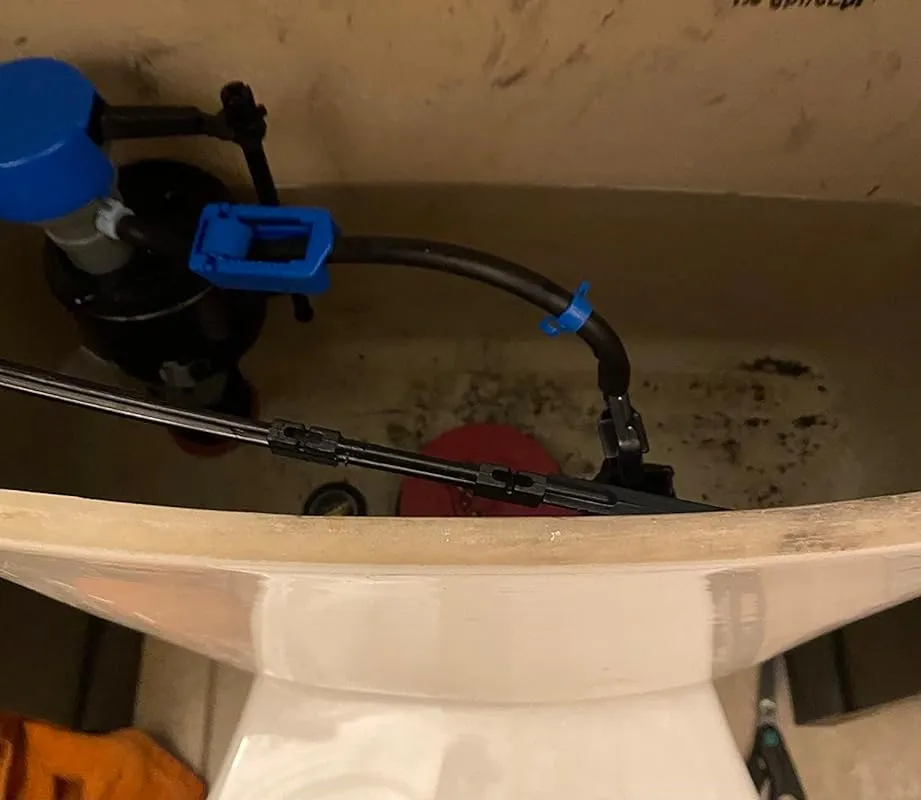
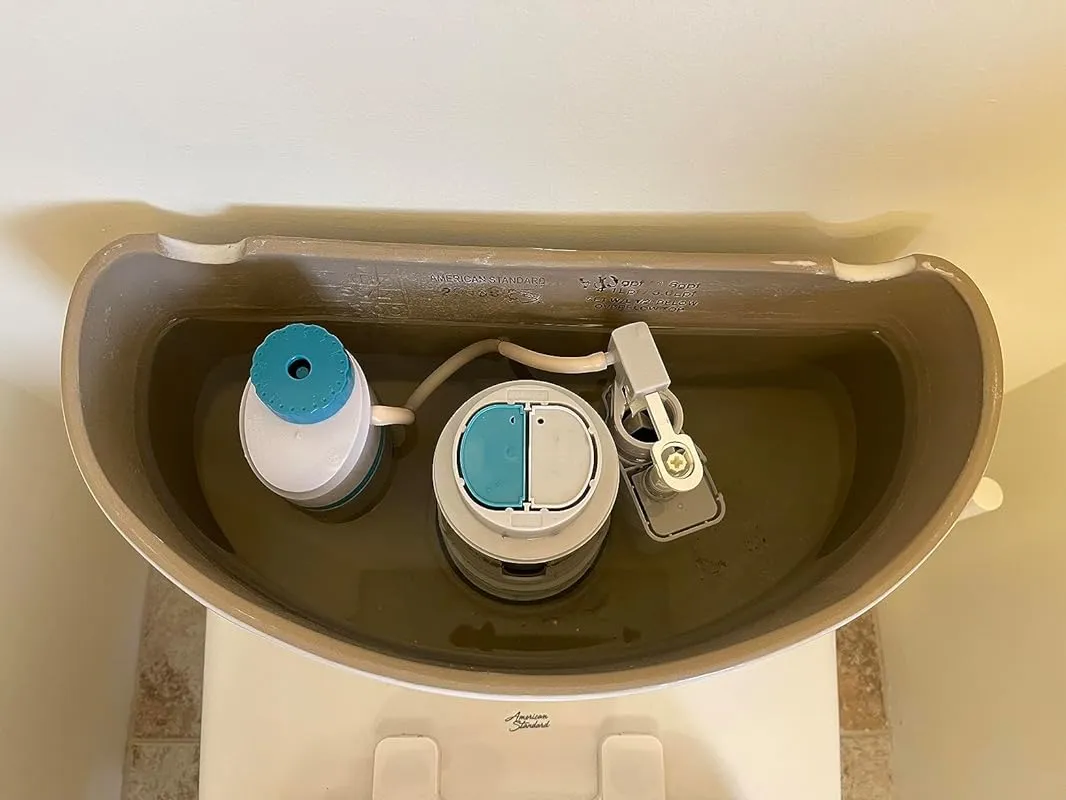
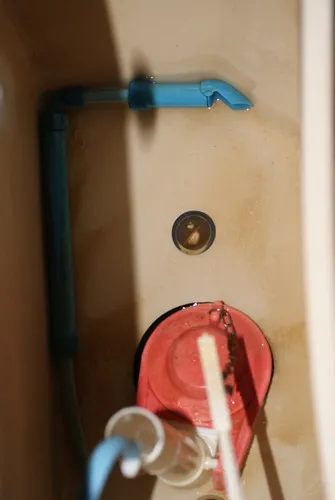
5. Danco Hydroright Dual Flush Toilet Repair Kit – White
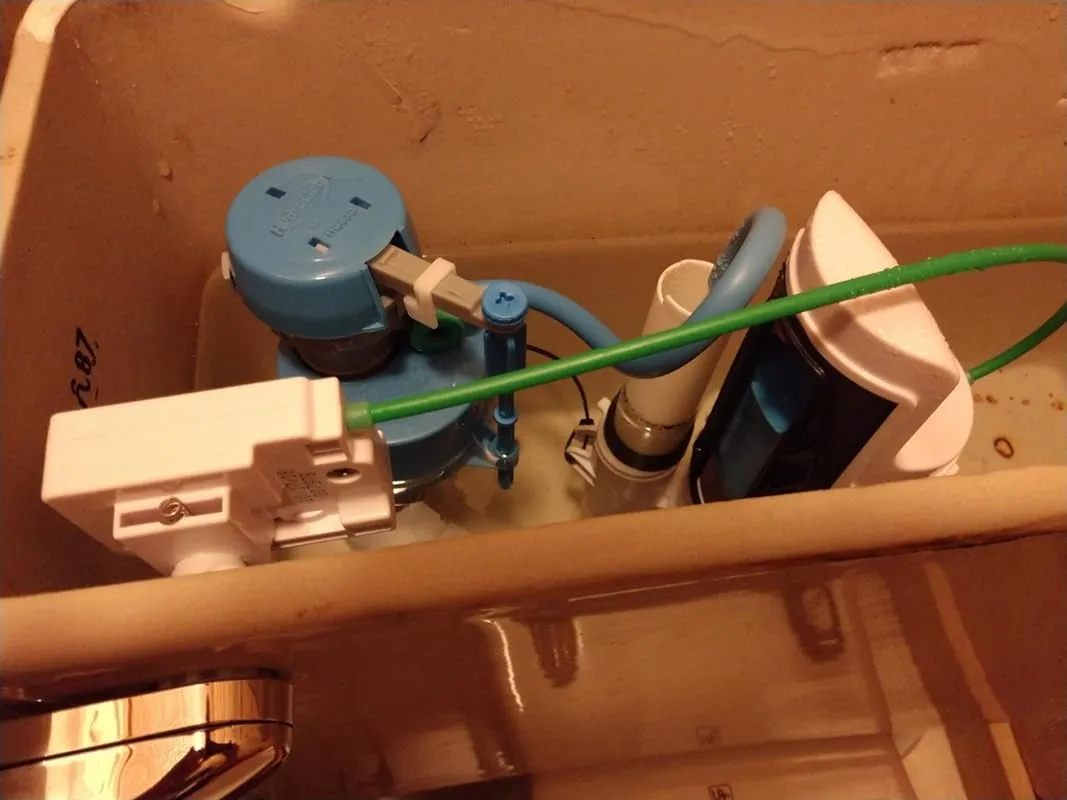
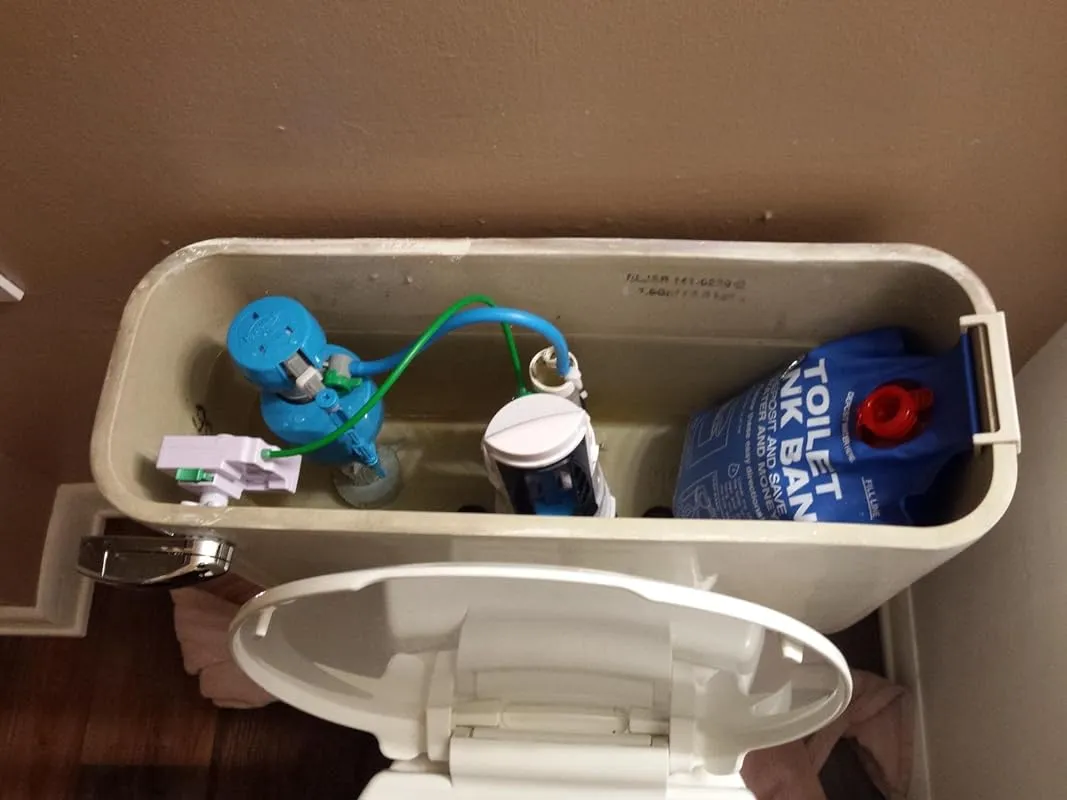
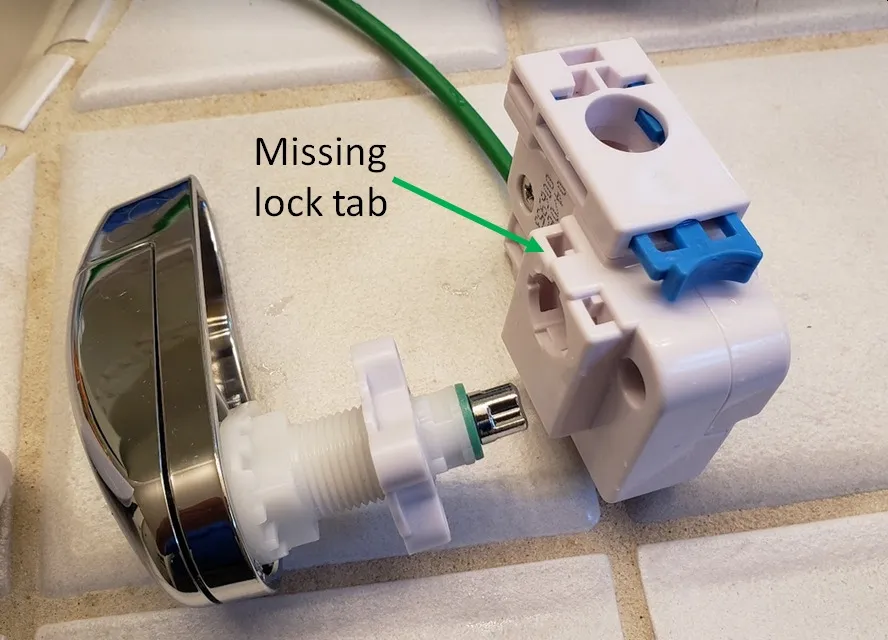

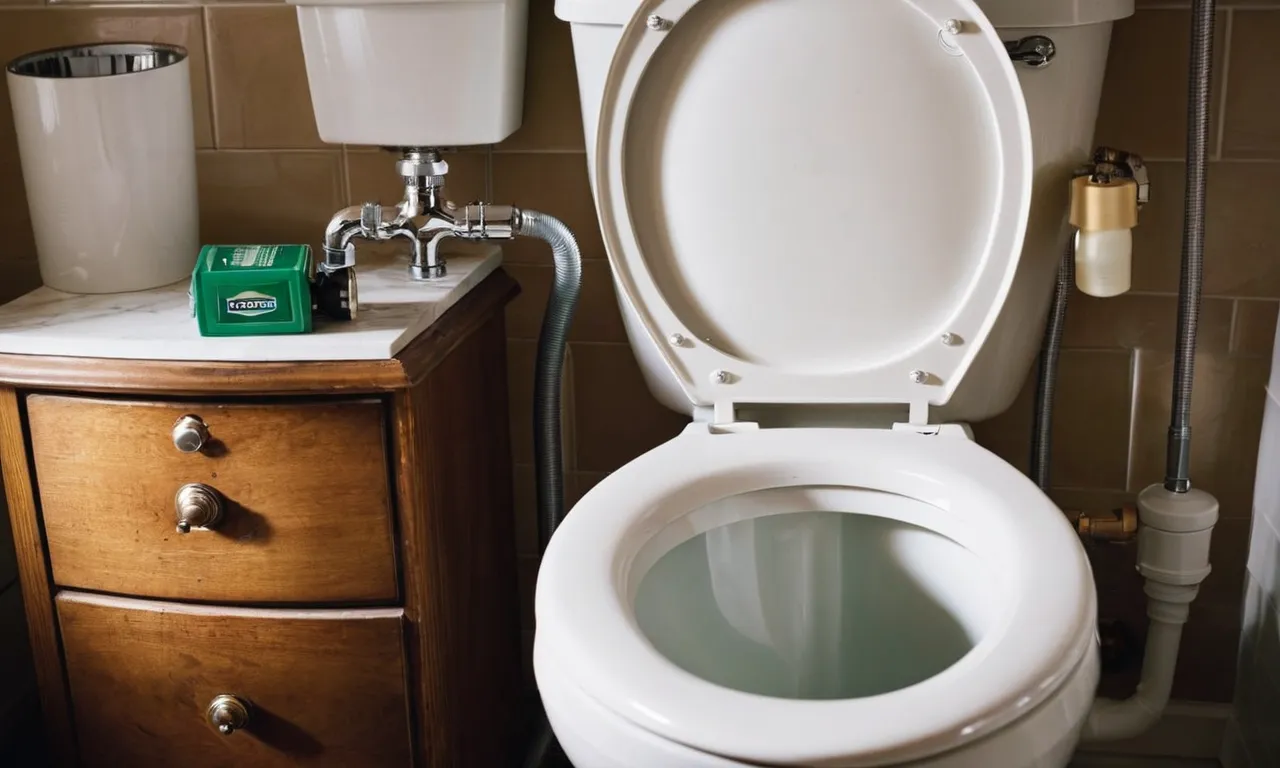
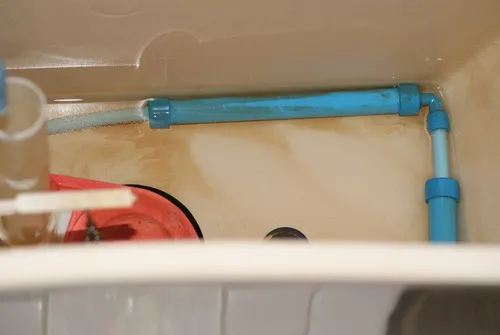
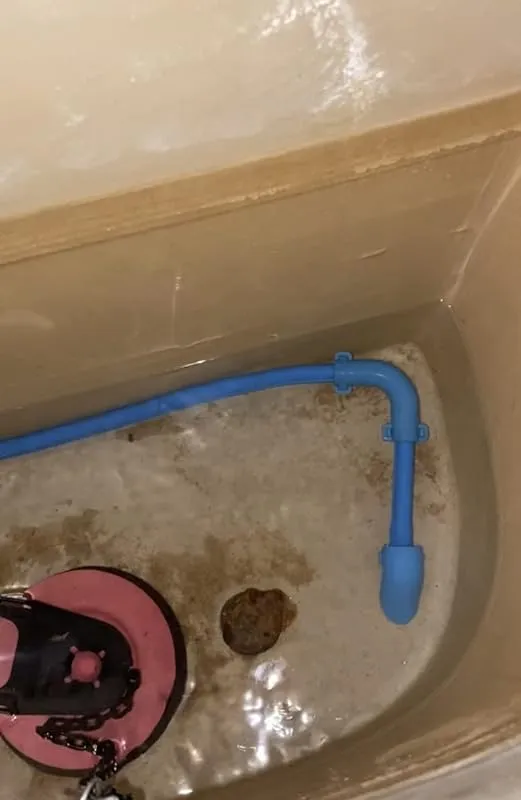
The installation process for this product was incredibly easy and quick. It took me less than an hour to install and make the necessary adjustments, all while my husband was at work. I absolutely love the concept of this product, especially the quick flush option that uses significantly less water compared to the traditional flush. This feature alone has the potential to save us a significant amount of money on our water bill. In addition to using this product, we also decided to utilize a tank bank, as shown in the photo, to further maximize our water savings.
However, I must mention a few caveats and issues that I encountered during the installation process. Firstly, it is important to ensure that there is enough clearance to prevent any kinking of the lines. Additionally, when installing the handle valve, which is the plastic box that goes inside the tank and is attached to the handle, it is crucial to ensure that there are no obstructions in its path. The instructions provided with the product were somewhat vague when it came to which lines should be attached where on the handle, which caused some confusion. Despite these minor setbacks, I was able to complete the installation within 30-40 minutes. I should note that a significant portion of this time was spent fine-tuning the product.
One of the main issues that this product solves for me is the problem of a constantly running toilet, which not only wastes water but also adds to the expenses. I have been using this product in a heavily-used Airbnb for a couple of months now, and I am pleased to report that there have been no complaints from guests regarding its functionality. If it continues to perform well and lasts for at least six months, I will definitely consider installing it in other bathrooms as well.
Initially, I had some doubts about its functionality because I was used to handles that did not require holding down. However, once I held down the handle for about three or four seconds, it worked perfectly fine. I did notice that the water flow was not as fast as with the old flapper style valve, but it still effectively flushes solids. One aspect that I appreciate is that it uses less water with the smaller flush option. However, I do wish that the icons indicating the small and large flush were slightly more visible, as I often have to actively search for them. Additionally, I receive numerous questions from guests on how to properly use the product, so it would be beneficial if it were more self-explanatory. Perhaps a more prominent and easily recognizable solid/liquid icon would be helpful in this regard.
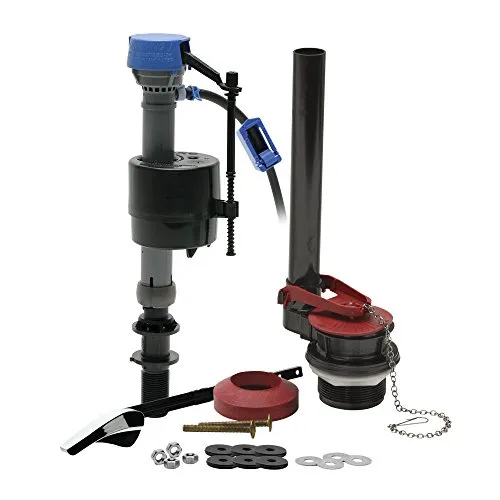
6. Fluidmaster 400c Fill Valve And 2 Inch Flapper Toilet Repair Kit
I recently had to replace the refill valve in my toilet for the first time, and I was initially overwhelmed by the instructions. However, I found that if you take the time to read them carefully, they are actually very clear and easy to follow. Depending on your specific system, you may be able to skip certain steps or not use all the parts included.
In my case, I didn't need to replace the flapper seal as it was still in good condition. This made the installation process simpler and saved me some time. I also didn't need to use all the external connections, which further streamlined the process.
Despite my initial hesitation, I decided to give it a try and was pleasantly surprised by how quick and straightforward the installation was. It only took me about 20-30 minutes, and now I feel confident that I could do it even faster next time.
There was one part of the instructions that I could have figured out on my own, but I'm glad I followed them because they included a water level adjustment step that I wouldn't have known otherwise. It was a simple adjustment, but an important one for optimal performance.
I had a problem with my toilet running constantly, and I determined that the refill valve was the issue. After researching various options, I decided to go with this refill valve, which was priced at around $10.
Since my valve stem was still in good condition, I only needed to replace the top valve piece. The installation process was simple and quick. I was able to remove the lock washer on the old valve, lift it off, slide the new one on, and secure it with the washer. Then, I attached the plastic water tube. Within just a couple of minutes, my toilet was no longer running.
This refill valve setup worked perfectly for me. I didn't need to use the refill stem or the flapper that came with it, so the repair process was even easier. I simply reused my old flapper mount, which saved me some additional time and effort.
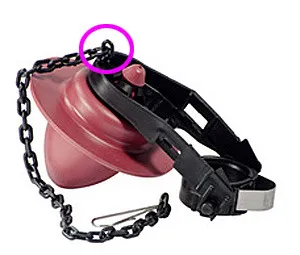
7. Toto Toilet Flapper Replacement Kit
The Universal Toilet Flapper Replacement Kit is a reliable and efficient solution for any leaking toilet. With its easy installation process, even for those with limited plumbing experience, this product ensures a hassle-free replacement in just minutes.
The quality of these flappers is commendable, as they are well-made and designed to last for years. The rubber material used provides the necessary rigidity to effectively seal the drain hole, preventing any water leakage into the bowl.
For those experiencing water wastage due to a faulty flapper, this product is a cost-effective solution. By replacing the old flapper with the Universal Toilet Flapper Replacement Kit, you can effectively fix the running toilet and reduce water consumption, resulting in a noticeable improvement in your water bill.
Furthermore, this kit not only includes a single flapper but also provides three additional flappers for other toilets in your house. This ensures that you have spare parts readily available for any future replacements, saving you time and effort in the long run.
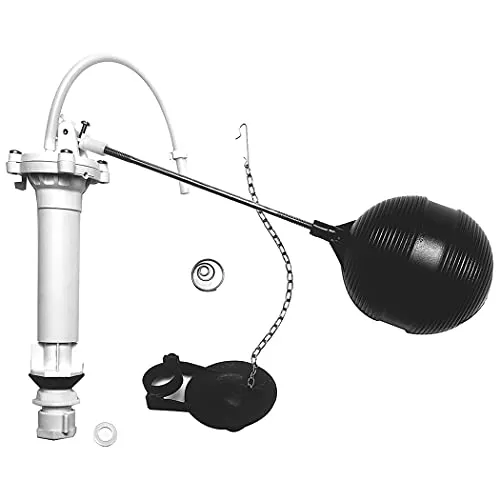
8. Danco 80816 Complete Toilet Repair Kit Fill Valve, Flapper, Rod, Float Replacement, White
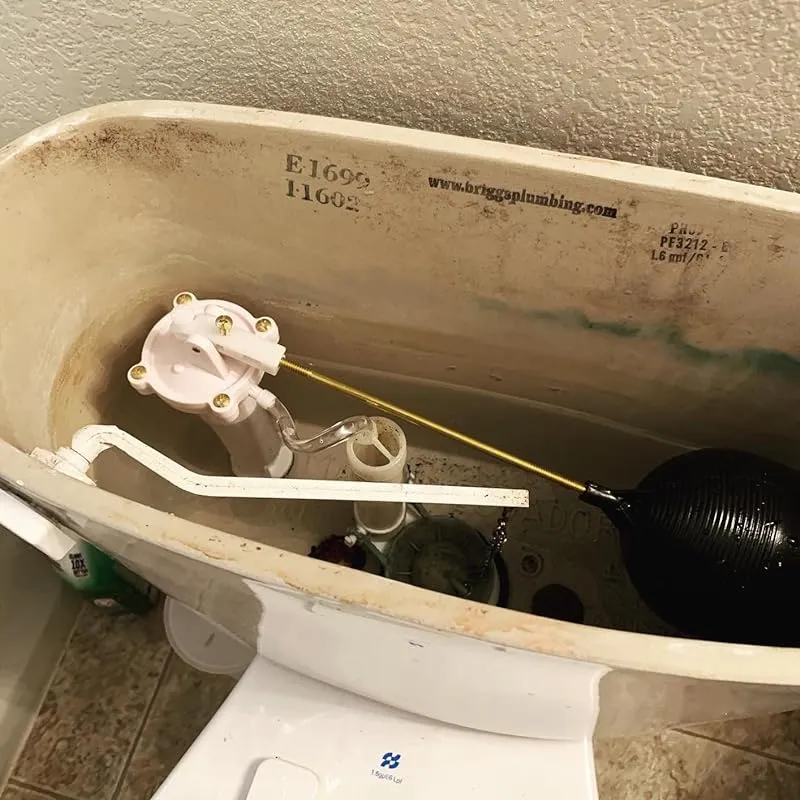
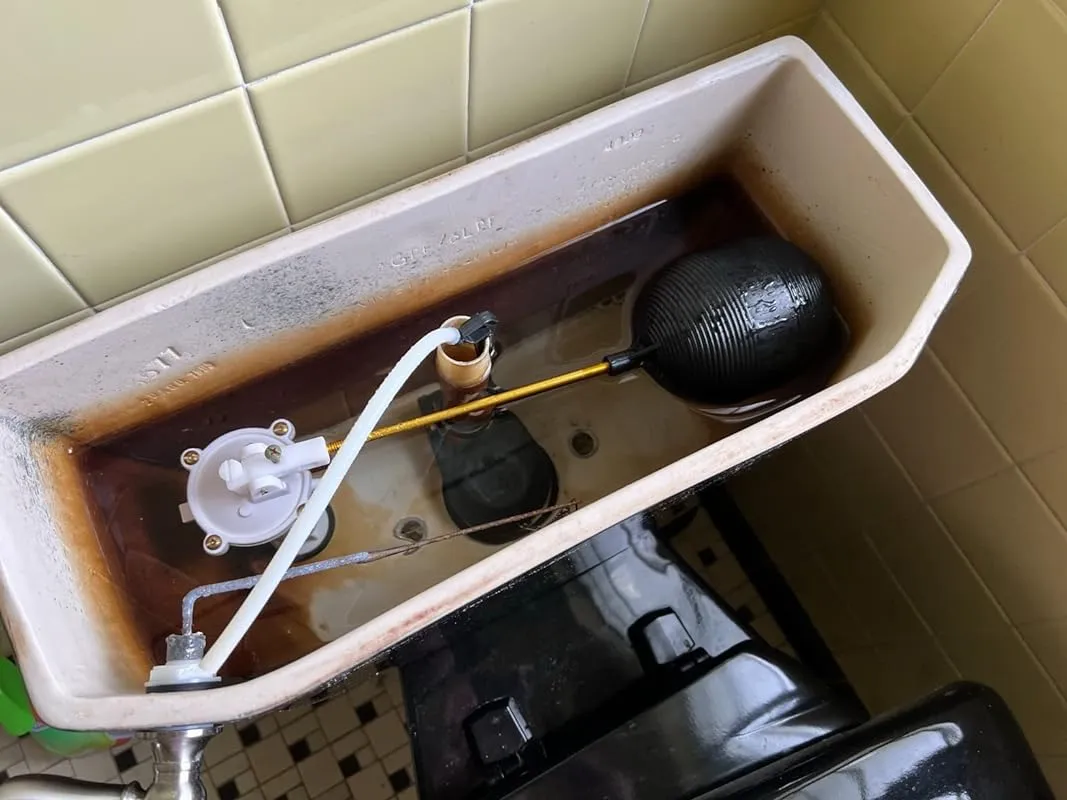
I recently installed the Danco fill valve in my 40-year-old toilet, and I must say, I am impressed. The installation process was a breeze, taking me less than 15 minutes. I had to bend the ball rod slightly to achieve a higher water level, but it was easily adjustable with a basic screwdriver.
I opted for the more traditional ball and leveler design instead of the newer all-in-one models because I find it easier to level the water. From my personal experience, the all-in-one models don't last as long. I've heard great things about Danco's durability, and so far, it has lived up to its reputation. In fact, it was easier to install the Danco fill valve than it was to uninstall the old one.
One thing to note is that the length of the Danco fill valve is not adjustable like the newer styles. However, it fit perfectly in my older toilet, which can only accommodate this type of ballcock valve. The fittings were the same size, and I was able to adjust the water level to the "water fill mark" in the tank. I did have to secure and spray into the tank instead of using the bowl filler and tube, but it worked well for my 1985 commode.
The Danco fill valve works great and has solved my previous leakage issue. The only minor inconvenience I encountered was that the pole was a bit too long for my toilet, but I easily bent it to the desired height. If you have a thin and tall water tank, you may want to consider the height of the fill valve before purchasing.
9. Danco Hc660 Toilet Fill Valve Repair Kit, Pack Of 1, Blue White
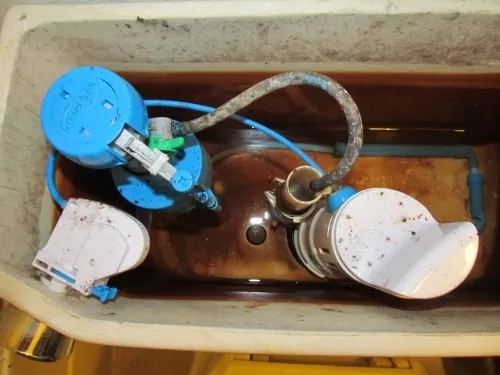
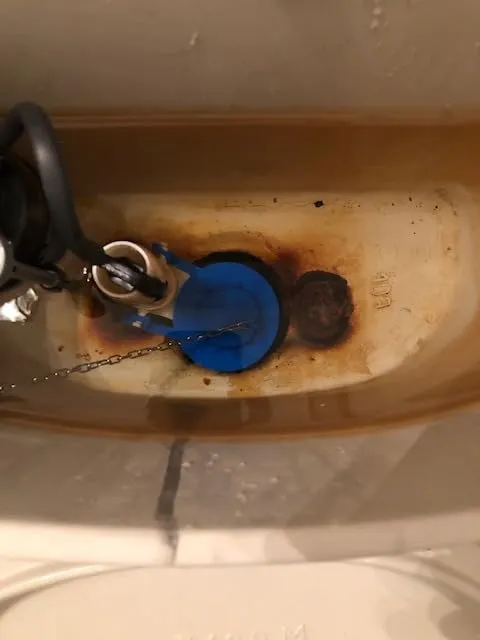
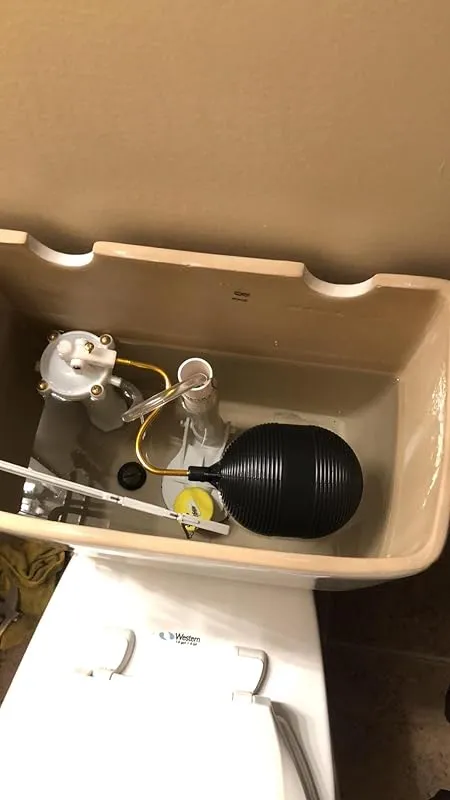
I recently installed the Hydroclean valve in all four of my toilets and I must say, it has exceeded my expectations. As an engineer, I was curious to see how much water was being wasted with the previous fill valve. After conducting a test, I was shocked to discover that I was wasting three quarters of a gallon of water with every flush.
The Hydroclean valve has solved this problem by allowing me to adjust the flow of water into the toilet bowl, ensuring that it is filled just enough without any wastage. This not only saves water but also helps in reducing water bills.
I was also impressed with how effectively the J-tube directed water flow to the stagnant side of the toilet tank, cleaning the bottom of the tank. Initially, the water was cloudy due to the sediment and scum being stirred up, but after a few flushes, the tank was clean and free from any scum or build-up. This has also prevented any leaks caused by scum buildup, saving me the hassle of constantly replacing the flapper.
One thing to note is that you may need to measure the distance between the floor valve and the fill valve inlet in the back of the toilet if you don't have a flex supply tube. I had to make an additional trip to the hardware store to get new flex supply tubes. Additionally, I replaced the flappers to ensure everything was in top condition.
An update on the performance of the Hydroclean valve after three years of use – everything is still working well and we have saved a substantial amount of water. I recently replaced the flapper with a new dual flush valve and was pleasantly surprised to find the tank reasonably clean after three years. The bottom of the flapper was also very clean, with minimal black grit. This further reinforces my high recommendation for this product.
FAQs
Are all toilet fill valve replacement kits universal, or do I need to find one specific to my toilet model?
Toilet fill valve replacement kits are not universally compatible with all toilet models. It is crucial to find a replacement kit that is specific to your toilet model. Each toilet manufacturer may have different specifications and dimensions for their fill valves, so using the wrong kit may result in improper functioning or even damage to your toilet.
To determine the right replacement kit for your toilet, you can start by identifying the make and model of your toilet. This information is usually printed on the inside of the tank or can be found in the owner's manual.
With this information, you can either contact the manufacturer directly or search for compatible fill valve replacement kits online or at your local hardware store.
If you are unsure or unable to find the exact replacement kit for your toilet model, it is recommended to consult a professional plumber who can provide guidance and suggest suitable alternatives.
Are there any common mistakes or challenges to be aware of when replacing a toilet fill valve?
When replacing a toilet fill valve, there are a few common mistakes and challenges that you should be aware of. First, it is important to ensure that you turn off the water supply to the toilet before starting the replacement process. Failure to do so can result in water leakage and potential damage.
Another common mistake is not properly aligning the new fill valve with the existing water supply line. It is crucial to ensure a tight and secure connection between the fill valve and the water supply line to prevent any leaks.
One challenge that you may encounter is removing the old fill valve, especially if it has been in place for a long time. The old valve may be corroded or stuck, making it difficult to remove. In such cases, using penetrating oil or a wrench may help loosen it.
Lastly, it is essential to follow the manufacturer's instructions carefully when installing the new fill valve. Each model may have specific requirements and steps that need to be followed for proper installation.
If you are unsure or uncomfortable with replacing a toilet fill valve, it is recommended to seek the assistance of a professional plumber. They have the necessary expertise and tools to handle the job efficiently and effectively.
Are there any specific instructions or steps I should follow when replacing a toilet fill valve?
When replacing a toilet fill valve, there are several key instructions and steps that you should follow to ensure a successful installation. Here is a general guideline to help you through the process:
1. Turn off the water supply: Locate the shut-off valve near the base of the toilet and turn it clockwise to shut off the water supply.
2. Drain the tank: Flush the toilet to drain as much water as possible from the tank. Use a sponge or towel to soak up any remaining water.
3. Disconnect the water supply line: Unscrew the nut connecting the water supply line to the bottom of the tank. Have a bucket or towel handy to catch any water that may still be in the line.
4. Remove the old fill valve: Unscrew the nut underneath the tank that secures the fill valve. Carefully lift the old fill valve out of the tank.
5. Install the new fill valve: Insert the new fill valve into the hole at the bottom of the tank. Secure it with the nut provided, ensuring it is tightly fastened.
6. Reconnect the water supply line: Attach the water supply line to the fill valve by screwing the nut back on. Make sure it is snug but not over-tightened.
7. Turn on the water supply: Slowly turn on the shut-off valve to allow water to fill the tank. Check for any leaks around the connections and tighten if necessary.
8. Adjust the water level: Most fill valves have an adjustable float that determines the water level in the tank. Follow the manufacturer's instructions to set the desired water level.
9. Test the toilet: Flush the toilet a few times to ensure proper functionality and check for any leaks. Make any necessary adjustments.
By following these steps and referring to the specific instructions provided with your new fill valve, you should be able to replace it successfully. If you encounter any difficulties or are unsure about any part of the process, it is recommended to consult a professional plumber for assistance.
Can a toilet fill valve replacement improve water efficiency and reduce water bills?
Yes, a toilet fill valve replacement can indeed improve water efficiency and reduce water bills. The fill valve is responsible for regulating the water level in the toilet tank after each flush. Older fill valves may not function optimally, leading to water wastage by either overfilling the tank or causing constant running water.
By replacing the fill valve with a more modern and efficient one, you can ensure that the toilet tank fills to the correct level and stops when it should, effectively reducing water consumption.
Newer fill valves often come with features like adjustable fill levels, which allow you to customize the amount of water used per flush. Additionally, some fill valves have dual-flush options, providing a lower water volume for liquid waste and a higher volume for solid waste.
By taking advantage of these features, you can further enhance water efficiency and contribute to lower water bills.
It is important to note that a fill valve replacement is just one component of a water-efficient toilet system. Other factors like the flapper valve and flush mechanism also need to be considered. Therefore, it is advisable to consult a plumbing professional for a comprehensive evaluation and recommendation for improving water efficiency in your toilet.
Can I replace the toilet fill valve myself, or do I need to hire a professional plumber?
Replacing a toilet fill valve can be done as a DIY project if you have some basic plumbing skills and tools. However, it is important to consider your level of experience and comfort with plumbing tasks before attempting it yourself.
To replace a toilet fill valve, you will need to turn off the water supply, drain the tank, disconnect the old valve, and install the new one. This process may require some manual dexterity and familiarity with plumbing connections.
If you are confident in your abilities and have access to the necessary tools, you can save money by replacing the fill valve yourself.
However, if you are unsure or uncomfortable with the task, it is advisable to hire a professional plumber. They have the expertise and experience to handle such jobs efficiently and effectively, ensuring proper installation and minimizing the risk of leaks or other complications.
It is always better to seek professional help if you are unsure or lack the necessary skills for a plumbing task.
How do I choose the right toilet fill valve replacement kit for my toilet?
Choosing the right toilet fill valve replacement kit for your toilet is essential to ensure proper functioning and prevent any leaks or water wastage. Here are a few steps to guide you in selecting the right replacement kit:
1. Identify the type of toilet: Determine the type of toilet you have, whether it is a standard gravity-flush toilet or a newer pressure-assisted or dual-flush model. This will help you select a compatible fill valve replacement.
2. Measure the height: Measure the height of the existing fill valve to ensure the replacement kit will fit properly. You can do this by removing the tank lid and measuring from the bottom of the tank to the top of the valve.
3. Check the valve type: Different toilets may have different types of fill valves, such as ballcock valves or newer float cup valves. Identify the type of valve in your toilet and look for a replacement kit that matches it.
4. Consider water-saving features: If you are concerned about water conservation, look for a fill valve replacement kit that offers water-saving features, such as adjustable refill rates or dual-flush options.
5. Read product reviews: Before making a purchase, read reviews from other customers to ensure the replacement kit is of good quality and reliable.
If you are unsure about the right replacement kit for your toilet, it is recommended to consult a professional plumber who can provide guidance based on your specific toilet model and requirements.
How do I know if I need to replace my toilet fill valve?
If you are experiencing issues with your toilet such as constant running, inconsistent water levels, or slow filling, it may be an indication that you need to replace your toilet fill valve. These problems can arise due to a faulty or worn-out fill valve.
To confirm if a replacement is necessary, you can perform a simple test. Start by turning off the water supply to your toilet and flushing it to empty the tank. Then, place a few drops of food coloring into the tank. Wait for about 15-20 minutes without flushing.
If you notice the colored water seeping into the bowl, it suggests that the fill valve is not sealing properly and needs to be replaced. Remember, if you are unsure or uncomfortable performing the replacement yourself, it is always advisable to seek the assistance of a professional plumber.
How much does a toilet fill valve replacement kit typically cost?
The cost of a toilet fill valve replacement kit can vary depending on the brand, quality, and where you purchase it from. On average, a basic fill valve replacement kit can range from $10 to $20. These kits usually include the fill valve, float, refill tube, and necessary mounting hardware.
However, if you prefer a more advanced or premium fill valve, the cost can go up to $30 or more. Keep in mind that prices may also vary depending on your location and the specific retailer you choose. It's always a good idea to compare prices and read reviews before making a purchase.
Additionally, if you're uncertain about replacing the fill valve yourself, it's recommended to consult a professional plumber for assistance.
What are the signs of a faulty toilet fill valve?
A faulty toilet fill valve can lead to various issues that can be easily identified through certain signs. Firstly, if your toilet is constantly running, it could indicate a problem with the fill valve. This means that water is continuously flowing into the tank, even when it is not being used.
Another sign is weak or inconsistent flushing. If you notice that the water flow is weak or the flush is not powerful enough, it could be due to a malfunctioning fill valve. Additionally, if you hear strange noises coming from your toilet, such as hissing or gurgling sounds, it could be a sign of a faulty fill valve.
Finally, if you notice water leaking around the base of the toilet or into the bowl, it is likely caused by a faulty fill valve. In such cases, it is advisable to have a professional plumber inspect and replace the faulty fill valve to avoid further damage and water wastage.
What tools do I need to replace a toilet fill valve?
To replace a toilet fill valve, you will need a few basic tools. Here's a list of the essential tools you'll need:
1. Adjustable wrench: This is necessary for loosening and tightening nuts and bolts. You can use it to disconnect the water supply line and detach the old fill valve.
2. Channel-lock pliers: These pliers are useful for gripping and turning pipes. You may need them to unscrew the coupling nut that connects the fill valve to the toilet tank.
3. Screwdriver: Depending on your toilet's configuration, you may need either a flathead or a Phillips screwdriver. This tool will help you remove screws or fasteners holding the fill valve in place.
4. Bucket or towels: When disconnecting the water supply line, it's a good idea to have a bucket or towels nearby to catch any water that may spill.
Additionally, it's always a good idea to have a replacement fill valve on hand before starting the project. This will ensure a smooth replacement process.