Can You Spackle Over Paint? Everything You Need To Know
Painting walls can leave unsightly imperfections like nail holes, cracks, and chips. If you want your walls to look flawless, you’ll need to fill in those flaws with spackle or joint compound. But what if the wall is already painted? Can you still spackle over paint?
The short answer is yes, you can spackle over paint if you use the right products and techniques. In this comprehensive guide, we’ll walk through everything you need to know about spackling over painted walls to get professional-looking results.
What Is Spackle and When Should It Be Used?
Spackle is a versatile material used in home improvement projects to fill in small holes, cracks, and imperfections on walls, ceilings, and other surfaces. It is a type of putty that is applied to the damaged area and then smoothed out to create a seamless surface.
Spackle is typically used before painting or wallpapering, as it helps to create a smooth and even base for the new finish.
What is spackle made of?
Spackle is made from a combination of gypsum powder, binders, and water. The gypsum powder acts as the main filler, while the binders help to hold the mixture together. When water is added to the powder, it forms a paste-like consistency that can be easily applied to the damaged area.
Once dry, spackle hardens and can be sanded down to create a smooth surface.
Benefits of using spackle
There are several benefits to using spackle for small repairs and touch-ups around the house. Firstly, spackle is easy to work with and can be applied using a putty knife or a finger. It dries quickly, allowing for a faster project completion time.
Additionally, spackle is a relatively inexpensive material, making it a cost-effective option for DIY enthusiasts. It also has good adhesive properties, ensuring that it stays in place and provides a durable repair.
When to use spackle vs. joint compound
While spackle is great for small repairs, it is important to know when to use spackle versus joint compound. Spackle is best suited for filling in small holes, cracks, and dents, such as those left by nails or screws. It is ideal for repairing damaged drywall or plaster surfaces.
Joint compound, on the other hand, is used for larger repairs and for creating smooth seams between drywall panels. It is a thicker material that requires more drying time.
It is worth noting that spackle can be used on top of painted surfaces. However, it is important to ensure that the paint is clean and free from any dirt or grease. Lightly sanding the painted surface before applying spackle can also help to improve adhesion.
For more information on spackle and its uses, you can visit websites such as Home Depot or This Old House.
Can You Spackle Over Painted Walls?
Painted walls can sometimes develop imperfections over time, such as small holes, dents, or cracks. If you’re wondering whether you can spackle over these painted surfaces, the answer is yes, you can! Spackling is a great solution for repairing minor damages and achieving a smooth, flawless surface.
Using spackle on painted walls
When using spackle on painted walls, it’s important to follow a few steps to ensure the best results. First, clean the area that needs to be repaired by removing any loose paint or debris. Then, apply a thin layer of spackle to the damaged area using a putty knife or a spackle knife.
Smooth out the spackle, making sure to blend it with the surrounding painted surface. Allow the spackle to dry completely before sanding it down gently with fine-grit sandpaper. Finally, once the surface is smooth, you can apply a fresh coat of paint to match the rest of the wall.
Potential issues and solutions
While spackling over painted walls is generally a straightforward process, there are a few potential issues that you might encounter. One common problem is color variation between the spackle and the surrounding paint.
To address this, you can try mixing a small amount of paint with the spackle to create a better color match. Another issue is shrinkage, which can occur as the spackle dries. To minimize shrinkage, it’s advisable to apply multiple thin layers of spackle rather than one thick layer.
Additionally, it’s important to note that spackle is not suitable for large or deep holes in painted walls. For such repairs, it’s recommended to use joint compound or plaster instead. These materials are better suited for filling larger gaps and can provide a more durable and long-lasting solution.
Choosing the right spackle for painted walls
When selecting a spackle for painted walls, it’s crucial to choose the right type of spackle for the job. Lightweight spackle is ideal for small repairs, as it dries quickly and is easy to sand. It’s suitable for filling nail holes, small cracks, and minor blemishes.
On the other hand, heavy-duty spackle is better suited for larger repairs and can be used to fix more significant damage, such as larger holes or deep cracks.
It’s always a good idea to read the manufacturer’s instructions and guidelines before using any spackle product. This will ensure that you choose the appropriate spackle for your specific needs and achieve the best results.
How To Spackle Over Painted Walls
Materials needed
Before you start spackling over painted walls, gather the necessary materials. You will need:
- Spackle paste
- Putty knife or a spackle knife
- Sandpaper
- Primer
- Paint
Having these materials on hand will ensure a smooth and successful spackling process.
Prepping the wall
Before applying spackle, it is important to prepare the wall properly. Start by cleaning the area around the damaged or uneven paint. Use a mild detergent and warm water to remove any dirt or grease that may affect the adhesion of the spackle.
Once the area is clean and dry, use painter’s tape to mask off the surrounding area to prevent any accidental spackle application.
Applying the spackle
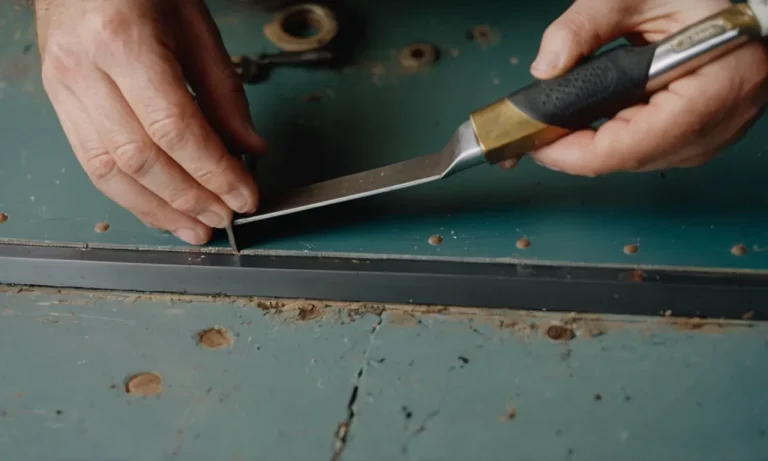
Using a putty knife or a spackle knife, scoop a small amount of spackle paste onto the blade. Apply the spackle to the damaged or uneven area in a smooth, even motion. Make sure to fill in the entire area and feather it out around the edges for a seamless blend with the surrounding paint.
Allow the spackle to dry according to the manufacturer’s instructions.
Smoothing and drying time
Once the spackle is dry, gently sand the area using fine-grit sandpaper. This will help to smooth out any rough edges or imperfections. Be careful not to sand too aggressively, as this could damage the surrounding paint. After sanding, wipe away any dust with a clean cloth or sponge.
Sanding
To achieve a smooth and even finish, sand the patched area once more. Start with a coarser grit sandpaper and gradually move to a finer grit to achieve the desired smoothness. This step is crucial to ensure that the patched area blends seamlessly with the rest of the wall.
Priming and painting
After sanding, it’s time to prime the patched area. Apply a thin coat of primer to ensure proper adhesion of the paint. Once the primer is dry, you can proceed to paint the wall. Use the same color and type of paint as the rest of the wall, and apply it in thin, even coats.
Allow each coat to dry before applying the next, and make sure to blend the paint with the surrounding area for a seamless finish.
Remember, spackling over painted walls can be a simple and effective way to repair and restore the surface. Following these steps will help you achieve professional-looking results and keep your walls looking great.
Tips for Getting Great Results with Spackle
Use lightweight spackle
When it comes to spackling over paint, using lightweight spackle is key. Lightweight spackle is easier to work with and dries faster compared to heavier alternatives. It is formulated to be applied in thin layers and can be sanded down smoothly, giving you a seamless finish.
Look for products specifically labeled as lightweight spackle at your local hardware store.
Apply thin coats
When applying spackle over paint, it’s important to apply thin coats rather than slathering on a thick layer. Thin coats not only dry faster but also minimize the chances of cracking or shrinking as the spackle dries.
Apply the spackle using a putty knife, spreading it evenly over the area you want to repair. Remember, it’s easier to add more spackle later if needed than to remove excess spackle.
Let it fully dry before sanding
Patience is key when working with spackle. After applying the spackle, give it ample time to fully dry before sanding. This ensures that the spackle is hardened and ready to be smoothed out. The drying time may vary depending on the brand and environmental conditions, so be sure to read the instructions on the spackle packaging.
Rushing the drying process can result in a less satisfactory finish.
Sand correctly
When it’s time to sand the spackled area, use fine-grit sandpaper or a sanding block. Sand in a gentle circular motion, applying even pressure to avoid creating uneven surfaces. Take your time and periodically check the smoothness of the patched area by running your hand over it.
Once the surface feels smooth and blends well with the surrounding paint, you’re ready to move on to the next step.
Prime before painting
Before applying paint over the spackled area, it’s important to prime it first. Priming helps the paint adhere better and provides a consistent base for the color. Use a high-quality primer and follow the manufacturer’s instructions for application.
Once the primer is dry, you can proceed with painting the patched area, making sure to feather the paint out to blend it seamlessly with the rest of the wall.
Choose the right paint finish
When selecting the paint finish for the spackled area, consider the finish of the surrounding wall. If the surrounding wall has a matte or eggshell finish, it’s best to choose a similar finish for the patched area. This helps to maintain a consistent appearance.
However, if the surrounding wall has a glossy finish, you may want to use a satin or semi-gloss paint for the patched area to match the sheen. Keep in mind that the paint may dry slightly different on the spackled area compared to the rest of the wall, so it’s always a good idea to test the paint in a small inconspicuous area first.
For more detailed information and step-by-step instructions on spackling over paint, you can visit the Home Repair Tutor website at https://www.homerepairtutor.com/spackle-over-paint/.
Common Questions about Spackling Over Paint
How long does spackle take to dry on painted walls?
When it comes to spackling over paint, one common concern is how long it takes for the spackle to dry. The drying time can vary depending on factors such as the thickness of the spackle layer and the ambient temperature.
Generally, spackle can take anywhere from 30 minutes to a few hours to dry completely. It’s important to follow the manufacturer’s instructions for the specific spackle product you are using.
What is the best spackle to use on painted walls?
Choosing the right spackle for painted walls is crucial for achieving a seamless finish. It is recommended to use a lightweight spackle that is specifically designed for use on painted surfaces. These types of spackles are formulated to adhere well to painted walls and provide a smooth finish once dry.
Some popular brands that offer spackles suitable for painted walls include DAP Fast ‘N Final Lightweight Spackling and 3M Patch Plus Primer.
Can you use joint compound over paint?
Using joint compound over paint is not recommended. Joint compound, also known as drywall mud, is typically used for filling and finishing seams between drywall panels. It is not designed for use on painted surfaces.
Joint compound may not adhere properly to paint and can result in a less durable and less visually appealing finish. It is best to remove any loose or damaged paint and then apply spackle specifically designed for painted walls.
Should spackle be sanded before painting?
Before painting over spackle, it is generally recommended to sand the patched area to achieve a smooth and even surface. Sanding helps to blend the spackle with the surrounding painted wall and ensures a seamless finish. Use fine-grit sandpaper or a sanding block to gently sand the spackled area.
After sanding, wipe away any dust with a clean cloth or sponge before applying primer or paint. This extra step will help you achieve professional-looking results.
Conclusion
Spackling over existing paint on your walls is definitely possible with the right products and techniques. Lightweight spackling compounds are formulated to adhere to glossy surfaces like painted walls.
Prepare the surface properly, apply thin coats of spackle, let dry fully, sand smooth, and prime before painting. Following these steps will allow you to flawlessly patch holes and cracks in painted drywall, giving you smooth, professional-looking walls.
With this guide, you can take on small drywall repairs with confidence.


