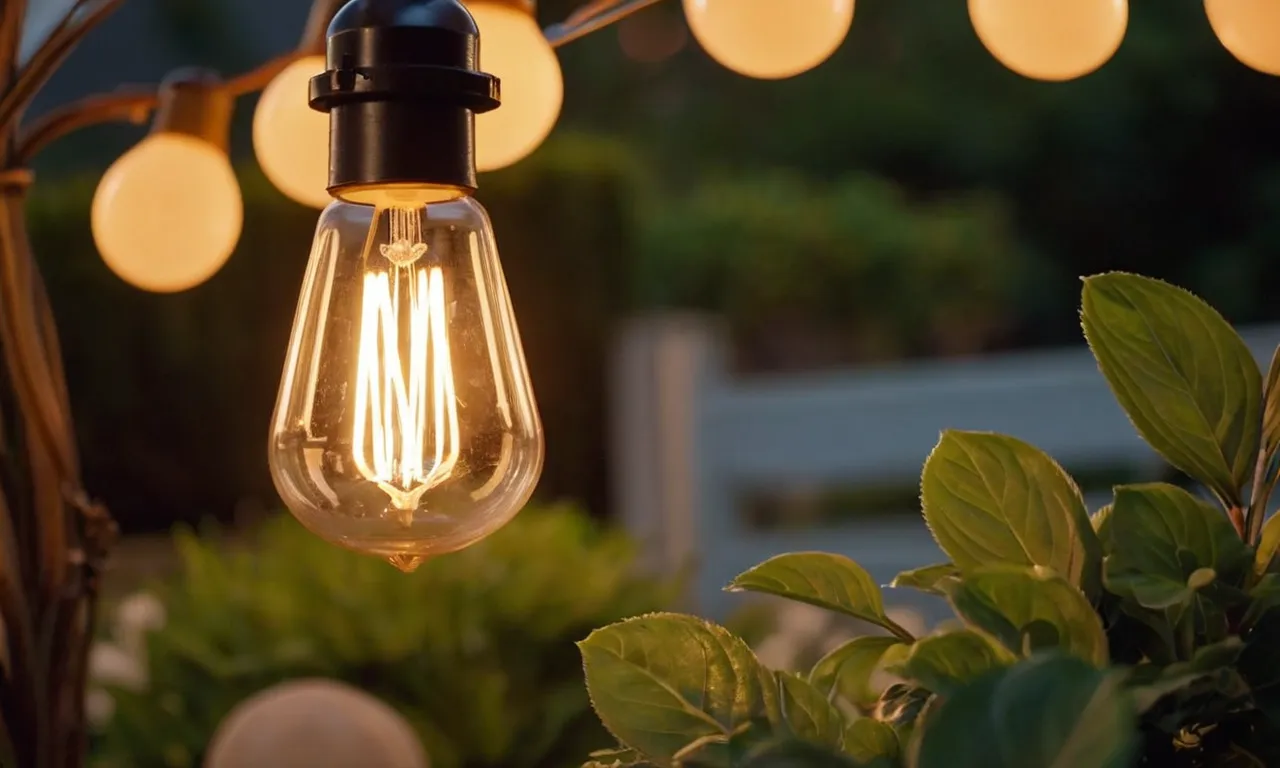
How To Replace The Bulb In Your Hampton Bay Outdoor Lighting
Outdoor lighting not only provides security and visibility at night, but can also be an important decorative element for your home’s exterior. Over time, the bulbs in outdoor lighting fixtures like those made by Hampton Bay will eventually burn out and need replacing.
If you’re short on time, here’s a quick answer to your question: Replacing the bulb in Hampton Bay outdoor lighting involves turning off the power, removing the old bulb, comparing wattages on the new bulb, cleaning the contacts, inserting the new bulb, and restoring power.
Turn Off the Power to the Light Fixture
Before replacing the bulb in your Hampton Bay outdoor lighting, it is crucial to turn off the power to the light fixture. This step ensures your safety and prevents any electrical accidents from occurring. Here are two subheadings that will guide you through the process:
Locate the Circuit Breaker
The first step is to locate the circuit breaker that controls the power supply to the outdoor light fixture. The circuit breaker box is usually found in the basement, garage, or utility room of your home. It is a metal box with multiple switches, each representing a different electrical circuit.
Once you have located the circuit breaker box, open the door and look for the switch labeled “outdoor lighting” or something similar. If you’re unsure which switch controls the outdoor light fixture, you can refer to the user manual of your Hampton Bay lighting system or contact a professional electrician for assistance.
Flip the Breaker Off
After identifying the correct switch, flip it to the “off” position. This action will cut off the power supply to the outdoor light fixture, ensuring that it is safe to proceed with replacing the bulb.
It is essential to double-check that the switch is in the off position by ensuring that the lights connected to the circuit are no longer functioning.
Remember, safety should always be your top priority when working with electrical appliances. Turning off the power at the circuit breaker is a crucial step to prevent any accidents or injuries. If you’re unsure about working with electrical components, it’s always best to seek professional help.
Remove the Old Light Bulb
Replacing the bulb in your Hampton Bay outdoor lighting is a simple task that can be done in just a few steps. The first step is to remove the old light bulb. This can be done by following these instructions:
1. Turn off the Power
Before you begin, make sure to turn off the power to the outdoor lighting fixture. This will ensure your safety while working on the bulb replacement. Locate the switch or circuit breaker that controls the power to the fixture and turn it off.
2. Allow the Bulb to Cool
Once the power is turned off, give the old bulb some time to cool down. Outdoor light bulbs can get hot during operation, so it’s important to avoid any burns or injuries. Wait for a few minutes to ensure the bulb is cool to the touch before proceeding.
3. Remove the Bulb Cover or Shade
Depending on the design of your Hampton Bay outdoor lighting fixture, you may need to remove a cover or shade before accessing the bulb. Look for any screws or clips that hold the cover in place and carefully remove them. Gently lift off the cover or shade and set it aside.
4. Unscrew the Bulb
With the cover or shade removed, you should now have clear access to the old bulb. Use a firm grip and twist counterclockwise to unscrew the bulb from its socket. Be careful not to apply too much pressure, as this could cause the bulb to break or shatter.
5. Dispose of the Old Bulb
Once the old bulb is removed, it’s important to dispose of it properly. Outdoor light bulbs are typically made of glass and contain small amounts of mercury. Check your local recycling guidelines to find out the proper way to dispose of the bulb.
That’s it! You have successfully removed the old light bulb from your Hampton Bay outdoor lighting fixture. Now you’re ready to move on to the next step of replacing it with a new bulb.
Purchase the Replacement Bulb
When it comes to replacing the bulb in your Hampton Bay outdoor lighting, there are a few factors to consider. The first step is to purchase the replacement bulb. Here are some tips to help you make the right choice:
Match the Wattage Rating
One important factor to consider when purchasing a replacement bulb is to match the wattage rating of the original bulb. The wattage rating refers to the amount of power the bulb consumes. Using a bulb with a higher wattage rating than recommended can lead to overheating and potentially damage your lighting fixture.
On the other hand, using a bulb with a lower wattage rating may result in dimmer light output. Therefore, it is essential to find a replacement bulb with the same wattage rating as the original bulb.
Choose the Correct Shape and Base
Another crucial consideration is selecting a replacement bulb with the correct shape and base. Hampton Bay outdoor lighting fixtures come in various shapes and sizes, so it’s important to choose a bulb that fits properly.
Additionally, the base of the bulb must match the socket in your lighting fixture. Common base types include screw-in (Edison), bayonet, and pin bases. Check the base type of your existing bulb before purchasing a replacement to ensure compatibility.
It’s worth noting that some Hampton Bay outdoor lighting fixtures may require specific types of bulbs, such as LED or fluorescent bulbs. In such cases, it is advisable to consult the manufacturer’s guidelines or the Hampton Bay official website for specific recommendations.
The official Hampton Bay website is a reliable source of information and can provide you with detailed specifications for your lighting fixture.
By following these guidelines and purchasing the correct replacement bulb, you can ensure that your Hampton Bay outdoor lighting continues to illuminate your outdoor space effectively and efficiently.
Clean the Light Bulb Contacts
Before replacing the bulb in your Hampton Bay outdoor lighting, it is important to clean the light bulb contacts. Over time, dirt, dust, and corrosion can accumulate on the contacts, which can result in poor connectivity and dim lighting. To clean the contacts, follow these steps:
Step 1: Turn off the Power
First and foremost, ensure that the power to the outdoor lighting is turned off. This will prevent any accidents or electrical shocks while handling the light bulb.
Step 2: Remove the Bulb
Gently remove the existing bulb from the socket by twisting it counterclockwise. Set the bulb aside for disposal or future use.
Step 3: Inspect the Contacts
Take a close look at the contacts inside the socket. If you notice any dirt, dust, or corrosion, it’s time to clean them.
Step 4: Clean the Contacts
Using a clean cloth or cotton swab, gently wipe the contacts to remove any debris. If the corrosion is stubborn, you can use a small amount of vinegar or lemon juice to help dissolve it. Just be sure to dry the contacts thoroughly before proceeding.
Step 5: Reinstall the Bulb
Once the contacts are clean and dry, it’s time to reinstall the new bulb. Align the prongs on the base of the bulb with the slots in the socket and gently twist it clockwise until it is securely in place.
By properly cleaning the light bulb contacts, you can ensure optimal connectivity and brightness for your Hampton Bay outdoor lighting. Remember to always follow safety precautions and consult the product manual for specific instructions.
For further assistance, you can visit the official Hampton Bay website at www.hamptonbay.com.
Insert the New Bulb
Now that you have removed the old bulb, it’s time to insert the new one. Follow these steps to ensure a successful replacement:
Step 1: Choose the right bulb
Before inserting the new bulb, make sure you have the correct type and wattage. Check the label on the old bulb or refer to the Hampton Bay outdoor lighting manual for guidance. Using the wrong bulb can damage your fixture or result in poor lighting.
Step 2: Prepare the new bulb
Inspect the new bulb for any defects or damage. Ensure that it is clean and free from any debris. If necessary, wipe it gently with a dry cloth to remove any fingerprints or smudges. Handling the bulb with care will prolong its lifespan and prevent premature burnout.
Step 3: Align the bulb correctly
Hold the new bulb by its base and align the prongs or pins with the corresponding slots in the socket. Make sure it is inserted straight and fully seated. Avoid twisting or forcing the bulb into place, as this could cause damage.
Step 4: Secure the bulb
Once the bulb is properly aligned, gently push it in until it clicks or locks into position. Give it a slight tug to ensure that it is securely fastened. If your Hampton Bay outdoor lighting fixture has a screw or locking mechanism, follow the manufacturer’s instructions to secure the bulb in place.
Step 5: Test the new bulb
After inserting the new bulb, turn on the power to your outdoor lighting fixture and test if it is working properly. If the bulb does not light up, double-check the alignment and seating. If the issue persists, you may need to troubleshoot further or seek professional assistance.
Remember: Always handle bulbs with care, using a cloth or gloves to avoid touching the glass directly. This will prevent oils from your skin from transferring to the bulb, which can cause hotspots and reduce its lifespan.
For more detailed instructions or troubleshooting tips, refer to the Hampton Bay official website at https://www.hamptonbay.com. They provide comprehensive resources and support for maintaining and troubleshooting your outdoor lighting.
Restore Power and Test
Before starting the process of replacing the bulb in your Hampton Bay outdoor lighting, it is essential to ensure that the power is turned off. Safety should always be the top priority when dealing with electricity.
Begin by locating the circuit breaker or switch that controls the power supply to the outdoor lighting. Once you have found it, switch it off to cut off the electricity flow.
Once the power is turned off, it is important to test and make sure that the power is indeed off before proceeding. One way to do this is by using a voltage tester. Simply place the tester against the wires coming out of the lighting fixture to check if any electricity is still present.
If the tester indicates that there is no voltage, then it is safe to continue with the bulb replacement process. However, if there is still voltage present, it is recommended to seek professional assistance to avoid any potential risks.
Pro tip: It is always a good idea to double-check the power supply by using another method, such as using a non-contact voltage detector. This device can detect the presence of electricity without the need for direct contact, providing an extra layer of safety.
Remember, safety should always come first when dealing with electrical components. Taking the necessary precautions will not only protect you from potential harm but also ensure a smooth and successful bulb replacement process.
Conclusion
With just a few simple steps, you can replace a burned out bulb in your Hampton Bay outdoor lights. Always make sure to turn off power to avoid getting shocked, and take care to select the correct wattage and style replacement bulb.
After securely inserting the new bulb and restoring power, your Hampton Bay outdoor lighting will be back to illuminating your yard and providing exterior ambiance.