How To Fill Cracks In Wood Floors: A Complete Guide
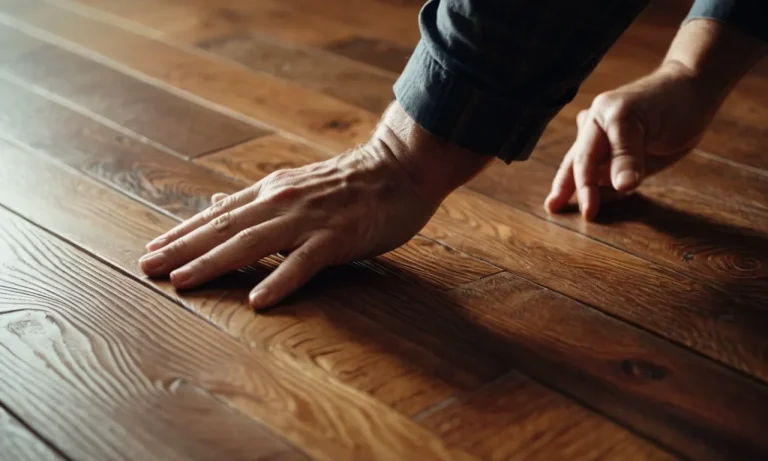
If you have cracks in your wood floors, don’t panic! Filling cracks in wood floors is an easy DIY project that can refresh the look of your floors. With some basic supplies and a little time, you’ll have smooth floors in no time.
If you’re short on time, here’s a quick answer to your question: Use wood filler to fill the cracks, sand the filler smooth, clean the floor, apply wood stain to match the color, and add polyurethane as a protective topcoat.
In this comprehensive guide, we’ll walk through all the steps for repairing wood floor cracks, from choosing the right materials to finishing the job. You’ll learn the causes of cracks, how to properly prepare the floor, tips for achieving an invisible repair, and how to protect your floors from future damage.
With the right information and techniques, you can fill those unsightly gaps and have floors that look brand new again.
Assessing the Damage: Types of Cracks and Potential Causes
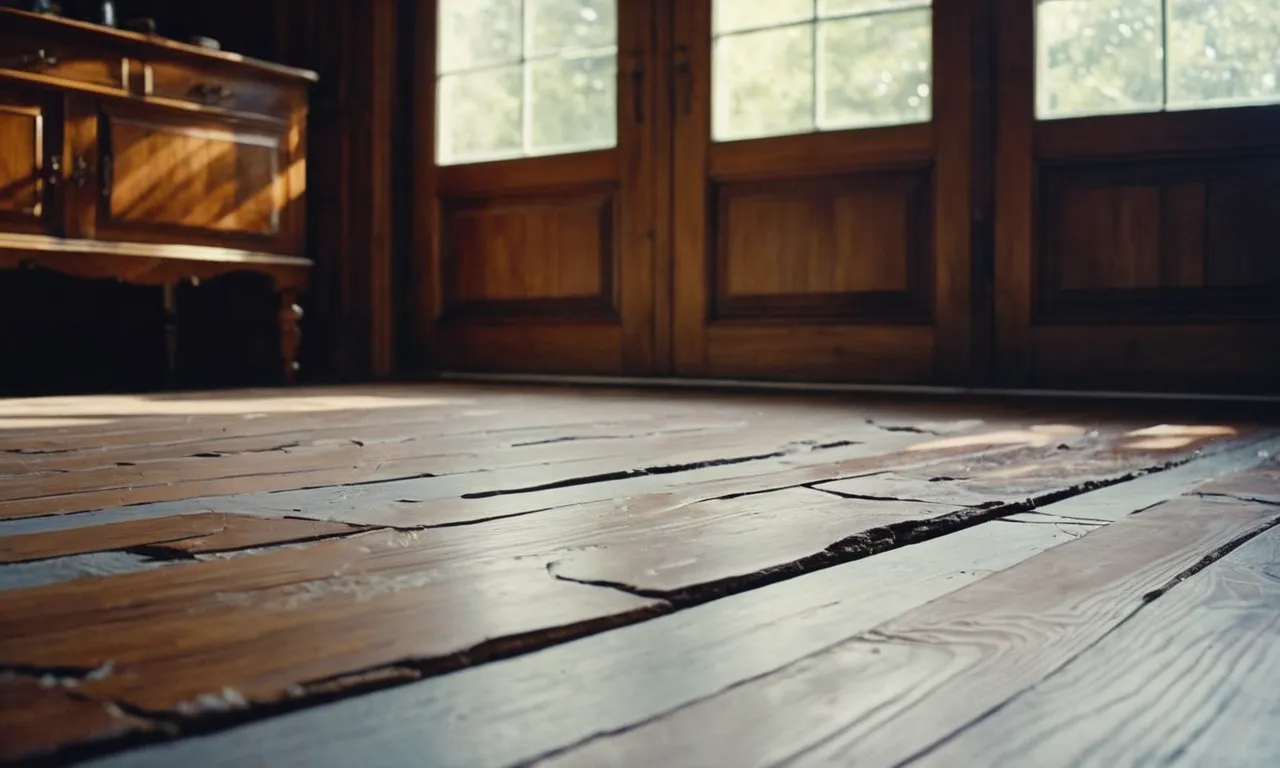
Before diving into the process of filling cracks in wood floors, it is important to assess the extent of the damage. Cracks in wood floors can range from minor surface-level imperfections to severe structural issues.
By understanding the types of cracks and their potential causes, you can determine the appropriate course of action for repair.
Checking for Minor, Moderate, or Severe Cracking
When assessing the cracks in your wood floors, it is important to determine the severity of the damage. Minor cracking may include hairline cracks or small gaps between floorboards. These cracks are usually superficial and can be easily addressed with simple repair techniques.
Moderate cracking typically involves larger gaps or cracks that extend deeper into the wood. These cracks may require more extensive repairs, such as filling with wood putty or replacing damaged floorboards.
Severe cracking, on the other hand, can indicate significant structural issues in the floor. These cracks may be wide, deep, or accompanied by other signs of damage, such as sagging or uneven flooring.
In such cases, it is recommended to consult with a professional to assess the extent of the problem and determine the best course of action.
Understanding Why Wood Floors Crack
Wood floors can develop cracks due to a variety of reasons. One common cause is changes in humidity and moisture levels. Wood is a natural material that expands and contracts with fluctuations in temperature and humidity.
When the wood absorbs moisture, it swells and can cause the floorboards to push against each other, leading to cracks.
Another potential cause of cracking is improper installation or inadequate subfloor preparation. If the floorboards are not properly acclimated or if the subfloor is uneven or unstable, it can put stress on the wood, leading to cracks over time.
Identifying Source of Damage for Proper Repair
In order to effectively repair cracks in wood floors, it is important to identify the source of the damage. This will help determine the most appropriate repair method and prevent the issue from recurring in the future.
If the cracks are primarily caused by changes in humidity, addressing the underlying moisture issue is essential. This may involve improving ventilation, using a dehumidifier, or sealing the wood to prevent moisture absorption.
In cases where the cracks are a result of structural issues or improper installation, it is recommended to seek professional assistance. A professional can assess the damage, identify the root cause, and provide the necessary repairs to ensure the longevity and stability of your wood floors.
Remember, proper assessment of the types of cracks and their potential causes is crucial to determine the appropriate repair method. Whether it’s a minor imperfection or a more serious structural issue, addressing the cracks in your wood floors promptly will help maintain their beauty and functionality for years to come.
Gathering Your Materials and Tools
Before you begin the process of filling cracks in your wood floors, it’s important to gather all the necessary materials and tools. Having everything you need on hand will save you time and ensure that you can complete the job effectively. Here are some key items to consider:
Choosing the Right Wood Filler
When it comes to choosing a wood filler, you’ll want to select a product that matches the color and type of wood in your floors. There are various types of wood fillers available, including water-based, solvent-based, and epoxy fillers.
Each type has its own advantages and disadvantages, so it’s important to do your research and choose the one that best suits your needs.
One popular brand of wood filler is Minwax High Performance Wood Filler. It’s a solvent-based filler that can be used on both interior and exterior wood surfaces. It dries quickly and is easy to sand, making it a great choice for filling cracks in wood floors.
Selecting Sandpaper Grits
After filling the cracks in your wood floors, you’ll need to sand them down to create a smooth and even surface. To do this, you’ll need to have the right sandpaper grits on hand. The grit of sandpaper refers to the size of the abrasive particles on the paper.
The higher the grit number, the finer the sandpaper.
For initial sanding, you’ll want to use a lower grit sandpaper, such as 60 or 80 grit, to remove any rough edges or excess filler. As you progress, you can move up to higher grits, such as 120 or 150, to achieve a smoother finish.
Finally, for a polished look, you can use a very fine grit, like 220 or 240.
Polyurethane, Stains, Cleaners, and Other Supplies
In addition to wood filler and sandpaper, you’ll also need other supplies to complete the job. Polyurethane is commonly used to protect and finish wood floors after crack filling and sanding. There are different types of polyurethane available, such as water-based and oil-based, so choose the one that best suits your needs.
If you want to change the color of your wood floors, you can also consider using a wood stain. Just make sure to choose a stain that is compatible with the type of wood you have. Additionally, you’ll need cleaners and a vacuum to thoroughly clean the area before and after filling the cracks.
It’s important to note that some of these materials and tools can be found at your local hardware store or online. Home Depot and Lowe’s are two popular websites where you can find a wide range of wood fillers, sandpaper, polyurethane, stains, and other supplies.
Preparing the Damaged Wood Floor for Repairs
Before filling cracks in wood floors, it is crucial to properly prepare the damaged areas. This will ensure that the repairs are effective and long-lasting. Here are some essential steps to follow:
Cleaning Out Cracks and Gaps Thoroughly
The first step in preparing the damaged wood floor is to clean out the cracks and gaps thoroughly. Use a vacuum cleaner or a soft brush to remove any loose debris, dust, or dirt that may be present in the cracks. This will allow the filler material to adhere better to the wood surface.
For deeper cracks, you may need to use a narrow putty knife or a chisel to remove any debris or old filler that may have accumulated over time. Be careful not to damage the surrounding wood while doing this.
Sanding and Smoothing Edges
After cleaning out the cracks, it is important to sand and smooth the edges of the damaged wood floor. This will help create a flat and even surface for the filler material to be applied. Use a sandpaper with a fine grit to gently sand the edges of the cracks.
Make sure to sand in the direction of the wood grain to avoid any further damage.
Once the edges are smooth, wipe away any dust with a clean cloth or a tack cloth. This will ensure that the filler material adheres properly to the wood surface without any interference from dust particles.
Masking and Protecting Surrounding Areas
Before applying the filler material, it is important to mask and protect the surrounding areas of the damaged wood floor. This will prevent any accidental spills or smudges that may occur during the filling process.
Use painter’s tape or masking tape to cover the edges of the cracks and gaps. This will create a clean boundary for the filler material and help achieve a neater finish. Additionally, place drop cloths or plastic sheets on the floor to protect it from any spills or drips.
By following these steps to prepare the damaged wood floor, you can ensure that the repairs are done effectively and the filled cracks blend seamlessly with the rest of the floor.
Filling Cracks in the Wood Floor
Wood floors are a beautiful addition to any home, but over time, they may develop cracks. These cracks can be unsightly and can also pose a tripping hazard. Fortunately, filling cracks in wood floors is a relatively simple process that can restore the floor’s appearance and safety.
Applying Wood Filler According to Package Directions
The first step in filling cracks in wood floors is to choose the right type of wood filler. There are various types available, such as latex-based fillers, epoxy fillers, and wax fillers. It’s important to read the package directions carefully and choose a filler that is suitable for your specific type of wood floor.
Once you have selected the appropriate filler, begin by cleaning the crack and the surrounding area. Remove any dirt, dust, or debris using a soft brush or vacuum. This will ensure that the filler adheres properly to the wood.
Next, apply the wood filler to the crack according to the instructions on the package. Use a putty knife to spread the filler evenly across the crack, making sure to fill it completely. Apply gentle pressure to ensure that the filler adheres well to the wood.
Pro Tip: If the crack in your wood floor is wider than 1/4 inch, it’s recommended to use a wood patch instead of a filler. Wood patches are specifically designed to fill larger gaps and provide a more durable solution.
Letting Filler Dry and Cure Completely
After applying the wood filler, it’s important to allow it to dry and cure completely. This usually takes several hours or even overnight, depending on the type of filler used. Follow the manufacturer’s instructions for the recommended drying time.
During the drying process, it’s essential to keep the area well-ventilated. Open windows or use fans to ensure proper air circulation. This will help the filler dry faster and prevent any unpleasant odors from lingering in your home.
Sanding Filler Smooth and Even with Floor
Once the filler has dried and cured, it’s time to sand it to create a smooth and even surface. Use a fine-grit sandpaper or sanding block to gently sand the filled area. Start with light pressure and gradually increase it until the filler is level with the surrounding floor.
After sanding, clean the area thoroughly to remove any dust or debris. You can then apply a matching stain or finish to blend the filled area with the rest of the floor. Use a brush or cloth to apply the stain or finish, following the manufacturer’s instructions.
Pro Tip: If you’re unsure about the color or finish to use, it’s recommended to test it on a small, inconspicuous area of the floor before applying it to the filled crack.
By following these steps and taking the necessary precautions, you can effectively fill cracks in wood floors and restore their beauty. Remember to choose the right filler, allow it to dry and cure completely, and sand it to create a smooth surface.
With a little time and effort, your wood floors will look as good as new!
Staining and Sealing the Repaired Floors
Once you have successfully filled the cracks in your wood floors, the next step is to stain and seal the repaired area. This will not only help to blend the repaired spot with the rest of the floor, but also protect it from future damage.
Matching the Stain Color to the Original Floor
One of the key aspects in staining the repaired wood floor is to ensure that the stain color matches the original floor. To achieve this, it is important to use the same type and shade of stain that was originally used on the floor.
This can usually be determined by examining any leftover stain containers or consulting the manufacturer’s website for guidance.
If you are unable to find an exact match, you can try blending different shades of stain to achieve a similar color. It is recommended to test the stain on a small inconspicuous area of the floor first to ensure that the color matches before applying it to the repaired spot.
Applying Polyurethane in Thin, Even Coats
After staining the repaired area, it is crucial to seal it with a protective finish. Polyurethane is a popular choice for sealing wood floors due to its durability and resistance to wear and tear. When applying polyurethane, it is important to do so in thin, even coats to avoid streaks or bubbles.
Start by applying a thin coat of polyurethane using a brush or applicator pad. Allow it to dry completely according to the manufacturer’s instructions. Once dry, lightly sand the surface with fine-grit sandpaper to ensure a smooth finish.
Repeat this process for two to three coats, allowing each coat to dry and sanding in between.
Considering Alternatives Like Paint or Wax
While staining and sealing with polyurethane is the traditional method for repairing wood floors, there are alternative options to consider. If you are looking for a more unique or creative approach, you can explore options like painting the repaired area to create a contrasting design or using wax to give the floor a more rustic look.
Before deciding on an alternative method, it is important to research and understand the specific techniques and materials required. Consulting with a professional or referring to reputable websites such as Wood Magazine or This Old House can provide valuable insights and guidance in choosing the best approach for your wood floor repair.
Protecting Wood Floors from Future Cracks
Wood floors are a beautiful and timeless addition to any home. To keep them looking their best and prevent future cracks, there are several measures you can take. By maintaining proper humidity levels year-round, cleaning and waxing regularly, and using rugs and floor protectors, you can ensure the longevity and durability of your wood floors.
Maintaining Proper Humidity Levels Year-Round
One of the main causes of cracks in wood floors is changes in humidity levels. Wood is a natural material that can expand and contract with fluctuations in moisture. To prevent this, it is important to maintain consistent humidity levels throughout the year.
The recommended humidity range for wood floors is typically between 35% and 55%. Investing in a hygrometer can help you monitor the humidity levels in your home and make necessary adjustments. Additionally, using a humidifier during dry winter months can help prevent the wood from drying out and cracking.
Cleaning and Waxing
Regular cleaning and waxing are essential for keeping wood floors in top condition. Dust, dirt, and debris can act as abrasives, causing scratches and eventually leading to cracks. Use a soft broom or vacuum with a brush attachment to remove loose dirt and debris.
Avoid using harsh chemicals or excessive water when cleaning, as these can damage the wood. Instead, opt for a mild wood floor cleaner and a damp mop. After cleaning, apply a high-quality wood floor wax to provide a protective layer and enhance the natural beauty of the wood.
Using Rugs and Floor Protectors
Another effective way to protect your wood floors from future cracks is by using rugs and floor protectors. Place rugs in high-traffic areas, such as entryways and hallways, to prevent excessive wear and tear. Make sure the rugs have a non-slip backing to prevent accidents.
Additionally, use floor protectors under furniture legs to prevent them from scratching or denting the wood. Felt pads or rubber caps are commonly used for this purpose. Regularly inspect and replace any worn-out or damaged floor protectors to ensure maximum effectiveness.
By following these maintenance tips, you can protect your wood floors from future cracks and enjoy their beauty for years to come. Remember, prevention is key when it comes to maintaining the integrity of your floors.
So, invest some time and effort into these preventive measures, and your wood floors will thank you!
Conclusion
With some basic tools and materials, filling cracks in wood floors is an achievable DIY project for any homeowner. Just take the time to properly clean, fill, sand, stain, and seal the damaged areas. Be patient during the drying and curing times for best results.
Your restored wood floors will look beautiful and last for many more years. Just be sure to maintain proper humidity and continue protecting them from excess moisture. Follow these steps anytime cracks reappear to keep your floors looking their best. Enjoy the satisfaction of doing the job yourself!