How To Make Paint Glossy: A Complete Guide
Making paint glossy can transform the look of your walls or woodwork. The sheen and depth of gloss paint creates an upscale, polished aesthetic. While specialty gloss paints are available, you can also turn standard wall paints into a gloss finish with a few simple techniques.
If you’re short on time, here’s a quick answer to your question: You can make paint glossy by choosing a paint formulated for gloss, adding a clear gloss glaze, or applying a high-gloss clear coat like polyurethane over already painted surfaces.
In this comprehensive guide, we’ll cover everything you need to know to get a flawless glossy paint finish. You’ll learn how to choose the right paint, what tools and supplies you need, how to prepare surfaces, application techniques, and tips for achieving an ultra-glossy look.
Choosing a Gloss Paint
When it comes to making your paint glossy, choosing the right type of gloss paint is essential. Here are some factors to consider when selecting the perfect gloss paint for your project:
Get a dedicated gloss paint
If you want a high-gloss finish, it’s important to use a dedicated gloss paint. These paints are specifically formulated to provide a shiny and reflective surface. They contain higher levels of resins and binders, which contribute to the glossy appearance.
Look for paints labeled as “high gloss” or “gloss” for the best results.
Use semi-gloss for less shine
If you prefer a slightly less shiny finish, you can opt for semi-gloss paint. Semi-gloss paint offers a balance between shine and durability. It has a lower sheen level compared to high-gloss paint but still provides a smooth and reflective surface.
This makes it a popular choice for areas that require easy maintenance, such as kitchens and bathrooms.
Consider oil-based gloss paint
Oil-based gloss paint is known for its exceptional durability and high sheen level. It creates a hard and glossy finish that is resistant to wear and tear. Oil-based gloss paint is often used for trim, doors, and furniture.
However, it is important to note that oil-based paints have a longer drying time and can emit strong odors. Proper ventilation is necessary when using oil-based gloss paint.
Choose the sheen level
Gloss paints come in different sheen levels, ranging from high gloss to satin. The sheen level determines the amount of shine and reflection the paint will have. High gloss paints have the highest sheen level and provide a mirror-like finish.
Satin paints, on the other hand, have a more subtle sheen and offer a smooth and velvety appearance. Consider the overall look you want to achieve and the practicality of the surface when choosing the sheen level of your gloss paint.
Remember to carefully read the product labels and follow the manufacturer’s instructions for the best results. Experimenting with different gloss paints and sheen levels can help you find the perfect combination to make your paint glossy and achieve the desired effect.
Tools and Supplies for Glossy Paint
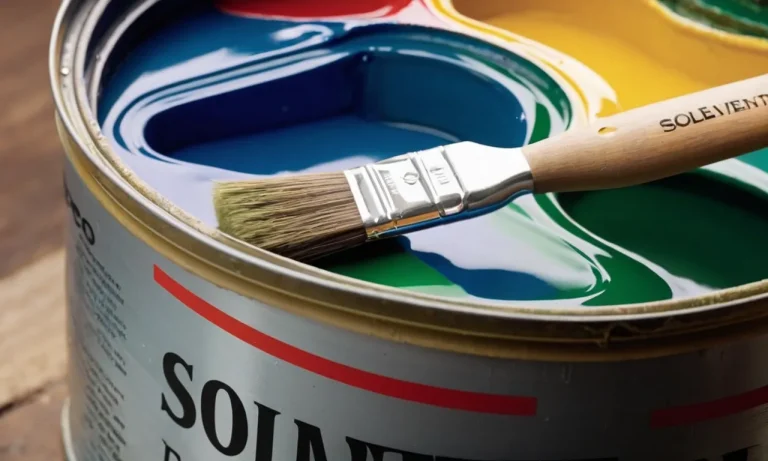
High-quality brush for smooth finish
When it comes to achieving a glossy finish on your paint job, using a high-quality brush is essential. A brush with fine bristles will help to distribute the paint evenly and smoothly, resulting in a professional-looking finish.
Look for a brush specifically designed for glossy paints, as it will have the right stiffness and thickness for the job.
Mini foam roller for large areas
For larger areas, such as walls or ceilings, a mini foam roller can be a game-changer. These rollers are designed to apply paint smoothly and evenly, minimizing the appearance of brush strokes. They are also great for achieving a seamless finish on surfaces with texture, such as stucco or popcorn ceilings.
Make sure to choose a roller with a high-density foam for best results.
Paint tray and liners
A paint tray and liners are essential tools for any painting project, including glossy paint. The tray provides a convenient container for your paint, while the liners make cleanup a breeze. Using liners also allows you to switch between different paint colors without having to clean the tray each time.
Drop cloths or tarps
Protecting your floors and furniture from paint splatters and spills is crucial. Lay down drop cloths or tarps to create a barrier between your work area and the rest of the room. This will save you time and effort in cleaning up afterwards and ensure that your glossy paint job remains flawless.
Sandpaper or deglosser
Before applying glossy paint, it’s important to prepare the surface properly. If you’re working with a previously painted surface, use sandpaper or a deglosser to remove any existing gloss or sheen. This will create a smooth and clean surface for the new paint to adhere to, resulting in a better gloss finish.
Masking tape
To achieve clean and crisp lines, use masking tape to protect areas that you don’t want to paint. This could include baseboards, window frames, or trim. Make sure to press the tape firmly to ensure a tight seal and remove it carefully once the paint has dried to avoid peeling.
Preparing Surfaces for Gloss Paint
Before applying gloss paint to any surface, it is important to properly prepare the area. This will help ensure a smooth and long-lasting finish. Here are some essential steps to follow:
Clean and degrease the surface
Start by cleaning the surface that you plan to paint. Remove any dirt, dust, or grease using a mild detergent and water solution. This will help the paint adhere better to the surface. Make sure to rinse the area thoroughly and allow it to dry completely before moving on to the next step.
Sand glossy surfaces
If the surface you are painting has a glossy finish, it is important to sand it first. This will help roughen up the surface, allowing the paint to adhere better. Use a fine-grit sandpaper to gently sand the glossy surface in a circular motion.
Be sure to remove any dust or debris afterwards using a clean cloth.
Fill any holes or imperfections
Before applying the gloss paint, take the time to fill any holes or imperfections in the surface. Use a suitable filler, such as spackling compound or wood filler, to fill in any cracks, dents, or gaps. Smooth out the filler with a putty knife and allow it to dry completely.
Once dry, sand the filled areas to ensure a smooth and even surface.
Prime bare wood before painting
If you are painting bare wood with gloss paint, it is crucial to prime the surface first. Primer helps seal the wood, prevents bleeding, and ensures better adhesion of the paint. Apply a coat of primer specifically designed for wood surfaces and allow it to dry according to the manufacturer’s instructions.
Once the primer is dry, you can proceed with applying the gloss paint.
By following these steps, you can effectively prepare your surfaces for glossy paint. Remember, proper preparation is key to achieving a professional and durable finish.
Applying Gloss Paint
When it comes to achieving a glossy finish on your paint project, the application process plays a crucial role. Here are some important tips to keep in mind when applying gloss paint:
Use a brush for trim and edges
For precise and detailed areas such as trim and edges, using a high-quality brush is recommended. The bristles of the brush will help you achieve a smooth and even application, ensuring that every nook and cranny is properly covered.
Take your time and apply the paint with steady strokes for the best results.
Roll larger surfaces evenly
When it comes to larger surfaces like walls or ceilings, using a paint roller is the way to go. A roller allows you to cover a larger area quickly and efficiently. To achieve an even application, make sure to load the roller with an appropriate amount of gloss paint.
Start from the top and work your way down, using long and overlapping strokes. This will help avoid streaks and ensure a smooth finish.
Apply in thin, even coats
One common mistake when applying gloss paint is applying it too thickly. This can lead to drips, uneven coverage, and a less-than-desirable finish. To avoid these issues, it’s important to apply the paint in thin, even coats.
This not only helps in achieving a smoother finish but also allows for better control over the overall appearance.
Let paint dry fully between coats
Patience is key when it comes to achieving a glossy finish. To ensure the best results, allow each coat of paint to dry fully before applying the next one. This will prevent the layers from mixing and smudging, resulting in a flawless and professional-looking finish.
Follow the manufacturer’s instructions for drying times, as they may vary depending on the type of gloss paint you are using.
Remember, practice makes perfect, so don’t be discouraged if your first attempt doesn’t turn out exactly as planned. With a bit of patience and these helpful tips, you’ll be able to achieve that desired glossy finish on your paint project. Happy painting!
Achieving an Ultra-Glossy Finish
Sand lightly between coats
To achieve a truly glossy finish, it is important to pay attention to the preparation of the surface. Before applying any coats of paint, make sure to sand the surface lightly. This will help to smooth out any imperfections and create a smoother base for the paint to adhere to.
Sanding between coats is also crucial to ensure a seamless finish. Use a fine-grit sandpaper and be gentle to avoid removing too much paint or creating scratches.
Apply three coats for maximum gloss
If you want to achieve a high-gloss finish, it is recommended to apply at least three coats of paint. This will help to build up the depth and shine of the finish. Make sure to allow each coat to dry completely before applying the next one.
Applying thin coats will also help to minimize any brush marks or streaks, resulting in a smoother and more professional-looking finish.
Consider a high-gloss clear topcoat
If you are looking for an extra level of shine and protection, consider applying a high-gloss clear topcoat. This can be applied over the final coat of paint to enhance the glossiness and durability of the finish.
Clear topcoats are available in various finishes, so make sure to choose one that matches the desired level of glossiness. Follow the manufacturer’s instructions for application and drying times.
Maintain with frequent dusting and gentle cleaning
To keep your glossy painted surfaces looking their best, it is important to maintain them properly. Dusting the surfaces regularly with a soft, lint-free cloth will help to remove any dust or debris that can dull the shine.
For gentle cleaning, use a mild soap and water solution and a soft sponge or cloth. Avoid using abrasive cleaners or scrubbing too vigorously, as this can damage the paint. Regular maintenance will help to preserve the glossy finish for years to come.
Conclusion
With the right paints and techniques, you can easily transform any surface into a glossy showpiece. Preparation is key – properly cleaning and sanding surfaces will help your paint adhere and maximize shine. Applying multiple thin coats creates a smooth, glass-like finish.
Consider adding a clear topcoat for extreme gloss. Just maintain the finish by gently dusting instead of harsh scrubbing. Follow these steps and you’ll achieve stunning glossy paintwork.