How To Stain Your Front Door: A Complete Guide
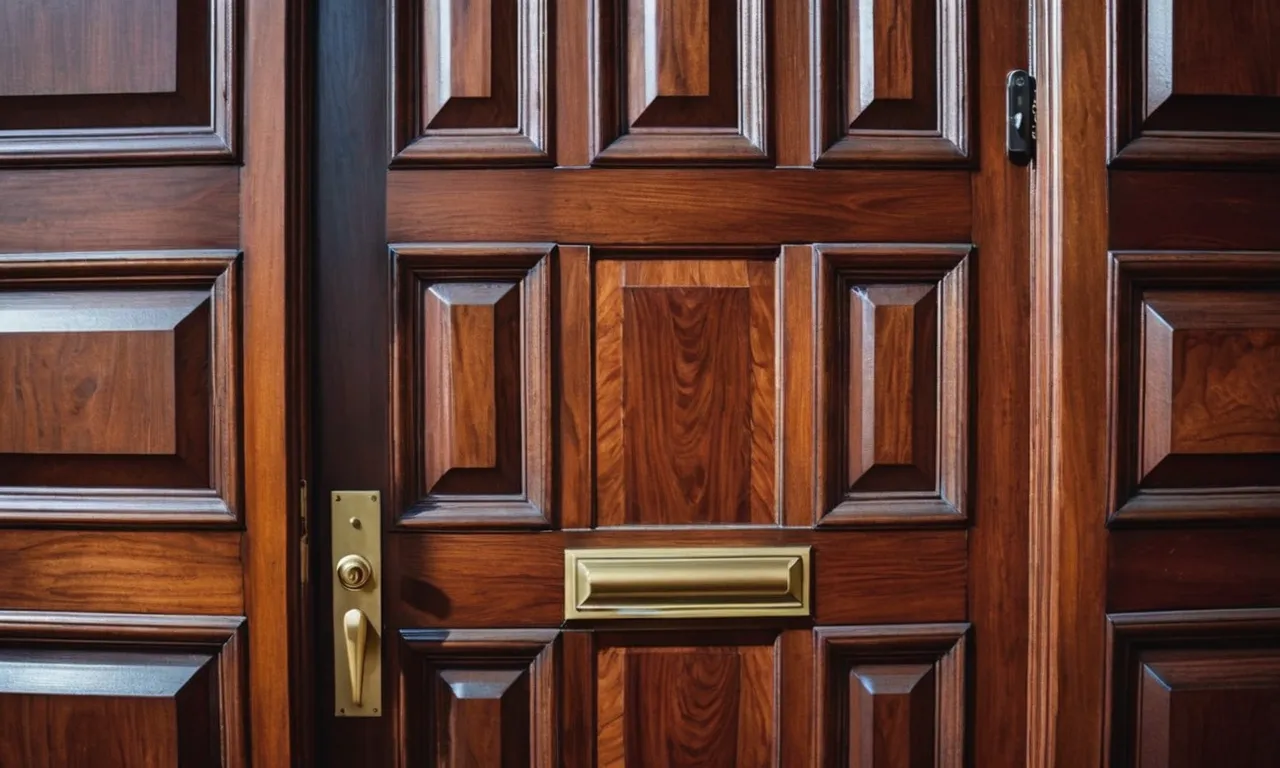
Staining your front door is an easy and affordable way to give your home’s exterior a fresh new look. With the right preparations and techniques, you can achieve a beautiful, professional-looking stained front door in a weekend.
If you’re short on time, here’s a quick answer to your question: Make sure the door is clean and sanded smooth. Apply wood conditioner, then use a high-quality oil-based exterior stain and applicator pad to apply the stain in the direction of the wood grain.
Apply 2-3 coats, letting each coat dry before adding the next. Finish with a polyurethane top coat for protection.
In this comprehensive guide, we’ll cover everything you need to know to stain your front door like a pro, from picking the right supplies to prepping the surface to achieving an even coat of stain. We’ll also provide tips on choosing the right color and sheen, sealing and protecting the finish, and avoiding common mistakes.
Let’s get started!
Choosing Supplies for Staining Your Front Door
Types of Stains
When it comes to staining your front door, there are several types of stains to choose from. Some popular options include oil-based stains, water-based stains, and gel stains. Each type has its own advantages and disadvantages, so it’s important to consider your specific needs and preferences.
Oil-based stains are known for their durability and ability to enhance the natural beauty of wood, while water-based stains are easier to clean up and have a quicker drying time. Gel stains, on the other hand, provide better control and are ideal for vertical surfaces like doors.
Stain Colors
The color of your stain will play a significant role in the overall appearance of your front door. Whether you prefer a traditional look or want to make a bold statement, there are numerous stain colors to choose from.
From rich mahogany to warm oak, and even vibrant blues or greens, the options are endless. Consider the style of your home and the surrounding environment when selecting a stain color. It’s also a good idea to test a small area before committing to a specific color to ensure it complements your front door and meets your expectations.
Stain Sheens
Stain sheen refers to the level of shine or glossiness that the stain will provide. Generally, there are three main options: gloss, semi-gloss, and satin. Glossy stains offer a high level of shine and can bring out the natural beauty of wood, but they also tend to highlight imperfections more prominently.
Semi-gloss stains strike a balance between shine and durability, making them a popular choice for front doors. Satin stains provide a softer sheen and are great for a more subtle and elegant finish. Consider the desired look and maintenance requirements when choosing a stain sheen for your front door.
Stain Brushes and Pads
When it comes to applying stain to your front door, the right tools can make a significant difference. Stain brushes and pads are commonly used for this task. Stain brushes are ideal for larger surfaces and can help achieve an even and smooth application.
Pads, on the other hand, are great for reaching into corners and intricate details. It’s recommended to have both options on hand to ensure you can effectively apply the stain to all areas of your front door.
Additional Supplies
In addition to the main supplies mentioned above, there are a few other items you may need when staining your front door. These may include sandpaper or a sanding block for preparing the surface, painter’s tape to protect any areas you don’t want to stain, and a drop cloth or plastic sheeting to cover the surrounding area and prevent any accidental spills.
It’s also important to have gloves and safety glasses to protect yourself during the staining process. Taking the time to gather all the necessary supplies beforehand will make the staining process smoother and more enjoyable.
Preparing the Front Door Surface
Inspect and Repair the Door
Before starting the staining process, it is essential to inspect your front door for any damage or wear. Look for any cracks, dents, or loose parts that might need to be repaired. If you notice any issues, consider fixing them before proceeding with the staining.
This will ensure that your front door looks great once the staining is complete.
Clean the Surface
To achieve a smooth and even stain finish, it is crucial to clean the surface of your front door properly. Use a mild detergent or a specialized wood cleaner to remove any dirt, grime, or grease. Ensure that you rinse off the cleaning solution thoroughly and allow the door to dry completely before moving on to the next step.
A clean surface will help the stain adhere better and result in a more professional-looking finish.
Sand the Door
Sanding is a vital step in preparing the surface of your front door for staining. It helps to remove any existing finish, smooth out imperfections, and create a surface that is ready to absorb the stain.
Start by using a medium-grit sandpaper and gradually work your way to a finer grit for a smoother finish. Remember to sand in the direction of the wood grain to avoid any scratches or marks. Once you are done sanding, make sure to remove any dust or debris from the door using a brush or a tack cloth.
Apply Wood Conditioner
Before applying the stain, it is recommended to use a wood conditioner, especially if you are working with a porous or softwood door. Wood conditioner helps to ensure an even color absorption and prevents blotches or uneven staining.
Apply the wood conditioner using a brush or a cloth, following the manufacturer’s instructions. Allow it to penetrate the wood for the recommended time before wiping off any excess. This step will help you achieve a more uniform and professional-looking stain finish.
Staining Techniques for a Smooth, Even Coat
Stir and Test the Stain
Before starting the staining process, it is important to stir the stain thoroughly to ensure that the color is evenly distributed. This will help you achieve a consistent result on your front door. Additionally, it is recommended to test the stain on a small, inconspicuous area of the door to ensure that you are satisfied with the color and finish.
Use an Applicator Pad
When applying the stain, using an applicator pad can help you achieve a smooth and even coat. Applicator pads are designed to hold the stain and distribute it evenly on the surface of the door. They are also easy to maneuver and provide better control compared to brushes or rags.
Apply Stain in Sections
It is best to apply the stain in sections rather than attempting to cover the entire door at once. This allows you to focus on a smaller area and ensures that the stain does not dry before you have a chance to work it into the wood.
Start at the top of the door and work your way down, applying the stain in long, even strokes.
Maintain a Wet Edge
To avoid uneven drying and streaks, it is important to maintain a wet edge while staining your front door. This means overlapping each stroke slightly with the previous one to create a seamless finish.
If the stain starts to dry before you can overlap, it can result in visible lines or blotches on the surface of the door.
Stain in Direction of Wood Grain
When applying the stain, it is crucial to follow the direction of the wood grain. This helps the stain penetrate the wood and enhances the natural beauty of the door. Staining against the grain can result in an uneven finish and may not allow the stain to fully penetrate the wood.
Let Each Coat Dry Before Adding Another
Once you have applied the first coat of stain, it is important to allow it to dry completely before applying another coat. This ensures that each layer of stain has enough time to penetrate the wood and provides a more even and durable finish.
Check the manufacturer’s instructions for the recommended drying time between coats.
For more detailed instructions and tips on staining your front door, you can visit www.diynetwork.com.
Achieving the Right Color
When it comes to staining your front door, achieving the right color is essential in creating a stunning first impression. Here are some tips to help you achieve the perfect hue:
Test Stain Colors on Sample Boards
Before committing to a particular stain color, it’s always a good idea to test it out on sample boards. This will give you a better sense of how the stain will look on your front door and allow you to make any necessary adjustments.
Apply the stain to a small section of the sample board and let it dry completely. This will give you a more accurate representation of the final color.
There are numerous websites and blogs, such as The Spruce or Houzz, that provide comprehensive guides on choosing the right stain colors for your front door. These resources can offer inspiration and help you make an informed decision.
Applying Tinted Stain Coats
Once you’ve settled on a stain color, it’s time to start applying the stain to your front door. To achieve a more even and vibrant color, consider applying multiple coats of tinted stain. This will create depth and richness, enhancing the overall appearance of your front door.
It’s important to follow the manufacturer’s instructions when applying the stain. Make sure to clean and prepare the surface of your front door properly before starting the staining process. Use a brush or rag to apply the stain, working with the grain of the wood for a smooth and consistent application.
Darkening the Stain Color
If you find that the initial stain color is lighter than desired, there are ways to darken it. One method is to apply a darker shade of stain on top of the existing stain. This will deepen the color and give it a richer appearance.
Another option is to use a wood stain conditioner or pre-stain to help the wood absorb more pigment. This can help darken the stain color and achieve the desired look.
Remember, staining your front door is a process that requires patience and attention to detail. Take your time, experiment with different stain colors, and don’t be afraid to seek inspiration from professional resources.
With the right techniques and the perfect stain color, you’ll be able to achieve a front door that adds beauty and charm to your home.
Sealing and Protecting the Stained Finish
Once you have successfully stained your front door, it is crucial to seal and protect the finish to ensure its longevity and durability. This will help protect the wood from moisture, UV rays, and daily wear and tear. There are a few key steps to follow when sealing and protecting the stained finish.
Applying a Polyurethane Top Coat
One effective way to seal and protect the stained finish is by applying a polyurethane top coat. Polyurethane is a clear protective coating that forms a hard, durable finish on the wood. It helps to enhance the color and depth of the stain while providing a protective barrier against damage.
To apply the polyurethane top coat, start by lightly sanding the stained surface with fine-grit sandpaper to create a smooth and even surface. Remove any dust or debris using a tack cloth. Then, using a high-quality brush or foam applicator, apply a thin coat of polyurethane in long, even strokes, following the grain of the wood.
Allow the first coat to dry completely, and then lightly sand it with fine-grit sandpaper before applying a second coat. Repeat this process for additional coats, if desired, to achieve a thicker protective layer.
Note: It is important to read and follow the manufacturer’s instructions for the specific polyurethane product you choose, as application methods and drying times may vary.
Reapplying Top Coats Over Time
Over time, the protective finish on your front door may wear down due to exposure to the elements and regular use. To maintain the integrity of the stained finish, it is recommended to periodically reapply top coats of polyurethane.
How often you need to reapply top coats will depend on various factors such as the climate, level of sun exposure, and amount of wear and tear your front door experiences. As a general guideline, it is recommended to inspect the finish annually and consider reapplying a fresh coat of polyurethane every 2-3 years.
Regular maintenance and reapplication of top coats will help ensure that your stained front door remains protected and looking great for years to come.
For more information on staining and protecting wood surfaces, you can visit thisoldhouse.com.
Common Mistakes and Problems
Not Sanding Between Coats
One common mistake people make when staining their front door is not sanding between coats. Sanding between coats helps to create a smooth and even finish. It removes any imperfections or raised grain that may have occurred during the staining process.
Skipping this step can result in a less professional-looking finish.
Brushing Against the Wood Grain
Another mistake to avoid when staining your front door is brushing against the wood grain. This can lead to an uneven application of the stain and can cause streaks or brush marks in the final finish. It is important to always brush in the direction of the wood grain for a smooth and consistent appearance.
Not Allowing Proper Dry Time
Proper dry time is crucial when staining your front door. Rushing the process and not allowing the stain to fully dry can result in tacky or sticky surfaces. This can lead to smudging or damage to the finish when the door is opened or closed.
It is important to follow the manufacturer’s recommended dry time and avoid using the door until the stain is completely dry.
Applying Stain in Direct Sunlight
Staining your front door in direct sunlight can be problematic. The heat from the sun can cause the stain to dry too quickly, resulting in uneven absorption and potential streaking. It is best to choose a time of day when the door is in shade or to work on a cloudy day to ensure optimal staining conditions.
To learn more about staining techniques and best practices, you can visit DIY Network or This Old House.
Conclusion
With the right supplies, thorough preparation, and careful application technique, you can achieve stunning stained wood grain patterns and colors on your front door. Pay close attention to details like sanding, dry times, wood grain direction and using high-quality stains and finishes to get results comparable to a professional.
Your beautiful new stained front door will add instant curb appeal and wow guests the moment they arrive at your home. We hope this comprehensive guide gives you the knowledge you need to take on this satisfying DIY project.


