How To Fix A Shower Faucet That Is Loose From The Wall
If you turn on your shower and notice the faucet wobbling or pulling away from the wall, you likely have a loose shower faucet. A loose shower faucet can leak and cause water damage if not repaired. Don’t worry – with the right tools and materials, you can tighten up a loose shower faucet in no time.
If you’re short on time, here’s a quick answer to your question: You’ll need to turn off the water supply, pry off the faucet trim, and tighten the mounting nuts and screws behind the wall. Apply plumber’s putty or caulk around the faucet base and reinstall the trim plate once securely fastened.
Assessing the Damage
When dealing with a loose shower faucet, it’s important to first assess the damage before attempting any repairs. This will help you understand the severity of the issue and determine the best course of action. Here are two key steps to take when assessing the damage:
Check for leaks behind the wall
One of the first things you should do is check for any signs of leaks behind the wall. A loose faucet can sometimes be an indication of water damage or a plumbing issue. Look for any dampness, mold, or discoloration on the wall or surrounding areas.
If you notice any of these signs, it may be necessary to contact a professional plumber to address the underlying problem.
Determine if the faucet is just loose or actually pulling away from the wall
Next, you’ll need to determine whether the faucet is simply loose or if it is actually pulling away from the wall. Start by gently wiggling the faucet to see if it moves easily. If it does, it may just need to be tightened.
However, if you notice that the faucet is pulling away from the wall or if there are visible gaps between the faucet and the wall, it may indicate a more serious issue. In this case, it is recommended to seek professional help to avoid further damage or potential water leaks.
Remember, it’s crucial to assess the damage accurately before attempting any repairs. Taking the time to properly evaluate the situation will help you determine the best course of action and ensure a successful fix for your loose shower faucet.
Gather Necessary Materials
Fixing a loose shower faucet from the wall requires a few key materials to get the job done. By gathering these materials beforehand, you can ensure a smooth and efficient repair process. Here are the essential items you will need:
Basin wrench
A basin wrench is a specialized tool that will come in handy when removing and tightening the nuts that secure the faucet to the wall. Its long handle and adjustable jaws make it easier to reach tight spaces and provide a firm grip.
Channel lock pliers
Channel lock pliers are another essential tool for this repair. These pliers have an adjustable jaw that allows you to grasp and turn objects of various sizes. They will be particularly useful when loosening and tightening the mounting nuts.
Plumber’s putty or silicone caulk
Plumber’s putty or silicone caulk is necessary to create a watertight seal between the faucet and the wall. This seal prevents any water from leaking behind the faucet and causing damage. Apply the putty or caulk around the base of the faucet before securing it to the wall.
Replacement screws or toggle bolts if needed
If the existing screws or bolts that hold the faucet to the wall are damaged or inadequate, you may need to replace them. Have a set of replacement screws or toggle bolts on hand to ensure a secure and stable installation.
By gathering these materials before starting the repair, you’ll have everything you need to fix a loose shower faucet and prevent any further damage. Remember to follow the manufacturer’s instructions and take all necessary safety precautions during the repair process.
Shutting Off the Water Supply
When fixing a loose shower faucet, the first step is to shut off the water supply to the shower. This is important to prevent any unwanted water flow while working on the faucet. Here’s how to do it:
Locate the shutoff valves for hot and cold water
Before shutting off the water, you need to locate the shutoff valves for both the hot and cold water supplies. These valves are usually located near the shower area, often behind an access panel or in the basement.
If you are unsure about the location of the shutoff valves, you can refer to the plumbing blueprint of your house or consult a professional plumber for assistance. It’s important to know the exact location of these valves to avoid any unnecessary damage to the plumbing system.
Turn the valves clockwise to shut off water to the shower
Once you have located the shutoff valves, it’s time to turn them off. To shut off the water supply to the shower, simply turn the valves clockwise until they are fully closed. This will stop the flow of water to the shower faucet.
Pro tip: It’s always a good idea to test if the water supply is indeed shut off by turning on the shower faucet after closing the valves. If no water comes out, it means you have successfully shut off the water supply.
Remember, shutting off the water supply is an important step when fixing a loose shower faucet. It ensures your safety and prevents any water damage during the repair process.
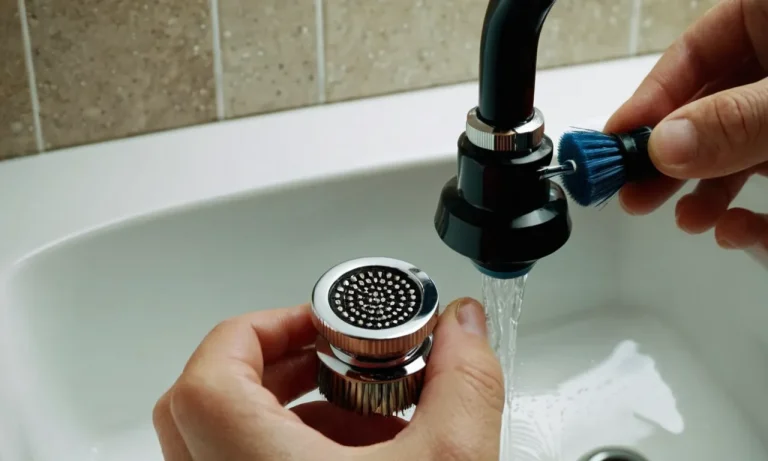
Removing the Faucet Trim
Pry off the handle and cover plate
Before you can remove the faucet trim, you need to access the screws holding it in place. Start by prying off the handle of the shower faucet. This can usually be done by inserting a flathead screwdriver under the edge of the handle and gently lifting it off.
Once the handle is removed, you will see a cover plate that needs to be taken off as well. Use a screwdriver to unscrew any screws that are holding the cover plate in place. Once the screws are removed, you can easily lift off the cover plate.
Unscrew the retaining nut and pull off the spout
With the cover plate removed, you will now have access to the retaining nut that holds the faucet spout in place. Use a wrench to unscrew the nut in a counterclockwise direction. Once the nut is loose, you can simply pull the spout off the wall.
Be careful not to damage any pipes or connections while doing this.
Remove any remaining parts of the trim
After removing the spout, you may still have some parts of the trim attached to the wall. These can include escutcheons, sleeves, or other decorative elements. Carefully inspect the area and remove any remaining trim pieces by unscrewing or prying them off.
Make sure to keep track of any screws or small parts that may come loose during this process.
Removing the faucet trim is an important step in fixing a loose shower faucet. By following these simple steps, you can easily take off the handle, cover plate, and spout, as well as any other remaining parts of the trim.
Once the trim is removed, you will have better access to the inner workings of the faucet, allowing you to make any necessary repairs or adjustments.
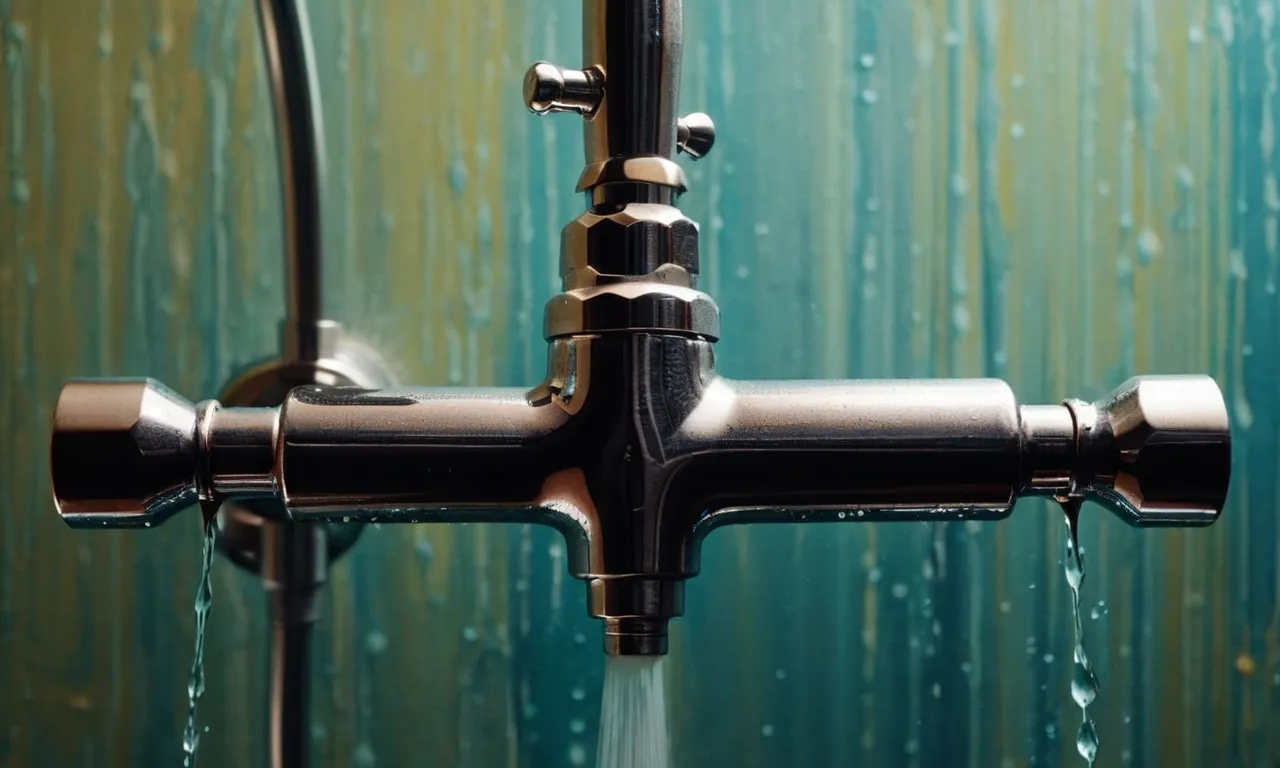
Tightening the Faucet Body
If you have noticed that your shower faucet is loose from the wall, it is important to address the issue as soon as possible. A loose faucet can lead to water leaks, further damage to the plumbing system, and potentially even costly repairs.
Fortunately, fixing a loose shower faucet is a relatively straightforward process that can be done with a few simple steps. One of the first steps in fixing a loose shower faucet is to tighten the faucet body.
Use a basin wrench to access the mounting nuts and bolts
To access the mounting nuts and bolts that hold the faucet body in place, you will need to use a basin wrench. A basin wrench is a specialized tool that is designed to fit into tight spaces and provide leverage for tightening or loosening nuts and bolts.
Begin by locating the mounting nuts and bolts underneath the faucet body. Use the basin wrench to reach these nuts and bolts, and position it in a way that allows you to apply pressure to tighten them.
Tighten the mounting hardware securely
Once you have accessed the mounting nuts and bolts, it is time to tighten them securely. Use the basin wrench to turn the nuts and bolts clockwise, applying enough pressure to ensure a tight fit. It is important to be careful not to overtighten the nuts and bolts, as this can cause damage to the faucet or the plumbing system.
Use your judgment and tighten them securely without excessive force. This will help to ensure that the faucet body is firmly attached to the wall and will not come loose again.
Replace stripped screws or bolts if necessary
In some cases, the screws or bolts that hold the faucet body in place may become stripped or damaged, making it difficult to tighten them properly. If you encounter this issue, it may be necessary to replace the stripped screws or bolts with new ones.
You can find replacement screws or bolts at your local hardware store or online. Be sure to choose screws or bolts that are the correct size and type for your specific faucet model. By replacing any damaged hardware, you can ensure a secure and tight fit for your shower faucet.
Remember, if you are unsure about how to fix a loose shower faucet or if you encounter any difficulties during the process, it is always best to consult a professional plumber. They have the expertise and experience to handle any plumbing issue and can help ensure that your shower faucet is fixed properly.
Reinstalling the Trim
Once you have fixed the loose shower faucet by tightening the mounting screws, it’s time to reinstall the trim to give your shower a finished look. Reinstalling the trim involves applying plumber’s putty or caulk around the faucet base, reattaching the spout, handle, and cover plate, and wiping away any excess sealant for a clean finish.
Apply plumber’s putty or caulk around the faucet base
Before reattaching the trim, it’s important to create a watertight seal around the faucet base to prevent any water leakage. You can use plumber’s putty or caulk for this purpose. Plumber’s putty is a soft, moldable substance that creates a tight seal, while caulk is a waterproof sealant.
Apply a thin line of plumber’s putty or caulk around the base of the faucet, ensuring full coverage.
Reattach the spout, handle, and cover plate
Once you have applied the plumber’s putty or caulk, it’s time to reattach the various components of the trim. Start by reattaching the spout, ensuring it is aligned properly and securely tightened. Next, attach the handle, making sure it is in the correct position for hot and cold water control.
Finally, reattach the cover plate, aligning it with the screw holes and using a screwdriver to tighten the screws.
Wipe away any excess sealant
After reattaching the trim components, take a damp cloth or sponge and carefully wipe away any excess plumber’s putty or caulk. This will give your shower a clean, polished look and prevent any unsightly residue from accumulating over time.
Take your time to ensure that all excess sealant is removed, paying attention to hard-to-reach areas.
Remember, if you’re unsure about any step in the process, it’s always a good idea to consult a professional plumber. They have the expertise and experience to handle any shower faucet issue and ensure a proper installation.
Turning the Water Back On
Turn the shutoff valves counterclockwise to restore water supply
Once you have successfully fixed the loose shower faucet, it’s time to turn the water back on. The first step is to locate the shutoff valves. These valves are usually located near the shower or in the basement. Turn the valves counterclockwise to restore the water supply to the shower.
It’s important to note that different homes may have different types of shutoff valves, so make sure to familiarize yourself with the specific type installed in your home.
Check for leaks and tighten any connections if needed
After turning the water back on, it’s crucial to check for any leaks or drips. Check the connections between the shower faucet and the water supply pipes. If you notice any leaks or loose connections, you will need to tighten them.
Use a wrench to tighten any loose connections, but be careful not to overtighten, as this can cause damage.
If you are unsure about how to properly tighten the connections, it’s always a good idea to consult a professional plumber. They have the expertise and knowledge to ensure that everything is properly secured and there are no leaks.
Remember, it’s important to take your time and thoroughly check for any leaks before using the shower. This will help prevent any potential water damage to your walls or floors. If you are unable to fix the issue or if you continue to experience problems with your shower faucet, don’t hesitate to reach out to a professional plumber for assistance.
Conclusion
If your shower faucet is loose or pulling away from the wall, with some basic DIY skills you can often carry out the repair yourself. Just be sure to turn off the water supply, remove the faucet trim, tighten all hardware securely, reseal the faucet base, and turn the water back on to test for leaks.
Carrying out preventive bathroom maintenance can help catch and remedy problems like a loose shower faucet before water damage occurs.