I Tested And Reviewed 10 Best Diy Window Tint For Home (2023)
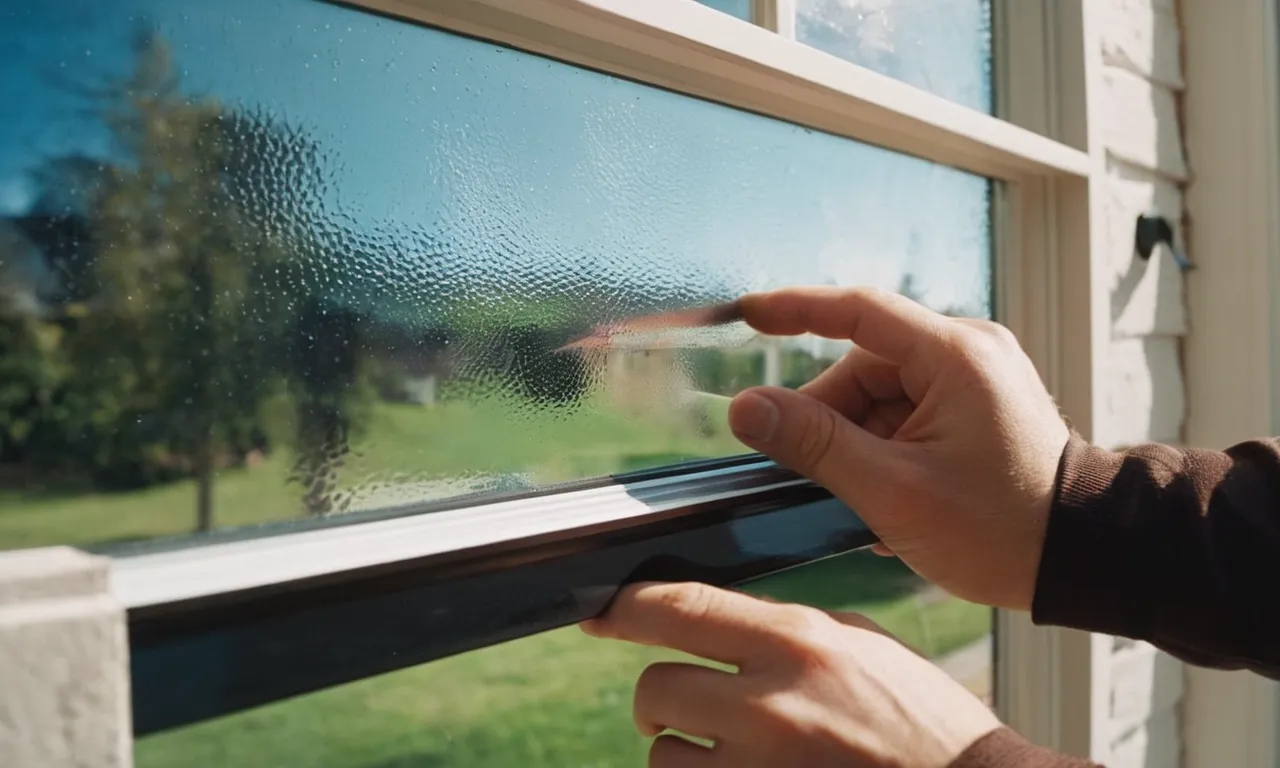
Installing window tint film is an easy and affordable way to add privacy, security, UV protection, and style to the windows in your home. But with so many DIY window tint products on the market, how do you choose the right one? Here are some key factors to consider before purchasing window tint for a do-it-yourself home project.
First, think about the level of light filtering you desire. Do you simply want a sheer, decorative look? Or are you aiming to block out sunlight and heat? Darker tint films, with a lower visible light transmission (VLT) percentage, reduce glare and heat gain more effectively. However, they also hamper outward visibility. Be sure to check your local regulations, as some places restrict excessively dark tint.
You'll also want to consider the film's composition. Dyed films typically offer better heat rejection compared to metallic films, which often have a reflective, mirrored look. Carbon films can combine the benefits of both. Additionally, the quality of materials and manufacturing can impact longevity and ease of application. Read customer reviews to help determine which products go on smoothly and hold up over time.
Finally, measure your window dimensions to calculate how much film you need to purchase. Precise measurements ensure you buy enough to complete the job without wasteful overage. All these factors will help you select the ideal DIY window tint to meet your needs and transform the ambiance of your home.
10 Best Diy Window Tint For Home
| # | Product Image | Product Name | Product Notes | Check Price |
|---|---|---|---|---|
|
1
|
 |
The product is ideal for heat and glare control on windows.
|
|
|
|
2
|
 |
The product is ideal for enhancing daytime privacy, blocking heat and UV rays, and creating a mirrored glass effect.
|
|
|
|
3
|
 |
The product is ideal for residential use, providing high heat control and blocking 99% of UV rays for home windows.
|
|
|
|
4
|
 |
The product is ideal for providing daytime privacy, heat control, sun blocking, and UV protection for home and office windows.
|
|
|
|
5
|
 |
The product is ideal for enhancing privacy by allowing you to see out of your window while preventing others from seeing in.
|
|
|
|
6
|
 |
The product is ideal for providing privacy and blocking UV light in homes and offices without using adhesive or permanent tint.
|
|
|
|
7
|
 |
The product is ideal for providing ultra high heat control and blocking UV rays for residential windows.
|
|
|
|
8
|
 |
The product is ideal for blocking sun and reducing heat in residential windows.
|
|
|
|
9
|
 |
The product is ideal for providing daytime privacy and sun control in windows with its very dark black film.
|
|
|
|
10
|
 |
The product is ideal for providing privacy and heat control during daytime in homes and offices.
|
|
1. Gila Privacy Mirror Film: Heat & Glare Control Diy


I recently installed window film and was pleasantly surprised by how easy it was to put up. While trimming the film was a bit challenging due to limited counter space, I managed to make it work. There were a couple of creases in the film that showed, so I would recommend keeping it as smooth as possible during installation.
Once the film was stuck on the window, it immediately adhered and could be easily slid into the right position. I didn't purchase the recommended solution or installation tools, but instead used a baby shampoo substitute and a pocket knife. While not perfect, these alternatives did the job well, along with using credit cards to smooth out the film.
I included pictures of my window, with one covered by the film and the other not, to showcase the difference in light. From the outside, the film provided complete privacy during the day, which was exactly what I wanted to keep my cat hidden. The film also allowed me to watch the kids playing in the yard without them realizing they were being observed.
During the day, the film appeared as a light tint when looking outside from the inside, while looking in from the outside simply reflected as a mirror. At night, there was a slight visibility into the inside, especially when the interior was well-lit. However, this was not a concern for me as I have motion lights and landscape lighting outside, ensuring it's never completely dark.
I'm particularly pleased with the film installed on my front door, which is made entirely of glass. It provides excellent privacy, allowing my cats to sit just a few feet away from a bird feeder on the front porch, without the birds noticing. From the outside, it appears as a large mirror, reflecting the surrounding landscaping and flowers.
The film also ensures privacy from anyone outside, including passersby, solicitors, and even the mailman. I can keep my door wide open and still enjoy privacy. Additionally, applying the film was made easier by completely soaking the glass and using invisible glass cleaner. The wetter the glass, the easier it was to apply the film. A tip for removing the film backing is to place a piece of tape on each side and slowly pull it apart.
To achieve a successful application, I also sprayed the outside of the film once it was applied to the window, which made using the squeegee much easier. Overall, I'm thrilled with the window film and its ability to provide privacy while still allowing for natural light and outside views. I have attached pictures of the view from the inside looking out and from the outside looking in for reference.
2. Mirror Film – Daytime Privacy, Heat Control, Diy


I highly recommend this privacy film for anyone looking to maintain privacy while still enjoying natural light and views. After moving into a condo with windows and a sliding glass door facing a parking area, I wanted a solution that would allow me to keep the blinds and curtains open without sacrificing privacy. This product exceeded my expectations.
The installation process was a breeze. The film stays in place with water, eliminating the need for sticky adhesives. From the outside, the film has a lovely light blue/green tint, reminiscent of the windows in skyscraper office buildings. Not only does it provide privacy, but it also helps to reduce cooling costs significantly.
In addition to privacy, I was also looking for glare and UV reduction. I suffer from UV light sensitivity, which can trigger debilitating migraines. Since installing the film, I am now able to enjoy the outdoor view without discomfort. Although the installation wasn't perfect initially, I plan to adjust the film using a squeegee and water to achieve a smoother finish. The entire process took less than two hours for both doors, including removing drapes and blinds.
For those attempting to install the film, I recommend trimming it after hanging rather than cutting it beforehand. This allows for easier repositioning and ensures that you have enough film to cover the entire window. Cleaning the glass before installation is as simple as using water and paper towels.
3. Snapguard Nano Ceramic Window Tint: Ultimate Uv Protection

I recently received the window film I ordered and was pleasantly surprised by how quickly it arrived. The only downside was that the shipping box was damaged, resulting in the film inside being crinkled and creased. However, I must commend the seller for their exceptional customer service. They promptly offered a full refund and were very responsive to my concerns. Overall, a great seller.
Despite the shipping mishap, I decided to try out the film and was impressed with the results. I opted for the 75% film, and to my surprise, it was barely noticeable when applied to my windows. The film effectively reduced the heat coming into my room, as I noticed a significant temperature drop of approximately 10 degrees when comparing areas of direct sunlight with those covered by the film. This product definitely works!
As someone who has been tinting windows for many years, I can confidently say that this film is of good quality. The price point is unbeatable, especially when compared to higher-end brands like 3M. While there may be a slight difference in quality, it is minimal and not worth the significant price difference. Overall, this window film offers excellent value for the money.
I decided to give this window film a five-star review due to its impressive performance. However, I was tempted to give it four stars because the available sizes are not very convenient for most windows. The 3'x6.5' roll I purchased was barely enough to cover the four window panes in my bedroom, requiring me to use three additional scrap pieces to cover the fourth pane. Thankfully, I was able to match the seams well and they are not visible from the outside. It would be great if the sizes offered were more suitable for standard windows.
Despite the inconvenience with sizing, I must emphasize that this film does an excellent job of keeping the hot sun out of the room. Prior to installation, the sunlight coming through the windows was uncomfortably hot. However, after applying the film, the sunlight was significantly reduced and only emitted a gentle warmth. Additionally, the film greatly improved the effectiveness of my air conditioning, making the room much more pleasant in terms of temperature.
The installation process for this film is straightforward, thanks to the clear instructions provided. It is important to spray a generous amount of water to prevent the film from sticking immediately and allow for proper positioning. Using a squeegee easily removes any water and bubbles, leaving the film so clear that it is hardly noticeable.
Curious about the film's properties, I took a leftover scrap piece to work and scanned it with a spectrometer. The results showed that the film has a slightly bluish tint and transmits about 70% of visible light up to 650 nm (red). Beyond 750 nm, the film's transmission drops, indicating its ability to reflect heat.
4. Daytime Privacy Window Film – Black Silver – 17.5" X 6.5'


I purchased this window film to create a blind for my bird feeder, as I didn't want to startle the birds when I sat near the window to watch them. I must say, this film exceeded my expectations in every way.
Firstly, it attaches easily to glass and provides complete privacy from the outside. I can now sit just a foot away from the birds and watch them enjoy their meals without disturbing them. The film was also easy to cut and apply, and it looks great on my windows.
Additionally, I discovered that this film has the added benefit of reducing the temperature inside my house. As someone living in an area with hot summers, this was a game-changer for me. I no longer have to worry about the direct sun shining into my windows and heating up my home.
For those planning to use this film, I have a few tips based on my experience. Firstly, make sure you have plenty of new razor blades or a utility knife to ensure a clean cut. Removing all the glue from the glass surface is crucial for a seamless look, so take the time to scrape off any residue. Cleaning the windows thoroughly before applying the film is also important, and I found that using rubbing alcohol worked well.
When applying the film, use a mixture of water and a small amount of soap to make it easier to move around. Having a helper to peel off the backing and spray the film while you hold it up is also beneficial. This prevents the film from rolling up and creasing during the application process.
Lastly, I want to mention that the quality of this film is excellent. It is thick enough to prevent any bunching and was easy to work with. I even managed to install it with my 12-year-old without any frustration or arguments. The bubbles were also easy to remove, especially because we saturated the window with the soapy water mixture.
5. Magic Black Window Privacy Film – See Out, Not In


I recently purchased this window tint film and I must say, it works wonderfully. It has made a significant difference in the temperature inside my home. Previously, the sun hitting my storm door would heat up the front door, making the handle extremely hot. However, with the tint film applied, the front door only gets warm now.
I ordered two pieces of the film, each measuring 23.6 ft x 9.84 ft. I would recommend measuring your windows before placing an order to ensure you get the right size. The tint itself is not obvious that it is made of two separate pieces, but personally, I would have preferred a single large piece to work with.
During installation, I found that keeping the window wet with soapy water made it easier to work with. However, I did encounter some issues with pet hair getting stuck to the adhesive backing. So, be mindful of that and try to avoid any pet hair getting trapped.
The tint itself is darker than most car tints, but not as dark as limo tint. During the day, it provides complete privacy as you cannot see through it at all. However, at night, visibility is reduced by approximately 60% compared to no tint. I have attached a picture of my window at night with the top two panels untinted for reference.
While I cannot fully vouch for its cooling properties as I applied it in 60-degree weather, I can confirm that it reduces the amount of light entering the room.
Here are some tips for applying the film to panels:
– Cut the film into pieces that are about an inch bigger in each direction.
– Instead of measuring, hold the roll to the window and roll out the film enough to cover one row, then cut it.
– Spray the window with soapy water, ensuring a nice mist but not streams.
– Peel off the clear film and gently stick the cut piece to one side of the panel.
– Press in at the center of the panel to ensure the vinyl film and glass meet, then use a squeegee or credit card to smooth it out to the edges.
– Use an exacto knife to cut the vinyl film at the edge of the panel.
I was able to apply the film to my entire paneled window in less than an hour using these tips.
6. Bloss Daytime Privacy Window Film: Uv Block, Non-Adhesive


I am extremely impressed with this product and its ability to provide both privacy and heat reduction. The instructions for installation must be followed exactly, with tape being used on both sides to ensure proper application. I found that once properly installed, this film did an excellent job of preventing outsiders from seeing into my home, even when the property tax assessor came to take pictures.
Although I made a mistake initially by not realizing that the mirror side is opposite of the side that sticks to the glass, I found it easy to remove and reuse. When mounted on the outside of a south-facing window, it made a significant difference in reducing heat transmission. The film adhered well even after multiple removals and reinstallations, suggesting it will withstand different weather conditions. Additionally, I was pleased with the film's ability to create a darkened atmosphere inside, resembling a sunset-like glow during the daytime.
One aspect that truly amazed me was the film's versatility. I first used it on the bottom two-thirds of two inside windows to block the view from outside, while still allowing a view of the trees through the uncovered top third. The film created a beautiful etched glass appearance, adding a touch of elegance to the room. It can be a bit tricky to apply, as moisture is essential for proper adhesion, so I recommend using it directly on the window surface.
Encouraged by the success on the windows, I decided to apply the film to the outside of my three-sided glass shower enclosure. This decision was a game-changer, as it completely eliminated the unwanted view of people showering from the outside. Additionally, I was pleasantly surprised to find that the film made the drops and calcium deposits on the glass invisible, both from the inside and the outside. The amount of light that still passed through was more than sufficient for a showering experience.
This film truly surpassed my expectations. I had anticipated something similar to contact paper, but it turned out to be an incredibly realistic imitation of etched glass. The durability of the film was evident, as it remained in perfect condition even after approximately 30 showers. Its ability to transform the appearance of the glass garnered praise from a picky neighbor, who mistook it for a new window with frosted bottom and clear top.
7. Nano Ceramic Window Tint: Ultimate Uv Ray Blocker


After conducting thorough research on ceramic window tints, I decided to purchase the 50% VLT (Visible Light Transmission) ceramic window tint for my south-facing office during the Covid work-from-home period. I chose this tint as it provides better UV protection and heat reduction compared to conventional tints. Additionally, I wanted a lighter tint for my home windows, similar to the 35% and 15% tint commonly used for car windows.
Before installing the tint, I decided to test it by placing it on my window for a day. I immediately noticed a significant difference in temperature inside the room – it didn't get as hot as before. Encouraged by this result, I proceeded with the installation.
Although it was my first time applying a tint film, I gained confidence after watching instructional videos on YouTube. However, I did encounter a few hiccups during the process. When I removed the adhesive protection film, the tint stuck together, requiring extra time and effort to separate them. This resulted in some wrinkles, but I am hopeful that the curing process will take care of them over time.
Unfortunately, I also noticed some bubbles in my current application, as shown in the picture. However, my research indicates that these bubbles will dissipate within 3 to 10 days during the curing process. I am eagerly waiting to see how it progresses.
Based on my positive experience so far, I am considering purchasing more ceramic window tint to cover another south-facing room. However, I understand the importance of studying and preparing in advance for the best installation results.
8. Gila Sun Blocking Window Film – Heat Control


I recently installed this window film on nine windows in my home that receive a lot of afternoon sun. I wanted to keep the curtains open to let in natural light, but I didn't want the heat to come in during hot summer afternoons. The installation process was a bit tedious, especially because I had dirty windows, but with some help, it was manageable. Peeling off the liner was the most challenging part.
To measure the difference in heat, I used an IR thermometer on a black carpet that was exposed to sunlight through a window with and without the film. The film reduced the temperature of the carpet by 15 degrees or more! I was amazed by the noticeable difference in heat reduction. The film is not very dark, so it doesn't affect the view outside too much. However, from the outside, both the "light" and "platinum" versions of the film have a mirror-like appearance when the sun hits them. This wasn't a major issue for me, but it's worth mentioning.
The installation time was not bad, and it was relatively easy to do. The key is to leave a small gap around the edge of the film to avoid fighting bubbles. Cutting the film exactly to the edge of the window trim will lead to constant bubble issues. My installation kit didn't include a jig for the recommended 1/6 of an inch space, so I eyeballed it and kept moving. Since all the windows will have blinds, the edges don't need to be perfect, just clean. If I wanted perfection, I would have hired a professional window tinting company. Overall, this is a great product that installs quickly and easily, looks great, is affordable, helps with energy conservation, and provides some privacy. If you're looking for something else, then this might not be for you.
This film has made a significant difference in the temperature of our house! Our house faces east, and the sun used to blast through our large bedroom window and sliding glass door in the afternoon/evening. It was almost unbearable to be in those rooms during the summer months. However, after installing this film, we couldn't be happier with the reduction in heat.
The installation itself was relatively easy. We started with the sliding glass door, which we expected to be the most challenging due to its size. However, as long as you use plenty of moisture, it goes on easier than anticipated. The trickiest part was peeling off the film from the plastic protector and handling such a large piece without it sticking to itself. Even when it did stick, we were able to carefully separate it.
We decided to purchase the installation kit, and it was worth it. The only additional tool we needed was a squeegee, which we already had in our shower. It was a cheap one from IKEA, but it worked just fine.
One thing to note is that we started installing the film in the early afternoon before the sun hit the windows. The installation on the glass door was easy, but when we moved upstairs to the bedroom window, the sun was already hitting it, and we noticed small pockets that looked like air bubbles all over the window. After reading their website, we realized that they were actually filled with water/spray. We waited until the next morning and redid the window by peeling off the film and reinstalling it. There were still a few water pockets, but not as many. After 24 hours, they completely disappeared, and you can't tell that they were ever there. I believe this issue happened because we installed the film in direct sunlight, as we didn't experience the same problem downstairs.
I give this product a 5-star rating. It has helped lower our power bills and made our home more comfortable. We couldn't be happier with the results!
9. Bdf Na05 Window Film Daytime Privacy And Sun Control, Black (Very Dark) – 36in X 12ft


I recently purchased a tint for my garden window on the south-west side of my house. My main criteria were that it needed to be non-reflective from the outside and dark enough to block the hot afternoon sun. After some research, I decided to go with this tint.
In terms of appearance, the tint is reflective when viewed from the outside, but it has a more mirrored bronze finish rather than a silver mirrored finish. This tint provides complete privacy in normal daylight and minimal privacy at night if there is light in the room. When looking from the inside of the house in natural daylight, it's like wearing a good pair of sunglasses. On rainy days, it appears another shade darker.
The installation process requires two people. I found it helpful to use a tiny bottle of baby shampoo and a good spray bottle for the soapy solution. The film came with a utility knife and a palm-size plastic squeegee, both of which were indispensable during the installation. The biggest challenge was separating the clear backing from the film, but bending a tiny corner of the film several times helped to loosen it up. It's important to make sure the glass is super-clean before starting the installation. The film is thick enough to avoid tearing while working it onto the glass and squeegeeing out the bubbles.
One of the main reasons I purchased this tint was for heat reduction, and I noticed an immediate difference. The room feels cooler, and I have also added cellular shades to further increase the heat reduction.
10. Reflective One-Way Mirror Privacy Film For Home & Office

I found the installation process to be incredibly simple and straightforward. I was able to install it on my own without any assistance, and it looks fantastic in my window. The privacy it provides is excellent, ensuring that I can enjoy my space without worrying about prying eyes.
However, I did notice that it made my dining room significantly darker than I had anticipated. While I appreciate the privacy it offers, I would have preferred if it allowed more natural light to filter through. This is something to keep in mind if you have a room that relies heavily on natural lighting.
Despite this minor drawback, I am still very happy with my purchase. The ease of installation and the privacy it provides make it well worth the investment. I would have given it a perfect 5-star rating, but I deducted a star because it is still somewhat clear at night from the outside. However, I understand that this was to be expected, and it does not diminish the overall effectiveness of the product.
FAQs
Are there any legal restrictions or regulations regarding residential window tinting?
Yes, there are legal restrictions and regulations regarding residential window tinting. These regulations vary from country to country and even within different states or provinces. In some jurisdictions, there are specific limits on the darkness or reflectivity of window tinting films for residential properties.
For example, in the United States, each state has its own regulations regarding window tinting. Some states allow darker tints on rear windows while others have specific limits for the front side windows.
Additionally, there may be regulations on the reflectivity of the tinted films to ensure visibility for law enforcement officers.
It is important to research and understand the specific regulations in your local area before installing window tinting on your residential property. This can typically be done by contacting your local department of motor vehicles or transportation agency as they often oversee window tinting regulations.
In case of doubt, it is advisable to consult with a professional window tinting installer who is knowledgeable about local regulations and can guide you accordingly.
Are there any specific tips or tricks for a successful DIY window tint installation?
Yes, there are several tips and tricks that can help ensure a successful DIY window tint installation:
1. Prepare the windows: Thoroughly clean the windows with a glass cleaner and a lint-free cloth to remove any dirt, grime, or debris. This will help the tint adhere properly.
2. Measure accurately: Measure each window precisely before cutting the tint film. It's important to measure slightly larger than the actual size to allow for trimming during installation.
3. Cut the film carefully: Use a sharp utility knife or a tint-specific cutting tool to cut the tint film along the measured lines. Take your time and make clean, straight cuts.
4. Apply the tint in a controlled environment: Choose a clean and dust-free area to apply the tint. Avoid windy or humid conditions as they can affect the adhesive and make installation more challenging.
5. Use a soapy solution: Mix a solution of water and mild dish soap in a spray bottle. Spray the solution on the window and the adhesive side of the tint film before applying. This will allow you to easily slide and position the film.
6. Smooth out air bubbles: As you apply the tint film, use a squeegee or a credit card to smooth out any air bubbles or wrinkles. Start from the center and work your way outward to eliminate any trapped air.
7. Trim excess film: Once the tint is applied, trim any excess film using a sharp blade. Be careful not to scratch the window while trimming.
8. Allow proper curing time: After installation, allow the tint to cure for at least 48 hours before rolling down the windows or cleaning them. This will ensure the adhesive fully bonds to the glass.
If you're unsure about your DIY skills, it's always a good idea to seek professional help or consult detailed installation guides/videos for further guidance.
Are there any specific tools or equipment required for DIY window tint installation?
Yes, there are specific tools and equipment required for DIY window tint installation. Here are some essential items you will need:
1. Window tint film: Choose a high-quality tint film suitable for your desired level of privacy and UV protection.
2. Spray bottle: Fill it with a mixture of water and a few drops of dish soap. This will be used to wet the window during installation.
3. Squeegee: A rubber squeegee helps smooth out air bubbles and ensure proper adhesion of the tint film.
4. Razor knife or window tint trimmer: Used for cutting the tint film to the correct size and shape.
5. Heat gun or hairdryer: These tools are used to heat the film, making it more pliable and easier to install.
6. Cleaning supplies: Before installation, you'll need a lint-free cloth, mild detergent, and a glass cleaner to thoroughly clean the window surface.
7. Tint application solution: Some DIY kits include a specialized solution that helps with adhesion and prevents the film from sticking prematurely.
It's important to follow the manufacturer's instructions and safety guidelines when using these tools and equipment for window tint installation. If you're unsure about the process, it may be helpful to watch video tutorials or seek professional advice before starting your DIY project.
Can window tint help reduce energy costs in your home?
Yes, window tint can indeed help reduce energy costs in your home. Window tinting is designed to block a significant amount of the sun's heat and glare from entering your home through the windows. By reducing the amount of solar heat gain, window tint helps to keep your home cooler during hot summer months, which in turn decreases the need for air conditioning and ultimately reduces energy consumption.
Window tint also acts as an insulator, helping to keep the warm air inside during the winter months. This means that less heat escapes through the windows, reducing the reliance on heating systems and saving energy.
Furthermore, window tinting can block harmful UV rays, which can fade furniture, flooring, and other items in your home. By preventing UV damage, you can extend the lifespan of your belongings, reducing the need for replacements and further saving costs.
To maximize energy savings, it is recommended to choose high-quality window tint and have it professionally installed. Additionally, combining window tint with other energy-efficient measures such as proper insulation and sealing can further enhance energy savings in your home.
How difficult is it to apply window tint to your home's windows?
Applying window tint to your home's windows can vary in difficulty depending on your level of experience and the specific type of tint you choose. If you have prior experience with DIY projects and are comfortable working with tools, it may be a relatively straightforward process.
However, for someone with no prior experience, it can be challenging.
The difficulty lies in ensuring a smooth and bubble-free installation. You'll need to properly clean the window surface, measure and cut the tint accurately, and apply it without trapping air bubbles. Additionally, some types of window tint require heat and special equipment for installation, which can add complexity.
To make the process easier, consider using pre-cut window film kits that come with instructions and all the necessary tools. These kits can simplify the installation process and help achieve better results.
If you're unsure about tackling this task yourself, it's advisable to hire a professional window tinting service. They have the expertise and equipment to ensure a flawless installation, saving you time, effort, and potential frustration.
How long does DIY window tint typically last before needing replacement?
The lifespan of DIY window tint can vary depending on several factors such as the quality of the tint film, installation technique, and environmental conditions. Generally, high-quality DIY window tint can last anywhere from 5 to 10 years.
However, it is important to note that some cheaper or lower quality films may have a shorter lifespan.
Proper installation is crucial for the longevity of window tint. If the film is not applied correctly, it may start peeling or bubbling sooner. Additionally, exposure to harsh sunlight, extreme temperatures, and frequent contact with cleaning chemicals can also affect the lifespan of the tint.
Regular maintenance and cleaning can help prolong the life of DIY window tint. It is advisable to use non-abrasive cleaning solutions and soft cloths to clean the tinted windows. Avoid using sharp objects or abrasive materials that may scratch or damage the film.
If you notice signs of fading, peeling, or bubbling, it may be time to consider replacing the window tint. It is recommended to consult with a professional tinting service for advice on the best course of action if you are unsure about the condition of your DIY window tint.
Is DIY window tinting a cost-effective solution compared to hiring a professional?
DIY window tinting can be a cost-effective solution compared to hiring a professional, but it depends on various factors. If you have experience and skills in tinting windows, you may be able to achieve satisfactory results at a lower cost by doing it yourself.
DIY kits are available at a fraction of the price of professional services, making them an attractive option.
However, there are some drawbacks to consider. Window tinting requires precision and attention to detail. If you lack experience or make mistakes during the installation process, you may end up with unsatisfactory results that could affect the appearance and performance of the tint.
Additionally, professional window tinting services often provide warranties and guarantees for their work, giving you peace of mind and protection against any issues that may arise.
If you're unsure about your skills or don't want to risk a subpar outcome, it's advisable to hire a professional. They have the expertise, tools, and knowledge to ensure a flawless installation. Ultimately, the decision between DIY window tinting and hiring a professional depends on your confidence, budget, and willingness to take on the task yourself.
What are the benefits of installing DIY window tint for your home?
Installing DIY window tint for your home can provide several benefits. Firstly, window tinting helps to reduce the heat entering your home, thus improving energy efficiency. By blocking the sun's rays, it can reduce the need for excessive air conditioning, resulting in lower energy bills.
Secondly, window tinting enhances privacy by preventing outsiders from seeing into your home while still allowing natural light to enter. This is especially useful for ground-level windows or those facing busy streets.
Additionally, window tinting can protect your furniture, flooring, and artwork from fading or damage caused by UV rays. It filters out up to 99% of harmful UV radiation, extending the lifespan of your belongings.
Moreover, window tinting can reduce glare, making it easier to watch TV or work on computers without straining your eyes. It also helps to create a more comfortable living environment by balancing temperature fluctuations and reducing hotspots in your home.
While installing DIY window tint can be cost-effective, it is important to follow the instructions carefully and ensure proper application for optimal results. If you are unsure about the process, it is recommended to seek professional assistance.
What are the different types of window tint available for residential use?
There are several types of window tint available for residential use, each offering different benefits and features. The most common types include:
1. Dyed Window Tint: This type of tint is made by applying a layer of dye to the window glass. It helps to reduce glare and block harmful UV rays. However, dyed window tint may not be as effective at heat reduction as other types.
2. Metalized Window Tint: Metalized tint contains tiny metallic particles that reflect heat and UV rays away from the window. It offers good heat reduction, glare reduction, and UV protection. However, it may interfere with radio and GPS signals.
3. Ceramic Window Tint: Ceramic tint is made using advanced technology that incorporates ceramic particles into the film. It provides excellent heat reduction, UV protection, and glare reduction without interfering with signals. It is also less likely to fade or change color over time.
4. Carbon Window Tint: Carbon tint contains carbon particles that block heat, UV rays, and reduce glare. It provides a sleek, matte appearance and is less likely to fade over time.
It is recommended to consult with a professional window tinting service to determine the best type of tint for your specific needs and preferences.
What materials do I need to purchase for a DIY window tint installation?
To successfully install window tint on your own, there are a few materials you will need to purchase. These include:
1. Window Tint Film: Choose a high-quality tint film that suits your preferences and needs. Look for a film that offers good heat and UV ray reduction.
2. Spray Bottle: Fill a clean spray bottle with a mixture of water and a few drops of dish soap. This will be used to wet the window surface during installation.
3. Squeegee: Get a soft, flexible squeegee tool to remove air bubbles and smooth out the tint film during installation.
4. Utility Knife: You'll need a sharp utility knife to trim the excess tint film after installation.
5. Heat Gun or Hair Dryer: A heat gun or hair dryer can be used to help shape the film and remove any wrinkles or creases.
6. Cleaning Materials: Ensure you have quality glass cleaner, lint-free cloths, and a razor blade for cleaning and preparing the window surface before installation.
7. Tinting Tools: Optional, but recommended, are tinting tools such as a hard card, a heat-forming tool, and a window film application solution for a smoother installation process.
Remember to carefully read and follow the instructions provided with the tint film for the best results. If you're unsure about any step, it's always a good idea to seek guidance from professionals or reputable online tutorials.